Logo
  • Balcony Law
  • About us
  • Inspection services
  • FAQ
  • Blog
  • Call us ‪+1 818-806-7885
  • Book now

Month: August 2026

Early Signs of Structural Failure: A Prevention Guide

Posted on August 10, 2026 by Apex Balcony admin
Early Signs of Structural Failure: A Prevention Guide

Table of Contents

  • Why Early Detection of Structural Failure Matters for Property Owners
  • Visual Indicators of Structural Distress You Can Spot Yourself
    • Foundation Settlement and Shifting
    • Cracks in Walls and Masonry
    • Deflection and Sagging of Structural Members
  • Differentiating Between Cosmetic and Structural Cracks
  • Structural Failure Risk Assessment Checklist for Property Managers
    • Monthly Visual Walkthrough Protocol
    • Documentation and Record Keeping
  • Structural Health Monitoring Tools for Firms Managing Multi-Unit Properties
    • IoT Sensors and Real-Time Monitoring
    • Professional Inspection and Reporting Systems
  • When to Call a Structural Engineer and Document Findings
  • Preventive Maintenance Protocols and Compliance Requirements
  • Liability and Legal Documentation for Property Owners

Last Updated: August 10, 2026

Why Early Detection of Structural Failure Matters for Property Owners

Structural failure starts small, a hairline crack in concrete, a barely perceptible sag in a beam, water stains suggesting deeper problems. By the time visible damage becomes obvious, the underlying issue has often progressed significantly. This is why identifying early signs of structural failure is critical for property owners, particularly those managing multi-unit residential buildings in California where SB 326 and SB 721 compliance requirements make structural integrity a legal obligation.

The stakes are high. The 2015 Berkeley balcony collapse that killed six people and similar incidents underscore what happens when structural problems go undetected. These weren’t freak accidents but failures that accumulated over time, visible to those trained to see them. For property managers and HOA board members, early detection transforms a potential catastrophe into a manageable repair project.

At Apex Balcony, we’ve worked with hundreds of building owners across California who discovered structural issues during professional inspection they initially thought were fine. The difference between a $15,000 repair caught early and a $150,000+ emergency rebuild often comes down to whether someone was looking for the right warning signs. This guide walks you through what those signs are, how to assess them, and when professional intervention becomes essential.

Visual Indicators of Structural Distress You Can Spot Yourself

Structural distress leaves visual clues. Some are obvious; others require a trained eye. Property managers should conduct regular visual walkthroughs specifically looking for these indicators.
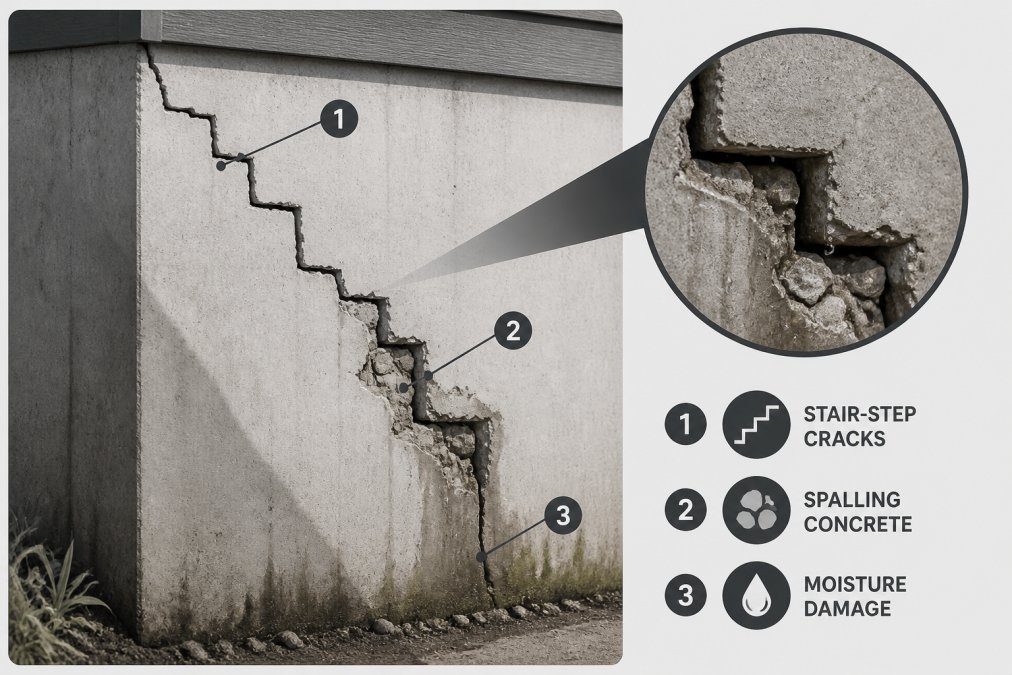
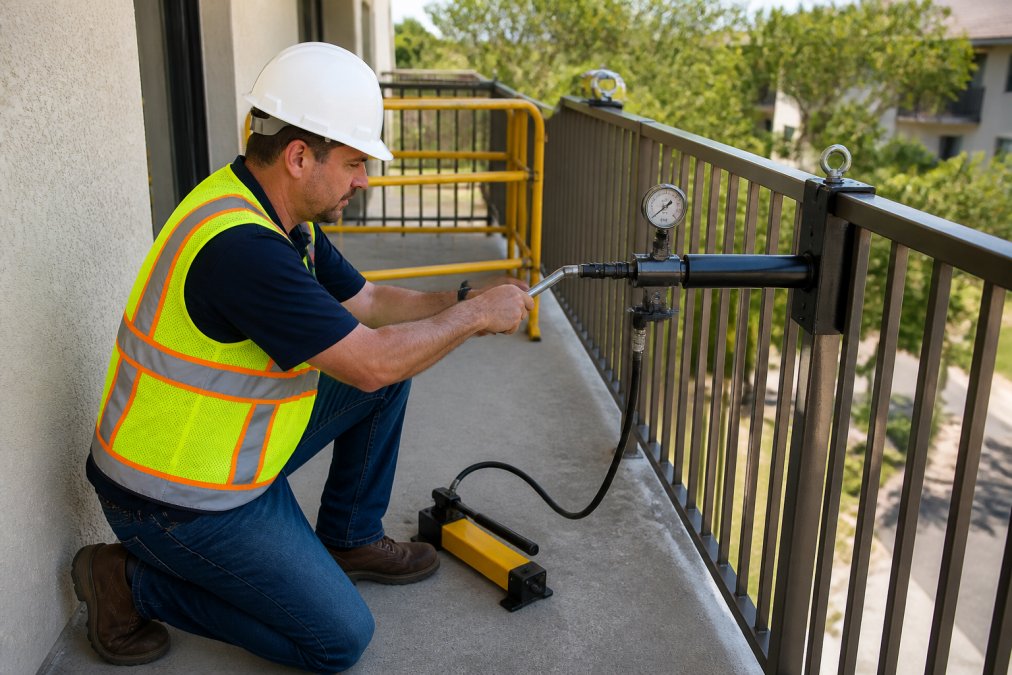
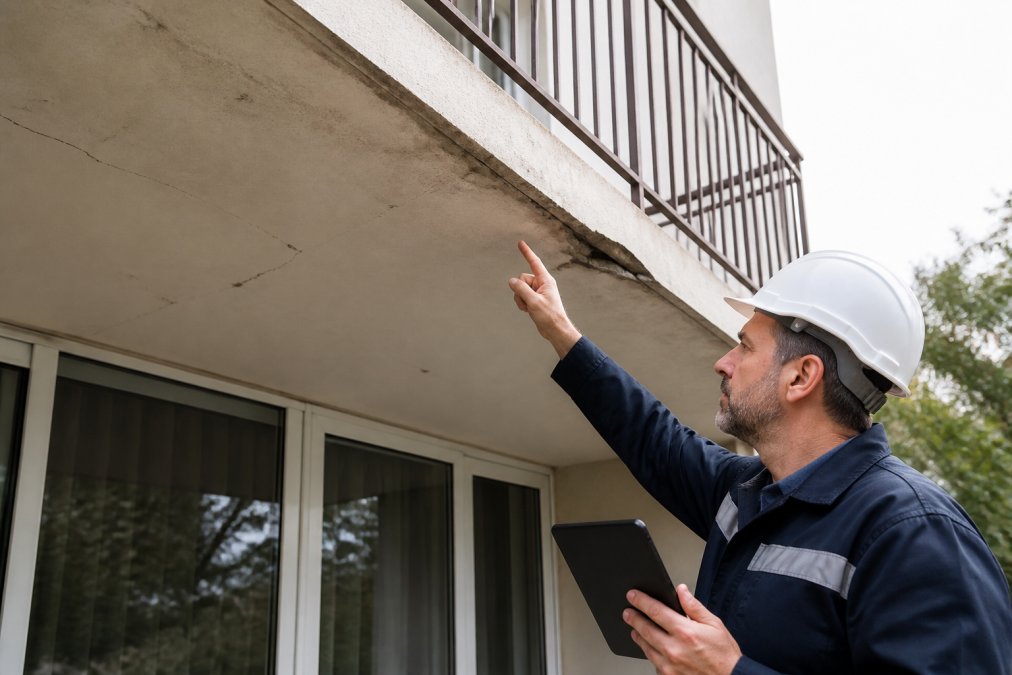
Close-up of a concrete foundation wall showing stair-step pattern cracks with visible spalling concrete and moisture damage along the crack edges in natural daylight

Foundation Settlement and Shifting

Foundation settlement occurs when soil beneath a structure compacts or shifts, causing uneven building movement. Differential settlement, where different parts settle at different rates, creates structural stress.

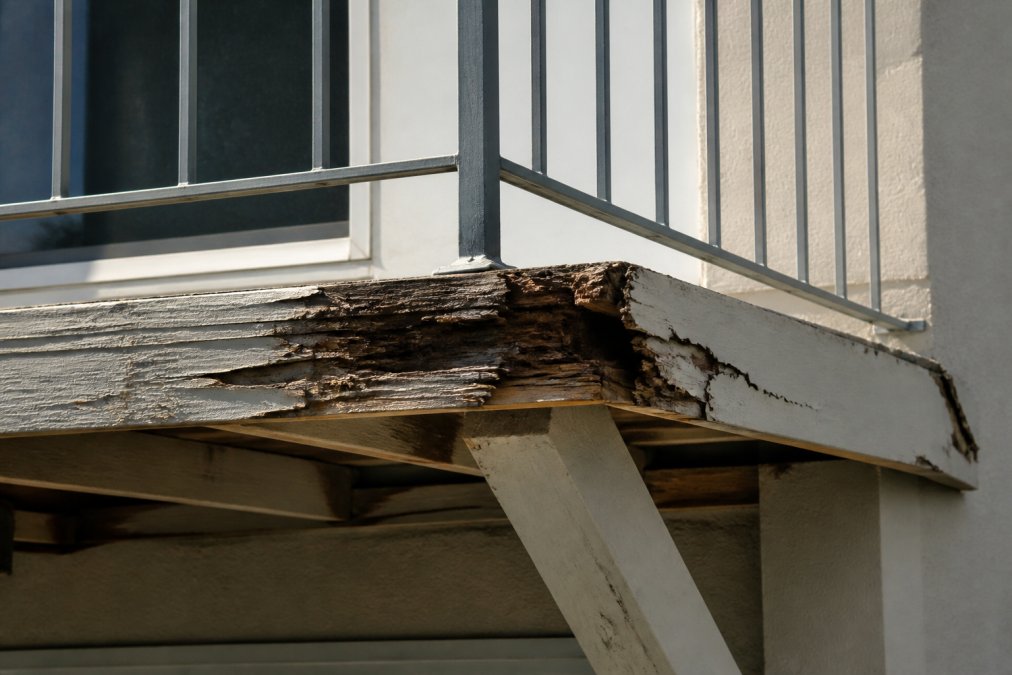
Telltale signs include stair-step pattern cracks through masonry or concrete, doors and windows that no longer close properly, and visible gaps between exterior walls and adjacent structures. Horizontal foundation cracks are particularly concerning because they indicate pressure from soil movement or water intrusion. Document the location, direction, and width of any cracks observed. Cracks wider than 1/8 inch warrant professional assessment, especially when accompanied by water seepage or moisture stains, which suggest the structural member is under stress and the building envelope is compromised.

Cracks in Walls and Masonry

Understanding the difference between cosmetic and structural cracks is essential for prioritizing repairs. Cosmetic cracks are typically hairline (less than 1/16 inch wide), horizontal, and isolated. Structural cracks tend to be wider, follow diagonal or stair-step patterns, and appear in multiple locations.

Diagonal cracks running at 45-degree angles through masonry indicate shear stress, the building is being pulled or pushed in opposing directions. Horizontal cracks along mortar joints suggest pressure from above or lateral forces. Vertical cracks in load-bearing walls, especially those wider than 1/4 inch, indicate compression or uneven foundation settlement. Spalling concrete, where the outer layer breaks away exposing aggregate and reinforcement, signals serious deterioration and loss of load capacity.

Deflection and Sagging of Structural Members

When you notice visual sagging in a ceiling, floor, or roof, the structural member is no longer performing as designed. This is a critical anomaly requiring immediate professional assessment.

Deflection becomes visible when horizontal lines that should be straight appear to bow or sag. In residential buildings, this often appears as a ceiling that dips in the middle of a room or a floor that feels bouncy when walked across. Any visible sagging should trigger immediate professional inspection.

Differentiating Between Cosmetic and Structural Cracks

This distinction separates unnecessary worry from legitimate concern. Cosmetic cracks are surface-level, typically caused by normal settling or concrete shrinkage. Structural cracks indicate the building is experiencing forces that exceed what its members can safely resist.

Cosmetic cracks typically display these characteristics:

  • Width less than 1/16 inch
  • Horizontal orientation
  • Isolated to one small area
  • No accompanying water seepage
  • No pattern of similar cracks elsewhere
  • No movement over time

Structural cracks typically display these characteristics:

  • Width greater than 1/8 inch
  • Diagonal or stair-step pattern
  • Multiple cracks in similar locations
  • Accompanied by water seeping or moisture stains
  • Widening or lengthening when monitored over weeks or months
  • Located in load-bearing walls, foundations, or around structural openings

The critical test is monitoring. Mark crack ends with a permanent marker and photograph with a date stamp. If the crack extends beyond your marks within 30 days, it’s actively growing and requires professional evaluation. For masonry, cracks cutting through the brick or block itself indicate the masonry unit is cracking under stress, a more serious structural issue than cracks following mortar joints.

Structural Failure Risk Assessment Checklist for Property Managers

Systematic inspection protocols catch problems early. Rather than reactive responses to obvious damage, property managers should conduct scheduled assessments using a structured approach.

Monthly Visual Walkthrough Protocol

A monthly walkthrough takes 30-45 minutes for a typical multi-unit building and focuses on areas most prone to structural distress. Start with the foundation and work upward, paying attention to load-bearing walls, connections between major structural elements, and areas where water intrusion is likely.

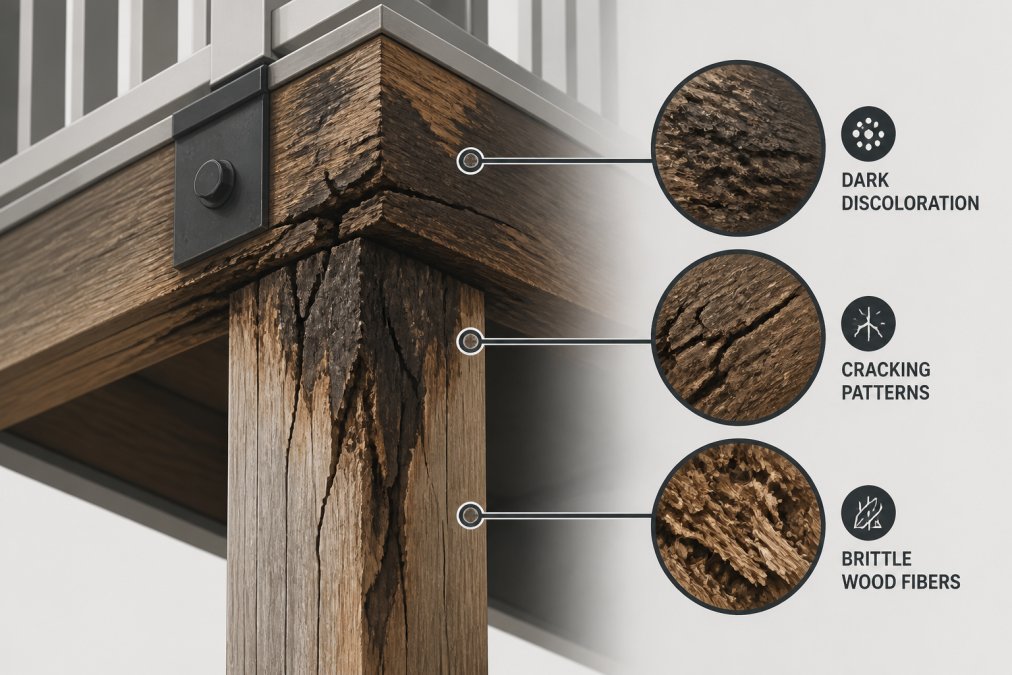
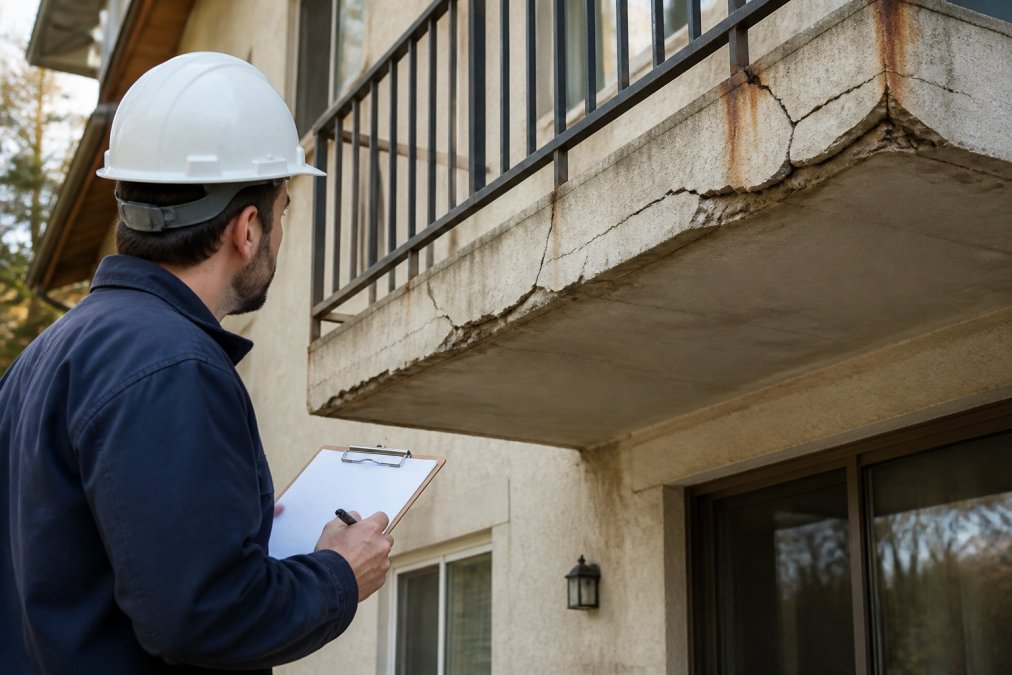
Document findings using a standardized form or digital checklist. Photograph any cracks, stains, or visible damage with a date stamp. Note location precisely and measure crack widths. Pay special attention to balconies and elevated exterior elements, which experience greater weather exposure and are subject to SB 326 and SB 721 inspection requirements. Look for wood rot, rust on steel members, spalling concrete, or separation between the balcony structure and main building.

Check interior spaces for water damage signs, which often precede structural failure. Water stains on ceilings indicate roof or upper-level leaks. Stains on walls suggest exterior water intrusion. Soft or spongy flooring suggests water damage to floor joists.

Documentation and Record Keeping

Documentation creates a timeline of structural changes, provides evidence of due diligence for liability protection, and supports repair decisions. Maintain a log of all inspections, findings, and actions taken.

For each issue identified, record the date discovered, location, description, photographs, and measurements. Note whether the issue is cosmetic or structural. Keep professional inspection reports and recommendations in your file. This documentation demonstrates active monitoring and appropriate response, critical if a property owner faces audit or liability claims.

Structural Health Monitoring Tools for Firms Managing Multi-Unit Properties

Traditional visual inspection catches obvious problems, but modern monitoring tools detect issues before they become visible.
Book inspection →

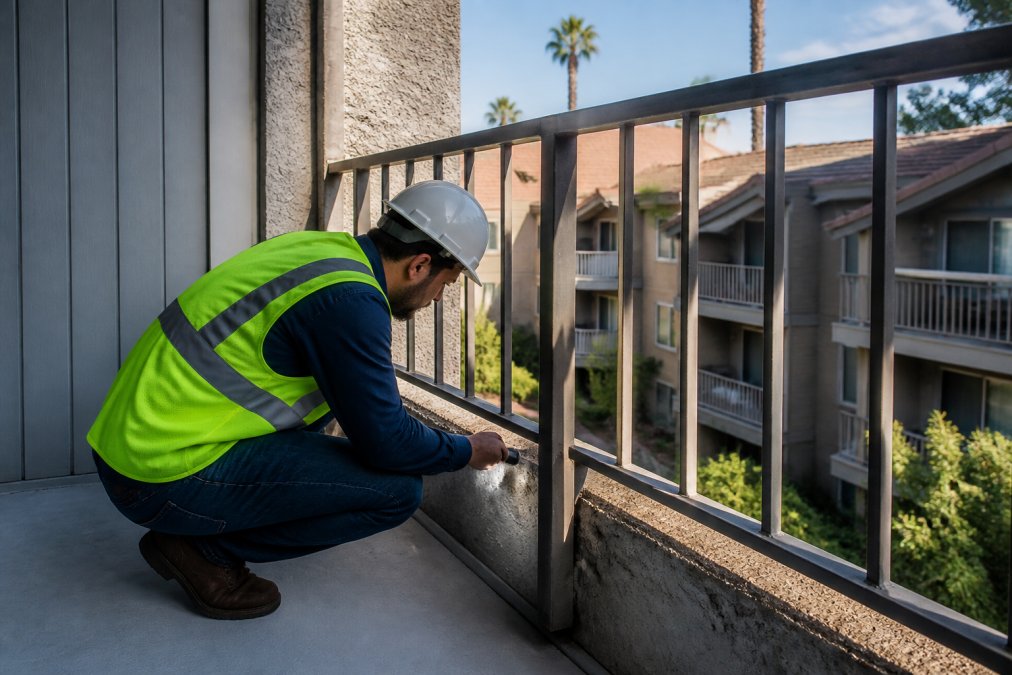
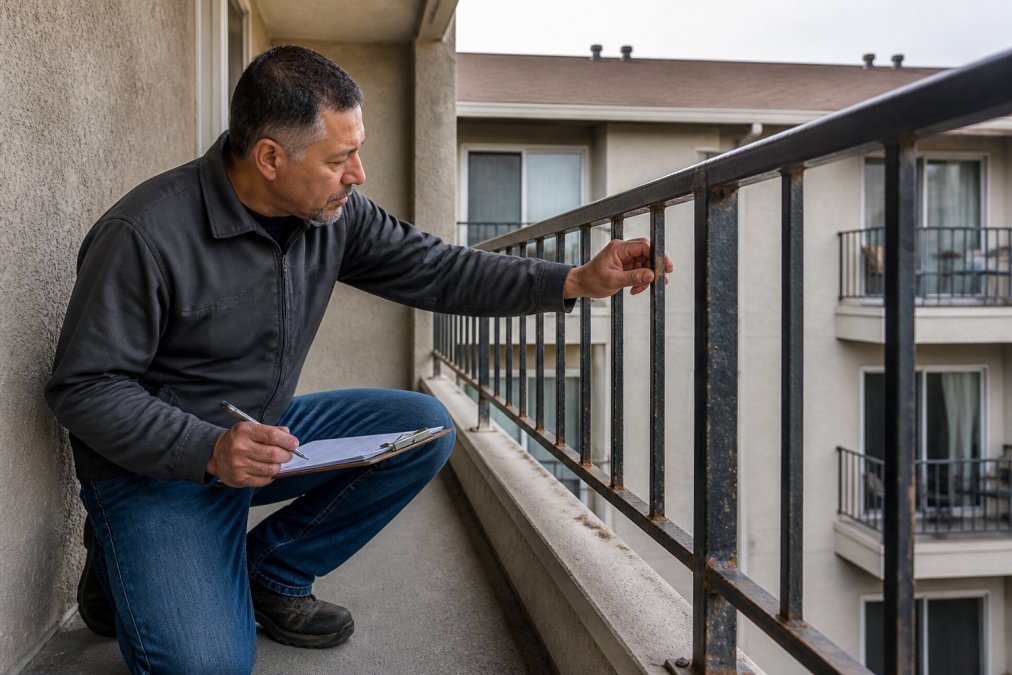
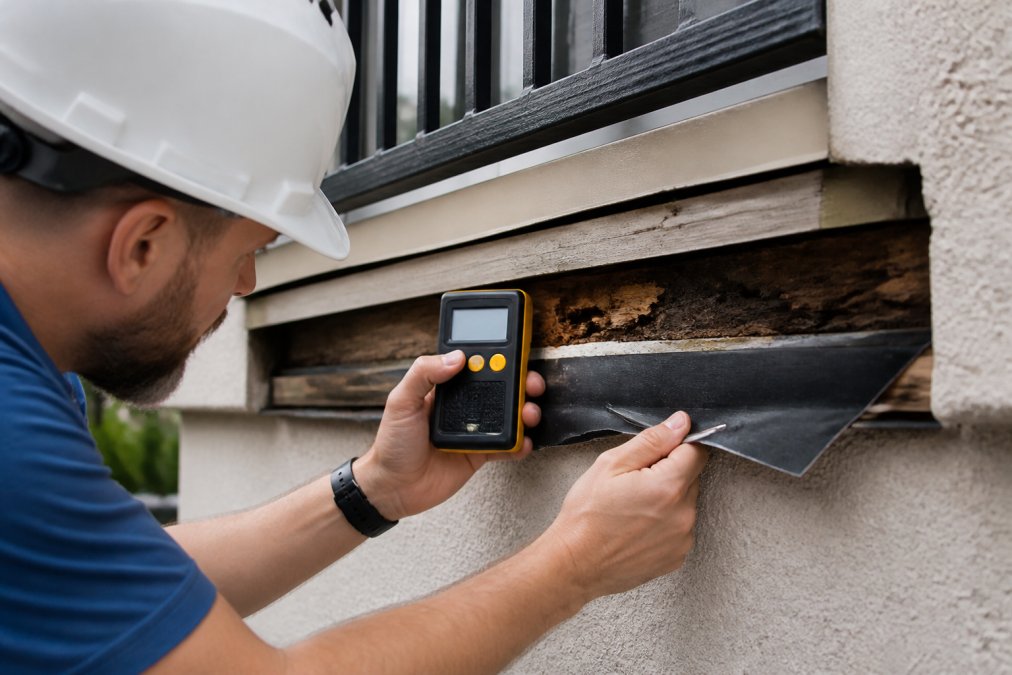
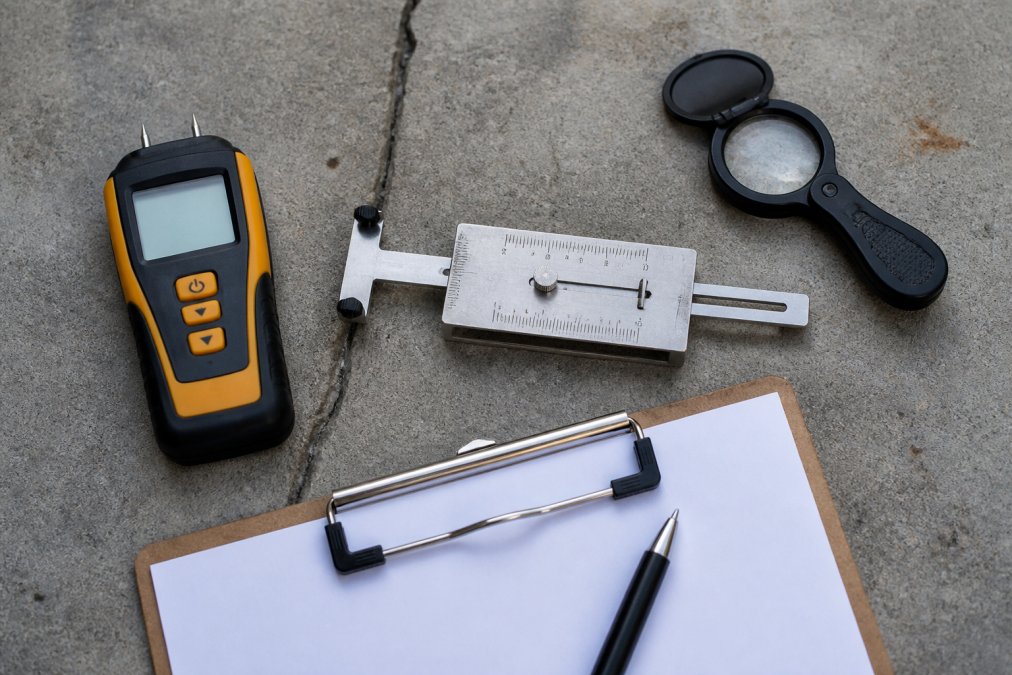
Licensed building inspector using a handheld moisture meter and crack gauge on a residential balcony's concrete surface with a clipboard for documentation

IoT Sensors and Real-Time Monitoring

Internet-connected sensors monitor structural members continuously, detecting movement, vibration, or moisture changes that precede visible damage. Tilt sensors detect beam deflection. Moisture sensors alert you to water intrusion before rot or corrosion becomes visible. These systems transmit data to cloud platforms where property managers track structural health in real time.

The advantage is early detection. A moisture sensor detecting water inside a concrete beam gives you weeks or months to address the problem before spalling becomes visible. However, sensor systems require proper installation and calibration. They’re most cost-effective for larger properties or buildings with known structural concerns.

Professional Inspection and Reporting Systems

Licensed inspectors use systematic protocols and specialized equipment to assess structural integrity comprehensively. Professional reports document structural health in detail, identifying early signs of structural failure and providing prioritized recommendations. These reports become compliance documentation and evidence of responsible property management.

For California properties subject to SB 326 and SB 721, professional inspection is a legal requirement for balconies and elevated exterior elements.

When to Call a Structural Engineer and Document Findings

Certain situations demand professional assessment. Engage a licensed structural engineer immediately if you identify:

  • Cracks wider than 1/4 inch
  • Cracks that are actively growing
  • Visible deflection or sagging of structural members
  • Water seepage accompanied by structural cracks
  • Foundation settlement affecting multiple areas
  • Damage to load-bearing walls or primary structural elements
  • Spalling concrete exposing reinforcement
  • Rust staining indicating corroding reinforcement

When contacting a structural engineer, provide your documentation: photographs with dates, crack measurements, a timeline of discovery, and any previous inspection reports. A structural engineer will conduct detailed assessment, determine the cause, evaluate safety, and recommend repairs. Their report becomes your roadmap for addressing the problem and provides professional documentation of responsible action.

Preventive Maintenance Protocols and Compliance Requirements

Preventing structural failure is far more cost-effective than repairing it. A systematic maintenance program addresses factors that accelerate deterioration: water intrusion, deferred repairs, and inadequate monitoring.

Water management is the single most important preventive measure. Roof leaks, foundation drainage failures, and failed sealants allow water to penetrate the building envelope, causing wood rot, steel corrosion, and concrete deterioration. Regular roof inspections, gutter cleaning, proper grading, and maintenance of exterior sealants prevent most water-related structural problems.

For California properties, SB 326 and SB 721 compliance requirements mandate regular inspection and maintenance of balconies and elevated exterior elements. These laws exist because deferred maintenance on these structures has led to collapses. Compliance is both legal obligation and the framework for preventing structural failure.

Establish a maintenance schedule addressing known vulnerabilities in your building. Document all maintenance performed. This record demonstrates due diligence and helps identify patterns, if you’re constantly repairing the same area, it signals a deeper structural problem needing professional assessment.

Liability and Legal Documentation for Property Owners

Property owners and HOAs have a legal duty to maintain safe conditions for residents. In California, SB 326 and SB 721 specifically require regular inspection and maintenance of balconies and elevated exterior elements. Failure to maintain these structures or disclose known problems exposes you to significant liability.

Documentation is your primary defense. If you can demonstrate that you conducted regular inspections, documented findings systematically, engaged professionals when appropriate, implemented recommended repairs, and maintained records of all actions, you’ve established responsible management. Conversely, if structural failure occurs and you cannot demonstrate monitoring and maintenance, liability exposure is severe.

When a structural engineer identifies needed repairs, document their recommendation and your response. If budget constraints prevent immediate repair, document that decision and establish a timeline. This creates a record showing you were aware of the problem and made a deliberate choice about addressing it. For multi-unit properties, disclose known structural issues and your remediation plan to residents.


Structural failure prevention begins with awareness. You now understand the visual indicators of structural distress, how to differentiate between cosmetic and serious issues, and when professional assessment becomes essential. For California property owners managing multi-unit buildings, this knowledge directly supports compliance with SB 326 and SB 721 requirements.

The next step is action. Conduct a baseline inspection of your property using the checklist approach outlined here. Document your findings. If you identify cracks wider than 1/8 inch, visible deflection, water seepage, or spalling concrete, contact a licensed structural engineer for professional assessment.

For properties requiring balcony inspection and assessment, Apex Balcony provides professional, affordable inspection services with licensed inspectors who have decades of combined construction and design experience. We identify early signs of structural failure in elevated exterior elements and help building owners protect their residents and assets while maintaining compliance with California safety standards. Book an inspection with Apex Balcony to get a clear assessment of your property’s structural health and a concrete path forward for any needed repairs.

Frequently Asked Questions

What are the main early signs of structural failure I should watch for in my building?

The most visible early signs include stair-step cracks in masonry or concrete, horizontal cracks in foundations, spalling concrete, sagging or deflection in beams and load-bearing walls, and misaligned door or window frames. Foundation settlement patterns, visible warping in structural members, and cracks that grow visibly over weeks are critical anomalies requiring immediate attention. Regular visual assessment of balconies, decks, and elevated exterior elements is essential for multi-unit residential properties.

How do I know if a crack is cosmetic or indicates structural failure?

Cosmetic cracks are typically hairline, less than 1/8 inch wide, horizontal, and stable over time. Structural cracks are wider than 1/4 inch, diagonal or stair-stepped, grow noticeably between inspections, or occur in load-bearing walls. Horizontal foundation cracks are almost always structural. If you're unsure, document the crack with photos and measurements, then contact a structural engineer. Don't wait, early detection prevents catastrophic structural failure and liability exposure.

What should be included in a structural failure risk assessment checklist for my property?

Your checklist should include monthly visual walkthroughs of all elevated exterior elements (balconies, decks, stairways), documentation of any visible cracks or settlement, inspection of load-bearing walls and structural members for deflection, verification of building code compliance, and records of all repairs or maintenance. For California properties, ensure SB 326 and SB 721 compliance documentation is current. Maintain detailed photographs, measurements, and dates. This documentation protects you legally and demonstrates due diligence to regulators and insurers.

When should I hire a structural engineer rather than handling inspections myself?

Hire a structural engineer immediately if you observe stair-step cracks, horizontal foundation cracks wider than 1/4 inch, visible sagging or deflection in beams, settlement patterns, spalling concrete, or any anomaly affecting load-bearing elements. California law requires professional inspection for balcony and deck safety under SB 326 and SB 721. Professional inspections provide liability protection, create legally defensible documentation, and identify hidden structural hazards that visual assessment alone misses. Don't delay, structural health monitoring by licensed professionals is your best risk mitigation strategy.
Book inspection

Posted in BlogLeave a Comment on Early Signs of Structural Failure: A Prevention Guide

SB 326 vs SB 721 Requirements: A 2026 Guide

Posted on August 9, 2026 by Apex Balcony admin
SB 326 vs SB 721 Requirements: A 2026 Guide

Table of Contents

  • SB 326 vs SB 721: Core Differences and Scope
    • Which Buildings Fall Under SB 326
    • Which Buildings Fall Under SB 721
  • What Are Exterior Elevated Elements and Why They Matter
  • SB 721 Compliance Deadline: When Inspections Must Happen
    • Initial Inspection Timeline
    • Re-Inspection Cycles
  • SB 326 Inspection Checklist: What Inspectors Must Evaluate
    • Structural Integrity Assessment
    • Common Defects to Identify
  • Who Qualifies as a Qualified Balcony Inspector California
  • Cost of SB 326 Balcony Inspection and Budget Planning
    • Factors That Affect Inspection Pricing
    • Budgeting for Repairs After Inspection
  • Reporting and Documentation Requirements
    • What Must Be Included in Inspection Reports
    • Record Retention and Compliance Deadlines
  • Non-Compliance Penalties and Liability Risks

Last Updated: August 9, 2026

SB 326 vs SB 721: Core Differences and Scope

California’s balcony safety laws address the same underlying concern, structural failure of exterior elevated elements, but target different building types and have different timelines. SB 326 applies to condominiums and homeowners associations. SB 721 applies to rental apartments and multifamily residential buildings. The inspection requirements, deadlines, and consequences of non-compliance differ significantly, making it critical to understand which law governs your property.

Which Buildings Fall Under SB 326

SB 326 applies to common interest developments, including condominiums, planned unit developments, and HOA-governed buildings. It requires inspection of all exterior elevated elements, balconies, decks, stairwells, and walkways, that are part of the common area or attached to individual units where the HOA holds maintenance responsibility.

Initial inspections must occur by January 1, 2025, for buildings constructed before January 1, 2018. Inspections must be performed by a licensed architect, structural engineer, or building inspector. SB 326 requires property management firms to maintain inspection records and repair documentation for 18 years, creating a detailed historical record that protects both the HOA and residents.

Which Buildings Fall Under SB 721

SB 721 applies to multifamily residential buildings with three or more rented units. The owner or property manager bears direct responsibility for compliance, not a board. Buildings constructed before January 1, 2019, must have completed initial inspections by January 1, 2025. The critical difference is enforcement: violations trigger civil penalties assessed directly against the property owner, with no HOA buffer or shared responsibility.

California Department of Housing and Community Development guidance on SB 721 requirements


What Are Exterior Elevated Elements and Why They Matter

Exterior elevated elements (EEEs) are structural components, primarily balconies, decks, stairwells, and walkways, that extend from residential buildings and support occupancy. These elements deteriorate through water intrusion, wood rot, termite damage, and fastener corrosion. California’s coastal climate and seasonal moisture cycles accelerate this deterioration.

The 2015 Berkeley balcony collapse that killed six residents and the 2021 Malibu incident underscore the stakes. Both involved exterior elevated elements that had deteriorated beyond safe load-bearing capacity. Structural engineers look for visible warning signs: splintering wood, soft spots in decking, discolored surfaces indicating water damage, and gaps between the balcony and building facade. Non-destructive testing like borescoping reveals hidden deterioration inside walls and structural connections.

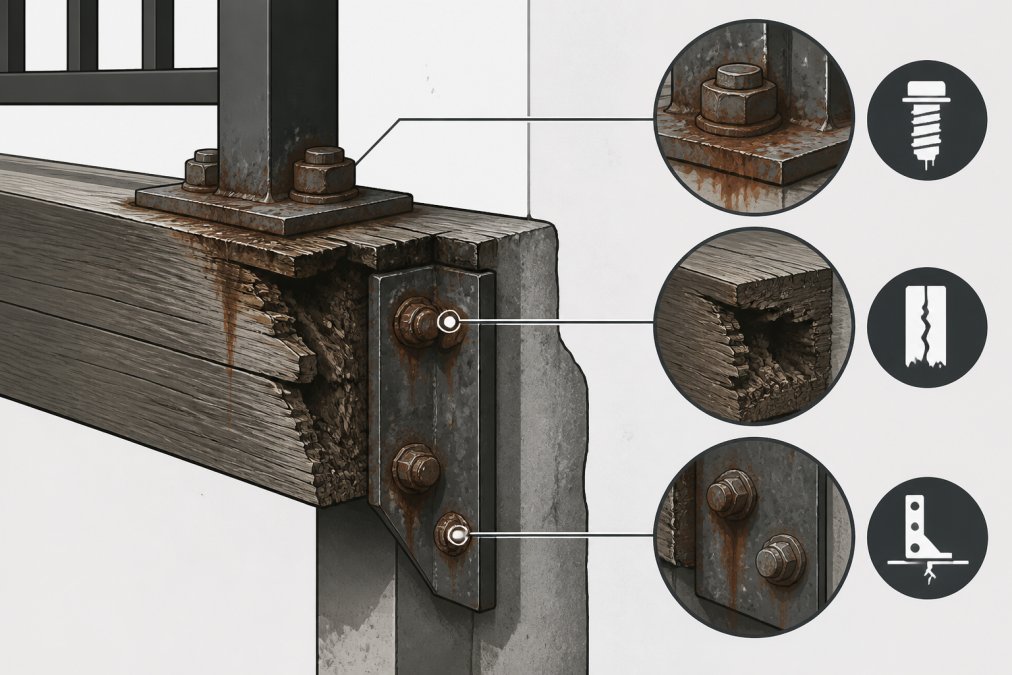
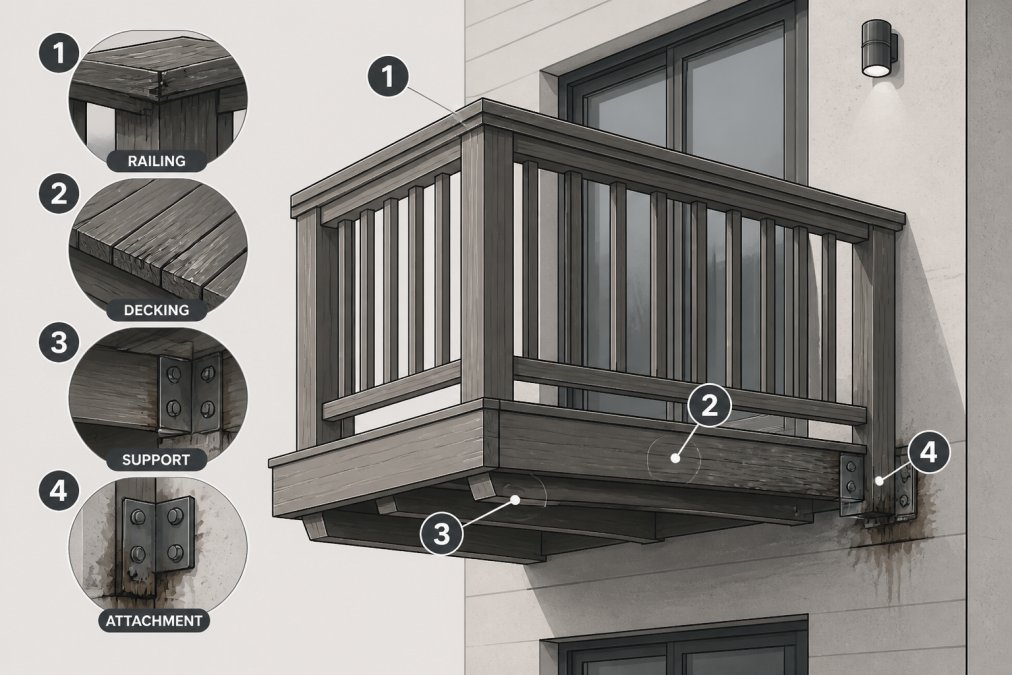
Close-up of a residential balcony showing wooden railings, decking, and attachment points to the building facade with natural daylight highlighting structural details and potential moisture damage areas

A failed exterior elevated element can collapse, injuring or killing residents. Property owners face catastrophic liability, and insurance may not cover incidents involving known defects that weren’t repaired. Compliance is both a safety imperative and a liability mitigation strategy.
Watch Out
Delaying inspection creates exponential risk. Deterioration accelerates once water penetration begins. A minor defect identified in year one might become a major structural failure by year three if left unaddressed.

SB 721 Compliance Deadline: When Inspections Must Happen

Initial Inspection Timeline

For buildings constructed before January 1, 2019, the initial inspection deadline was January 1, 2025. If your property hasn’t been inspected, you’re now in violation and exposed to civil penalties. For buildings constructed on or after January 1, 2019, the initial inspection must occur within five years of occupancy.

Re-Inspection Cycles

After the initial inspection, SB 721 requires re-inspection every six years. This creates a rolling compliance schedule. If your initial inspection occurred in 2024, your next inspection is due in 2030. The six-year cycle is fixed regardless of initial findings. Even if the first inspection revealed no defects, re-inspection is mandatory.

Pro Tip
[Schedule your re-inspection](/how-to-prepare-for-sb-721-site-visit/) 3-4 months before the deadline. Inspectors book up quickly in late fall and early winter. Waiting until the deadline month almost guarantees you’ll miss it.

SB 326 Inspection Checklist: What Inspectors Must Evaluate

Structural Integrity Assessment

Inspectors evaluate load-bearing capacity of all exterior elevated elements, examining connection points where balconies attach to the main structure, bolts, welds, and fasteners. They assess decking material condition for soft spots, splintering, separation, or movement, and examine railings for structural stability.

Waterproofing receives thorough examination because water intrusion is the leading cause of structural failure. Inspectors look for failed sealants, cracks in concrete, gaps around penetrations, and evidence of previous water damage. Borescoping allows inspection of concealed areas without destructive removal of building materials. Fasteners receive detailed attention, as corroded bolts and loose connections are documented.

Common Defects to Identify

Inspection reports categorize defects by severity. Immediate safety hazards requiring emergency closure are flagged separately. Defects requiring repair within a specific timeframe are prioritized. Each defect includes location, condition observed, likely cause, and recommended repair approach.

A comprehensive SB 326 inspection covers connection integrity, decking material condition, railing stability, waterproofing system condition, fastener corrosion, pest damage, water intrusion evidence, concrete condition, structural member integrity, and sealant condition.


Who Qualifies as a Qualified Balcony Inspector California

A qualified inspector must hold one of these credentials: licensed structural engineer, licensed architect, or certified building inspector with specific training in structural evaluation. The license must be current and in good standing with the California Department of Consumer Affairs.

The inspector’s report carries legal weight. If challenged, the inspector’s qualifications and methodology determine whether the report withstands scrutiny. When selecting an inspector, verify their license directly with the California Department of Consumer Affairs and ask about their experience with SB 326 and SB 721 inspections specifically.

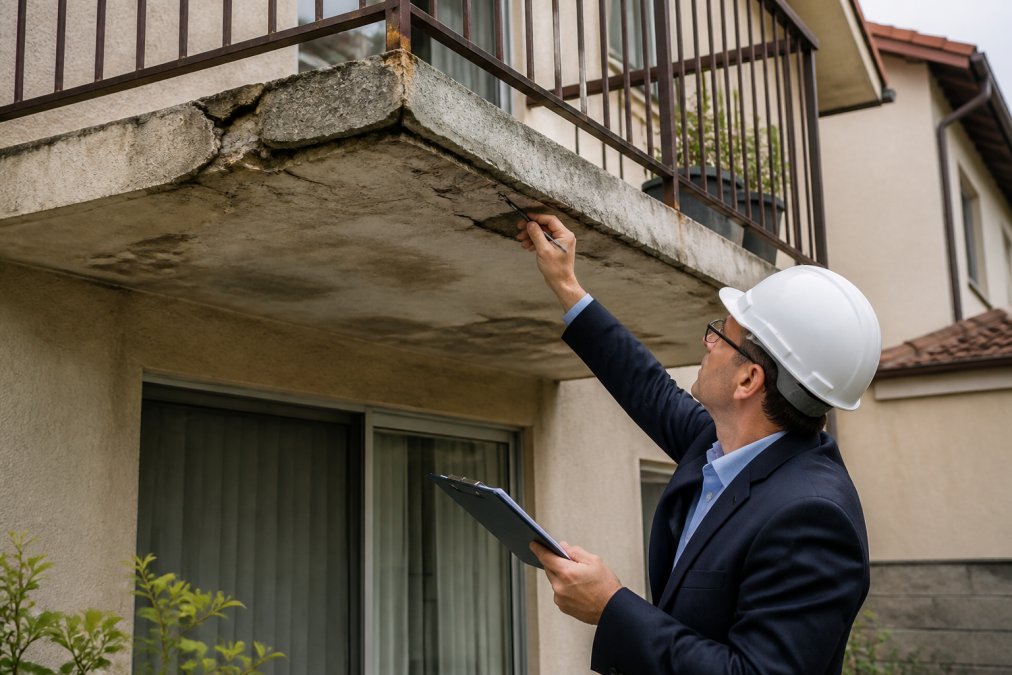
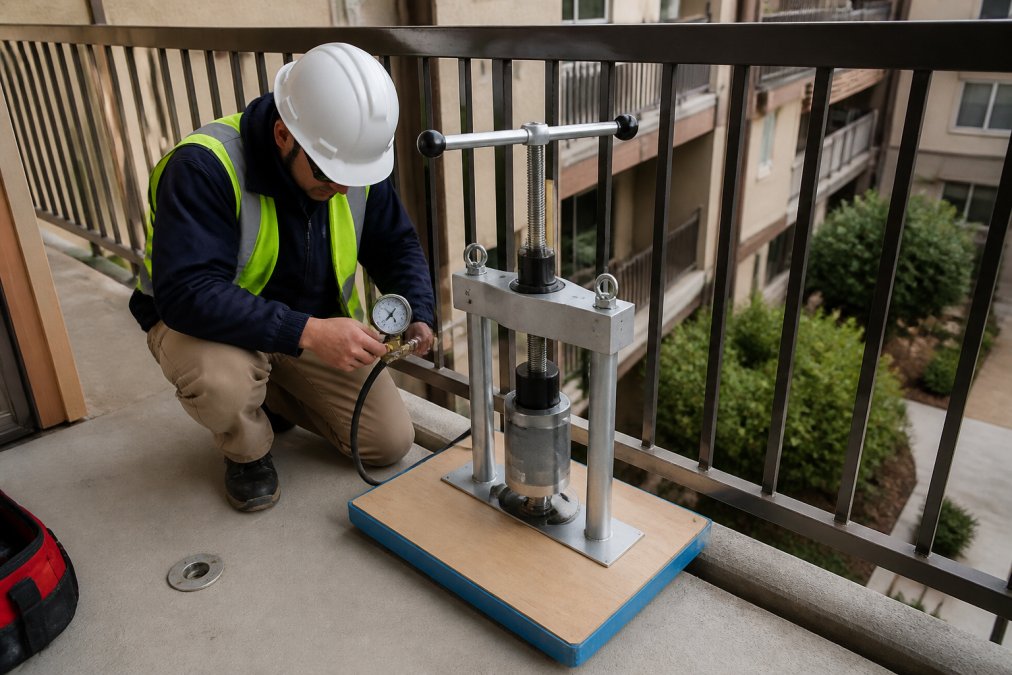
A licensed structural engineer or architect in professional attire performing a hands-on inspection of a balcony, using inspection tools and clipboard to document findings with natural daylight illuminating the work
Key Takeaway
A qualified inspector isn’t just someone with a license, it’s someone with proven experience identifying the specific defects common to your building type and age.

Cost of SB 326 Balcony Inspection and Budget Planning

Factors That Affect Inspection Pricing

Building size is the primary cost factor. Inspectors typically charge based on the number of units or total square footage of exterior elevated elements. Building age affects complexity; older buildings often have more deterioration requiring detailed investigation and borescoping. Accessibility impacts cost, buildings requiring scaffolding or lifts incur additional fees. The type of exterior elevated elements and inspection methodology (basic visual versus comprehensive with borescoping and moisture testing) also affect pricing.

Budgeting for Repairs After Inspection

Most inspections identify defects requiring repair. Minor defects like failed caulking or loose fasteners cost relatively little. Moderate defects like rotted decking or corroded fasteners cost more but are manageable. Major defects like structural member replacement or complete waterproofing overhaul represent significant expenses.

Book inspection →

Reserve fund planning should account for both immediate repairs and staged repairs over time. Inspection reports typically prioritize defects by urgency. Immediate safety hazards must be repaired quickly, while other defects can be scheduled within a reasonable timeframe, allowing costs to spread across multiple budget cycles.

California Building Standards Commission guidance on repair cost estimation


Reporting and Documentation Requirements

What Must Be Included in Inspection Reports

The report must clearly identify the building address, inspection date, inspector credentials, and the scope of the inspection. It documents all defects found, including location, description, severity classification, and recommended repair approach. Each defect must be specific enough that a contractor can understand exactly what needs repair.

The report includes the inspector’s professional opinion on structural safety. If any element is deemed unsafe for occupancy, that determination must be clearly stated. Photographs typically document defects and areas of concern. The report states the inspector’s license number and professional credentials.

Record Retention and Compliance Deadlines

SB 326 requires inspection reports and repair documentation be maintained for 18 years. SB 721 requires retention for at least seven years, though longer retention is prudent. Records must be accessible to residents and enforcement authorities. Missing an inspection deadline puts the property in violation; missing a repair deadline compounds the violation. Documentation of timely action is your defense against enforcement.

Watch Out
Incomplete or poorly organized records create problems if your property is audited or if a resident files a claim. Treat documentation as a compliance necessity, not an administrative burden.

Non-Compliance Penalties and Liability Risks

For SB 721 violations, the Department of Housing and Community Development can assess civil penalties that escalate over time. For SB 326 violations, the HOA board and property management company face enforcement action, and residents can file complaints with local agencies.

Beyond regulatory penalties, non-compliance creates catastrophic liability exposure. If an exterior elevated element fails and injures or kills a resident, insurance may deny coverage if the incident involved a known defect that wasn’t repaired. A jury may view non-compliance as gross negligence, opening the door to punitive damages that can exceed the property’s value. The 2015 Berkeley balcony collapse and 2021 Malibu incident both resulted in liability settlements far exceeding the cost of proper inspection and repair.

Compliance is the foundation of resident safety and asset protection.

California Department of Housing and Community Development enforcement guidance

AspectSB 326 (HOAs/Condos)SB 721 (Rental Apartments)
Applies ToCommon interest developments, condominiums, HOA-governed buildingsMultifamily rental buildings with 3+ units
Initial Inspection DeadlineJanuary 1, 2025 (for pre-2018 buildings)January 1, 2025 (for pre-2019 buildings)
Re-Inspection CycleEvery 6 yearsEvery 6 years
Qualified InspectorLicensed architect, structural engineer, or building inspectorLicensed architect, structural engineer, or building inspector
Record Retention18 years7+ years (recommended longer)
Enforcement AuthorityHOA board, local agenciesDepartment of Housing and Community Development
Penalty TypeHOA liability, reserve fund impactCivil penalties assessed to property owner
ResponsibilityHOA board manages complianceProperty owner/manager responsible

Compliance with SB 326 and SB 721 protects residents and shields property owners from liability. The inspection process identifies defects early, when repairs are typically less expensive and disruptive. Apex Balcony specializes in SB 326 and SB 721 inspections for California property owners. Our licensed inspectors bring decades of construction and design experience to every evaluation. We identify defects comprehensively, document findings thoroughly, and provide clear repair recommendations. Book an inspection with Apex Balcony today and take the first step toward full compliance.

Frequently Asked Questions

What is the difference between SB 326 and SB 721?

SB 326 applies to condominiums and common interest developments, requiring initial inspections by January 1, 2025, with re-inspections every 9 years. SB 721 covers multifamily residential buildings with three or more units, mandating initial inspections by January 1, 2025, with re-inspections every 6 years. The main difference lies in building type, inspection frequency, and reporting requirements. Both laws address structural integrity of balconies and elevated exterior elements to prevent accidents.

Does my property fall under SB 326 or SB 721?

If your property is a condominium or common interest development (HOA-governed), it falls under SB 326. If it is a multifamily residential building with three or more rental units, it falls under SB 721. A single property cannot fall under both laws. Review your property's ownership structure and unit count to determine which applies. When in doubt, consult with a qualified balcony inspector California who can verify your building's classification.

What qualifies as a qualified balcony inspector under California law?

Under both SB 326 and SB 721, inspections must be performed by a licensed structural engineer, licensed architect, or building official with expertise in structural evaluation. The inspector must have experience identifying structural defects, waterproofing failures, and safety hazards in elevated exterior elements. California law requires inspectors to carry professional liability insurance and maintain detailed inspection records. Hiring a qualified balcony inspector California ensures your report will withstand regulatory scrutiny and protect your property from liability.

What happens if my building fails a balcony inspection?

If defects are identified, the property owner or HOA must notify affected residents within 15 days and begin repairs within 120 days (SB 721) or as required under SB 326 timelines. Structural defects, dry rot, water intrusion, and load-bearing damage must be addressed by licensed contractors. The inspector's report will prioritize repairs by severity. Failure to complete repairs within statutory deadlines can result in civil penalties, fines, and increased liability if an accident occurs. Professional guidance ensures timely, compliant remediation.

How much does an SB 326 or SB 721 balcony inspection cost?

The cost of SB 326 balcony inspection varies based on building size, number of units, balcony complexity, and accessibility. Factors include inspection depth, whether borescoping or destructive testing is needed, and travel distance. Pricing depends on quantity, dates, and building specifics. For current pricing and a detailed quote tailored to your property, contact Apex Balcony directly. Investing in a thorough inspection now prevents costly emergency repairs and liability exposure later.

What is included in an SB 326 inspection checklist?

An SB 326 inspection checklist evaluates structural integrity, waterproofing, load-bearing components, railings, fasteners, wood rot, termite damage, water intrusion, and concrete deterioration. Inspectors assess balcony connections to the building, decking condition, and safety hazards. The checklist follows California building codes and statutory obligations to ensure comprehensive evaluation. A detailed SB 326 inspection checklist provides property owners with clear documentation of what was examined, what passed, and what requires repair or further investigation.

What is the SB 721 compliance deadline for inspections?

The initial SB 721 compliance deadline for inspections was January 1, 2025. All multifamily residential buildings with three or more units must have completed their first inspection by this date. After the initial inspection, re-inspections are required every 6 years. Missing the SB 721 compliance deadline can result in civil penalties and legal liability. If your building has not yet been inspected, schedule an appointment immediately with a qualified inspector to achieve compliance and protect residents.

Can I use the same inspector for both SB 326 and SB 721 inspections?

Yes, if the inspector is a licensed structural engineer or architect qualified under California law, they can perform inspections for both SB 326 (condominiums) and SB 721 (multifamily buildings). However, the inspection scope, reporting requirements, and re-inspection timelines differ between the two laws. A qualified balcony inspector California experienced in both statutes will tailor their evaluation and documentation to meet the specific requirements of your building type, ensuring full compliance.

Book inspection

Posted in BlogLeave a Comment on SB 326 vs SB 721 Requirements: A 2026 Guide

EmpireWorks Alternatives for Balcony Inspections

Posted on August 8, 2026 by Apex Balcony admin
EmpireWorks Alternatives for Balcony Inspections

Table of Contents

  • Why Property Managers Need Balcony Inspection Alternatives
  • SB-326 Inspection Requirements for HOAs: What You Need to Know
    • Understanding SB-326 vs. SB-721 Compliance
  • Licensed Inspection Services as EmpireWorks Alternatives
    • What to Look for in a Qualified Inspection Provider
  • Inspection Software Solutions for Structural Assessment
    • OrangeQC: Mobile Inspection Platform
    • ScribeWare EEE: California-Specific Reporting
    • Hammer Missions: Drone-Based Facade Inspections
  • Balcony Inspection Checklist for Property Managers
    • Critical Items to Verify During Inspection
    • Red Flags That Indicate Structural Failure Risk
  • California Balcony Inspection Cost: Budget Planning
    • Factors That Affect Inspection Pricing
    • Inspection vs. Remediation: Understanding Total Costs
  • How to Vet and Select the Right Inspection Provider
    • Questions to Ask Before Hiring
    • Red Flags in Inspection Proposals
  • Conclusion

Last Updated: August 8, 2026

Why Property Managers Need Balcony Inspection Alternatives

California’s SB-326 and SB-721 legislation mandates compliance inspections for residential buildings with elevated exterior elements. A single structural failure can result in catastrophic liability, regulatory fines, and loss of life. Yet many property managers are locked into inspection providers that don’t align with their building’s needs, budget, or timeline.

The inspection landscape has fragmented significantly since these laws took effect, with providers ranging from boutique inspectors to large national firms. Property managers often find themselves caught between competing recommendations, unsure which provider delivers genuine compliance without unnecessary upselling. The right inspection partner should match your property’s scale, provide transparent reporting, and help you understand exactly what needs fixing without inflating costs. Below, we’ll show you how to evaluate alternatives for balcony inspections and select the provider that fits your situation.

SB-326 Inspection Requirements for HOAs: What You Need to Know

California’s Senate Bill 326 mandates comprehensive inspections of elevated exterior elements for common interest developments with three or more units. The law requires that all balconies, decks, stairways, and other load-bearing components meet current building code standards and remain structurally sound. These elements are considered part of the building envelope and essential to resident safety.

Understanding SB-326 vs. SB-721 Compliance

SB-326, enacted in 2018, focuses on common interest developments and HOA-managed structures. SB-721 applies to residential rental properties and extends inspection requirements to additional building types. Both laws require a licensed structural engineer or qualified contractor to visually inspect all elevated exterior elements, document findings in a standardized report, and identify components that fail to meet current building codes. The timelines and re-inspection intervals differ slightly, but the inspection methodology remains consistent.

Determining which law applies is straightforward: check your property’s ownership structure and whether residents own balconies individually or collectively. If uncertain, a qualified inspection provider should clarify this during your initial consultation without charging a fee.

Licensed Inspection Services as Alternatives

Licensed inspection services remain the foundation of balcony compliance. A qualified inspector, whether a structural engineer, civil engineer, or licensed contractor, brings professional liability insurance, years of experience identifying structural decay, and credibility if your inspection report is ever challenged in court or during an audit.

The key difference between providers lies in their depth of expertise, transparency about findings, and approach to remediation recommendations. The best providers help you understand the severity of findings so you can prioritize repairs strategically.

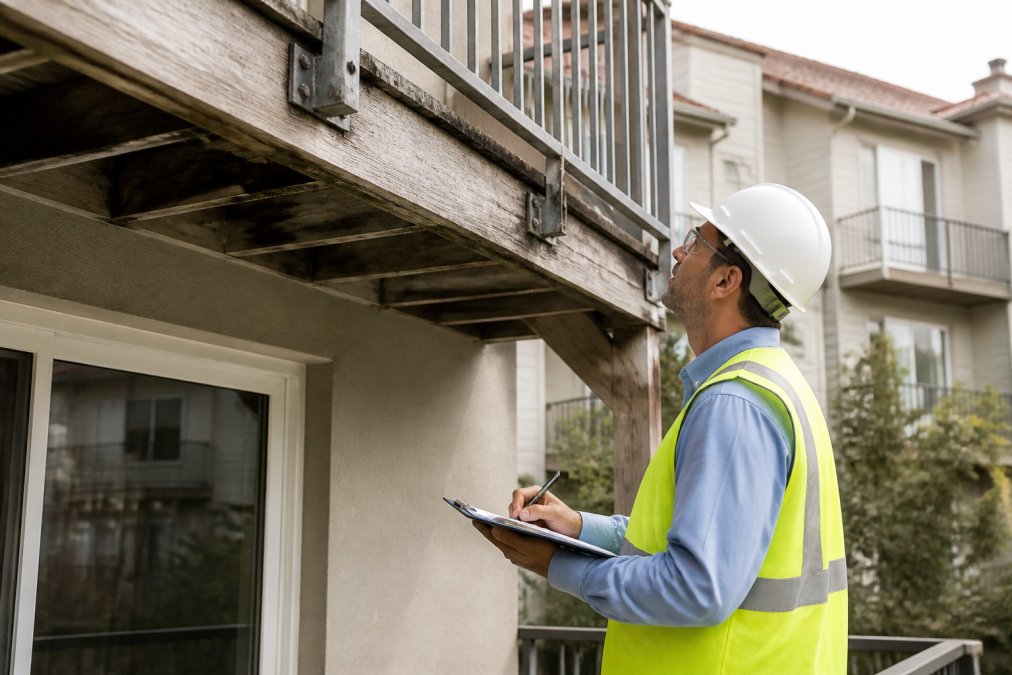
Licensed structural engineer in safety vest examining residential balcony decking with measurement tools and clipboard, taking detailed notes while inspecting wood framing and metal railings with apartment building visible in background

What to Look for in a Qualified Inspection Provider

A qualified inspection provider should hold active licensure from the California Department of Consumer Affairs, carry professional liability insurance, and maintain a track record on similar properties. Ask potential providers how they document findings, do they use standardized templates, include photographic evidence, and provide clear categorization of defects by severity? Request references from similar-sized properties they’ve inspected.

One critical factor: does the provider have a financial incentive to recommend extensive repairs? Some inspection firms partner with remediation contractors, creating conflicts of interest. The best providers operate independently, offering inspection services only.

Inspection Software Solutions for Structural Assessment

Inspection software platforms have emerged as powerful tools for documenting findings, managing workflows, and generating professional reports. These platforms don’t replace inspector expertise but simplify data collection and create verifiable records over time, critical for demonstrating ongoing compliance if disputes arise.

OrangeQC: Mobile Inspection Platform

OrangeQC is a field-based platform enabling inspectors to capture data on mobile devices, tag issues with GPS coordinates and timestamps, and generate professional reports with photo integration. The platform works online and offline, making it reliable for inspectors managing multiple properties daily.

OrangeQC’s strength lies in flexibility, inspectors can create custom templates tailored to your building’s components, and the platform maintains a historical record of all inspections. This creates a longitudinal documentation trail showing how conditions have evolved, invaluable if audited or facing liability questions.

ScribeWare EEE: California-Specific Reporting

ScribeWare EEE is purpose-built for California’s SB-326 and SB-721 requirements. The software includes templates matching statutory reporting standards, ensuring your inspection documentation meets regulatory expectations without gaps or omissions.

This platform is ideal for property managers standardizing inspection processes across multiple buildings or inspectors handling dozens of California properties annually. The trade-off is specialization, ScribeWare EEE is California-focused, limiting utility if your organization manages properties in other states.

Hammer Missions: Drone-Based Facade Inspections

Hammer Missions uses AI-powered drone technology to capture high-resolution imagery of building facades, then provides software tools to annotate findings, track defects over time, and generate collaborative reports. Drone inspections excel at identifying water damage patterns, corrosion on metal components, and structural cracks that might be missed during traditional visual assessment.

The limitation is cost and complexity. Drone inspections require licensed pilots, specialized equipment, and higher service fees than traditional assessment. For small to mid-sized residential buildings, drone technology is often unnecessary. For large complexes or buildings with significant facade concerns, the detailed imagery can justify the investment.

Balcony Inspection Checklist for Property Managers

Understanding what inspectors should examine helps you evaluate whether a provider is thorough and whether findings make sense. A comprehensive balcony inspection covers structural integrity, waterproofing systems, load-bearing components, and safety hazards.

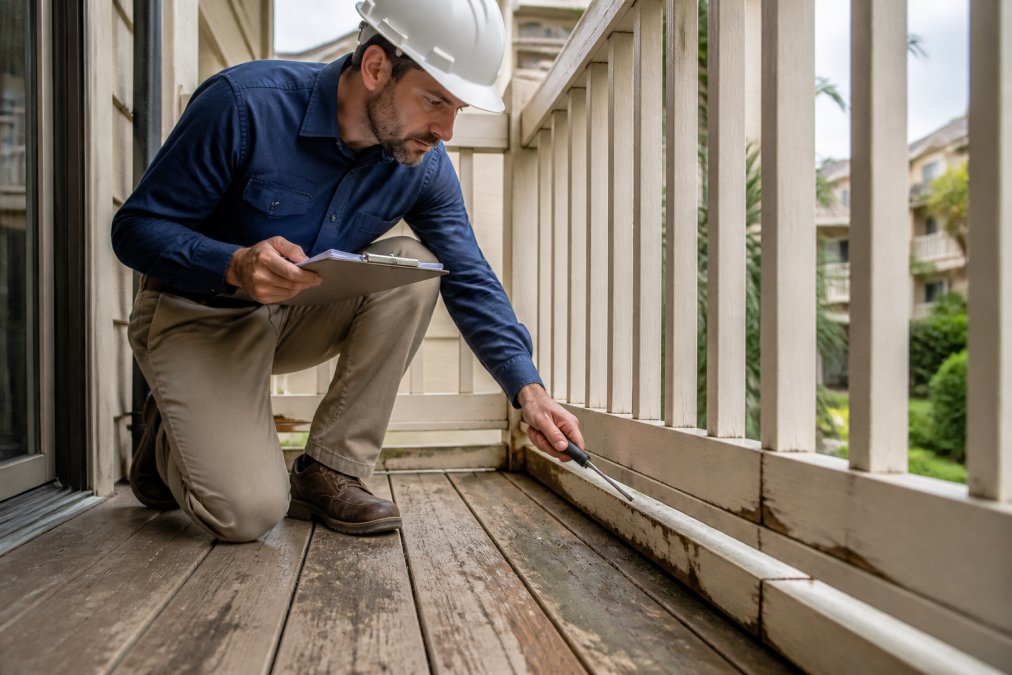
Property manager in hard hat performing visual assessment of residential balcony decking, checking for water damage and wood rot on railings and flooring, using hand tools to probe structural components while taking notes on inspection form

Critical Items to Verify During Inspection

A qualified inspector should systematically evaluate these elements on every balcony:

Structural framing and connections. The inspector examines ledger board attachment points where the balcony connects to the building, checking for proper fastening, corrosion, or separation. Ledger board failure is a leading cause of balcony collapse.

Decking material and condition. Whether wood, composite, or concrete, the inspector probes for soft spots, rot, or delamination. For wood decking, a moisture meter and borescope assess decay depth. Composite materials are checked for cracking, warping, or separation from support structure.

Railings and guardrails. The inspector examines connections, material integrity, and whether railing height and spacing meet current standards. Corroded or loose railings are common deficiencies.

Drainage and waterproofing. The inspector checks for proper slope on the deck surface, functioning drainage systems, and evidence of water penetration. Staining on ceilings or walls of units below often indicates balcony leaks.

Fasteners and hardware. Bolts, lag screws, and metal connectors are examined for corrosion, looseness, or missing components.

Red Flags That Indicate Structural Failure Risk

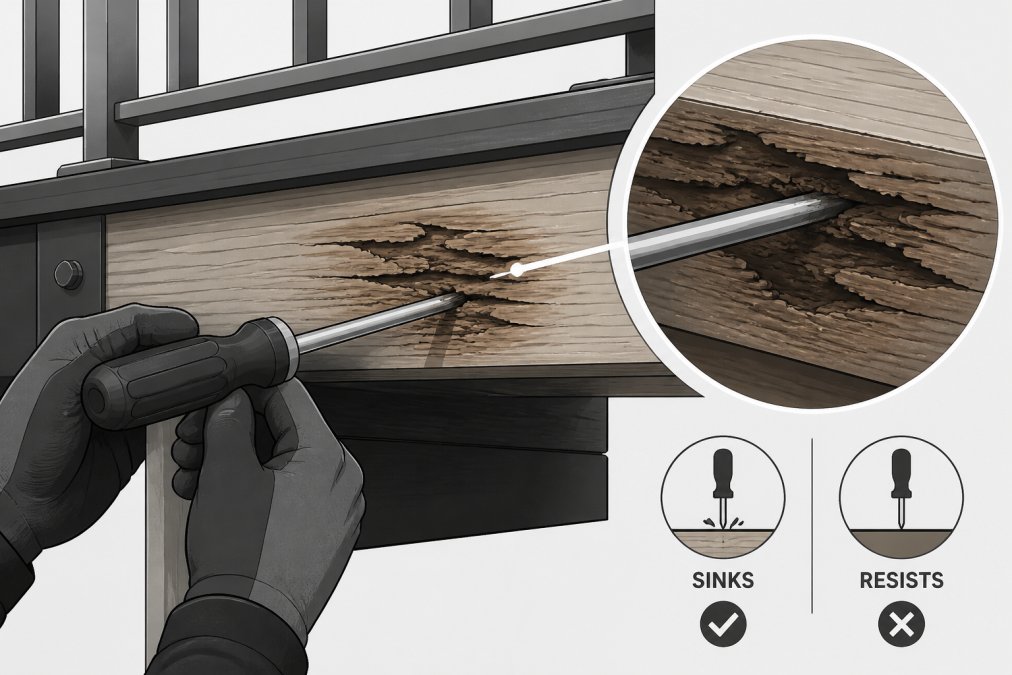
Soft wood or visible rot. If an inspector’s probe penetrates the wood surface easily, decay has compromised structural capacity. This is critical.

Separation or movement. Visible gaps between the balcony and building, or evidence of shifting or sagging, indicates connection failure, an emergency-level finding.

Corroded fasteners or metal components. Significant rust that has reduced material thickness is a structural concern. Corroded ledger bolts are particularly dangerous.

Water damage in units below. Active leaking or staining on ceilings and walls indicates waterproofing failure and ongoing water intrusion.

Missing or inadequate railings. Damaged, loose, or code-noncompliant railings pose an immediate fall hazard.

A thorough inspection report should clearly distinguish between critical findings and minor cosmetic issues. If everything is flagged equally, you’re not getting the prioritization needed to budget repairs strategically.

California Balcony Inspection Cost: Budget Planning

Understanding cost structure helps you evaluate provider quotes and avoid both underbidding and excessive pricing.

Book inspection →

Factors That Affect Inspection Pricing

Building size and unit count. A 12-unit building requires less time than a 100-unit complex. Most providers charge either a flat fee per building or a per-unit rate.

Balcony complexity. Simple rectangular balconies are faster to inspect than structures with multiple tiers, different materials, or unusual configurations.

Accessibility. Buildings where balconies are easily accessible cost less than structures requiring lifts, scaffolding, or specialized equipment.

Report requirements. A basic inspection report costs less than detailed documentation with drone imagery, borescope findings, or 3D modeling.

Re-inspection intervals. Follow-up inspections on previously identified deficiencies have narrower scope and lower costs than initial comprehensive inspections.

Rather than fixating on a single number, evaluate whether a provider’s quote is reasonable given your building’s characteristics. Unusually low quotes often indicate the provider is cutting corners on documentation or thoroughness.

Inspection vs. Remediation: Understanding Total Costs

Inspection is only the first step. Once deficiencies are identified, remediation costs dwarf the inspection fee. An inspection might cost between a few hundred and several thousand dollars. Remediation, actually fixing identified problems, typically costs substantially more. Ledger board replacement, deck resurfacing, railing upgrades, and waterproofing systems represent significant capital expenditures.

This is why selecting an honest inspection provider matters. An inspector who inflates findings directly increases your remediation budget. An inspector who clearly distinguishes between critical safety issues and minor cosmetic concerns helps you prioritize spending and avoid wasting reserve funds.

When evaluating proposals, ask the provider to estimate typical remediation costs for similar buildings. This helps you budget realistically for the full compliance cycle.

How to Vet and Select the Right Inspection Provider

Choosing an inspection provider is critical and affects your compliance posture, budget, and resident safety. A systematic vetting process protects you from predatory upselling and ensures you’re working with someone who genuinely understands California’s regulatory environment.

Questions to Ask Before Hiring

Are you licensed as a structural engineer, civil engineer, or contractor in California? Verify their license status directly with the California Department of Consumer Affairs.

How many SB-326 and SB-721 inspections have you completed? Experience matters. A provider who’s inspected hundreds of California properties understands common deficiencies and realistic remediation costs.

Do you carry professional liability insurance? Ask for proof of current coverage.

What is your inspection methodology? Do they use borescope technology? Do they measure moisture content? Do they photograph all findings?

How do you document findings? Request a sample report. Is it clear and well-organized? Does it distinguish between severity levels?

Do you have financial relationships with remediation contractors? Ideally, your inspector operates independently.

What is your timeline? Reasonable timelines are typically 2-4 weeks from inspection to final report.

What happens if I disagree with your findings? A good provider should be willing to explain their assessment and consider a second opinion.

Red Flags in Inspection Proposals

Unusually low pricing. Below-market quotes often signal cut corners on documentation or planned upselling.

Pressure to decide quickly. Legitimate providers give you time to evaluate proposals and check references.

Vague scope of work. If the proposal doesn’t clearly specify what will be inspected or what the deliverable will be, ask for clarification.

Recommendation to use their remediation contractor. You should have freedom to solicit multiple bids for repairs.

Dismissiveness about your questions. A professional provider welcomes questions and provides clear answers.

No references available. A provider with a solid track record should provide contact information from three recent clients in your area.


The balcony inspection landscape in California has matured significantly since SB-326 and SB-721 took effect. You’re no longer limited to a single provider or forced to accept inflated costs and unnecessary recommendations. By understanding what constitutes a thorough inspection, evaluating providers systematically, and comparing alternatives, whether licensed inspectors, software platforms, or hybrid approaches, you can ensure your property remains compliant while protecting your budget and residents.

Apex Balcony specializes in helping HOA boards and property managers navigate this challenge. Our licensed inspectors bring decades of combined construction and design experience to every assessment, providing clear documentation of structural conditions without manufactured urgency or unnecessary upselling. We focus on identifying early signs of structural failure in elevated exterior elements, giving you the information you need to make informed remediation decisions. Whether you’re managing a small residential building or a larger complex, Apex Balcony’s inspection services are designed to be affordable, transparent, and compliant with California’s regulatory requirements. Book an inspection today and get clarity on your building’s actual condition.

Frequently Asked Questions

What is the difference between SB-326 and SB-721 inspection requirements?

SB-326 applies to residential common interest developments and requires triennial inspections of balconies and elevated exterior elements. SB-721 covers multi-family residential buildings with three or more units and mandates more frequent inspections with stricter timelines for repairs. Both laws aim to prevent structural failures, but SB-721 has more stringent compliance deadlines. Your property type and unit count determine which applies to you, and many California properties must comply with both.

What qualifications should a balcony inspection professional have?

A qualified inspector must hold a California state license as a structural engineer, civil engineer, or general contractor with balcony inspection expertise. They should have demonstrated experience with elevated exterior elements, dry rot assessment, and waterproofing systems. Verify their liability insurance covers structural inspection work, and ask for references from similar-sized properties. Licensed professionals understand building code standards and can produce reports that hold up under regulatory review or litigation.

How much does a California balcony inspection cost?

Inspection costs depend on building size, number of balconies, property age, and accessibility. Factors include whether drone technology or borescope methods are needed, travel distance, and report complexity. Request quotes from multiple providers to compare pricing and scope. Remember that inspection fees are typically far lower than remediation costs, skipping an inspection to save money now often costs thousands more in emergency repairs or regulatory penalties later.

What are the most common red flags inspectors find during balcony assessments?

Dry rot in wood framing, corrosion of fasteners and load-bearing components, failed waterproofing systems allowing water infiltration, cracked or spalling concrete, rusted steel reinforcement, and damaged deck coatings are frequent issues. Visual inspection combined with borescope methods reveals hidden decay inside structural members. If an inspector finds water staining, soft wood, or rust discoloration, those indicate immediate safety hazards requiring remediation before the next inspection cycle.

Book inspection

Posted in BlogLeave a Comment on EmpireWorks Alternatives for Balcony Inspections

Balcony vs Patio: Key Differences & Building Code Rules

Posted on August 7, 2026 by Apex Balcony admin
Balcony vs Patio: Key Differences & Building Code Rules

Table of Contents

  • Defining a Balcony vs Patio: Core Architectural Differences
    • What Makes a Balcony
    • What Makes a Patio
  • Structural Support and Elevation: The Critical Distinction
  • Balcony Building Codes US: Compliance Requirements
    • California SB 326 and SB 721 Requirements
    • Railing, Waterproofing, and Load-Bearing Standards
  • Deck vs Patio vs Balcony: How They Compare
    • Deck Characteristics and Code Requirements
    • Ground-Level vs Elevated: The Key Dividing Line
  • Materials, Durability, and Maintenance Differences
    • Patio Surface Materials: Stone Pavers and Concrete
    • Balcony Materials: Railings, Balustrades, and Waterproofing
  • Resale Value, Accessibility, and Legal Liability
    • Impact on Home Value and Marketability
    • ADA Compliance and Accessibility Considerations
  • Apartment Balcony Decorating Tips and Design Considerations
  • Why Balcony Inspections Matter: Structural Failure Prevention

Last Updated: August 7, 2026

Defining a Balcony vs Patio: Core Architectural Differences

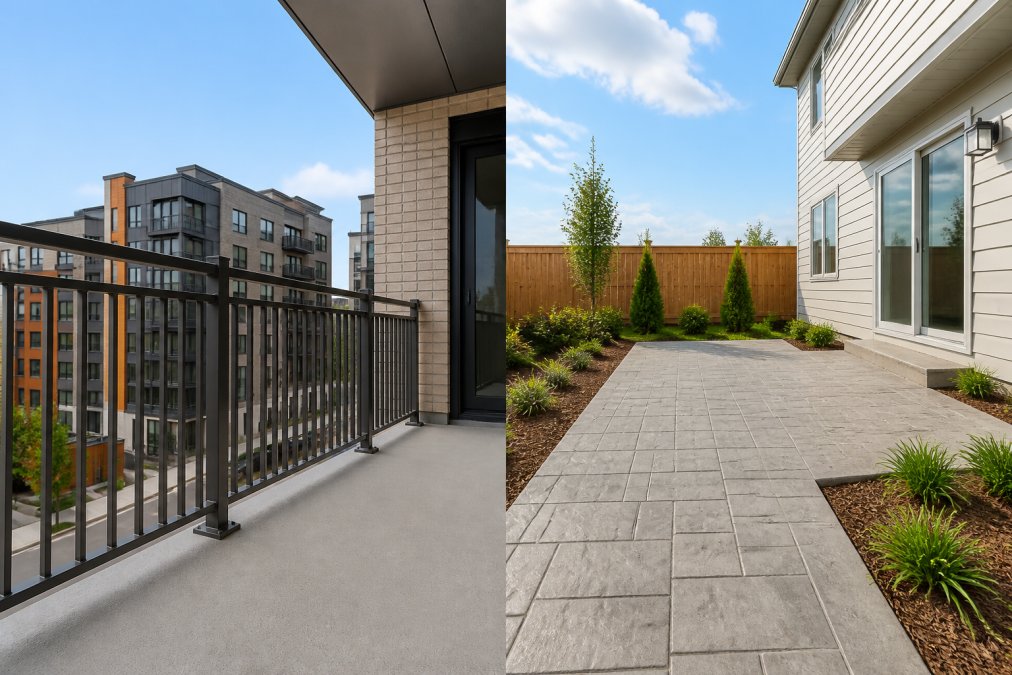
A balcony is an elevated platform attached to a building that extends outward from an upper floor, supported by the building’s structural system through console brackets, cantilevers, or columns. A patio is a ground-level outdoor living space, typically paved with concrete, stone pavers, or similar hardscape surfaces, built directly on the earth or a foundation slab.

This distinction determines building code requirements, maintenance obligations, liability exposure, and resale value. At Apex Balcony, we’ve inspected hundreds of California properties where owners misunderstood which regulations applied to their elevated exterior elements, often discovering expensive violations during inspection.

What Makes a Balcony

A balcony is defined by three characteristics: elevation above ground level, structural attachment to the building’s frame, and load-bearing capacity engineered to support occupant weight plus safety margins. Most residential balconies sit 8 to 40 feet above ground. The structural support comes from the building envelope itself, the balcony is part of the building’s load-bearing system. Balconies require railings (typically 36 to 42 inches high depending on jurisdiction), waterproofing membranes to prevent water intrusion, and regular inspection for structural failure.

What Makes a Patio

A patio sits at or near ground level and is built on a prepared base of compacted soil, gravel, or a concrete slab, surfaced with hardscape materials. Unlike a balcony, a patio doesn’t require structural attachment to the building and operates independently of the building’s load-bearing system. Patios don’t require railings unless elevated and are simpler to maintain, requiring less waterproofing though proper drainage remains important.

Structural Support and Elevation: The Critical Distinction

The moment an outdoor space leaves the ground, everything changes. Ground-level and elevated platforms operate under completely different structural logic, code requirements, and failure modes.

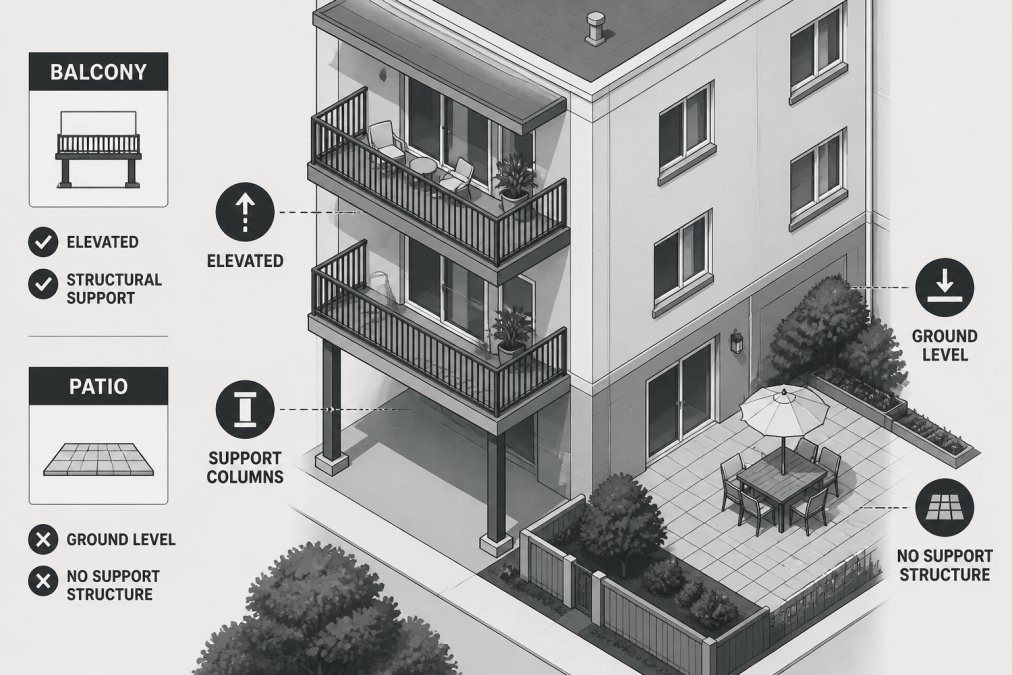
Aerial view of a multi-story residential building showing elevated balconies with metal railings and support columns visible from below, contrasted with a ground-level patio area featuring stone pavers and no visible support structure

A balcony is cantilevered or supported by columns and console brackets that transfer weight back into the building’s structural frame. The connection point where the balcony meets the building is most critical. Improper flashing, corroded fasteners, or deteriorated rim joists can cause catastrophic failure.

A patio relies on proper foundation and drainage. The ground itself provides support. Main failure modes are settling, frost heave in cold climates, and water pooling if drainage slopes are inadequate. This elevation difference is why California’s SB 326 and SB 721 focus specifically on elevated exterior elements. Ground-level patios aren’t subject to the same inspection mandates because they don’t pose the same risk of sudden, catastrophic failure.

Balcony Building Codes US: Compliance Requirements

Building codes governing balconies vary by state and jurisdiction, but California’s regulations are among the strictest in the nation. If you own a residential building with three or more units in California, you’re almost certainly subject to either SB 326 or SB 721, or both.

California SB 326 and SB 721 Requirements

SB 326 (effective January 1, 2019) requires owners of residential buildings with three or more units to have balconies, decks, and exterior stairs inspected by a licensed architect, structural engineer, or certified building inspector every six years. SB 721 mandates that balcony railings and support structures be repaired or replaced if they don’t meet current code standards, regardless of when the building was constructed.

Inspection is mandatory and must be documented in writing with findings reported to the local building department.

Watch Out
Many property managers assume that a visual walkthrough counts as compliance. It doesn’t. SB 326 and SB 721 require a formal inspection by a licensed professional, documented in writing, with findings reported to the local building department. Skipping this step exposes you to liability and potential fines.

Railing, Waterproofing, and Load-Bearing Standards

California code requires balcony railings to be at least 36 inches high, capable of resisting a 200-pound concentrated load without failure, and spaced so that a 4-inch sphere cannot pass through the balusters.

Waterproofing is equally critical. Water that penetrates the balcony decking and reaches the underlying structure can cause dry rot in wood framing, corrosion in steel, or spalling in concrete. Inspectors examine the waterproofing membrane, flashing details, and any signs of water staining or efflorescence on the building face below the balcony. Load-bearing capacity must accommodate occupant weight, furniture, and snow loads in applicable climates.

Deck vs Patio vs Balcony: How They Compare

These three outdoor structures occupy distinct categories in building code and practice.

Deck Characteristics and Code Requirements

A deck is an elevated platform that sits on posts driven into the ground, separate from the building’s structural system. Unlike a balcony, which is attached to and supported by the building frame, a deck stands independently. Decks are typically 1 to 6 feet above grade and require railings if more than 30 inches above ground. They require proper post footings below the frost line and adequate joist and beam sizing based on span and load.

A patio requires no railings, no posts, and no structural attachment to the building. A balcony is integrated into the building’s structure, carries the highest code requirements, and demands regular professional inspection under California law.

Ground-Level vs Elevated: The Key Dividing Line

The elevation threshold changes everything. Anything more than 30 inches above grade requires railings and triggers more stringent code compliance. Anything at or near ground level does not.

Pro Tip
If you’re considering adding an outdoor space to a rental property or HOA-managed building, the elevation choice has enormous implications for future liability, inspection costs, and code compliance. A ground-level patio avoids the SB 326/SB 721 inspection requirements entirely. An elevated platform triggers them.

Materials, Durability, and Maintenance Differences

Balconies and patios are exposed to weather, foot traffic, and UV radiation. The materials you choose determine how long they’ll last and how much maintenance they’ll demand.

Book inspection →

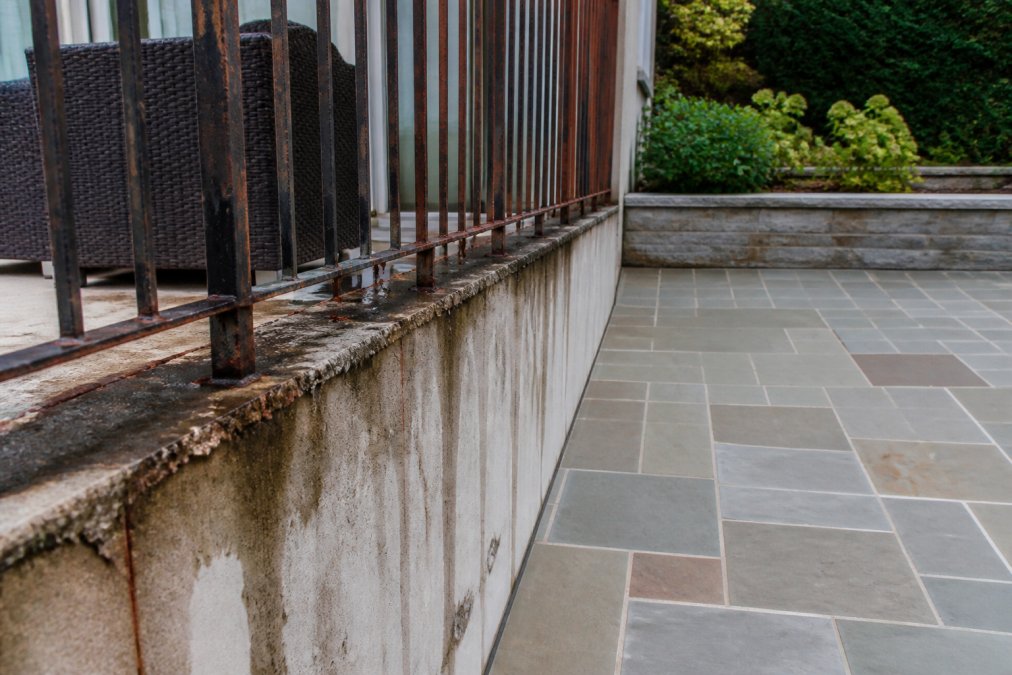
Close-up of a weathered balcony railing with visible corrosion on metal balusters and water staining on the building wall below, positioned next to a well-maintained stone patio surface with clean grout lines and no visible deterioration

Patio Surface Materials: Stone Pavers and Concrete

Patios are typically surfaced with concrete, stone pavers (like those offered by Belgard, a leading hardscape manufacturer), or similar materials. Concrete is affordable and durable but can crack, spall, and stain over time. Stone pavers offer aesthetic appeal and durability, with individual pavers replaceable if one cracks. Patio maintenance is straightforward: keep weeds out of joints, seal surfaces periodically, and ensure proper drainage.

Balcony Materials: Railings, Balustrades, and Waterproofing

Balcony railings can be aluminum, steel, composite, vinyl, or wood, each with different durability profiles. RDI Railing Systems provides engineered railing solutions designed for code compliance and low maintenance. The waterproofing membrane, typically a rubberized or PVC coating applied to the deck surface before the visible flooring, prevents water from reaching the structural framing. Balcony maintenance means monitoring the membrane for cracks, ensuring drains aren’t clogged, and replacing flashing or sealants before water intrusion occurs.

Resale Value, Accessibility, and Legal Liability

A balcony or patio can add significant value to a property, or create significant liability if it’s not maintained properly.

Impact on Home Value and Marketability

Outdoor living space is highly valued in residential real estate. A well-maintained patio or balcony can increase property value by 5 to 10 percent, depending on size, location, and condition. However, a balcony or patio in poor condition becomes a liability. In California, SB 326 and SB 721 inspections are now part of the due diligence process for multifamily properties. A property with a failed inspection or outstanding repair orders will be harder to sell or refinance.

Key Takeaway
For property owners, maintaining balconies to code isn’t optional, it’s an investment in resale value and marketability. Properties with current SB 326/SB 721 inspections and documented repairs command higher prices than those with deferred maintenance.

ADA Compliance and Accessibility Considerations

Patios can be designed to meet ADA (Americans with Disabilities Act) accessibility standards relatively easily: a smooth, slip-resistant surface, a gentle slope for drainage (no more than 1:20 ratio), and an accessible route from the building. Balconies pose more challenges. If a balcony is the primary means of access to a unit, it must meet ADA standards. Check local code and fair housing requirements for your specific property.

Apartment Balcony Decorating Tips and Design Considerations

For renters and owners with limited balcony space, thoughtful design maximizes utility and aesthetic appeal without overwhelming the structure. Small balconies benefit from vertical gardening. Planters like those from elho, which specializes in lightweight balcony planters, allow you to add greenery without consuming floor space. Light colors reflect heat in summer, and natural materials create a cohesive outdoor living aesthetic. Avoid heavy furniture or permanent structures that could overload the balcony’s weight capacity or complicate future inspections.

Why Balcony Inspections Matter: Structural Failure Prevention

Balcony collapses, while rare, are catastrophic. The 2015 Berkeley balcony collapse killed six people and injured seven others. The structure had suffered years of water intrusion and wood rot, none of which was visible from inside the apartment. Both incidents were preventable with regular, professional inspection.

This is why SB 326 and SB 721 exist. Regular inspection by a licensed professional catches deterioration before it becomes dangerous. An inspector trained to read the signs, water staining, soft spots in wood framing, cracks in concrete, corrosion patterns on metal, can identify problems years before they become critical. For property owners and HOA boards, inspection is structural failure prevention. The cost of an inspection is negligible compared to the cost of emergency repairs or the liability of a structural failure.

Apex Balcony provides professional inspection services specifically designed to meet California’s SB 326 and SB 721 requirements. Our licensed inspectors bring decades of construction and design experience to every inspection, identifying early signs of structural failure in balconies, decks, and exterior stairs. We help property owners and HOAs understand their compliance obligations and develop a clear repair plan.

FeatureBalconyPatioDeck
ElevationElevated (attached to building)Ground-levelElevated (freestanding posts)
Structural SupportBuilding frame, ledger, cantileverGround/foundation slabPosts and footings
Railing RequiredYes (36"+ high)No (unless elevated)Yes if >30" above grade
SB 326/SB 721 InspectionRequired every 6 yearsNot requiredMay apply if attached
Waterproofing CriticalYes (prevents interior damage)No (drainage adequate)Yes (at ledger connection)
Maintenance LevelHigh (membrane, flashing, drainage)Low (surface sealing, drainage)Moderate (posts, connections, decking)
Typical MaterialsComposite, tile, concrete decking; metal/composite railingsStone pavers, concretePressure-treated lumber, composite decking

Balconies and patios serve the same purpose, extending your living space outdoors, but they’re fundamentally different structures with different code requirements, maintenance demands, and liability profiles. Understanding which one you have, and what regulations apply to it, determines how you maintain it, inspect it, and eventually sell or refinance the property.

If you own a California residential building with three or more units, SB 326 and SB 721 compliance is mandatory. Don’t wait for a problem to emerge. Book an inspection with Apex Balcony today and ensure your balconies, decks, and exterior stairs meet current safety standards. Our licensed inspectors will identify structural issues early, help you develop a repair plan, and keep your residents safe and your property compliant with California law.

Frequently Asked Questions

What is the difference between a patio and a balcony?

A patio is a ground-level outdoor living space built on a concrete slab or stone pavers, requiring no structural support columns. A balcony is an elevated platform attached to a building's upper floor, cantilevered or supported by columns and console brackets. Balconies require railings (balustrades) and waterproofing to protect the building envelope. Patios are accessible directly from ground level, while balconies require stairs or interior building access.

What are the building code requirements for balconies in the US?

In California, balconies must comply with SB 326 and SB 721, which mandate structural inspections and waterproofing standards. All balconies require railings at least 36 inches high with balusters spaced no more than 4 inches apart. Load-bearing structural components must be engineered to support occupancy loads. Waterproofing is critical to prevent water intrusion into the building envelope. Local jurisdictions may have additional requirements; consult your local building department or a licensed inspector for your specific property.

Does a patio add more value to a home than a balcony?

Both add value, but differently. Patios appeal to buyers seeking accessible outdoor entertaining space and typically add 5-8% to home value. Balconies add value in urban settings and multi-unit buildings where ground-level outdoor space is limited, though their value depends on size, view, and condition. A well-maintained balcony meeting all building codes increases marketability; a deteriorating balcony with structural issues can reduce value significantly and create liability concerns.

Is a balcony considered part of the square footage of an apartment?

No, in most U.S. markets, balconies are not included in the apartment's gross square footage. Real estate appraisers typically count only interior heated and cooled space. However, some markets and appraisers may list balcony square footage separately as additional outdoor space. Always verify with your local real estate standards or appraiser, as practices vary by region and property type.

What is the difference between a deck and a patio?

A deck is an elevated wooden or composite platform built on posts and joists, typically attached to a house. A patio is a ground-level hardscape made of concrete, stone pavers, or similar materials. Decks require railings if elevated more than 30 inches and must meet load-bearing codes for structural support. Patios sit directly on a foundation or grade and require proper drainage and slope. Decks typically need more maintenance (staining, sealing) than patios.

Book inspection

Posted in BlogLeave a Comment on Balcony vs Patio: Key Differences & Building Code Rules

How to Update Reserve Study for SB 326: Step-by-Step Guide

Posted on August 6, 2026 by Apex Balcony admin
How to Update Reserve Study for SB 326: Step-by-Step Guide

Table of Contents

  • Understanding SB 326 Requirements and Reserve Study Updates
  • Step 1: Conduct Your Structural Inspection of Exterior Elevated Elements
  • Step 2: Create Your SB 326 Compliance Checklist for HOAs
  • Step 3: Document Findings and Calculate Replacement Costs
  • Step 4: Understand the Cost of SB 326 Balcony Inspections and Budget Impact
  • Step 5: Integrate Inspection Findings into Your Reserve Study Funding Plan
  • Step 6: How to Fund EEE Repairs in Reserve Studies and Handle Assessment Spikes
  • Maintaining Compliance: Documentation, Audit Trails, and Board Fiduciary Duty

Last Updated: August 6, 2026

Understanding SB 326 Requirements and Reserve Study Updates

California’s SB 326 law requires residential buildings with three or more units to conduct inspections of exterior elevated elements (balconies, decks, stairs, and similar structures) and integrate those findings into reserve studies. The core challenge is coordinating physical inspections with financial planning to protect both residents and the building’s long-term viability.

The relationship between balcony inspections and reserve studies is direct and mandatory. Your reserve study must reflect the actual condition of elevated exterior elements, and your funding plan must account for identified repairs. Boards that fail to integrate inspection findings face liability exposure, special assessments, and potential legal consequences.

The real work isn’t the inspection itself, it’s translating findings into a realistic funding strategy that doesn’t bankrupt your reserve fund or trigger unexpected assessment spikes.

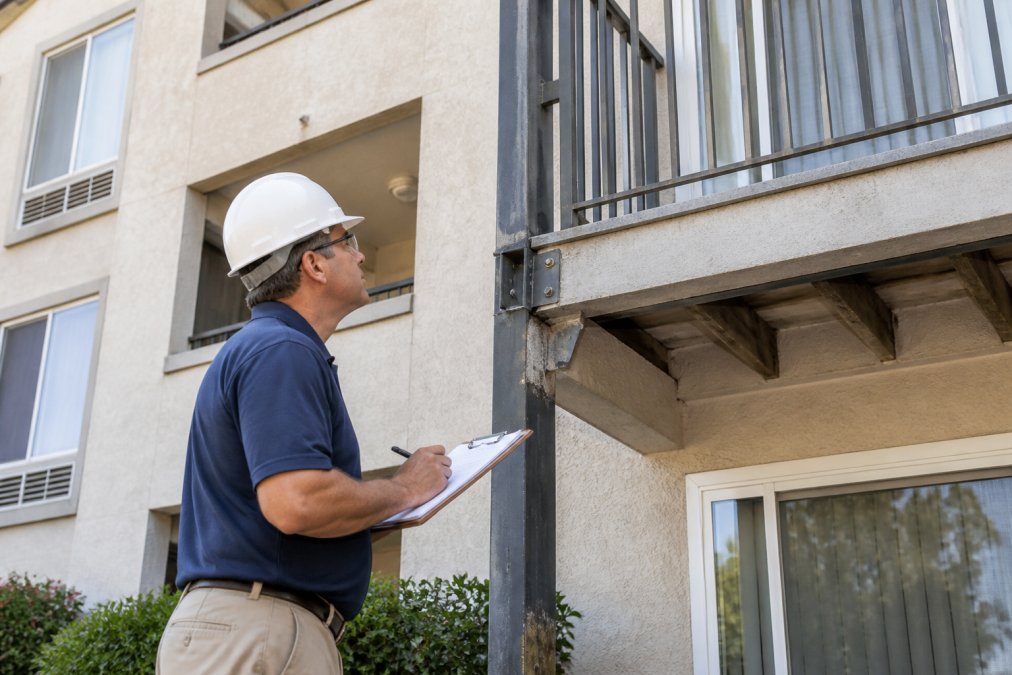
Licensed inspector examining a residential balcony railing and structural connections with clipboard in hand, documenting findings on a multi-unit building exterior

Step 1: Conduct Your Structural Inspection of Exterior Elevated Elements

Before updating a reserve study for SB 326, you need current structural inspection data. Hire a qualified reserve professional or licensed inspector to examine all balconies, decks, stairs, and other elevated exterior elements. The inspection identifies deferred maintenance, structural defects, and remaining useful life estimates for each component.

A Level I reserve study inspection focuses on visual assessment without destructive testing. The inspector documents railings, connections, decking surfaces, ledgers, and structural supports, looking for rot, corrosion, settlement, or material failure that could compromise safety.

The inspection report becomes the foundation for your reserve study update. Without accurate inspection data, your reserve calculations are guesses. With it, you have evidence to justify funding decisions and defend them if audited.

Common findings in California multi-unit buildings include ledger board separation, deck post deterioration, railing code violations, and water intrusion damage. The question isn’t whether your building has deferred maintenance, it’s how much and how urgently repairs are needed.

Pro Tip
Schedule inspections during dry weather when inspectors can safely access all areas. Plan for the inspection to take 1-2 days depending on building size, and budget time for the inspector to access interior walls if ledger board assessment is needed.

Step 2: Create Your SB 326 Compliance Checklist for HOAs

A structured checklist ensures you don’t miss critical compliance steps. Your SB 326 compliance checklist for HOAs should cover inspection scheduling, documentation requirements, reserve study integration, and board communication timelines.

Start with a timeline. Buildings constructed before January 1, 2018 had until January 1, 2026 to complete their first triennial reserve study with inspection findings integrated. Know your building’s deadline, missing it creates legal exposure.

Document inspection scope by specifying which exterior elevated elements must be inspected: all balconies, decks, exterior stairs, walkways at height, and any other elements that meet the definition.

Establish documentation requirements: inspection report, photographs, condition assessments for each component, remaining useful life estimates, and replacement cost projections. These documents become part of your official reserve study and must be retained for audit purposes.

Plan reserve study integration so inspection findings are reflected in your reserve component list, funding plan, and cash flow analysis.

Set board communication deadlines so your board has time to review findings, discuss funding implications, and present options to residents before finalizing the reserve study.

Compliance TaskTimelineResponsibilityDocumentation
Schedule inspection6-12 months before deadlineProperty managerInspection contract
Complete inspectionPer contract termsLicensed inspectorInspection report with photos
Obtain cost estimatesWithin 30 days of inspectionProperty manager/contractorRepair quotes and specifications
Update reserve studyWithin 60 days of inspectionReserve professionalRevised reserve study document
Board review and approvalBefore resident disclosureBoardBoard meeting minutes
Resident disclosurePer state lawProperty managerDelivery confirmation

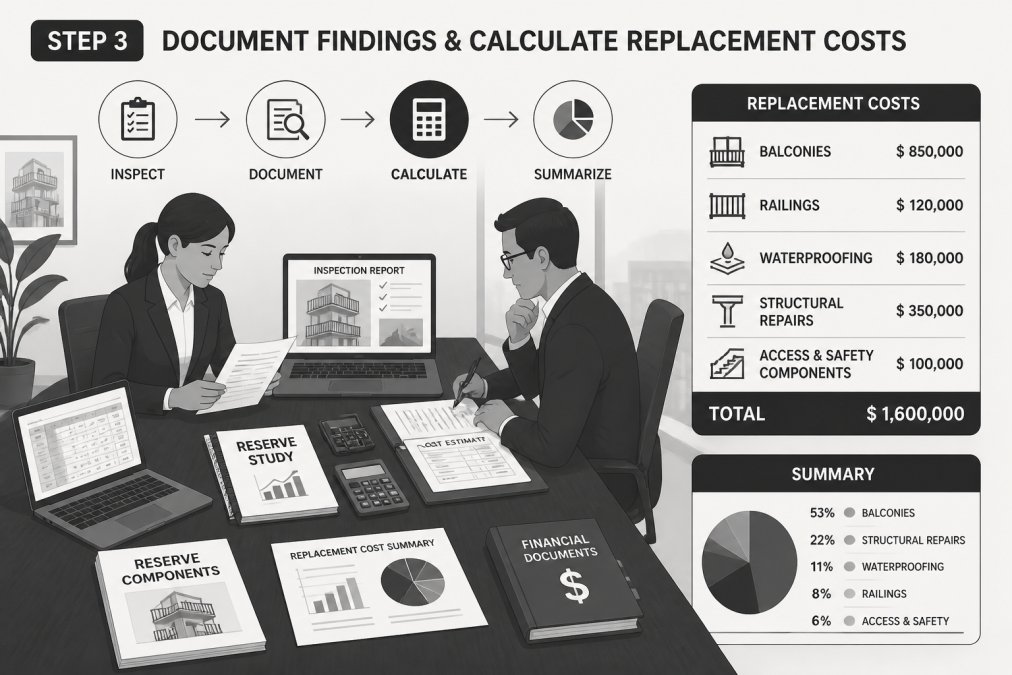
Step 3: Document Findings and Calculate Replacement Costs

Once the inspection is complete, documentation becomes critical. Every finding must be recorded with photographs, condition descriptions, and cost projections to create an audit trail that protects your board.

A quality inspection report includes photographs of each structure from multiple angles, written descriptions of condition, identification of specific defects, and recommendations for repair or replacement. Reference building components by location so findings are traceable to specific areas.

Property manager and board member reviewing inspection reports and financial documents at a conference table with reserve study materials and laptops

Obtain repair cost estimates from contractors specializing in the needed work. Get multiple quotes to establish realistic pricing. Calculate replacement costs for entire components, not just repairs. If a balcony deck shows significant deterioration, the reserve study should reflect the cost to replace the entire deck, not just patch it.

Document the useful life and remaining useful life for each component. A wood deck might have a 20-year useful life but only 5 years remaining if it’s 15 years old. These estimates drive your funding timeline.

Create a component inventory with condition ratings using a standardized scale: excellent, good, fair, poor, or failed. This inventory becomes part of your official reserve study documentation.

Step 4: Understand the Cost of SB 326 Balcony Inspections and Budget Impact

Inspection costs vary based on building size, complexity, and accessibility. Smaller buildings (12-25 units) with straightforward layouts generally cost less than large complexes with multiple buildings or rooftop decks.

What many boards underestimate is the downstream cost. The inspection itself is one expense. The real budget impact comes from repairs and replacements the inspection identifies. A thorough inspection often reveals deferred maintenance, water damage, structural deterioration, and code violations that drive reserve study updates increasing funding requirements.

If your reserve study was previously underfunded, integrating inspection findings often reveals a significant shortfall. Your reserve fund might have $500,000 but need $1.2 million to address identified repairs over the next 10 years. This gap must be addressed through increased reserves, special assessments, or extended funding timelines.

Watch Out
Boards that delay inspections hoping to avoid bad news often face worse outcomes. Deferred maintenance compounds. A balcony problem costing $50,000 to fix today might cost $150,000 if water damage spreads for three more years. Early detection saves money long-term, even if it increases short-term funding requirements.

Plan for the inspection cost as a separate line item, but budget for the repair costs that follow.

Book inspection →

Step 5: Integrate Inspection Findings into Your Reserve Study Funding Plan

Integrating inspection findings into your reserve study funding plan means updating three critical elements: the component list, the funding analysis, and the cash flow projections.

Update your reserve component list by adding new components the inspection identified and revising condition ratings for existing components based on findings. If balcony railings were rated "good" but the inspection shows code violations and deterioration, update the rating to "poor" and adjust remaining useful life downward.

Revise your percent funded calculation. This metric shows what percentage of the reserve fund you need to meet future obligations. If your reserve study previously showed 70% funding but inspection findings increase the total reserve need, your percent funded drops, signaling to residents and auditors whether your funding plan is adequate.

Update your cash flow analysis to show when major expenses will occur and how they’ll be funded. If inspection identifies that three buildings need deck replacement within five years, your cash flow projection must show those expenses and the funding source.

The funding plan update is where board fiduciary duty becomes concrete. You must propose a realistic funding strategy that addresses identified defects. Options include increasing monthly reserves, implementing special assessments, extending repair timelines, or combinations thereof. Each option has trade-offs that must be documented.

Many boards propose funding plans that don’t fully address identified needs, creating liability. If the reserve study identifies $1.2 million in needed repairs but the funding plan only addresses $800,000, the board is knowingly underfunding, violating fiduciary duty.

Step 6: How to Fund EEE Repairs in Reserve Studies and Handle Assessment Spikes

Funding exterior elevated element repairs creates tension between protecting residents and maintaining affordability.

The most common funding strategy is increased monthly reserves. If your building currently collects $150 per unit monthly for reserves, the updated reserve study might recommend $220 per unit. This spreads the cost over time and avoids a single large special assessment.

Special assessments create immediate impact but address funding shortfalls faster. A $5,000 per unit special assessment for a 30-unit building raises $150,000 immediately. The challenge is handling assessment spikes without triggering resident resistance. Phase assessments over multiple years: instead of a single $5,000 assessment, implement $2,000 in year one and $3,000 in year two.

Some boards use a hybrid approach: increase monthly reserves modestly and implement a smaller special assessment for urgent repairs.

Key Takeaway
The key to managing assessment spikes is transparency and advance notice. Residents who understand why assessments are necessary and see the inspection report backing the decision are more likely to accept increases.

Another funding option is extending repair timelines. If inspection identifies deferred maintenance but nothing is immediately dangerous, the board might extend the timeline from three years to seven years, reducing annual funding requirements while documenting that extended timelines don’t create safety risks.

Maintaining Compliance: Documentation, Audit Trails, and Board Fiduciary Duty

Compliance doesn’t end when the reserve study is updated. Ongoing documentation and audit trails protect the board and demonstrate that fiduciary duties were fulfilled.

Maintain a complete file of all inspection reports, contractor quotes, board meeting minutes discussing reserve findings, and correspondence with residents about reserve funding. Board minutes should document the discussion of inspection findings, options considered, and reasoning for choices made.

The reserve professional should provide an annual update to the reserve study even in non-triennial years. This keeps the document current and shows that the board is actively monitoring reserve adequacy.

Fiduciary duty requires that boards act in the best interest of the community, not individual residents or board members. A board that underfunds reserves to avoid resident opposition breaches fiduciary duty. A board that makes decisions transparently, with documentation, and based on professional advice fulfills its duties.

The consequences of non-compliance are real. Boards that fail to conduct required inspections, fail to integrate findings into reserve studies, or fail to disclose reserve information face liability. Residents can sue for breach of fiduciary duty. Buildings can be placed in receivership if governance failures are severe.

How to update reserve study for SB 326 ultimately means creating a process that coordinates inspection findings with financial planning, documents decisions thoroughly, and maintains transparency with residents. This is protection for the building, the residents, and the board members themselves.


Managing SB 326 compliance creates real challenges for boards managing aging buildings with deferred maintenance. The inspection process identifies problems that must be addressed, and the reserve study update translates those problems into a funding strategy. Apex Balcony’s licensed inspectors help building owners navigate this process by providing comprehensive inspection reports that clearly document conditions and support realistic reserve funding decisions. If your building needs an inspection to meet SB 326 requirements or update an existing reserve study, book an inspection with Apex Balcony and get the documentation your board needs to make confident decisions.

Frequently Asked Questions

Does SB 326 require a reserve study update?

Yes. SB 326 mandates that HOAs update their reserve studies to include exterior elevated elements (balconies, decks, stairs) and their structural condition. The triennial reserve study must reflect current replacement costs and remaining useful life of these components. Annual budget reports must also address any deferred maintenance identified during inspections, ensuring your funding plan accounts for repairs and compliance costs.

What is included in an SB 326 compliance checklist for HOAs?

Your SB 326 compliance checklist must verify that your reserve study identifies all exterior elevated elements, documents their condition from visual inspection, lists replacement costs and useful life, shows percent funded for each component, includes a cash flow analysis for repairs, and establishes a maintenance schedule. You should also confirm the reserve professional consulted inspection reports, the board reviewed fiduciary duty obligations, and you have documentation of all inspection findings and reserve funding decisions for audit purposes.

How often must an HOA perform a balcony inspection under SB 326?

SB 326 requires a Level I visual inspection at least once every three years for buildings with three or more units. However, if an inspection identifies defects or deferred maintenance, the statute may require a more detailed Level II structural inspection. Your reserve study must be updated triennial, with annual budget reports addressing any new findings. Between inspections, maintain detailed records of all repairs and maintenance to support your reserve funding plan and demonstrate ongoing compliance.

What happens if we don't update our reserve study for SB 326?

Failure to comply with SB 326 exposes your HOA to significant liability. The Davis-Stirling Act requires boards to fulfill fiduciary duties by maintaining adequate reserves for structural safety. Non-compliance can result in special assessments, litigation from residents, regulatory penalties, and personal liability for board members. If a balcony failure occurs and inspections were not documented or reserves were inadequate, your HOA faces catastrophic liability. Updating your reserve study demonstrates good faith compliance and protects residents, assets, and the board.

Book inspection

Posted in BlogLeave a Comment on How to Update Reserve Study for SB 326: Step-by-Step Guide

Fix Loose Balcony Railings: Multi-Unit Building Guide

Posted on August 5, 2026 by Apex Balcony admin
Fix Loose Balcony Railings: Multi-Unit Building Guide

Table of Contents

  • Identifying the Cause of Loose Balcony Railings
    • Common failure points in multi-unit buildings
    • How to perform a visual safety inspection
  • Tools and Materials Required for Railing Repair
  • Best Tools for Tightening Metal Railings
  • Step-by-Step Repair Process for Wobbly Railings
    • Step 1: Tighten loose fasteners and bolts
    • Step 2: Install blocking between rim joists
    • Step 3: Replace post-to-rail hardware
  • IBC Railing Load Requirements and Code Compliance
    • SB 326 and SB 721 compliance for California buildings
  • Balcony Railing Inspection Checklist for Property Managers
    • What to look for during routine inspections
    • Preventative maintenance protocol
  • Liability for Balcony Railing Failure in Multi-Unit Buildings
    • Legal responsibility and insurance implications
    • Documentation and professional assessment
  • When to Call a Professional Inspector

Last Updated: August 5, 2026

Identifying the Cause of Loose Balcony Railings

Loose balcony railings in multi-unit buildings represent a serious structural and liability concern, typically resulting from fastener deterioration, material fatigue, and inadequate blocking between structural elements.

Common failure points in multi-unit buildings

The most common failure points include corroded lag bolts and carriage bolts that lose shear strength and cannot transfer lateral loads required by building codes, particularly acute in coastal California where salt spray accelerates corrosion and in freeze-thaw regions.

Deteriorated blocking between rim joists represents another critical weakness. Inadequate or undersized pressure-treated lumber fails due to water intrusion and rot. Without solid blocking, the rim joist cannot properly support the vertical load-bearing posts that anchor the railing system.

Hardware failure at the post-to-rail connection is equally problematic. Bolts loosen over time due to vibration and thermal expansion, causing the entire railing to shift laterally and creating the wobbly sensation that signals danger.

How to perform a visual safety inspection

Apply firm lateral pressure to the railing at multiple points along its length, it should not move. Any movement indicates loose fasteners, failed blocking, or compromised hardware.

Inspect all visible fasteners for corrosion, rust staining, or discoloration. Look for white powder or orange-red rust bloom around bolt heads. Check for gaps between the post and rim joist where blocking should be present. Examine concrete anchors for cracks radiating from anchor holes or broken concrete. Document any visible water damage or moisture intrusion.

Tools and Materials Required for Railing Repair

Essential tools include a socket wrench set with deep sockets for accessing lag bolts in tight spaces, a calibrated torque wrench for proper fastener tightening, and a cordless impact driver for fastener removal. A level, straightedge, drill, and reciprocating saw complete the toolkit.

For materials, stock stainless steel lag bolts and carriage bolts rather than galvanized fasteners, stainless steel resists corrosion far more effectively in coastal and humid environments. Use pressure-treated lumber rated for exterior use for all blocking. Include corrosion-resistant washers and lock washers with every fastener to prevent loosening due to vibration.

Best Tools for Tightening Metal Railings

Proper fastening technique separates a repair that holds from one that fails within months.

Professional technician's hands using a socket wrench to tighten lag bolts on a metal railing post, with a torque wrench, socket set, and stainless steel fasteners arranged on a work surface nearby

A calibrated torque wrench is non-negotiable for final fastener tightening. Lag bolts connecting posts to rim joists typically require 80-120 foot-pounds of torque, depending on bolt diameter and material specifications. Over-tightening can strip the wood or snap the bolt; under-tightening leaves the connection loose.

Socket wrenches with deep sockets allow access to recessed bolt heads. An impact driver accelerates fastener removal, particularly with corroded bolts, but should never be used for final tightening, as impact action prevents proper clamp load development.

Step-by-Step Repair Process for Wobbly Railings

A systematic repair process addresses root causes rather than applying cosmetic fixes.

Step 1: Tighten loose fasteners and bolts

Identify all fasteners in the railing system, including lag bolts connecting the post to the rim joist, carriage bolts through post-to-rail hardware, and bolts anchoring to concrete. Document location and condition with photographs.

Remove paint, rust, or debris from bolt heads using a wire brush. Apply penetrating oil to corroded fasteners and allow 15-30 minutes to soak. Using your socket wrench, remove the bolt completely and inspect for damage or corrosion. If severely compromised, replace with a new stainless steel fastener of the same diameter and length.

Reinstall the fastener with new lock and flat washers. Hand-tighten first, then use your torque wrench to tighten to manufacturer specification. Work methodically around the railing, tightening all fasteners in a balanced pattern.

Step 2: Install blocking between rim joists

Inspect the space between the post and rim joist. If you see daylight or feel looseness, blocking is missing or has failed. Measure the gap to determine the size and quantity of blocking needed.

Cut pressure-treated lumber to fit snugly between rim joist and post, typically 2×6 or 2×8 depending on span. Install using corrosion-resistant fasteners spaced approximately 16 inches apart. Use your torque wrench to tighten each fastener to appropriate specification.

Verify that blocking is tight with no movement between post and rim joist. If movement remains, the underlying rim joist may be compromised and require professional assessment.

Step 3: Replace post-to-rail hardware

The connection between post and railing must be inspected and tightened or replaced. For bolted connections, remove each bolt, clean thoroughly, and reinstall with new washers and lock washers. Tighten using your torque wrench to manufacturer specification.

For welded connections, look for cracks in the weld or corrosion around the weld perimeter. If cracks are present, the connection has failed and must be replaced by a professional welder.

After tightening or replacing hardware, test railing stability by applying firm lateral pressure at multiple points. The railing should not move perceptibly.

IBC Railing Load Requirements and Code Compliance

Building codes establish minimum load requirements that railings must meet to protect occupants from falls. The International Building Code (IBC) requires that railings resist a concentrated load of 200 pounds applied horizontally at any point along the top rail, plus a distributed load of 50 pounds per linear foot. Vertical members must be spaced so a 4-inch sphere cannot pass between them. The railing system must be designed so no single point of failure causes collapse.

SB 326 and SB 721 compliance for California buildings

California Senate Bills 326 and 721 impose additional requirements beyond the IBC. SB 326 (effective 2018) requires that balconies, decks, and exterior stairs in residential buildings three or more units old be inspected for safety and structural integrity. SB 721 (effective 2019) extends these requirements to buildings built before 1995 and mandates that railings be replaced if they do not meet current code standards.

These laws apply to any residential building with three or more units. The responsibility for compliance falls on the building owner or HOA. Failure to comply results in fines, liability for injuries, and legal action by residents.

Book inspection →

Compliance requires a licensed inspector to conduct thorough evaluation of all elevated exterior elements, document railing condition, identify structural defects, and recommend repairs or replacements. Building owners must complete recommended repairs within a specified timeframe.

At Apex Balcony, we specialize in SB 326 and SB 721 compliance inspections for California property owners. Our licensed inspectors have decades of combined construction and design experience and understand the specific requirements that apply to your building type and age. We provide comprehensive documentation that satisfies regulatory requirements and protects you from liability.

Balcony Railing Inspection Checklist for Property Managers

Regular inspections catch problems before they become dangerous. Property managers should conduct visual inspections at least twice annually, spring and fall, and after any severe weather events.

Property manager conducting a hands-on safety inspection of a metal balcony railing, checking fasteners and corrosion on the exterior of a residential apartment building

What to look for during routine inspections

Visually scan the entire railing for obvious damage, rust, or paint failure. Rust staining indicates fastener corrosion. Apply lateral pressure to the railing at multiple points, it should not move. Any movement indicates loose fasteners or failed blocking.

Inspect all visible fasteners for corrosion, missing components, or damage. Look for partially backed-out bolts or missing washers. Examine the connection between post and rim joist for gaps, movement, or failed blocking. Check for water staining or moisture damage. Test concrete anchors for cracks or spalling.

Preventative maintenance protocol

Establish a maintenance schedule addressing the most common failure modes before they become critical. Annually inspect and tighten all fasteners. Every two years, apply protective coating to all metal components. Every three to five years, depending on environmental exposure, replace fasteners with new stainless steel components.

Document all maintenance activities in a building maintenance log, recording date, work performed, personnel responsible, and any defects discovered. This documentation protects you if railing failure occurs, demonstrating diligent maintenance and compliance with legal obligations.

Liability for Balcony Railing Failure in Multi-Unit Buildings

Building owners and HOAs bear legal responsibility for resident safety. A balcony railing failure resulting in injury or death creates immediate liability exposure.

Legal responsibility and insurance implications

California law holds property owners to a standard of reasonable care, maintaining properties in a condition safe for occupants and compliant with applicable building codes. For balcony railings, this includes regular inspections, prompt repairs, and replacement of railings not meeting current code standards.

Failure to meet this standard constitutes negligence. If railing failure results in injury, the injured party can pursue claims for damages including medical expenses, lost wages, pain and suffering, and wrongful death claims exceeding millions of dollars.

Insurance policies typically include liability coverage for on-property injuries. However, carriers may deny coverage if the owner failed to maintain safe conditions or comply with building codes.

Documentation and professional assessment

The best protection against liability is comprehensive documentation of inspection and maintenance activities. When a railing is inspected, the inspector should provide a detailed written report documenting component condition, identifying defects, and recommending specific repairs or replacements.

If defects are identified, the building owner must act promptly. Delaying repairs creates liability exposure. Professional inspections provide credibility and protection, when a licensed inspector documents that a railing meets code requirements or identifies specific necessary repairs, this documentation supports your position if disputes arise.

At Apex Balcony, we provide comprehensive inspection reports documenting current railing condition and clearly identifying any defects or code violations. Our reports include specific repair or replacement recommendations with details on what must be done and why. This documentation protects you by demonstrating diligent duty to maintain safe conditions for residents.

When to Call a Professional Inspector

While property managers can perform basic visual inspections and routine maintenance, certain situations require professional assessment. A licensed inspector brings expertise in building codes, structural engineering, and material science beyond visual observation.

Call a professional inspector if you observe visible fastener or hardware corrosion, railing movement under lateral pressure, gaps between posts and rim joists, concrete anchor cracks or spalling, water staining or moisture damage, paint failure or coating deterioration, missing or damaged fasteners, or any uncertainty about code compliance.

Do not attempt repairs if uncertain about the problem or solution. Improper repairs create false confidence that the railing is safe when it remains defective.

California law requires buildings built before 1995 to comply with SB 721 requirements. If your building is in this category, professional inspection is not optional, it is a legal requirement. Professional inspections also satisfy insurance requirements, as most carriers expect periodic professional inspections to verify code compliance and safety standards.


Balcony railing failures in multi-unit buildings are preventable with systematic inspection, timely maintenance, and professional assessment. The cost of proactive maintenance is minimal compared to liability exposure and potential tragedy of railing failure. Building owners and property managers who take maintenance obligations seriously protect their residents and assets. Schedule a professional inspection today to verify that your railings meet current code requirements and that your residents are safe.

Frequently Asked Questions

How do you stabilize a wobbly railing?

Start by tightening all visible fasteners with the appropriate wrench or socket. Check lag bolts, carriage bolts, and post-to-rail hardware for corrosion or deterioration. If tightening doesn't stop the wobble, inspect the rim joist and blocking between joists for decay or gaps. Install pressure-treated blocking where needed to restore structural integrity. For multi-unit buildings, ensure all repairs meet IBC railing load requirements and document your work for liability protection.

What is the difference between SB 326 and SB 721 compliance?

SB 326 (California Building Standards Code) requires inspection of balconies and elevated exterior elements in residential buildings three or more units old. SB 721 extends compliance requirements to all multi-unit residential buildings. Both mandate professional structural assessment to identify deterioration. Determine which applies to your building based on its age and unit count, then schedule a professional inspection to maintain legal compliance and protect residents.

Who is liable if a balcony railing fails and someone is injured?

Building owners and property managers of multi-unit buildings are legally responsible for maintaining safe railings. Liability extends to the HOA, management company, and individual owners depending on your structure. Professional inspections and documented repairs create a liability defense. Without proof of compliance with SB 326 or SB 721, you face significant legal and financial exposure. Maintain detailed records of all inspections, repairs, and professional assessments.

Can I repair loose balcony railings myself, or do I need a professional?

Simple tightening of fasteners can be done in-house with proper tools. However, if inspection reveals structural damage, deteriorated blocking, corrosion-resistant hardware replacement, or load-bearing issues, hire a licensed structural engineer or balcony specialist. Multi-unit buildings require professional assessment to meet SB 326/721 compliance. Professional documentation protects your building legally and ensures repairs meet code requirements.

Book inspection

Posted in BlogLeave a Comment on Fix Loose Balcony Railings: Multi-Unit Building Guide

Identify Dry Rot in Wooden Balcony Supports: Step-by-Step

Posted on August 4, 2026 by Apex Balcony admin
Identify Dry Rot in Wooden Balcony Supports: Step-by-Step

Table of Contents

  • What Is Dry Rot and Why It Threatens Balcony Structures
  • Visual Signs of Dry Rot in Balcony Supports
    • Discoloration and Surface Changes
    • Fungal Fruiting Bodies and Mycelium Growth
  • How to Test Wood for Rot with a Screwdriver
    • The Screwdriver Penetration Test
    • Assessing Spongy Texture and Soft Spots
  • Dry Rot vs Wet Rot Identification
  • Inspecting Ledger Boards and Load-Bearing Joists
  • California SB 721 Balcony Inspection Requirements
  • Safety Protocols for DIY Structural Assessment
  • When to Call a Professional Inspector

Last Updated: August 4, 2026

What Is Dry Rot and Why It Threatens Balcony Structures

Dry rot is a destructive fungal decay that attacks wood in low-moisture environments, leaving timber brittle and structurally compromised. At Apex Balcony, we’ve inspected hundreds of California buildings where dry rot in wooden balcony supports went undetected for years, creating serious safety risks. The fungus responsible, Serpula lacrymans, thrives in wood with moisture content between 20-30%, paradoxically lower than the 40%+ moisture needed for wet rot. Balconies are particularly vulnerable because they experience repeated wetting from rain and snow followed by partial drying, creating the exact moisture band where dry rot flourishes.

In California, this threat has legal teeth. According to California Building Standards Commission SB 721 requirements, residential buildings with three or more units must have all exterior elevated elements inspected by a licensed professional every six years. Balcony collapses in Berkeley (2015) and Malibu (2021) demonstrated the catastrophic consequences of missed structural decay. When dry rot compromises ledger boards and load-bearing joists, the entire balcony system can fail suddenly, putting residents at risk and exposing building owners to massive liability.

Early identification is your first line of defense. The fungus produces visible fruiting bodies, distinct discoloration patterns, and characteristic wood deterioration that trained inspectors can spot. Property managers who catch dry rot early can often address it before repair costs escalate into six figures.

Close-up of wooden balcony support showing visible dark discoloration, cracking patterns, and surface deterioration with brittle wood fibers, photographed in natural daylight

Visual Signs of Dry Rot in Balcony Supports

The first step in identifying dry rot in wooden balcony supports is recognizing the visual markers that indicate fungal decay is underway.

Discoloration and Surface Changes

Infected wood develops distinctive color shifts from surrounding timber. Early-stage dry rot appears as dark brown or reddish-brown discoloration in irregular patches. As decay progresses, the wood can lighten to pale tan or grayish-brown, creating a mottled appearance.

The surface texture changes too. Dry rot causes wood fibers to break down, leaving the surface crumbly, flaking, or peeling in layers. Fine cracks running perpendicular to the grain indicate shrinkage caused by water loss as the mycelium consumes the wood structure. In advanced decay, the wood surface becomes papery and can be scraped away with a fingernail.

Discoloration often follows water infiltration patterns. On ledger boards where flashing fails, you’ll see a concentrated band of dark staining running horizontally. On joists, discoloration concentrates near the ends where wood meets concrete or masonry, junction points that trap moisture and accelerate fungal growth.

A musty odor frequently accompanies visible discoloration. The smell is distinct: earthy, slightly sour, reminiscent of a damp basement. If you notice this odor near balcony supports, it signals that wood-destroying fungi are active.

Fungal Fruiting Bodies and Mycelium Growth

The most definitive visual sign of active dry rot is the presence of fruiting bodies, fungal reproductive structures that appear on or near infected wood. These typically emerge as bracket-shaped or shelf-like growths protruding from the wood surface, ranging from 2-6 inches across with a pale, cream-colored upper surface and rusty-brown or orange underside. Fruiting bodies indicate the fungus has matured and is releasing spores to colonize new wood. Their presence means the timber needs replacement.

Before fruiting bodies appear, mycelium, the thread-like fungal network that does the decay work, may be visible as white, cotton-like strands or fine web-like material. Mycelium growth indicates that fungal decay is actively consuming the wood structure. In advanced cases, you may observe salt-like crystalline deposits on the wood surface, confirming active decay.

How to Test Wood for Rot with a Screwdriver

Visual inspection provides initial clues, but a hands-on test using a screwdriver is the most reliable way to assess the structural condition of wooden balcony supports.

The Screwdriver Penetration Test

Use a flathead screwdriver (ideally 1/4 inch wide) to probe the wood surface. In healthy wood, the screwdriver will not penetrate more than 1/4 inch without significant force. In rotted wood, the screwdriver penetrates easily, sometimes sinking an inch or more with minimal pressure. This tells you the wood fibers have lost structural integrity.

Perform this test at multiple points on each suspect timber, top surface, bottom surface, and sides. Dry rot often concentrates at specific locations where water pools or flashing fails, so a timber may be sound in one spot and severely compromised 12 inches away. Document your findings with photographs and notes of penetration depth and location.

Assessing Spongy Texture and Soft Spots

Press firmly on suspect wood with your thumb or palm. Healthy wood feels hard and unyielding. Rotted wood feels spongy, compressible, or soft. Soft spots indicate zones where the fungus has substantially consumed the wood structure. A timber where soft spots cover more than 10-15% of the cross-section is at risk of sudden failure.

Pay particular attention to joist and ledger board ends. These areas are most vulnerable because they sit in or near concrete/masonry, where moisture accumulates. You’ll often find that the outer 2-3 inches of a joist end are severely rotted while the interior timber is still sound. This end decay can reduce the effective depth of the joist, dramatically lowering its load-bearing capacity.

Inspector's hands performing screwdriver penetration test on wooden joist, showing tool sinking into soft wood fiber area with visible decay discoloration, photographed in clear daylight

Dry Rot vs Wet Rot Identification

Learning how to identify dry rot requires understanding how it differs from wet rot, because the two fungi demand different remediation approaches.

Dry rot (Serpula lacrymans) thrives in wood with 20-30% moisture content. It can spread through masonry and concrete to reach new wood sources, making it particularly aggressive in multi-story buildings. Dry rot produces visible fruiting bodies, moves rapidly through wood, and can cause structural failure within months if left untreated. The wood becomes brittle and shrinks as the fungus consumes it.

Wet rot (Coniophora puteana and related species) requires constant saturation, moisture content above 40%. It does not spread through masonry and remains localized to the affected timber. Wet rot advances more slowly and typically affects wood that is continuously wet. The wood becomes soft and spongy rather than brittle.

Balcony supports are more likely to develop dry rot because they experience cycles of wetting and partial drying, keeping moisture content in the danger zone (20-30%). Visual identification: dry rot wood is often darker and more brittle; wet rot wood is softer and more spongy. For balcony supports in California, assume dry rot unless the wood is in a state of constant saturation.

Inspecting Ledger Boards and Load-Bearing Joists

Ledger boards and joists are the critical structural elements of a balcony system. The ledger board connects the balcony deck to the building’s main structure, transferring all weight back to the building. Joists span from the ledger board to the outer rim beam, supporting the deck surface. If either fails, the entire balcony can collapse.

Dry rot in these elements is particularly dangerous because damage is often hidden. The top surface of a joist may look sound while the underside, where moisture accumulates and the fungus concentrates, is severely compromised.

Inspect the ledger board first. Look for gaps between the ledger and the building’s rim band, these indicate the ledger has shrunk, a classic sign of dry rot. Check the flashing where the ledger meets the building exterior. Failed flashing allows water to run behind the ledger, saturating the wood. Look for discoloration, soft spots, and screwdriver penetration along the entire length, especially at the ends.

Get Started Today →

For joists, inspect the top surface, bottom surface, and both ends. Pay special attention to where joists meet the rim beam or ledger board, these connection points trap water and are decay hotspots. Use your screwdriver to probe the end grain. If the wood is soft, the joist’s end connection is compromised.

Check the underside of the deck for water seepage or staining on joists. Water dripping down a joist indicates the deck surface above is allowing infiltration. Look for evidence of standing water or pooling on the deck surface. Poor drainage accelerates rot development.

Measure the depth of any soft spots or decay zones. If a joist has lost more than 1/4 of its cross-sectional depth to rot, its load-bearing capacity is significantly reduced. Building codes typically require that structural members maintain at least 75% of their original cross-section.

California SB 721 Balcony Inspection Requirements

California Senate Bill 721 mandates that residential buildings with three or more units must have all exterior elevated elements, balconies, decks, stairways, inspected by a licensed professional every six years. Inspections must be performed by a person licensed as a structural engineer, general contractor, or architect, or who has specific training in exterior elevated element inspection.

The inspector must document the condition of all structural components and classify findings as either "pass," "fail," or "needs monitoring." Property owners have 30 days from inspection to provide a copy of the report to residents. If the inspection identifies defects that pose imminent danger, the owner must take immediate action to ensure safety.

According to California Building Standards Commission SB 721 compliance guidance, dry rot in load-bearing elements is classified as a defect requiring repair. Non-compliance with SB 721 can result in fines up to $500 per day per violation, plus liability exposure if injury or collapse occurs.

Safety Protocols for DIY Structural Assessment

If you’re conducting a preliminary inspection before calling a professional, follow these safety protocols.

Wear appropriate protective equipment. Use work gloves to protect your hands from splinters and fungal spores. Wear a respirator mask (N95 or better) when probing suspect wood. Wear safety glasses to protect your eyes from wood particles. If the balcony shows severe decay, wear a hard hat.

Never put your full weight on a balcony that shows visible signs of decay. If the deck surface feels soft or spongy, or if joists are visibly rotted, restrict access immediately. Severe dry rot can cause sudden failure.

Test the deck surface carefully. Press down firmly on multiple points with your foot, shifting your weight gradually. If the deck flexes excessively or feels unstable, stop immediately. Excessive flex indicates compromised joists.

Probe suspect wood from a stable position. Use a step ladder or stable platform to reach elevated joists and ledger boards. Never lean precariously or overextend your reach.

Take photographs and detailed notes. Document the location of every soft spot, discoloration patch, and penetration depth. Use a measuring tape to record dimensions. This documentation is invaluable for your professional inspector.

Do not attempt to remove or chip away at suspect wood. Disturbing rotted timber can accelerate collapse. Your goal is observation only.

Understand your liability limits. If you identify severe decay and do nothing, you’ve documented a known hazard. If you identify decay and restrict access pending professional inspection, you’ve taken reasonable precautions. Document your actions.

When to Call a Professional Inspector

The line between preliminary visual inspection and professional structural assessment is clear. Call a licensed professional immediately if you observe:

  • Visible fruiting bodies indicating advanced dry rot
  • Soft spots covering more than 5% of a joist or ledger board suggesting significant structural compromise
  • Screwdriver penetration exceeding 1/2 inch with light pressure indicating substantial decay
  • Gaps between the ledger board and the building structure suggesting the ledger has shrunk due to decay
  • Failed flashing or evidence of water seepage behind the ledger or into joist ends
  • Balcony movement, flexing, or bouncing indicating structural instability (emergency)
  • Uncertainty about the extent or severity of decay

Apex Balcony has worked with hundreds of building owners and HOAs across California to conduct comprehensive balcony inspections and identify early signs of structural failure. Our licensed inspectors use decades of combined construction and design experience to assess dry rot and other defects that threaten balcony safety. We provide detailed written reports that document all findings and recommend specific repairs, helping property owners comply with SB 721 and protect their residents.

Inspection FindingDIY AssessmentProfessional Follow-UpUrgency
Discoloration or musty odorVisual observation, note locationConfirm fungal decay, assess extentWithin 2-4 weeks
Screwdriver penetration 1/4 inchSoft spot identified, documentDetermine structural impact, repair scopeWithin 2-4 weeks
Fruiting bodies visibleAdvanced decay confirmed, restrict accessFull structural assessment, replacement planningImmediate (within 1 week)
Ledger board gaps or failed flashingWater infiltration suspectedAssess ledger connection integrity, waterproofingWithin 1-2 weeks
Deck flexing or instabilityStructural concern noted, restrict accessEmergency assessment, stabilization or closureImmediate (24-48 hours)

Dry rot in wooden balcony supports is a silent threat that can compromise structural safety and create significant liability for building owners. Early detection through visual inspection and hands-on testing can catch decay before it becomes catastrophic. Once you’ve identified suspect wood, professional assessment is essential. Apex Balcony provides licensed structural inspections that document all defects, confirm SB 721 compliance, and guide you toward safe, code-compliant repairs. Book an inspection with our team today and protect your residents and your property.

Frequently Asked Questions

What does dry rot in wood look like, and how can I identify it visually?

Dry rot appears as shrunken timber with deep cracking in a cube-like pattern, often accompanied by discoloration ranging from light brown to dark gray. You may see white or gray mycelium growth (fungal threads) on the wood surface, and the affected wood feels brittle and crumbles easily when scraped. A musty odor often indicates active wood-destroying fungi. In balcony supports, look for these signs along ledger boards, joists, and connection points where moisture accumulates.

How do I test wood for rot with a screwdriver to identify dry rot in balcony supports?

Insert a screwdriver or awl perpendicular into the wood grain with moderate pressure. If the tool penetrates more than one-quarter inch easily, the wood has lost structural integrity. Press along the wood fibers as well; if the screwdriver sinks in smoothly rather than meeting resistance, soft spots indicate decay. Repeat testing at multiple locations on joists, ledger boards, and lag bolt connection areas to assess the extent of deterioration and load-bearing capacity loss.

What is the difference between dry rot and wet rot in balcony wood?

Dry rot requires less moisture (12-20% moisture content) and spreads faster, causing wood to shrink, crack in cubes, and become brittle. Wet rot needs higher moisture (above 50%) and grows more slowly, leaving wood soft and spongy without the characteristic cube cracking. Dry rot produces white mycelium and can travel through masonry; wet rot stays localized to wet areas. In balconies, dry rot is more dangerous because it can spread undetected through structural framing before moisture is obvious.

What are California SB 721 balcony inspection requirements, and do they apply to my property?

SB 721 requires annual visual inspections of balconies, decks, and exterior stairs on buildings with three or more residential units. Inspectors must assess structural integrity, water infiltration, fastener corrosion, and deterioration of wood and connections. Defects must be documented and repairs completed within specified timelines. If your building has three or more units and includes elevated exterior elements, SB 721 applies. Non-compliance can result in fines and liability. Contact a licensed inspector to confirm your property's compliance status.

What should I do if my balcony inspection reveals dry rot in load-bearing joists or ledger boards?

Stop using the balcony immediately if structural safety is compromised. Document findings with photographs and written notes. Contact a licensed structural engineer or professional balcony inspector to assess repair scope and urgency. Do not attempt DIY repairs on load-bearing elements; dry rot in joists and ledger boards requires professional replacement or reinforcement to restore load-bearing capacity. Budget for repairs promptly, as deterioration accelerates and can lead to catastrophic failure. Ensure repairs meet current building codes and SB 721 standards.

Get Started Today

Posted in BlogLeave a Comment on Identify Dry Rot in Wooden Balcony Supports: Step-by-Step

What Is a Balcony Load Test: Complete Guide

Posted on August 3, 2026 by Apex Balcony admin
What Is a Balcony Load Test: Complete Guide

Table of Contents

  • What Is a Balcony Load Test?
    • How Load Testing Differs From Visual Inspection
  • Why Is Load Testing Necessary for Balcony Safety?
  • IBC Balcony Load Capacity Standards and Structural Integrity
    • Lateral Force and Deflection Limits
    • Load Distribution and Anchor Points
  • California SB 721 Balcony Inspection Requirements
    • When Load Testing Is Required Under SB 721
  • Structural Load Testing Procedures Explained
    • Static Testing vs. Controlled Load Application
    • Measuring Deflection and Structural Performance
  • Failure Analysis: What Happens When Balconies Fail Load Tests
    • Common Structural Failures and Fixing Resistance Issues
    • Post-Failure Remediation and Repair Pathways
  • DIY vs. Professional Balcony Load Testing
    • When to Hire Licensed Inspectors
  • Cost Estimation for Balcony Load Testing and Repairs
    • What Affects Testing and Inspection Costs

Last Updated: August 3, 2026

What Is a Balcony Load Test?

A balcony load test is a structural evaluation that applies controlled force to railings, balusters, and edge protection systems to measure their ability to withstand lateral and vertical loads. At Apex Balcony, we perform these tests to verify that elevated exterior elements meet safety compliance standards and can protect occupants during normal use and emergency conditions. The test simulates real-world forces, wind, seismic activity, human impact, by applying measured pressure to barriers and monitoring deflection before failure occurs.

Load testing proves structural integrity mathematically, unlike visual inspection which only identifies obvious damage. When an inspector applies 200 pounds of lateral force to a railing and measures deflection, that data tells you whether the system will hold under actual conditions. This is why load testing has become mandatory in California for residential buildings with three or more units.

Licensed inspectors use calibrated equipment to apply force at precise points, recording deflection measurements at each increment. The data is compared against International Building Code (IBC) standards for balcony load capacity to determine pass or fail.

How Load Testing Differs From Visual Inspection

Visual inspection catches obvious problems: rotted wood, rust, loose fasteners, cracked concrete. But it cannot measure load capacity. A railing might look solid while harboring internal damage that won’t show until weight is applied. California SB 721 requires visual inspection by licensed professionals, but when inspections reveal potential structural issues, load testing becomes the verification step that answers the critical question: will this barrier actually hold?

Why Is Load Testing Necessary for Balcony Safety?

Balcony failures kill people. The 2015 Berkeley balcony collapse that killed six students and the 2021 Malibu incident demonstrated how catastrophic structural failure can be. These were preventable tragedies that occurred because structural integrity was never verified under load.

Balconies experience forces most building elements don’t: wind pressure, seismic acceleration, concentrated human weight, and dynamic movement. Load testing accounts for this reality by applying force in ways that simulate actual stress conditions.

Property owners face legal liability when balconies fail. Load testing creates a documented record of structural status, proving due diligence. For HOA boards managing hundreds of units, that documentation becomes essential protection against lawsuits and regulatory penalties. Insurance carriers increasingly mandate load testing, recognizing that tested, documented structures present lower risk.

IBC Balcony Load Capacity Standards and Structural Integrity

The International Building Code sets minimum load requirements that all residential balconies must meet. According to International Building Code standards for balcony design, balconies must resist specified loads without exceeding deflection limits.

Lateral Force and Deflection Limits

The IBC requires railings to resist 200 pounds of horizontal force applied at any point along the top rail without permanent deformation. Deflection must not exceed 1.5 inches at the point of load application. Vertical acceleration during seismic events creates additional lateral forces that can exceed one-third of gravitational force in severe events. Deflection limits exist because excessive movement indicates structural compromise and approaching failure.

Load Distribution and Anchor Points

Force applied at the top rail travels down through balusters to the base. If any component in that path is weak, the entire system fails. Anchor points, where railings attach to the deck structure, are critical. Load testing applies force at the top rail and monitors how the force distributes through the system, revealing localized failure at weak fastening points.

Tensile strength of fastening materials matters enormously. Modern stainless steel bolts resist corrosion and maintain strength. Older galvanized fasteners corrode over decades, losing 30-50% of their tensile load capacity. Load testing reveals these failures by showing localized deflection at corroded fastening points.

Watch Out
A railing that passes visual inspection but fails load testing indicates hidden structural failure, typically corroded fasteners or internal wood decay. Immediate remediation is required.

California SB 721 Balcony Inspection Requirements

California Senate Bill 721, effective January 1, 2019, mandated inspections of exterior elevated elements in residential buildings with three or more units. The law emerged directly from the Berkeley tragedy. SB 721 requires licensed inspectors to visually assess all balconies, decks, exterior stairs, and similar elevated elements by January 1, 2025, for buildings constructed before January 1, 2018.

When Load Testing Is Required Under SB 721

Load testing becomes mandatory when initial visual inspection identifies conditions suggesting potential structural failure. If an inspector observes signs of wood decay, rust, corrosion, loose fasteners, cracks, or other defects, the law requires further investigation. The California Department of Housing and Community Development published guidance on SB 721 inspection requirements clarifies that if visual inspection reveals conditions that could affect structural integrity, testing is required before the property can be deemed compliant.

Structural Load Testing Procedures Explained

Load testing follows a standardized methodology designed to safely apply force while measuring structural response.

Static Testing vs. Controlled Load Application

Static testing applies steady, sustained force to the barrier system. The inspector uses calibrated equipment, typically a hydraulic ram or manual force gauge, to push against the railing with increasing pressure. Force increments might occur in 50-pound intervals, with deflection measurements recorded at each step. The test continues until the railing either reaches the maximum required load without exceeding deflection limits (pass) or shows excessive movement or damage (fail).

Safety protocols are essential. Qualified inspectors use safety barriers, position themselves away from the point of maximum stress, and have contingency plans if the barrier fails catastrophically.

Licensed structural inspector applying controlled lateral load to balcony railing using calibrated hydraulic equipment with digital measurement display and safety barriers positioned around the test area

Measuring Deflection and Structural Performance

Deflection measurement is the core of load testing. Digital calipers, laser displacement sensors, or dial gauges measure how far the railing moves at the point of load application. A linear deflection curve indicates healthy structural behavior. Sudden increases in deflection at lower force levels indicate failing fasteners or material degradation.

Get Started Today →

Structural engineers analyze the deflection data to assess performance. The test report documents everything: the specific barrier tested, equipment used, force applied, deflection measurements, photos of the test setup, and the engineer’s conclusions.

Pro Tip
Request deflection curves and photos from your [load test](/balcony-repair-cost-estimation-guide/) report. The detailed data tells you exactly how much margin the barrier has before failure and where problems exist.

Failure Analysis: What Happens When Balconies Fail Load Tests

Failed load tests reveal specific structural problems that require remediation.

Common Structural Failures and Fixing Resistance Issues

Fastener failure is the most common reason balconies fail load tests. Corroded bolts, rusted lag screws, or deteriorated anchors cannot transfer the required load. When force is applied, the fastener fails first, allowing the railing to move excessively. This is fixable, replace the fasteners with corrosion-resistant alternatives, and the barrier passes retesting. Fastener replacement typically costs less than full railing replacement.

Wood decay in deck framing or balcony structure creates another common failure mode. Moisture penetration causes wood to soften and lose strength. Addressing this requires identifying the moisture source, replacing decayed wood, and reinstalling the railing on sound structure.

Closeup of heavily corroded metal fasteners and deteriorated wood framing on aged balcony structure showing rust staining and structural degradation

Post-Failure Remediation and Repair Pathways

When a balcony fails load testing, the property owner has three choices: repair, replace, or restrict use. Most choose repair because it’s the most cost-effective option. Repairs target the specific failures identified in the load test. A failed load test due to corroded fasteners might require 2-4 weeks to source corrosion-resistant replacement hardware and retest. A failed test due to structural wood decay might require 4-8 weeks to identify the moisture source, remove and replace decayed material, and allow proper curing.

Retesting after repairs is mandatory. Once repairs are complete, the barrier must pass load testing again to confirm the repair was effective and the barrier now meets code.

DIY vs. Professional Balcony Load Testing

Load testing requires specialized equipment, technical knowledge, and professional liability insurance. An untrained person applying force to a compromised barrier risks catastrophic failure and serious injury. DIY testing produces data that building departments and courts don’t recognize as valid.

When to Hire Licensed Inspectors

Hire licensed inspectors for all load testing. California requires that balcony inspections be performed by licensed professionals, architects, engineers, or building inspectors with appropriate credentials. Licensed inspectors have calibrated equipment and understand how to apply force safely. They document findings in reports that meet regulatory standards. The cost difference between DIY attempts and professional testing is smaller than most assume.

Cost Estimation for Balcony Load Testing and Repairs

Budgeting for balcony work requires understanding both testing costs and potential repair costs. Testing is relatively inexpensive compared to repairs.

What Affects Testing and Inspection Costs

Testing costs vary based on the number of barriers tested, their complexity, and the building’s accessibility. A small apartment building with 20 balconies costs less per unit to test than a 12-unit building with the same number of balconies. Accessibility affects costs significantly. A ground-floor balcony is easier and faster to test than a fifth-floor unit.

Repair costs depend entirely on what the load test reveals. Fastener replacement might cost $500-$2,000 per barrier. Wood replacement could cost $2,000-$8,000 depending on the extent of decay. Complete railing replacement runs $5,000-$15,000 per barrier depending on materials and complexity. Early detection through load testing keeps repair costs manageable.

Budget for retesting after repairs. Retesting typically costs 30-50% of the original test cost.


Balcony safety isn’t optional, it’s a legal and moral obligation. When load testing reveals structural problems, the path forward is clear: repair or replace the defective elements, then retest to confirm compliance. Apex Balcony specializes in exactly this process. Our licensed inspectors perform comprehensive load testing using calibrated equipment, identify specific structural failures, and guide property owners through remediation. We’ve worked with hundreds of building owners across California to bring aging balconies into compliance with SB 721 and SB 326 standards. Let our team assess your property’s structural integrity and provide a clear path to safety and compliance. Contact Apex Balcony for a professional inspection

Testing StageTypical TimelineCost RangeOutcome
Initial visual inspection1-2 daysPricing depends on the scope of workIdentifies need for load testing
Load testing (20-30 barriers)3-5 daysPricing depends on the scope of workDocuments structural status
Repair planning1-2 weeksPricing depends on the scope of workScope and cost estimate for fixes
Repairs (varies by scope)2-8 weeksPricing depends on the scope of workStructural remediation
Retesting after repairs2-3 daysPricing depends on the scope of workConfirms compliance

Frequently Asked Questions

What is a balcony load test and why do I need one?

A balcony load test applies controlled weight to railings, balusters, and structural connections to verify they can safely support occupant loads and lateral forces without excessive deflection. California property owners with buildings three or more units must conduct these tests under SB 721 to identify structural failures before they become safety hazards. Load testing goes beyond visual inspection by measuring actual structural performance under stress.

Does my California property need to comply with SB 721 or SB 326?

SB 721 applies to residential buildings with three or more units and requires balcony inspections by January 1, 2025. SB 326 covers common interest developments (HOAs) and requires similar inspections. If you own or manage a multi-unit residential building in California, you almost certainly fall under at least one of these laws. Both require structural assessment of balconies, decks, and exterior stairs. Contact a licensed inspector to determine which statute governs your specific property.

What structural issues do balcony load tests typically find?

Load tests commonly reveal corroded fasteners, deteriorated wood framing, inadequate anchor point strength, failed connections between railings and structural elements, and deflection exceeding IBC standards. Water damage, rot, and metal corrosion weaken tensile strength and fixing resistance. In older buildings, original construction may not meet current load capacity standards. Early detection through load testing prevents catastrophic failures like the 2015 Berkeley collapse that killed six people.

What happens if my balcony fails a load test?

A failed load test requires immediate remediation. Your inspector will provide a detailed report identifying specific failures in structural integrity, load distribution, or mechanical fasteners. You must notify residents of safety concerns, restrict balcony use if necessary, and develop a repair plan. Repairs typically address corroded connections, reinforce anchor points, or replace damaged infill panels. Professional contractors experienced in balcony remediation can execute repairs while minimizing water damage and exposure to the building interior.

Get Started Today

Posted in BlogLeave a Comment on What Is a Balcony Load Test: Complete Guide

Is a Balcony Inspection Worth the Cost? A 2026 Guide

Posted on August 2, 2026 by Apex Balcony admin
Is a Balcony Inspection Worth the Cost? A 2026 Guide

Table of Contents

  • Is a Balcony Inspection Worth the Cost? The Real Answer
    • Why property owners delay inspections
    • The hidden cost of deferring action
  • Understanding Balcony Inspection Cost and What Affects Pricing
    • Factors that influence inspection pricing
    • Visual vs. invasive inspections: cost and scope differences
  • California Balcony Inspection Regulations US: SB 326 and SB 721 Compliance
    • Which law applies to your property
    • Penalties for non-compliance
  • What Is Included in a Professional Balcony Inspection Checklist
    • Structural elements evaluated
    • Water intrusion and weatherproofing assessment
    • Documentation and compliance reporting
  • Balcony Repair Cost: Why Early Detection Saves Money
    • Common defects found during inspections
    • ROI of preventative maintenance vs. emergency repairs
  • DIY vs. Professional Inspection: Where to Draw the Line
    • What property managers can assess themselves
    • Why licensed inspectors are non-negotiable
  • Reading Your Inspection Report: Interpreting Findings and Next Steps
    • Severity classifications and repair timelines
    • How to prioritize repairs and budget capital expenditures
  • The Real Risks of Skipping Balcony Inspections
    • Liability exposure and insurance implications
    • Property valuation impact

Last Updated: August 2, 2026

Is a Balcony Inspection Worth the Cost? The Real Answer

When asking "is a balcony inspection worth the cost," most property owners are really asking two questions: Will this catch problems before they become catastrophic, and can I afford not to do it? A single balcony collapse, whether in Berkeley in 2015 or Malibu in 2021, killed residents, triggered lawsuits worth millions, and destroyed property values. Those buildings didn’t skip inspections because they were cheap; they skipped them because owners didn’t understand the real cost of deferral.

This guide shows you what inspections actually cost, what they catch, and whether the expense is justified for your situation. For most multi-unit properties in California, the answer is yes.

Why property owners delay inspections

The biggest reason property managers postpone balcony inspections is fear of what inspectors will find. Many owners have heard horror stories about invasive inspections that damage balconies and expose framing to water damage. The second reason is compliance confusion, California’s SB 326 and SB 721 regulations are complex, and many owners don’t know whether their building falls under either mandate. The third is cost anxiety about inspection fees triggering massive repair bills.

The hidden cost of deferring action

Structural damage to balconies compounds over time. Water intrusion that goes undetected for two years spreads to ledger boards, rim joists, and interior framing. An inspection costing $3,000 to $8,000 today might reveal repairs needed in three to five years. That same inspection deferred by two years often uncovers work that must happen in six months, at emergency rates. The cost difference between planned maintenance and crisis repair is typically 40% to 60% higher for the latter.

Beyond dollars, there’s liability exposure. If a resident is injured by a balcony defect your building knew about (or should have known about through proper inspection), your insurance may deny coverage. California Civil Code Section 1365.5 mandates that associations disclose known structural defects to buyers and residents.

Understanding Balcony Inspection Cost and What Affects Pricing

The cost of a professional balcony inspection varies widely depending on property size, building complexity, and inspection scope. For a typical 12-unit apartment building, visual inspections range from $2,500 to $6,000. Larger complexes or buildings requiring invasive inspections typically cost $8,000 to $15,000 or more.

Factors that influence inspection pricing

Property size and unit count is the primary driver. A 50-unit complex costs more to inspect than a 12-unit building simply because there are more balconies to evaluate. Building age and construction type matter significantly, older wood-frame buildings with deteriorated framing require more time and expertise than newer concrete structures. Accessibility affects labor time; if balconies are easy to reach, costs stay lower. If inspectors must use lifts, scaffolding, or rope access, costs climb.

Inspection type, visual versus invasive, creates the largest cost gap. Geographic location and local labor rates influence pricing, with coastal properties in expensive markets paying more than inland properties. Regulatory compliance requirements can add cost if your building falls under SB 721.

Visual vs. invasive inspections: cost and scope differences

Visual inspections examine balconies, decks, and stairs from accessible vantage points without removing materials or drilling into structural elements. The inspector looks for visible deterioration: wood rot, rust on fasteners, water stains, separation of connections, cracked concrete, and damaged flashing. A visual inspection typically takes one to two days for a 20-unit building and costs $3,000 to $6,000. Visual inspections are sufficient for buildings in good condition with no obvious defects but cannot detect decay hidden inside wood members.

Invasive inspections go deeper. The inspector removes portions of flooring or siding to examine wood members for internal decay, drills cores into wood to assess moisture and rot, and may examine connection details. For concrete balconies, they might chip away surface material to inspect rebar. Invasive inspections cost $8,000 to $15,000 for a typical complex and take three to five days. They are essential when visual inspection reveals potential problems, when the building is old (30+ years), or when preparing for major repairs.

Inspection TypeTypical Cost RangeDurationBest ForLimitations
Visual Assessment$3,000-$6,0001-2 daysGood-condition buildings, baseline assessmentCannot detect hidden decay or internal corrosion
Invasive Inspection$8,000-$15,0003-5 daysOlder buildings, visible defects, pre-repair evaluationMore disruptive, requires sealing of probe holes
Combined Approach$10,000-$18,0004-6 daysComprehensive assessment, regulatory complianceHigher cost but most thorough

California Balcony Inspection Regulations: SB 326 and SB 721 Compliance

California has two primary laws governing balcony safety inspections. Understanding which applies to your property is essential because non-compliance carries real penalties.

Which law applies to your property

SB 326 applies to residential buildings with three or more units built before January 1, 2008. It requires a comprehensive structural inspection of all exterior elevated elements at least once every nine years. The inspection must be conducted by a licensed engineer or architect.

SB 721 applies to multifamily rental properties with three or more units. It requires inspections every six years. Additionally, SB 721 mandates that balconies and decks deemed unsafe must be repaired or removed within 180 days of the inspection report. The practical difference: SB 721 buildings must act faster on defects. If an inspector flags a balcony as unsafe, you have six months to fix it or close it off. California Department of Housing and Community Development guidance on SB 326 and SB 721 clarifies which buildings fall under each statute based on construction date and unit count.

Pro Tip
If your building was constructed between January 1, 2008, and today, neither law applies yet. However, future legislation could extend SB 326 and SB 721 to newer buildings. Staying ahead of compliance is cheaper than scrambling when rules change.

Penalties for non-compliance

Failing to conduct required inspections or ignoring inspection findings carries significant consequences. Fines range from $1,000 to $5,000 per violation. Liability exposure is far more serious, if a resident is injured by a balcony defect that an inspection would have caught, and the building failed to conduct the required inspection, the property owner may be personally liable and insurance may deny coverage. Financing and sale complications arise when properties are out of compliance; lenders may refuse to refinance and buyers may cancel escrow.

What Is Included in a Professional Balcony Inspection Checklist

A thorough professional inspection examines dozens of specific elements. Understanding what inspectors evaluate helps you interpret findings and plan repairs.

Licensed structural engineer examining balcony ledger board connection and flashing with moisture meter and probing tools during detailed site inspection

Structural elements evaluated

Inspectors assess the load-bearing capacity and integrity of primary structural components. They examine ledger boards, the connections between the balcony frame and the building’s exterior wall, because this is where most failures originate. They inspect rim joists, band boards, and main support posts or columns. For wood-frame balconies, they probe for dry rot and assess wood moisture content. For concrete balconies, they look for cracked concrete, exposed rebar, and reinforcement corrosion. They check all fasteners for rust, missing pieces, and loose connections. Railings must meet current building code requirements for height and spacing.

Water intrusion and weatherproofing assessment

Water is the enemy of structural longevity. Inspectors examine flashing, caulking, and sealants that prevent water from entering the building envelope. They look for gaps where water can penetrate behind trim and into framing and check for water stains on ceilings below balconies, which indicate active leaks. They assess the condition of waterproofing membranes on balcony surfaces and the slope of decking to ensure water drains away rather than pooling.

Documentation and compliance reporting

The inspection report is the foundation for all future repair decisions and regulatory compliance. A professional report includes photographs of defects, measurements, moisture readings, and severity classifications. Defects are typically categorized as:

  • Immediate Safety Hazard: Repair or restrict access within 30 days
  • Non-Immediate Defect: Repair within 12 months
  • Monitor: Reassess at next inspection cycle

Balcony Repair Cost: Why Early Detection Saves Money

The true value of inspection emerges when you compare the cost of planned repairs to emergency repairs. Early detection transforms expensive crises into manageable maintenance projects.

Common defects found during inspections

Ledger board problems are the most common finding. Improper flashing, missing fasteners, or corroded bolts create water intrusion and structural weakness. Repair typically costs $5,000 to $15,000 per unit. Dry rot and wood decay in rim joists, band boards, or support posts require replacement of affected members, costing $8,000 to $20,000 per unit. Railing defects cost $2,000 to $8,000 per balcony. Cracked or spalling concrete on concrete balconies indicates internal reinforcement corrosion; sealing and patching cost $1,000 to $5,000 per balcony. Flashing and caulking failures are nearly universal in buildings over 20 years old and cost $500 to $2,000 per balcony to repair.

ROI of preventative maintenance vs. emergency repairs

The financial case for inspection-driven preventative maintenance is strong. Consider a 20-unit building where inspection reveals dry rot in five balconies. If repairs happen within 12 months of inspection (preventative approach), the owner can bid competitively and coordinate repairs for labor efficiency. Total cost: $50,000 to $100,000. If the same dry rot goes undetected and a balcony becomes unsafe 18 months later (emergency approach), the owner must emergency-bid contractors at premium rates and potentially face resident relocation costs. Total cost: $100,000 to $180,000 for the same five units.

Key Takeaway
Early detection of balcony defects typically saves 30-50% compared to emergency repair costs. A $5,000 inspection that prevents $50,000 in crisis repairs delivers a 10:1 return on investment within two years.

DIY vs. Professional Inspection: Where to Draw the Line

Property managers can perform visual walkthroughs to identify obvious defects: missing railings, visible rot, loose trim, water stains, or cracks. However, DIY assessment has hard limits. Managers cannot legally certify compliance with SB 326 or SB 721 (only licensed engineers or architects can). They cannot determine whether a balcony is structurally safe or assess moisture levels inside wood members. A licensed inspector brings technical expertise in structural assessment, liability insurance that protects the building owner, and legal standing for compliance documentation. Reports from licensed professionals are accepted by building departments, lenders, and courts.

Reading Your Inspection Report: Interpreting Findings and Next Steps

A professional inspection report can be dense and technical. Understanding how to read it is essential for making informed repair decisions.

Severity classifications and repair timelines

Most reports categorize defects into severity tiers:

Immediate Safety Hazard (30-day repair window): The defect poses imminent risk of injury or structural failure. Examples include severely corroded ledger board bolts, missing railings, or cracked concrete with exposed rebar.

Non-Immediate Defect (12-month repair window): The defect is significant and must be repaired, but it does not pose immediate danger. Examples include flashing that needs replacement or dry rot in non-critical framing.

Monitor (re-evaluate at next inspection): The condition is acceptable now but shows signs of potential future deterioration.

How to prioritize repairs and budget capital expenditures

After receiving an inspection report, follow this process: Step 1: Address immediate hazards first, these are non-negotiable. Step 2: Assess financial impact and get repair bids for all non-immediate defects. Step 3: Coordinate repairs; if multiple balconies need similar work, bid them together for contractor efficiency. Step 4: Budget strategically, spreading non-urgent repairs across multiple years if necessary. Step 5: Document completion with photographs, contractor invoices, and permits.

The Real Risks of Skipping Balcony Inspections

The question "is a balcony inspection worth the cost" becomes rhetorical when you understand what happens when inspections are skipped.

Liability exposure and insurance implications

A building owner who fails to conduct a required inspection and a resident is injured by a balcony defect faces catastrophic liability. Courts have ruled that failure to comply with SB 326 or SB 721 constitutes negligence. Insurance policies may deny coverage based on this non-compliance. The 2015 Berkeley balcony collapse, where six residents died when a wooden balcony failed, revealed that the building’s ledger board was improperly connected and had been deteriorating for years. Had a proper inspection been conducted, the defect would have been caught and could have been repaired.

Property valuation impact

Properties with deferred maintenance or known structural defects sell for significantly less than comparable properties in good repair. A building with a pending SB 721 inspection or known balcony defects will be heavily discounted by buyers. Lenders increasingly require SB 326 or SB 721 compliance as a condition of refinancing.


The real answer to "is a balcony inspection worth the cost" is this: it’s not an expense, it’s risk management. An inspection costs thousands. A collapse costs millions in repairs, litigation, and potentially lives. For California property owners managing multi-unit residential buildings, SB 326 and SB 721 compliance is not optional. For those not yet covered by law, inspections are still the single most effective way to prevent catastrophic failure and protect residents.

At Apex Balcony, we help building owners and HOAs navigate this process with licensed inspectors who have decades of combined construction and design experience. Our inspections identify early signs of structural failure before they become emergencies and ensure your building meets all regulatory requirements. California Department of Housing and Community Development SB 326 FAQs offers additional guidance if you’re uncertain about compliance requirements. The investment in a professional inspection today prevents far greater expense and risk tomorrow. Book an inspection with Apex Balcony and protect your residents and your assets.

Frequently Asked Questions

How much does a balcony inspection cost in the US?

Balcony inspection cost varies based on building size, number of units, inspection type (visual vs. invasive), and regional labor rates. For accurate pricing tailored to your property, contact Apex Balcony for a quote. Factors like building complexity and accessibility significantly affect final cost.

What does a professional balcony inspection checklist include?

A comprehensive balcony inspection checklist evaluates structural integrity of ledger boards, beams, and connections; water intrusion through flashing and sealants; signs of dry rot and corrosion; fastener condition; railing safety compliance; and building envelope integrity. Licensed inspectors document findings in detail to support compliance and repair planning.

Do I need SB 326 or SB 721 inspection for my California property?

SB 721 applies to residential buildings with three or more units constructed before January 1, 2008. SB 326 covers common areas in multi-unit buildings. If you're unsure which applies, Apex Balcony can clarify your specific requirements without obligation, helping you understand your compliance timeline and obligations.

Is a balcony inspection worth the cost if repairs are expensive?

Yes. Early detection through inspection prevents catastrophic failures, reduces emergency repair costs by 40-60%, protects residents from injury, and shields property owners from liability. Deferred maintenance compounds costs exponentially. A preventative inspection identifies issues when remediation is more affordable and controlled.

What's the difference between visual and invasive balcony inspections?

Visual inspections assess surface conditions without disturbing materials. Invasive inspections involve removing sealants, decking, or finishes to evaluate hidden structural elements. Invasive inspections provide deeper insight into water damage and decay but cost more and require repair afterward. Your property's condition and regulatory requirements determine which is necessary.

Posted in BlogLeave a Comment on Is a Balcony Inspection Worth the Cost? A 2026 Guide

5 Best Practices for SB 326 Inspection Reports

Posted on August 1, 2026 by Apex Balcony admin

Table of Contents

  • Understanding SB 326 Inspection Requirements
    • Which Buildings Are Subject to Inspection
    • Defining Exterior Elevated Elements (EEE)
  • Practice 1: Hire a Qualified SB 326 Inspector
    • Verifying Inspector Credentials and Experience
    • Minimizing Inspection Damage and Disruption
  • Practice 2: Use a Comprehensive SB 326 Compliance Checklist
    • Essential Elements to Document
    • Deficiency Classification and Hazard Severity Assessment
  • Practice 3: Create a Detailed SB 326 Inspection Report Template
    • Report Structure and Required Documentation
    • The 95% Confidence Statistical Standard in Reporting
  • Practice 4: Implement Post-Inspection Workflow Automation
    • Streamlining Report Distribution and Board Notifications
    • Integrating Inspection Data with Reserve Studies
  • Practice 5: Establish Liability Mitigation and Compliance Tracking
    • Protecting HOA Board Members from Legal Exposure
    • Maintaining Official Records and Open Meeting Requirements
  • 5 Best Practices for SB 326 Inspection Reports: Quick Implementation Guide
  • Common Mistakes to Avoid in SB 326 Inspections

5 Best Practices for SB 326 Inspection Reports

Last Updated: August 1, 2026

Understanding the 5 best practices for SB 326 inspection reports is essential for California HOA boards and property managers responsible for multi-unit residential buildings. According to California Department of Housing and Community Development, Senate Bill 326 requires inspections of exterior elevated elements on buildings with three or more units built before January 1, 2008. At Apex Balcony, we’ve guided hundreds of building owners through this compliance process and identified the practices that separate thorough, defensible inspections from incomplete ones that expose boards to liability.

Understanding SB 326 Inspection Requirements

Which Buildings Are Subject to Inspection

Senate Bill 326 applies to residential buildings with three or more units constructed before January 1, 2008. The statute requires inspections of exterior elevated elements, balconies, decks, stairs, and other raised structures extending from the main building envelope.

Your building falls under SB 326 if it meets these criteria: residential occupancy, three or more units, and pre-2008 construction. Properties were required to complete their first inspection by January 1, 2025. After the initial inspection, properties must conduct follow-up inspections every six years, with interim inspections required if significant deficiencies are identified.

Defining Exterior Elevated Elements (EEE)

Exterior elevated elements are the specific structural components SB 326 requires you to inspect: balconies, decks, stairs, landings, and other elevated structures accessible to residents. EEE inspection goes beyond visual walkthrough and includes evaluation of load-bearing components, waterproofing systems, connection points, guardrails, and decking materials. The inspection typically includes moisture testing, close-up examination of fasteners and ledger connections, and documentation of rot, corrosion, or separation.

Practice 1: Hire a Qualified SB 326 Inspector

Verifying Inspector Credentials and Experience

The inspector you hire determines the quality and defensibility of your entire SB 326 inspection report. California law requires that inspections be conducted by a licensed structural engineer, architect, or qualified inspector who has completed specific SB 326 and SB 721 training.

Before hiring, verify that your inspector holds a current Professional Engineer (PE) license in California or is a licensed architect with documented structural assessment experience. Ask for references from other HOAs and request copies of previous inspection reports to review their thoroughness. An experienced inspector will provide detailed photographic evidence, specific measurements, and clear deficiency classifications.

Pro Tip
Request your inspector’s insurance certificate and verify they carry professional liability coverage of at least $1 million. This protects your HOA if the inspection later misses significant deficiencies.

Minimizing Inspection Damage and Disruption

Invasive testing and close examination can cause water intrusion problems if not performed carefully. Work with your inspector to establish clear protocols before the inspection begins. Specify that any areas opened for inspection must be properly sealed afterward, and that testing must use non-destructive methods where possible. Require your inspector to provide a detailed plan for minimizing disruption to residents and preventing water intrusion during the inspection.

Practice 2: Use a Comprehensive SB 326 Compliance Checklist

Essential Elements to Document

Your inspection report must document specific structural and safety elements SB 326 defines as critical. A comprehensive checklist ensures nothing is overlooked and creates consistent standards across all inspected units. The checklist should include evaluation of ledger connections, decking condition, waterproofing systems, guardrails and handrails, fasteners and hardware, flashing and sealants, and signs of water intrusion or rot.

The POPProbe Balcony & Deck Structural Safety Inspection Checklist provides a free 33-point template covering essential components most inspectors use as a baseline. Your checklist should also include documentation of maintenance records, previous repairs or modifications, and resident complaints related to balcony conditions.

Watch Out
If your inspection checklist doesn’t include specific evaluation of ledger connections and waterproofing, you’re missing the most common failure points in residential balconies. Ledger failures account for a significant percentage of balcony collapses.

Deficiency Classification and Hazard Severity Assessment

SB 326 requires inspectors to classify deficiencies according to hazard severity levels: immediate danger, significant deficiency, or minor deficiency. Immediate danger means the deficiency poses imminent risk to resident safety and requires urgent remediation within 24 to 72 hours. Significant deficiencies indicate structural compromise or water intrusion that should be repaired within 6 to 12 months. Minor deficiencies are cosmetic or non-structural issues for long-term maintenance planning.

Your inspector should clearly explain the basis for each severity classification with specific evidence rather than vague statements.

Practice 3: Create a Detailed SB 326 Inspection Report Template

Report Structure and Required Documentation

A defensible SB 326 inspection report follows a clear structure documenting findings systematically with enough detail that a third party can understand exactly what was inspected and what was found. Your report template should include an executive summary, unit-by-unit findings, photographic documentation, severity classifications, and a recommended remediation plan.

The executive summary should state the inspection date, inspector credentials, number of units inspected, and a high-level overview of findings. The unit-by-unit section should document each balcony or deck individually with specific observations, measurements, and photographs showing deficiencies. The remediation section should recommend specific repairs with detail: "Replace corroded ledger bolts with ½-inch stainless steel bolts, upgrade flashing at ledger connection, and apply waterproofing membrane to deck surface."

Key Takeaway
A report lacking photographic evidence or using vague language about deficiencies will be challenged by contractors and may not hold up if your HOA faces legal scrutiny. Invest in detailed documentation.

The 95% Confidence Statistical Standard in Reporting

SB 326 uses a statistical sampling approach for large buildings. Rather than inspecting every balcony, inspectors may use a representative sample with a 95% confidence interval and 10% margin of error. The inspector selects units across different areas, exposures, and construction ages to create a statistically valid sample.

The report should clearly state the sampling methodology, number of units inspected, and confidence level. The 95% confidence interval means there’s a 95% probability that the actual condition of uninspected units falls within the range described in the report.

Sampling ApproachUnit CountSample SizeConfidence LevelBest For
100% inspectionAnyAll units100%Small buildings (under 20 units)
Statistical sampling50+20-30%95% confidenceLarge buildings (50+ units)
Risk-based samplingAnyTargeted unitsVariesBuildings with known problem areas

Practice 4: Implement Post-Inspection Workflow Automation

Simplifying Report Distribution and Board Notifications

After the inspection is complete, your board faces the challenge of distributing findings, obtaining repair bids, and coordinating remediation. Implement a structured workflow: receive the final inspection report, schedule a board meeting to review findings, distribute the report to contractors for repair estimates, compare bids, approve repairs, and track completion. Each step should have a documented owner and target completion date.

Consider using project management or document management tools that allow you to upload the inspection report, assign tasks, track deadlines, and maintain a centralized record of all communications about repairs. SB 326 requires that owners provide a written summary of inspection findings to the HOA within 30 days and that the HOA provide notice to residents within 30 days after that. Automating this notification process using templated letters ensures compliance and prevents missed deadlines.

Integrating Inspection Data with Reserve Studies

Your SB 326 inspection findings should directly inform your reserve study, which estimates how much funding your HOA needs to maintain and replace major building components. Work with your reserve study provider to integrate inspection data into the reserve funding plan. If your inspection identified major balcony repairs needed within two years, those costs should be reflected in your reserve budget.

Practice 5: Establish Liability Mitigation and Compliance Tracking

Protecting HOA Board Members from Legal Exposure

Board members are personally liable for decisions made in their official capacity. When it comes to SB 326 compliance, implementing strong documentation practices is your primary defense.

Ensure that your board’s decision-making process is documented in meeting minutes. When the board reviews inspection findings and approves a remediation plan, the minutes should reflect that the board considered the inspector’s recommendations, discussed severity of findings, and made an informed decision about repair timeline and scope. Require that your inspector carry professional liability insurance and obtain a certificate of insurance before work begins.

Watch Out
If your board is aware of immediate danger conditions but delays remediation for financial reasons, you’re creating significant personal liability for board members. Immediate danger findings require urgent action. If funding isn’t available, approve a special assessment or emergency reserve draw rather than delay critical repairs.

Maintaining Official Records and Open Meeting Requirements

SB 326 compliance creates extensive documentation requirements. Your HOA must maintain official records of inspection reports, repair contracts, completion certifications, and board decisions related to exterior elevated elements for the life of the building.

Establish a centralized filing system, physical or digital, where all SB 326-related documents are stored: the original inspection report, all photographs and supporting documentation, repair bids and contracts, invoices and proof of payment, completion certificates, and copies of board meeting minutes. Board decisions regarding SB 326 inspection findings and remediation plans should be made at properly noticed board meetings where residents have the opportunity to comment.

Documentation TypeRetention PeriodAccess RightsPurpose
Inspection reportsLife of buildingResidents, buyersProof of compliance
Repair contracts7+ yearsBoard, residentsFinancial audit trail
Completion certificatesLife of buildingBoard, residentsProof of remediation
Board meeting minutesPermanentResidents, buyersDecision documentation
Photographs and evidenceLife of buildingBoard, legal counselDeficiency substantiation

5 Best Practices for SB 326 Inspection Reports: Quick Implementation Guide

Implementing the 5 best practices doesn’t require complex systems or extensive expertise. Start with these immediate steps:

1. Hire your inspector this month. A qualified inspector with SB 326 experience will be in high demand. Begin the vetting process now and schedule the inspection for the earliest available date.

2. Request a detailed report template from your inspector. Ask what format they’ll use for the final report and whether you can see a sample. If their template is vague or lacks photographic documentation, ask them to enhance it or consider a different inspector.

3. Create a board communication plan. Decide how you’ll present inspection findings to residents, what timeline you’ll use for repairs, and how you’ll address questions.

4. Integrate inspection findings into your reserve study. Contact your reserve study provider and schedule a meeting to discuss how inspection findings should update your long-term financial projections.

5. Establish a document management system. Create a centralized location for all SB 326 documentation and assign someone to maintain it.

Common Mistakes to Avoid in SB 326 Inspections

The most damaging mistake HOAs make is waiting too long to hire an inspector. Properties that were required to complete inspections by January 1, 2025, and failed to do so now face compliance violations and potential fines.

A second critical mistake is hiring an inspector based primarily on price. The lowest bid often comes from inspectors with minimal SB 326 experience or those who cut corners on documentation.

Many boards also fail to address immediate danger findings with appropriate urgency. If an inspection identifies conditions posing imminent risk to resident safety, deferring repairs for financial or scheduling reasons creates significant liability. Immediate danger findings require action within 24 to 72 hours.

Finally, boards frequently neglect to communicate inspection findings clearly to residents. Transparent communication about inspection findings, repair plans, and timelines builds resident confidence and reduces disputes.


The challenge most HOA boards face isn’t understanding SB 326 requirements, it’s executing the compliance process systematically while managing resident expectations and protecting board members from liability. At Apex Balcony, we’ve helped hundreds of California property owners navigate this process with our licensed inspectors who specialize in structural assessment of exterior elevated elements. Our team provides comprehensive inspection reports with detailed photographic documentation, clear deficiency classifications, and specific remediation recommendations. Get started with Apex Balcony and transform your SB 326 inspection from a compliance checkbox into a strategic asset for long-term property maintenance.

Frequently Asked Questions

What are the key components of an SB 326 inspection report?

A comprehensive SB 326 inspection report must document all Exterior Elevated Elements (EEE), including balconies, decks, and stairways. It should include visual inspection findings, deficiency classifications by hazard severity, photographic evidence, repair recommendations, and remediation timelines. The report must meet the 95% confidence statistical standard and identify load-bearing components, waterproofing systems, and structural integrity concerns. Licensed inspectors or structural engineers must sign the report, and it must include contact information and inspection date.

Who is qualified to perform an SB 326 inspection?

California law requires SB 326 inspections to be performed by a licensed architect, structural engineer, or other qualified inspector with expertise in building construction and structural assessment. Inspectors must have demonstrated experience evaluating load-bearing components, waterproofing systems, and structural integrity of elevated exterior elements. Verification of credentials, professional licensing, and liability insurance is essential before hiring. Many property owners choose inspectors with decades of construction and design experience to ensure thorough, accurate assessments of balcony safety.

How does the 95% confidence interval apply to SB 326 sampling?

The 95% confidence statistical standard allows inspectors to use statistically significant sampling rather than inspecting every single balcony in large buildings. This means the sample size must be large enough to represent the entire population with 95% confidence. For example, a 50-unit building may require inspecting 20-25 units to meet this standard. The margin of error and sample size calculations depend on building size and defect distribution. Inspectors must document their sampling methodology and ensure the selected units represent the full range of construction types and ages on the property.

What should an HOA board do after receiving an SB 326 inspection report?

After receiving the inspection report, the HOA board must review findings during an open meeting, classify deficiencies by hazard severity, and establish remediation timelines per statutory requirements. High-priority safety issues require immediate action; other deficiencies follow compliance deadlines. The board should integrate findings into reserve studies to budget capital expenditures, obtain competitive repair bids from contractors, and maintain official records for legal protection. Post-inspection workflow automation tools can streamline notifications to residents, track repair progress, and ensure the board meets all legal obligations while managing liability exposure.

How do SB 326 and SB 721 inspection requirements differ?

SB 721 focuses specifically on balcony safety and requires inspections of exterior elevated elements in multifamily residential buildings. SB 326 is broader, applying to buildings with three or more units and requiring comprehensive assessment of all Exterior Elevated Elements including balconies, decks, and stairways. Both laws mandate qualified inspectors, detailed reporting, and compliance timelines, but SB 326 provides more specific guidance on inspection methodology, the 95% confidence statistical standard, and deficiency classification. Understanding which law applies to your property is critical for ensuring proper compliance and avoiding legal exposure.

Posted in BlogLeave a Comment on 5 Best Practices for SB 326 Inspection Reports

Posts navigation

Newer posts

Recent Posts

  • ADU Structural Engineering Requirements for California Permits
  • 7 Signs Your Home Needs a Structural Engineering Inspection
  • Definition of a Balcony: Types, Codes & Safety
  • Cantilever Beam Deck Construction: Code Rules
  • Third Party Inspection: A Guide for Property Owners

Recent Comments

No comments to show.

Archives

  • September 2026
  • August 2026
  • July 2026
  • June 2026

Categories

  • Blog
Logo
Created by Unilime.Group
  • Balcony Law
  • About us
  • Inspection services
  • FAQ
  • Blog

Call us ‪+1 818-806-7885‬
License: CSLB #1101305

Apex Balcony Inspection
‪+1 818-806-7885‬
[email protected]
4645 Van Nuys Blvd #201
Sherman Oaks CA 91403

Created by Unilime.Group