Logo
  • Balcony Law
  • About us
  • Inspection services
  • FAQ
  • Blog
  • Call us ‪+1 818-806-7885
  • Book now

Month: September 2026

ADU Structural Engineering Requirements for California Permits

Posted on September 7, 2026 by Apex Balcony admin
ADU Structural Engineering Requirements for California Permits

Table of Contents

  • Why ADU Structural Engineering Requirements Matter for Your Permit
  • When Does an ADU Need a Structural Engineer?
  • Key ADU Foundation Engineering Requirements
  • Understanding Seismic Requirements for ADU Construction
  • What Goes Into ADU Structural Plan Requirements?
  • Hiring a Structural Engineer for ADU Projects: A Checklist
    • The Initial Screening: Beyond the License
    • The Interview: Questions That Reveal Local Knowledge
    • The Red Flags: What to Avoid
    • The Contract: Negotiate These Terms in Writing
  • Common Permit Bottlenecks and How to Avoid Them
    • The Cost Bottleneck: Budgeting for Engineering Realities
    • The Regional Bottleneck: County-Specific Variances
    • The Process Bottleneck: The ‘One-Comment’ Rule
    • The Most Expensive Bottleneck: Construction Without Approval
  • Start Your ADU Project on Solid Ground
  • Frequently Asked Questions

Last Updated: September 7, 2026

Why ADU Structural Engineering Requirements Matter for Your Permit

California’s accessory dwelling unit boom has hit a wall that has nothing to do with zoning. Structural engineering requirements for California ADU permits stall more projects than any planning commission, and owners who skip this step face plan-check denials, costly redesigns, and months of delay.

Our inspectors have spent decades reviewing structural integrity in elevated exterior elements across the state, and we see the same pattern: owners underestimate the engineering depth required for a simple addition. ADU structural engineering is the process of verifying that your proposed building can resist gravity, wind, and seismic forces according to the California building code, and it must be stamped by a licensed professional engineer before your local building department will issue a permit.

Below, we break down what the state expects, what it costs in time, and how to avoid the bottlenecks that derail most projects.

When Does an ADU Need a Structural Engineer?

Every attached ADU, detached ADU, and garage conversion in California requires stamped structural calculations from a licensed professional engineer (gov.ca.gov). There is no size threshold that exempts you. Even a 400-square-foot studio must demonstrate code compliance with the California residential code.

The engineering scope varies with your project type. A JADU created within an existing single-family home may need only a verification of existing structural load paths, while a new detached structure demands full foundation design and lateral force resisting system analysis.

Many owners assume their contractor can handle this. Contractors build; engineers calculate. Your ADU permit application will be rejected without a wet stamp from a licensed professional.

Key ADU Foundation Engineering Requirements

The foundation is where structural engineering for ADUs begins, and it is also where most redesigns happen. Your engineer must design a foundation system based on a geotechnical report or, for simpler projects, the presumptive soil bearing capacity allowed by the California building code.

The two most common foundation types for ADUs are conventional slab-on-grade and raised foundations with perimeter footings. Your choice depends on slope, soil conditions, and whether you plan to build over a crawl space. Engineers calculate footing dimensions, rebar spacing, and concrete strength based on the structural load of your specific design.

A common mistake is assuming flat land means simple foundations. Expansive clay soils, common in many parts of the state, require special consideration, and an engineer who skips the soil analysis is setting you up for slab movement later.

Watch Out
Never pour concrete before your engineered foundation plans pass plan check. If the building department rejects your design after the slab is poured, you will pay to demolish and repour, a cost that dwarfs the engineering fee you were trying to save.

Understanding Seismic Requirements for ADU Construction

California’s seismic design category dictates how much lateral force your ADU must resist, and this is the most technical part of the entire process (dgs.ca.gov). Seismic requirements for ADU construction are not suggestions; they are mandatory provisions of the California building code that protect your structure during ground motion.

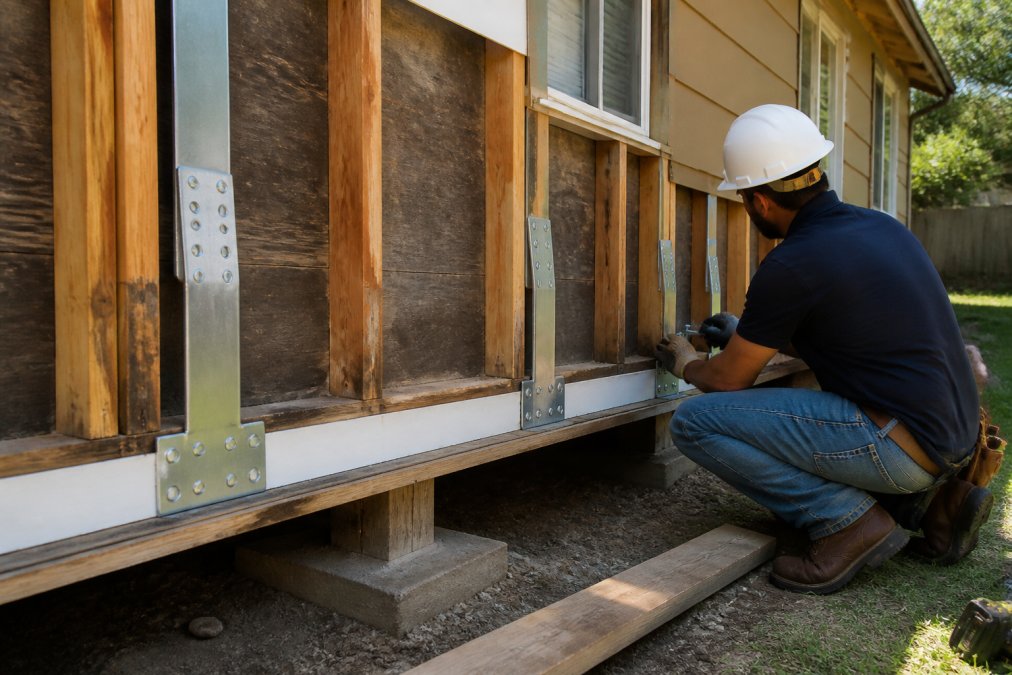
Your engineer will calculate the seismic forces acting on your ADU based on its location, weight, and height. The lateral force resisting system, typically shear walls or a moment frame, must be detailed on your stamped drawings. These calculations are unique to every property, which is why you cannot reuse a neighbor’s approved plans.

A structural engineer in a white hard hat reviewing blueprints at a residential construction site, with the partially framed walls of a detached ADU visible behind her under bright afternoon sun

Seismic retrofitting is often required when converting an existing garage or attaching an ADU to an older home. The connection between the new structure and the existing one must transfer lateral loads properly, and this detail is a frequent source of building department comments.

What Goes Into ADU Structural Plan Requirements?

The ADU structural plan requirements read like a checklist, and each item must be present before your permit moves forward. Your engineer prepares a full set of structural drawings that include foundation plans, floor and roof framing plans, and wall elevations showing all structural connections.

The calculations package demonstrates that every beam, joist, and post is sized correctly for the structural load it carries. The building department review will check these numbers against the California residential code, and errors here trigger formal correction letters.

Your plans must also address Title 24 energy compliance, which affects the building envelope and insulation values. While energy is not strictly structural, the plan check process treats your submission as one package, and an energy compliance failure stalls the same permit.

For a detached ADU under 1,200 square feet, many jurisdictions accept a simplified process, but the structural depth required does not shrink (leginfo.legislature.ca.gov).

Hiring a Structural Engineer for ADU Projects: A Checklist

Finding the right engineer is the single highest-use decision you will make. A good one saves you from three rounds of plan-check corrections; a poor one buries you in them. This vetting process uncovers what separates an ADU specialist from a general structural engineer before you sign a contract.

Book inspection →

The Initial Screening: Beyond the License

Start by confirming they hold a current California professional engineer (PE) license, verifiable on the California Department of Consumer Affairs’ BreEZe license lookup system. However, a PE license is the floor, not the ceiling. For projects in high seismic zones or with complex soil conditions, you may need a structural engineer (SE) license, which requires additional testing and experience. Ask directly: “Are you a licensed SE or a PE?”

The Interview: Questions That Reveal Local Knowledge

Your county’s building department has its own interpretation of the California Residential Code (CRC) and its own plan-check preferences. Ask these questions during your initial consultation:

  • “How many ADU permits have you successfully pulled in [your specific county] in the last 12 months?” A vague answer is a red flag.
  • “Which plan-check reviewer do you typically work with in [your city]?” A specialist will often know the reviewers by name and understand their common comments.
  • “What is your process for handling a plan-check correction letter? Do you charge per revision, or is it included in your fee?” This is the most critical financial question you can ask.
  • “Do you perform your own site visit, or are you designing solely from the architect’s plans?” A site visit is non-negotiable for a conversion project where existing conditions are unknown.

The Red Flags: What to Avoid

  • The ‘One-Size-Fits-All’ Quote: An engineer who gives you a price over the phone without asking about your soil type, foundation design, or whether you’re converting a garage is not doing the work. They are planning to stamp a generic plan, which will likely fail plan check.
  • No Errors and Omissions (E&O) Insurance: This is your protection if their calculations are wrong. If they don’t carry it, you are personally liable for any structural failure. Ask for a certificate of insurance before you sign.
  • Refusal to Coordinate: Your engineer must be willing to talk directly with the building department during plan check. If they expect you to be the middleman, you will face delays and miscommunication.
  • The ‘Cheap’ Fee: While we don’t list specific prices here, be wary of quotes that are significantly lower than the other two or three you receive. Engineering is a liability business, and a low fee often means the engineer is cutting corners on the depth of their analysis or the number of plan-check revisions they will cover.

The Contract: Negotiate These Terms in Writing

Before you engage an engineer, get the fee structure in writing. The most common model is a flat fee that covers the calculations, the stamped drawings, and a set number of plan-check revisions. However, the number of revisions is the key variable. Ask for a contract that explicitly states:

  • The number of plan-check review cycles included in the flat fee (typically two or three).
  • The hourly rate for any additional revisions beyond that number.
  • The scope of work, specifically whether it includes Title 24 energy compliance or if you need to hire a separate consultant.
Watch Out
Engineers who charge per revision have a financial incentive to submit incomplete plans. A contract that caps your liability for their errors is your only protection against an endless cycle of costly corrections.

A specialist who knows your county’s specific zoning ordinances and plan check preferences will get your permit approved faster, saving you more in carrying costs than their higher fee adds.

Common Permit Bottlenecks and How to Avoid Them

The most common ADU permitting bottleneck is an incomplete structural submission. Building departments reject plans that lack calculations, use the wrong design criteria, or show framing details that conflict with the California Residential Code. These rejections are avoidable when your engineer prepares a complete package the first time.

The Cost Bottleneck: Budgeting for Engineering Realities

Most service-provider websites hide engineering costs, leaving homeowners with a false sense of what a proper structural package should cost. While a single statewide price is impossible, a common pattern is that the structural engineering fee will be roughly 10% to 15% of the total architectural and engineering design cost. For a typical detached ADU, the structural engineering portion often falls between $2,500 and $5,000.

Here is a more granular breakdown of where that money goes and how it creates bottlenecks if you under-budget:

  • Geotechnical Investigation ($800 – $2,500): This is the soil report. If you skip this to save money and rely on the code’s presumptive soil bearing capacity, you are gambling. If the building department’s geotechnical reviewer deems the soil conditions on your site to be variable (common in hillside areas), they will reject your foundation design and require a full report. That rejection is a 2-to-4-week delay while you wait for a geotech to schedule a site visit.
  • Structural Calculations and Drawings ($1,500 – $3,500): This is the core engineering work. The fee is higher for a garage conversion because the engineer must verify the existing foundation and framing, which requires a site visit and often unanticipated discoveries.
  • Title 24 Energy Compliance ($300 – $800): This is often a separate consultant. If your engineer doesn’t include this and you don’t budget for it, you will get a plan-check comment that stalls your entire permit over an insulation detail.

The Regional Bottleneck: County-Specific Variances

Engineering requirements vary significantly between jurisdictions. A one-size-fits-all approach to your permit package will fail. Here is a practical look at how the review process differs across the state’s major markets:

RegionTypical Review FocusCommon Bottleneck
Bay Area (e.g., San Francisco, Oakland)High seismic scrutiny, especially for soft-story conversions and hillside properties.The building department often requires a full SE stamp (not just a PE) for any project on a slope greater than 10%. They also focus heavily on the connection details between the new ADU and the existing primary dwelling.
Los Angeles CountyA mix of seismic and zoning enforcement. The LA Department of Building and Safety (LADBS) is known for its rigorous plan-check process.LADBS frequently issues comments on the lateral force resisting system (shear wall nailing and hold-downs). They also require a specific geotechnical report format that engineers who work in other counties often miss.
San Diego CountyFocus on fire safety and hillside erosion, which impacts foundation design and material specifications.The review process often involves coordination between the building department and the fire department. A structural design that doesn’t account for fire-resistant construction materials near the property line will get rejected.

The Process Bottleneck: The ‘One-Comment’ Rule

A less-known bottleneck is the administrative process itself. Many building departments issue only one set of comments per plan-check cycle. If your engineer’s plans have three separate issues, you must fix all three and resubmit; if you miss one, you start the entire review cycle over. A complete, well-coordinated package can pass in one cycle, while an incomplete one can take three or four cycles, adding months to your timeline.

The Most Expensive Bottleneck: Construction Without Approval

Some owners start building while the permit is pending, hoping to save time. If the building department discovers unapproved work, they can stop the project and require destructive inspection of concealed framing. This is the most expensive bottleneck of all, combining the cost of the delay with the cost of demolition and re-inspection.

Start Your ADU Project on Solid Ground

The path to an approved ADU permit runs through structural engineering, and there are no shortcuts around the California building code. Budget for the engineering early, vet your engineer against the checklist above, and order your soil analysis before you finalize your plans.

If your project involves verifying the structural integrity of existing elevated elements, like the balcony of a home you are converting, our team brings decades of construction and design experience to the inspection process. Our licensed inspectors identify early signs of structural failure so you can address them before they become a permit issue or a safety hazard. Book an inspection and start your project with confidence that every structural element meets the standards that protect your residents and your investment.

Frequently Asked Questions

Do I need a structural engineer for an ADU project?

Most California jurisdictions require a licensed structural engineer or architect to prepare and stamp the structural plans for an ADU. This is non-negotiable when your project involves alterations to the primary structure, such as a garage conversion, or when building a new detached unit. The engineer performs structural calculations for seismic and wind loads, foundation design, and load paths. Skipping this step delays your permit application and creates safety risks. Check with your local building department for specific thresholds, but plan on hiring an engineer for any ADU that is not a simple prefab on a slab.

What structural documents are required for an ADU permit application?

A complete ADU permit application typically requires a site plan, floor plan, and a full set of structural drawings stamped by a licensed professional engineer. These drawings must include foundation details, framing plans, lateral force resisting system diagrams, and structural calculations. You will also need a geotechnical report if the soil conditions require it, and Title 24 energy compliance documents. Your structural engineer coordinates these documents with the architectural plans to ensure the building department review goes smoothly.

What are the seismic requirements for ADU construction in California?

ADUs in California must comply with the California Building Code, which includes seismic design requirements based on the site’s seismic design category. The structural engineer must design the foundation and framing to resist lateral forces from earthquakes. This often involves specifying anchor bolts, shear walls, and hold-down connectors. The lateral force resisting system must be clearly detailed in the plans. For garage conversions, you may also need to address seismic retrofitting of the existing structure. Your engineer determines the exact requirements based on your property’s soil type and location.

What are the common mistakes when building an ADU that delay permits?

The most frequent mistakes include submitting plans without proper engineer stamps, failing to account for soil conditions with a geotechnical report, and designing a foundation that does not meet the seismic requirements for the site. Many owners also overlook the need for a separate lateral force resisting system when opening up walls for a garage conversion. Incomplete Title 24 energy documentation is another common cause of plan check corrections. Working with a licensed structural engineer upfront prevents these issues and keeps your permit approval process on schedule.

Book inspection

Posted in BlogTagged adu foundation engineering requirements, adu structural engineering, adu structural plan requirements, hiring a structural engineer for adu, seismic requirements for adu construction

7 Signs Your Home Needs a Structural Engineering Inspection

Posted on September 6, 2026 by Apex Balcony admin
7 Signs Your Home Needs a Structural Engineering Inspection

Table of Contents

  • Why a Structural Engineering Inspection Matters More Than a Standard Home Inspection
  • Cracks in Walls and Foundations: Which Patterns Signal Real Trouble
  • Sticking Doors and Windows Plus Sloping Floors: Signs of Foundation Settlement
  • Sagging Roof Lines and Ceiling Deflection: When Framing Members Are Compromised
  • 7 Signs of Structural Failure in Elevated Decks and Balconies
  • SB 326 Balcony Inspection Requirements: A Legal Obligation for California Property Owners
  • Structural Engineer Inspection Cost vs. The Price of Ignoring the Problem
  • What to Do After the Inspection: Your Post-Inspection Action Plan
  • Frequently Asked Questions

Last Updated: September 6, 2026

A standard home inspection is not a structural engineering inspection. When a home inspector spots a suspicious crack, they note it in the report and move on. That is where their scope ends. A structural engineering inspection goes several layers deeper, analyzing the load path, the condition of framing members, and whether the building envelope is still doing its job. At Apex Balcony, we have worked with hundreds of building owners across California, and the gap between what a generalist flags and what an engineer diagnoses is often the difference between a minor repair and a serious safety hazard.

The distinction matters because the stakes are not cosmetic. Structural failure is rarely sudden; it announces itself through cracking patterns, deflection, and settlement long before a catastrophic event. Understanding the signs your home needs a structural engineering inspection is the first step in protecting both your investment and the people inside it. Below, we break down the seven most common indicators, what they actually mean, and why acting early is almost always cheaper than waiting.

Why a Structural Engineering Inspection Matters More Than a Standard Home Inspection

A structural engineering inspection is a targeted evaluation of a building’s load-bearing systems, including foundations, load-bearing walls, joists, and the connections that tie them together. Standard home inspections focus on surface condition and building code compliance at a generalist level. They check that outlets work and roofs do not leak, but they do not calculate whether a wall is carrying its intended load or whether soil expansion under a slab is pushing the foundation upward.

This is where the real risk hides. A home inspector might note “hairline cracks in garage slab,” while a structural engineer will tell you whether those cracks indicate settlement, heaving, or simple concrete shrinkage. The difference in interpretation changes everything about how you respond. A structural assessment provides the definitive answer, and for elevated elements like balconies and decks, that assessment is not optional in many jurisdictions.

Cracks in Walls and Foundations: Which Patterns Signal Real Trouble

Not all cracks are created equal, and learning to read them is the most practical skill a homeowner can develop. Hairline cracks in plaster or drywall, often spider-webbing from window corners, are typically cosmetic and relate to normal expansion and contraction. The patterns that warrant concern are those that show movement: vertical cracks that are wider at one end, horizontal cracks in foundation walls, and stair-step cracking following the mortar joints of masonry or block construction.

Stair-step cracking is a classic indicator of foundation settlement or soil pressure, and horizontal cracks in a poured or block foundation often point to hydrostatic pressure from poor drainage pushing the wall inward (ceprofs.civil.tamu.edu). Bowed walls amplify this concern. If you can slide a nickel into a crack, or if the crack extends through the structural framing rather than just the finish surface, you have moved past cosmetic territory. A structural engineering inspection will determine whether the movement is active and whether the foundation repair requires underpinning, wall anchors, or drainage corrections.

Crack PatternWhat It Typically SignalsUrgency Level
Hairline spider cracks in drywallNormal expansion and contractionLow
Vertical crack, wider at top or bottomPossible foundation settlementModerate
Stair-step cracking in masonryFoundation settlement or heavingHigh
Horizontal crack in foundation wallSoil pressure or poor drainageHigh
Bowed or leaning wallSignificant lateral structural movementCritical

Sticking Doors and Windows Plus Sloping Floors: Signs of Foundation Settlement

When doors and windows start sticking for no apparent reason, the building is telling you that its geometry has changed. Frames that were square and true are now racked, which means the foundation beneath them has shifted. The same settlement that causes a door to bind will often reveal itself in the floors. A marble rolled across a room will not lie; it will find the low spot created by a sagging subfloor or compromised joists.

Foundation settlement is rarely uniform. One corner of a slab may sink while the opposite side stays put, twisting the entire load path and transferring stress to framing members that were never designed to handle it. Sloping floors that accompany sticking doors and windows are a strong signal that the settlement is active and structural. A visual inspection by an engineer will measure the degree of tilt and deflection, then determine whether the movement is ongoing or has stabilized. That distinction drives the entire repair strategy, from mudjacking and pier installation to simple moisture management.

Watch Out
Ignoring sticking doors and sloping floors because they seem like minor annoyances can allow foundation settlement to progress unchecked. Over time, the structural movement can compromise load-bearing walls and create safety hazards that cost significantly more to address.

Sagging Roof Lines and Ceiling Deflection: When Framing Members Are Compromised

A straight roofline is something you rarely notice until it is no longer straight. Sagging along the roof ridge, a visible dip in the ceiling, or a roofline that resembles a gentle wave all point to compromised framing members. The joists and rafters that carry the roof’s weight can deflect, crack, or rot, particularly where water has found its way past the building envelope over years of exposure.

Ceiling deflection is often the first visible clue. A ceiling that sags in the middle of a room, especially one that also shows water stains or cracking along the seams, suggests that the joists above are struggling. This is not a condition that improves on its own. Structural framing that has lost its integrity requires reinforcement or sistering, and a structural engineering inspection will identify exactly which members are overstressed and why. Catching this early prevents a slow sag from becoming a sudden failure, particularly in regions with heavy snow loads or seismic activity.

7 Signs of Structural Failure in Elevated Decks and Balconies

Elevated decks and balconies deserve their own category because they fail differently than foundations and roofs. They are exposed to the elements on all sides, making them vulnerable to water intrusion, wood decay, and corrosion of metal connectors. The consequences of failure are also more immediate and more severe, as the tragic balcony collapse in Berkeley in 2015 demonstrated when six people lost their lives (the CDC).

Close-up photograph of a wooden balcony underside showing dark water stains on the joists, cracked and splintered wood beams, and visible corrosion on a metal fastener bracket, lit by harsh afternoon sunlight

The following seven signs indicate that an elevated structure may be compromised:

  1. Visible rot or decay on the underside of decking, around posts, or at beam connections, often appearing as soft, dark, or spongy wood.
  2. Corroded or rusted connectors, including joist hangers, bolts, and post anchors that have lost their structural capacity.
  3. Cracked or splintered framing members, particularly where beams bear on posts or where joists meet the house.
  4. Water stains and moisture intrusion patterns that indicate the waterproofing membrane has failed and is trapping moisture against structural wood.
  5. Separation gaps between the deck and the house, or between railings and the deck surface, which signal movement in the connections.
  6. Bouncy or springy floors that flex noticeably underfoot, indicating undersized joists or failed connections.
  7. Leaning or loose guardrails that move when pushed, a sign that the railing posts are not securely anchored to the framing.

Each of these signs represents a breakdown in the structural integrity of the assembly. A structural engineering inspection of elevated elements looks beyond the visible surface to test the actual condition of the load-bearing components, often exposing decay that is hidden behind siding or under waterproof membranes.

Book inspection →

SB 326 Balcony Inspection Requirements: A Legal Obligation for California Property Owners

For California property owners, the question of whether to inspect is not optional. SB 326 balcony inspection requirements mandate that HOAs and multifamily property owners conduct inspections of elevated exterior elements, including balconies, decks, and stairways, on a specific compliance timeline (leginfo.legislature.ca.gov). These laws were written in direct response to the Berkeley balcony collapse, and they place a legal duty on building owners to identify and repair structural defects before they cause harm.

The scope of an SB 326 inspection is comprehensive. It requires a visual inspection of the load-bearing components of the exterior elevated elements, along with probing where water intrusion is suspected. The inspector must be qualified, and the findings must be documented and reported to the board and, in many cases, to the local building department. The goal is to catch the signs of structural failure in elevated decks before they escalate. A licensed inspector with construction experience will know where to probe and what deterioration patterns to look for, which is why the choice of inspector matters as much as the inspection itself.

Structural Engineer Inspection Cost vs. The Price of Ignoring the Problem

The structural engineer inspection cost is often the first objection we hear from HOA boards and property owners. It is a fair question, particularly when boards are already staring at repair estimates that strain their reserve funds. The honest answer is that inspection pricing varies based on the size of the building, the number of elevated elements, and the complexity of the assessment. There is no single national price, and quotes should be compared based on the depth of the inspection, not just the bottom line.

What is easier to quantify is the cost of not inspecting. A single balcony failure can result in injury, loss of life, legal liability, and fines for non-compliance with state law. The cost of repair only increases as decay spreads and structural movement progresses. An inspection that identifies a failing waterproofing membrane early might cost a fraction of the repair that becomes necessary after the membrane fails completely and the framing rots. The inspection is consistently the smallest line item in the entire process, and it is the one that prevents the largest ones.

Pro Tip
When comparing inspection quotes, ask what the report includes. A thorough inspection will document the condition of the waterproofing, the framing, and the connections, and will provide a clear path to repairs. A report that only lists observations without analysis leaves you no better off than the original home inspection.

What to Do After the Inspection: Your Post-Inspection Action Plan

The inspection report lands, and now you have a decision to make. The first step is to read the report with your board or your contractor and separate the findings into three categories: immediate safety hazards, required repairs for compliance, and recommended maintenance. Items in the first category should be addressed before anyone uses the affected area. The second category must be scheduled to meet the compliance deadlines. The third category is where you protect your investment over the long term.

Your post-inspection action plan should also include a timeline for the next inspection. Balcony and deck assemblies do not get more durable with age, and the conditions that caused the current deterioration will not have disappeared. Regular structural assessments, even when no problems are found, establish a baseline that makes future inspections faster and more accurate. For properties that have already experienced water intrusion or structural movement, annual monitoring may be warranted until the repairs are completed and the structure has proven stable.

The reality is that most building owners put off inspections because they are afraid of what the report will say. The better approach is to find out early, when the repair options are still broad and the costs are still manageable. A structural engineering inspection is not a verdict; it is a roadmap. The sooner you have the roadmap, the sooner you can make the repairs that keep your residents safe and your property sound.


Every property will eventually show signs of wear, but distinguishing between a cosmetic blemish and a genuine structural defect requires professional expertise. At Apex Balcony, our licensed inspectors bring decades of combined construction and design experience to every assessment, specializing in California’s SB 326 and SB 721 compliance requirements. We provide a comprehensive inspection of all elevated exterior elements, including balconies, decks, and stairways, and deliver a clear path to the necessary repairs. Book inspection with Apex Balcony and get the clarity you need to protect your residents, your reserve fund, and your peace of mind.

Frequently Asked Questions

What does a structural engineer look for in a home inspection?

A structural engineer assesses the building’s load path, from the roof down to the foundation. They look for signs of settlement or heaving, cracking patterns in walls and foundations, deflection in framing members like joists, and moisture intrusion that compromises structural integrity. They also check for bowed walls, sagging roof lines, and issues with load-bearing walls. The goal is to determine if any movement is cosmetic or a sign of a structural failure requiring repair.

How much does a structural engineer inspection cost?

The cost of a structural engineer inspection varies widely based on the size of the building and the complexity of the issues. For a precise quote, contact a licensed professional directly. Consider it an investment: the cost of an inspection is far less than the price of major foundation repair or a complete structural failure.

When should you hire a structural engineer instead of a general home inspector?

A general home inspector provides a broad overview of a property’s condition, but they are not licensed to diagnose structural issues. You should hire a structural engineer when you see specific warning signs like new or widening cracks in foundation walls, sloping floors, or doors that stick for no apparent reason. A structural engineer is also essential before buying a home with known issues, before a major renovation, or when you need a professional report to confirm the structural stability of the building.

What are the signs of structural failure in elevated decks?

Key signs include water damage and rot on the deck surface, joists, or ledger board, which is the board attaching the deck to the house. Look for corroded fasteners, cracked or splitting wood, and a noticeable bounce or movement when walking. Separation of the deck from the house, sagging, and visible decay around posts and footings are also red flags. These issues compromise the structural integrity of the deck and require immediate professional evaluation.

Book inspection

Posted in Blog

Definition of a Balcony: Types, Codes & Safety

Posted on September 5, 2026 by Apex Balcony admin
Definition of a Balcony: Types, Codes & Safety

Table of Contents

  • What Is the Definition of a Balcony?
  • Exterior Elevated Elements Definition Under SB 326
  • Balcony vs Deck Structural Differences
  • Key Structural Components of a Safe Balcony
    • The Ledger Board Connection
    • Joists and the Span-to-Cantilever Ratio
    • Joist Hangers and Hardware Specifications
    • Lateral Bracing and Blocking
    • Hurricane Ties and Seismic Connectors
    • Fastener Corrosion Resistance
  • SB 326 Balcony Inspection Requirements for Property Owners
  • Common Signs of Balcony Structural Failure
    • The 15-Minute DIY Safety Checklist
    • Documenting What You Find
    • What the Checklist Does Not Cover
  • Why Understanding Balcony Definitions Matters for Compliance
  • Frequently Asked Questions

Last Updated: September 5, 2026

What Is the Definition of a Balcony?

A balcony is an elevated exterior platform that projects from a building above ground level, enclosed by a railing and accessible from an interior room. The definition determines which California safety statutes apply, what inspectors look for, and who bears liability when something fails. At Apex Balcony, our licensed inspectors have examined hundreds of these structures, and the most common mistake property owners make is assuming their exterior walkways and decks fall outside regulatory scope.

Following the 2015 Berkeley balcony collapse and the 2021 Malibu incident, California enacted strict inspection mandates for specific exterior features (leginfo.legislature.ca.gov). Knowing whether your building has balconies, decks, or both tells you which law governs your compliance timeline and budget.

Below, we break down the definitions, structural differences, and inspection requirements you cannot afford to ignore.

Exterior Elevated Elements Definition Under SB 326

Under California law, the exterior elevated elements definition includes any walking surface supported by structural members extending beyond the building footprint. This covers balconies, decks, porches, stairways, walkways, and their supporting beams, posts, and foundations. The statutory language in California Civil Code Section 5551 captures load-bearing components essential to the structure’s stability.

The scope is deliberately broad. If a resident can walk on it, it sits above grade, and it attaches to a multifamily building with three or more units, it likely qualifies. Common examples include:

  • Cantilevered balconies projecting from exterior walls
  • Second-story decks supported by posts and beams
  • Exterior stairways and elevated walkways between units
  • Porches with structural support extending beyond the foundation

Ground-level patios with no structural elevation generally fall outside these statutes. If unsure whether your property’s features qualify, assume they do until a licensed inspector confirms otherwise.

Balcony vs Deck Structural Differences

The distinction comes down to support systems, not appearance. A balcony typically cantilevers from the building, relying on the floor structure and ledger connection. A deck stands independently on posts and piers, transferring load directly to the ground.

Cantilevered balconies transfer load back into the building’s framing, creating tension at the top connection and compression at the bottom. Decks concentrate load at discrete bearing points, making post spacing and footing size critical. Balcony failures often trace to ledger corrosion or end-grain rot, while deck collapses typically involve inadequate footings or over-spanned joists.

The distinction drives where an inspector looks and what they test. A compromised ledger bolt presents different risks than a decayed post base. Misidentifying structures risks hiring the wrong specialist or preparing for the wrong repair scope.

FeatureBalconyDeck
Primary supportBuilding structure, cantileverIndependent posts, piers
Load transferBack into floor framingDown to foundation
Common failure pointLedger board, rim joistPost bases, footings
Typical accessInterior roomGround or exterior stairs

Key Structural Components of a Safe Balcony

A safe balcony depends on a continuous, unbroken load path from the walking surface to the building’s main structural frame. Every component, from visible decking boards to hidden joist hangers, maintains structural integrity under both dead load (material weight) and live load (people, furniture, weather).

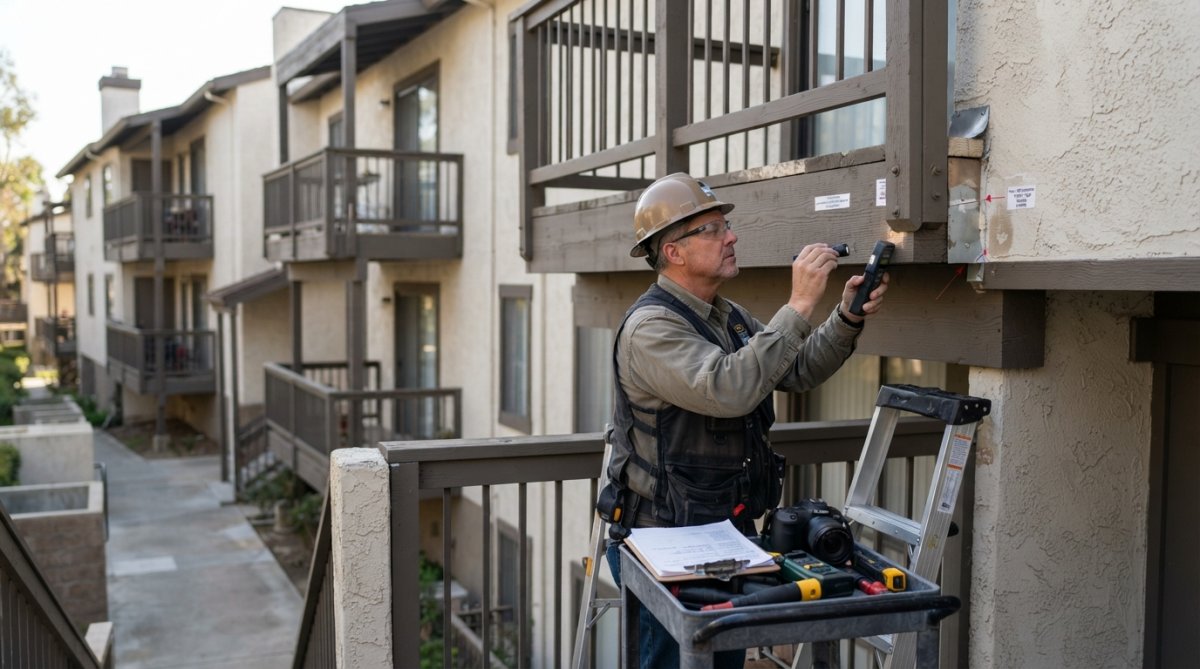
A licensed inspector in a hard hat and safety harness examining the underside of a residential balcony, flashlight in hand, checking joists and the ledger board for rot and water damage on a bright afternoon

The Ledger Board Connection

The ledger board is the primary attachment point where the balcony meets the building, bolted or lag-screwed into the rim joist or floor framing. Most residential codes require 1/2-inch diameter lag screws or through-bolts spaced no more than 16 inches on center, staggered in two rows (codes.iccsafe.org). The ledger must be flashed with corrosion-resistant metal to prevent water from seeping behind it, the leading cause of ledger rot and failure. A common mistake is using galvanized nails or undersized screws, which cannot resist the sheer forces of the cantilever.

Joists and the Span-to-Cantilever Ratio

Joists are the horizontal members that carry the decking surface. For cantilevered balconies, the governing rule is the span-to-cantilever ratio: the back span inside the building must be at least twice the length of the cantilevered projection. For example, a joist cantilevering 2 feet requires at least 4 feet of continuous span anchored within the structure. This ratio is a minimum requirement in the International Residential Code (IRC) and most state amendments.

Joist spacing is typically 12, 16, or 24 inches on center. For standard residential decks designed for 40 psf live load, 2×8 joists spaced 16 inches on center can typically span up to 9 feet, while 2x10s can reach 13 feet. These numbers shift dramatically with a cantilever, which effectively reduces the allowable span.

Joist Hangers and Hardware Specifications

Joist hangers are the metal brackets that connect joists to the ledger board and rim joist. Each hanger is rated for a specific load capacity, and using the wrong one is a code violation. For cantilevered balconies, look for hangers rated for the full load of the joist, not just the end reaction. Hangers must be fastened with the exact nails specified by the manufacturer, and every nail hole must be filled, missing even one nail can reduce capacity by up to 20%.

Lateral Bracing and Blocking

Blocking and bridging between joists provide lateral stability and prevent twisting under load. Solid blocking should be installed at mid-span and near the cantilever fulcrum. For cantilevered sections, the IRC requires cantilevered joists to be tied back to at least two interior joists using a continuous rim board or metal strapping to prevent peeling away from the structure.

Hurricane Ties and Seismic Connectors

In high-wind and seismic zones, standard joist hangers are not enough. Hurricane ties (also called seismic ties) are metal straps that connect the joist to the wall top plate or rim joist, resisting uplift forces. In California, these ties are mandatory for any balcony projecting more than 12 inches from the building face. The specific tie model and nailing pattern must match the engineered plans.

Watch Out
Do not confuse a visually sound surface with a structurally sound balcony. Water damage hides behind finishes, and rot can compromise joist ends while decking boards look pristine. Only a destructive inspection that opens visible surfaces reveals the true condition of the ledger connection and joist ends.

Fastener Corrosion Resistance

All fasteners and hardware in exterior exposure must be corrosion-resistant. Hot-dipped galvanized (HDG) is the minimum standard for most jurisdictions, but coastal environments with salt air often require stainless steel. Electro-galvanized fasteners are not acceptable for structural connections, they corrode rapidly when exposed to moisture. When inspecting an older balcony, check fastener heads: rust streaks running down the wood are a red flag that the hardware is failing.

SB 326 Balcony Inspection Requirements for Property Owners

SB 326 balcony inspection requirements mandate that buildings with three or more multifamily units undergo inspection of exterior elevated elements at least every nine years. The law, codified in Civil Code Section 5551, applies to common areas and requires visual observation plus limited destructive testing to expose hidden conditions.

Property owners and HOAs must complete the first inspection by the statutory deadline and maintain ongoing compliance thereafter. The inspection must be performed by a licensed architect, structural engineer, or certified inspector with relevant experience. A report documents findings and categorizes each element’s condition, with repair timelines tied to the severity of deficiencies.

Book inspection →

For property owners facing an approaching deadline, the practical steps are:

  1. Confirm whether your building meets the three-unit threshold
  2. Determine if your property falls under SB 326 or the similar SB 721 statute for employee housing
  3. Schedule a licensed inspection well before your compliance deadline
  4. Review the report and budget for any required repairs
  5. Maintain documentation for future inspections and potential audits

The cost of noncompliance extends beyond repair expenses. Fines, liability exposure, and reputational damage of an accident far exceed the price of a professional inspection. Property owners who delay often face emergency repairs at premium rates.

Common Signs of Balcony Structural Failure

Structural failure rarely announces itself without warning signs, but those signs often go unnoticed by untrained eyes. The following checklist is designed for homeowners and property managers to perform a preliminary visual assessment. It does not replace a licensed inspection.

The 15-Minute DIY Safety Checklist

Perform this check quarterly and after any major storm or seismic event. You will need a flashlight, a flathead screwdriver, and a small mirror on an extendable handle.

Step 1: The Wall Connection (2 minutes)

  • Stand at ground level and look at the line where the balcony meets the building wall. Insert the flathead screwdriver into any crack you find. If the screwdriver penetrates more than 1/4 inch, the wood behind is likely soft and rotting.
  • Check for gaps wider than 1/8 inch between the ledger board and the wall. A uniform gap suggests the ledger is pulling away.
  • Look for rust-colored streaks running down the siding or stucco below the ledger, this indicates corroding fasteners.

Step 2: The Walking Surface (3 minutes)

  • Walk slowly across the entire balcony surface. Note any area that feels spongy, bouncy, or deflects more than 1/4 inch under your weight. Pay special attention to the outer edge, where cantilever deflection is most pronounced.
  • Look for decking boards that have lifted, cupped, or separated from their neighbors by more than 1/4 inch. This can indicate that the joists below have twisted or settled.
  • Check the gap between the decking boards and the building wall. If this gap is widening at one end, the balcony may be tilting.

Step 3: The Underside (5 minutes)

  • Use the flashlight and mirror to inspect the underside of the balcony, focusing on the ledger board and the first 2 feet of joists where they meet the wall.
  • Look for water stains, dark discoloration, or a white, fuzzy growth (efflorescence) on the wood, all signs of chronic moisture.
  • Examine the joist hangers. Are they rusted? Are any nails missing or popped out? Tap the hangers with the screwdriver handle; a dull thud indicates corrosion, while a clear ring suggests sound metal.
  • Check the ends of the joists where they sit in the hangers. If you can see end-grain cracking or splitting, the joist is losing its load-bearing capacity.

Step 4: The Railings and Guards (3 minutes)

  • Push firmly on the top rail in both directions. Movement of more than 1 inch indicates loose posts or inadequate anchoring.
  • Check the base of each baluster (the vertical posts). Rot at the base is common and compromises the entire railing system.
  • Look for cracks in the concrete or stucco at the base of any support posts.

Step 5: Below the Balcony (2 minutes)

  • Stand directly beneath the balcony and look up. Check for water stains, cracks, or bulging in the ceiling of the space below.
  • Look for any visible sagging in the rim joist or the outer beam. A straight edge placed against the underside should touch evenly; any daylight showing through the middle indicates sag.

Documenting What You Find

Take dated photos of every anomaly you find. This documentation gives your inspector a head start on where to focus and creates a record of when issues first appeared. If a repair is needed, these photos help you verify that the contractor addressed the correct problem.

What the Checklist Does Not Cover

The DIY checklist cannot detect hidden rot inside the ledger board, corrosion on the back side of joist hangers, or inadequate fastening concealed behind finishes. These conditions require destructive testing, opening small sections of finishes to expose structural members. If your checklist reveals any warning signs, or if your building approaches its SB 326 inspection deadline, schedule a licensed inspection immediately.

Pro Tip
Keep a printed copy of this checklist with your property maintenance records. Performing it regularly not only protects residents but also demonstrates due diligence if an accident occurs and liability is questioned.

Why Understanding Balcony Definitions Matters for Compliance

The definition of a balcony determines your legal obligations, inspection schedule, and liability exposure. Misclassifying an exterior element as a “walkway” or “porch” when it legally qualifies as an elevated exterior element does not exempt you from compliance.

Property owners who understand the definitions can communicate effectively with inspectors, evaluate repair bids, and prioritize maintenance spending. A clear record of compliant inspections demonstrates diligence and reduces liability exposure.

Given the stakes, working with a qualified inspection team matters. Apex Balcony provides licensed inspectors with specialized expertise in SB 326 and SB 721 compliance, conducting comprehensive evaluations of balconies, decks, and stairways. Our team identifies early signs of structural failure, provides a clear path to necessary repairs, and helps property owners maintain safe conditions for residents.

Key Takeaway
The balcony definition is your starting point for safety and compliance. Know what you own, understand how it transfers load, and schedule inspections before deadlines force your hand. Early detection prevents both accidents and budget-breaking emergency repairs.

Getting the definition right is the first step, but compliance requires action. Many property owners postpone inspections because they fear repair costs, yet early identification of minor issues is far less expensive than emergency structural work. Apex Balcony offers professional inspection services that identify problems while they are still manageable. Book your inspection today and protect your residents, your asset, and your peace of mind.

Frequently Asked Questions

How does the legal definition of a balcony differ from a deck?

The key difference is structural support. A balcony is an elevated platform that projects from an exterior wall and is supported by the building itself, often with cantilevered joists. A deck is typically a freestanding structure supported by its own posts and piers, though it may be attached to the house with a ledger board. This distinction matters because building codes and inspection rules, like the exterior elevated elements definition, can apply differently based on the structure’s support system.

Are balconies considered exterior elevated elements under SB 326?

Yes. Under SB 326, exterior elevated elements include balconies, decks, porches, stairways, walkways, and their supporting components that extend beyond the exterior walls. The law targets load-bearing components that are exposed to water and can cause injury if they fail. The tragic 2015 Berkeley balcony collapse that killed six people prompted this legislation, making it clear that any elevated exterior structure with a walking surface more than six feet above grade falls under the inspection requirements.

What is the 1/3 rule for cantilevered balconies?

The 1/3 rule, or the span-to-cantilever ratio, states that the joist span inside the building must be at least three times the length of the cantilever outside. For example, if a balcony projects 4 feet from the wall, the interior joist span must be at least 12 feet. This rule ensures the weight of the balcony is properly transferred to the building’s structure, preventing the joists from acting like a lever and pulling away from the wall.

What safety standards apply to residential balconies in California?

Residential balconies in buildings with three or more units must comply with SB 721 and SB 326. These laws mandate that a qualified inspector assess the load-bearing components of exterior elevated elements for decay, corrosion, and water damage. Inspections must occur at least every nine years, with the first inspection deadline being January 1, 2025, for many properties. The goal is to identify structural issues early and prevent catastrophic failures, ensuring the safety of all residents.

Book inspection

Posted in Blog

Cantilever Beam Deck Construction: Code Rules

Posted on September 4, 2026 by Apex Balcony admin
Cantilever Beam Deck Construction: Code Rules

Table of Contents

  • How Cantilever Beam Deck Construction Works
  • Deck Joist Cantilever Span Limits: The 1/4 Rule
    • Why the 1/4 Rule Is Not a Universal Constant
    • Reading the IRC Span Tables Correctly
    • Deflection: The Limit That Actually Controls Design
    • A Visual Approach to Load Path
  • Beam and Post Support Requirements for Cantilevers
  • Hardware and Fastener Schedules That Prevent Failure
  • Common Cantilever Framing Mistakes and How to Avoid Them
    • The Hidden Failure: Missing Lateral Bracing
    • A Homeowner’s Inspection Checklist for Cantilevered Decks
    • Retrofitting: When Adding a Cantilever Is Not an Option
  • SB 721 Balcony Inspection Requirements for Cantilevered Decks
  • When to Hire Structural Engineering Services California
  • Conclusion: Build It Safe or Retrofit It Right
  • Frequently Asked Questions

Last Updated: September 4, 2026

How Cantilever Beam Deck Construction Works

Cantilever beam deck construction is a framing method where deck joists extend beyond their supporting beam or bearing wall, creating an overhang without additional posts or supports beneath the outer edge. This technique opens up outdoor living space and keeps the ground below clear, but it transfers significant structural demands to the framing members and their connections.

The load path begins at the decking surface, where live and dead loads press down on the joists and travel to the bearing point. The cantilevered portion acts like a see-saw: the overhang’s weight pulls down on the unsupported end, creating upward tension on the interior portion. Every connection must resist both compression and tension forces or the assembly slowly works itself apart.

Close-up view from below of a cantilevered deck frame showing pressure-treated joists extending past a support beam, with galvanized joist hangers and solid blocking visible between the joists

Deck Joist Cantilever Span Limits: The 1/4 Rule

The most important rule in deck joist cantilever span limits is the 1/4 ratio: the cantilevered overhang should not exceed one-quarter of the joist’s total span between supports. A joist spanning 12 feet between bearing points, for example, can safely cantilever roughly 3 feet beyond the beam.

Joist Span Between SupportsMaximum Cantilever OverhangTypical Joist Size
8 ft2 ft2×8
10 ft2.5 ft2×10
12 ft3 ft2×10
14 ft3.5 ft2×12

Building codes in the United States, including the International Residential Code (IRC) that most jurisdictions adopt, spell out allowable joist spans based on wood species, grade, and spacing. The span-to-cantilever ratio is your first check, but it is not the only one. Deflection under live load matters just as much; a bouncy deck signals inadequate joist depth even if the ratio looks correct on paper. When in doubt, the International Code Council’s residential code provisions provide the baseline tables that local building departments enforce.

Why the 1/4 Rule Is Not a Universal Constant

The 1/4 rule is a practical shorthand, not a substitute for engineering. It assumes standard residential live loads (40 psf) and dead loads (10 psf) as defined by the IRC, but breaks down under two common conditions:

1. Heavy Snow Loads. In the upper Midwest and Northeast, ground snow loads can reach 50 to 70 psf, nearly double the standard assumption, dramatically increasing downward force on the overhang and uplift tension on the interior span. Many engineers in these regions reduce the maximum cantilever to 1/5 or even 1/6 of the back span, or specify deeper joists.

2. High-Wind Zones. Along the Gulf Coast and Atlantic seaboard, wind uplift can reverse the load path, trying to lift the entire deck. In hurricane-prone areas, the IRC requires additional tension ties and hold-down anchors connecting the deck frame to the foundation. The cantilever ratio stays the same, but the connection schedule must be upgraded.

Reading the IRC Span Tables Correctly

The IRC Table R507.5 provides maximum joist spans for different species, grades, and spacing. To use it correctly, you need three data points:

  • Wood species and grade: Southern Pine, Douglas Fir-Larch, and Hem-Fir each have different strength values. A #2 grade 2×10 in Southern Pine spans farther than the same size in Spruce-Pine-Fir.
  • Joist spacing: 12 inches on center allows longer spans than 24 inches on center. Most cantilevered decks use 16-inch spacing as a compromise between strength and material cost.
  • Live load assumption: The IRC tables are based on 40 psf live load. If your jurisdiction requires a higher live load for commercial applications or assembly areas, the allowable span decreases.

Deflection: The Limit That Actually Controls Design

Most cantilevered decks fail the deflection test before the strength test. The IRC limits live load deflection to L/360, meaning a 12-foot span can deflect no more than 0.4 inches under load. A cantilevered joist deflects more at its free end because the load is concentrated at the furthest point from the bearing. The fix is not always a shorter cantilever; upsizing from 2×10 to 2×12 often solves the problem while keeping the same overhang.

Pro Tip
When building in snow country, ask your local building department whether they apply the IRC’s ground snow load map or a more conservative local amendment. Some jurisdictions in the Rocky Mountain states require 70 psf design loads, which effectively cuts the 1/4 rule down to 1/5 for most framing.

A Visual Approach to Load Path

The diagram above shows the classic see-saw mechanism: the overhang’s downward load creates an upward reaction at the beam, resisted by the interior span’s downward load and connection hardware. If the interior span is too short, the uplift force at the beam exceeds the interior portion’s dead load, and the deck tries to tip backward.

Beam and Post Support Requirements for Cantilevers

Cantilevered decks demand beams and posts sized for the full tributary load, including the overhang. A common mistake is treating the beam as if it only supports the joists directly above it; in reality, it must resist concentrated forces at each joist bearing point plus torsional stress from the cantilever.

Posts supporting the beam need a solid foundation, typically a pier or footing poured below the frost line, and must be tied to the beam with approved post-to-beam connectors. The connection between the beam and the house is equally critical. A ledger board bolted through the rim joist with proper flashing prevents both structural failure and water intrusion, the two most common causes of deck collapse.

Hardware and Fastener Schedules That Prevent Failure

Hardware selection is where cantilevered decks either survive decades or fail silently. Joist hangers must match the exact joist dimensions and be rated for the loads they carry. Nails driven through hanger holes are not interchangeable with the structural screws the manufacturer specifies; the fastener schedule is part of the engineering.

For cantilevered joists specifically, you need more than standard hangers. Hurricane ties or similar tension hardware anchor the joist to the beam and resist the uplift forces created by the overhang. Blocking between joists over the beam prevents the joists from twisting under load and distributes point loads across adjacent members. The American Wood Council’s connection guidelines emphasize that end grain connections and nailing patterns determine whether a joint holds or pulls apart under repeated stress cycles.

Watch Out
Using ordinary galvanized nails where structural screws are specified is a leading cause of connection failure. The fastener schedule on the hanger package or engineering drawings is not a suggestion; substituting cheaper hardware voids the structural rating and can lead to progressive collapse.

Common Cantilever Framing Mistakes and How to Avoid Them

Several framing errors appear repeatedly in decks that fail inspection or collapse. The most dangerous is over-cantilevering beyond the 1/4 ratio, often done to create a larger deck without adding supports. Another frequent issue is notching joists to run pipes or electrical, which reduces the effective section and creates a stress concentration point.

Improper ledger attachment ranks high as well. Lag screws driven through siding without a proper spacer, or missing the rim joist entirely, leave the deck connected by little more than friction. Water damage compounds these problems silently; end grain on exposed joists wicks moisture into the framing, accelerating rot.

The Hidden Failure: Missing Lateral Bracing

A cantilevered deck’s overhang acts like a lever, creating lateral forces that push and pull the beam sideways. Without adequate cross-bracing or moment connections at the posts, the deck can sway under load. The IRC requires lateral load connections at the house and posts, but many decks built before the 2015 code update lack them.

A Homeowner’s Inspection Checklist for Cantilevered Decks

Most guides focus on building a cantilevered deck correctly, but few address what to look for when you suspect an existing deck has problems. This checklist is for a visual inspection that takes about 15 minutes and requires no special tools. It does not replace a professional structural evaluation, but it helps you identify red flags before they become emergencies.

At the House Connection (Ledger Board):

  • Look for gaps between the ledger board and the house siding. A gap wider than 1/8 inch suggests the ledger is pulling away from the rim joist.
  • Check for rust streaks running down the siding below the ledger. This indicates the flashing has failed and water is entering the connection.
  • Examine the bolt heads or lag screw heads. If they are countersunk and covered with caulk, the caulk should be intact. Cracked or missing caulk allows water to reach the hardware.

At the Beam and Posts:

  • Look for cracks in the beam, especially near the post connections. Vertical cracks wider than 1/4 inch are structural concerns.
  • Check the post-to-beam connector. Galvanized brackets should be free of rust and firmly attached. If you can move the bracket by hand, the fasteners have loosened.
  • Examine the base of the posts where they meet the concrete piers. Rot at this point is common because the post end grain sits in a moisture trap. Probe the wood with a screwdriver; if it sinks in more than 1/4 inch, the post is compromised.

At the Joist-to-Beam Connection:

  • Look at the joist hangers from below. The joist should sit fully inside the hanger, with the hanger’s seat supporting the full width of the joist.
  • Check for nails that have backed out or are missing. Each hanger has a specified nail pattern; missing nails reduce the connection’s load capacity.
  • Examine the joist ends for splitting or checking. A split that runs through the joist end into the hanger area is a sign of overloading or fastener corrosion.

At the Cantilever Overhang:

  • Stand at the outer edge and bounce gently. Excessive bounce (more than 1/2 inch of vertical movement) indicates undersized joists or failed connections.
  • Look at the decking surface for cupping or warping. This suggests water is trapped between the decking and the joists, which accelerates rot.
  • Check the underside of the overhang for water stains or discoloration. Dark streaks running along the joist length indicate prolonged moisture exposure.
Watch Out
If you find any of the following during your inspection, stop using the deck immediately and contact a licensed structural inspector: visible separation between the ledger and the house, cracked or broken joist hangers, posts that move when pushed, or soft wood that a screwdriver penetrates more than 1/4 inch. These are signs of imminent structural failure, not cosmetic issues.

Retrofitting: When Adding a Cantilever Is Not an Option

A common question is whether homeowners can extend an existing deck by cantilevering joists beyond the current beam. The answer is almost always no: existing joists were sized for their current span, the beam and posts were not designed for additional uplift forces, and the ledger connection was engineered for the current dead load. Adding an overhang increases the pull on the ledger, the most common failure point in deck collapses.

If you need more deck space, the safer retrofit is to add a new beam and posts at the new outer edge, converting the proposed cantilever into a simply supported span. This requires new footings below the frost line but avoids the structural compromises of extending unsupported joists. A structural engineer can evaluate whether your existing framing can handle the additional posts and beam, or whether the deck needs a full rebuild.

SB 721 Balcony Inspection Requirements for Cantilevered Decks

California property owners face specific legal obligations beyond general building codes. The SB 721 balcony inspection requirements mandate that buildings with three or more multifamily units undergo inspection of all elevated exterior elements, including cantilevered decks, balconies, and stairways, by January 1 of each compliance cycle. These inspections must be performed by a licensed professional who evaluates the structural integrity of load-bearing components and identifies deterioration that could compromise safety.

The law was written in response to the Berkeley balcony collapse that killed six people in 2015, a tragedy caused by dry rot in cantilevered joists that had gone undetected for years. For HOA boards and property managers, SB 721 compliance is not optional paperwork; it is a liability shield. A documented inspection by a qualified professional demonstrates diligence, while a missed deadline exposes owners to fines and, far more seriously, to civil liability if a failure injures a resident.

When to Hire Structural Engineering Services California

Not every cantilevered deck issue requires a full engineering engagement, but several situations demand professional analysis. If your deck shows visible sagging, cracked joists, or corroded hardware, a structural engineer can determine whether repair or replacement is safer. Similarly, if you are planning to extend an existing cantilever or add a hot tub or other concentrated load, the original framing was likely not designed for it.

Hiring structural engineering services California property owners trust is especially important when an inspection report identifies deficiencies. An engineer can calculate the exact load path, specify repairs, and produce stamped drawings a contractor can build from and a building department will approve. For properties facing SB 721 compliance, working with a firm that combines engineering expertise with inspection experience, like the team at Apex Balcony, ensures the report holds up under audit and gives the board a clear path to repairs.

Key Takeaway
A cantilevered deck is only as safe as its weakest connection. The 1/4 span rule, proper hardware, and regular inspection form the three legs of a structure that will safely support residents for decades.

Conclusion: Build It Safe or Retrofit It Right

Cantilever beam deck construction rewards careful planning and punishes shortcuts. The 1/4 span ratio, properly sized beams and posts, and a complete fastener schedule are not optional details; they are the difference between a deck that lasts and one that fails. If your property has cantilevered decks that have never been inspected, or if an inspection revealed issues you have been postponing, the cost of delay is measured in risk to your residents and your liability exposure. Apex Balcony provides licensed inspectors with decades of construction experience to identify early signs of structural failure and guide you through SB 721 and SB 326 compliance. Book an inspection and get a clear, defensible path to a safe property.

Frequently Asked Questions

How far out can a deck be cantilevered?

The maximum cantilever distance depends on the joist size and spacing. The standard rule is that the cantilever cannot exceed one-quarter of the joist’s actual span between supports. For example, a 2×10 joist spanning 12 feet between beams can cantilever up to 3 feet beyond the beam. Always verify this against your local building code, as some jurisdictions enforce stricter limits for elevated decks.

What is the 1/3 rule for cantilever deck construction?

The 1/3 rule is a common framing guideline stating that a cantilever should not exceed one-third of the backspan of the joist. However, for deck construction, most building codes in California require the more conservative 1/4 ratio. This means the cantilevered portion should be no more than one-quarter of the total joist span. Using the 1/3 rule can lead to excessive deflection and structural failure.

Why is structural inspection critical for cantilevered balconies?

Cantilevered balconies hide their primary structural components behind siding and finishes, making deterioration difficult to spot. Water intrusion at the ledger board or rim joist can rot the framing without visible warning until failure. SB 721 requires inspection of these elevated exterior elements every six years for buildings with three or more multifamily units. A licensed inspector can identify compromised load paths and unsafe cantilever ratios.

How far can a 2×8 beam cantilever?

A 2×8 joist used in cantilever beam deck construction has a maximum overhang determined by its span. If the 2×8 spans 8 feet between support beams, the cantilever cannot exceed 2 feet under the standard 1/4 ratio. This shorter joist size limits your design options. For longer cantilevers, you would need to step up to a larger joist like a 2×10 or 2×12, or add an additional support beam.


The information provided in this article is for general guidance only and does not constitute legal advice. Building codes and regulations vary by jurisdiction; always consult with a licensed professional and your local building department for requirements specific to your property.

Book inspection

Posted in Blog

Third Party Inspection: A Guide for Property Owners

Posted on September 3, 2026 by Apex Balcony admin
Third Party Inspection: A Guide for Property Owners

Table of Contents

  • What Is Third Party Inspection?
  • Why Third Party Inspections Matter for Property Safety
  • SB 326 Compliance Requirements for Elevated Exterior Elements
  • SB 721 Balcony Inspection Timeline and Deadlines
  • Structural Engineering Services and Technical Evaluation
  • The Third Party Inspection Process: Step-by-Step
  • Common Inspection Pitfalls and How to Avoid Them
  • Conclusion
  • Frequently Asked Questions

Last Updated: September 3, 2026

What Is Third Party Inspection?

A third party inspection is an independent structural assessment of a building’s elevated exterior elements, such as balconies, decks, stairways, and walkways, performed by a licensed professional who has no financial stake in the property’s outcome. Unlike inspections conducted by the building owner or contractor, a third party inspection provides objective verification that these critical safety features meet current building codes and regulatory standards.

The inspector’s role is to identify structural defects, material deterioration, water damage, and code violations before they become safety hazards. This independent evaluation creates a documented record of the property’s condition, protects residents from preventable accidents, and gives property owners a clear roadmap for necessary repairs.

At Apex Balcony, we conduct third party inspections that go beyond surface-level observation. Our licensed inspectors bring decades of construction and design experience to every assessment, identifying early signs of structural failure that untrained eyes would miss. We understand that a thorough third party inspection isn’t just about compliance, it’s about protecting lives and assets.

Why Third Party Inspections Matter for Property Safety

Property owners often delay inspections because they fear what inspectors will find. That hesitation can be costly. A single balcony collapse creates liability exposure that far exceeds the cost of preventive inspection and repair.

Consider the real-world consequences. In 2015, a balcony collapse in Berkeley killed six people and sparked widespread regulatory reform. In 2021, a Malibu balcony collapse injured multiple residents and exposed how quickly deterioration can escalate when left unaddressed. These incidents weren’t anomalies, they were preventable failures that could have been caught through rigorous third party inspection.

The value of independent inspection lies in objectivity. A contractor hired to perform repairs has financial incentive to find problems. A property owner conducting self-assessment may lack technical expertise. A third party inspector answers to neither, their job is accuracy, not profit or avoidance.

Key Takeaway
Third party inspections create documented evidence of structural condition at a specific point in time. This documentation protects property owners from liability claims and demonstrates due diligence to regulators and residents.

Beyond liability protection, third party inspections identify problems early when repairs are less invasive and less expensive. Water intrusion caught in year one costs far less to remediate than structural rot discovered in year five. Regular inspections establish a maintenance timeline that prevents emergencies and spreads repair costs predictably across multiple fiscal years.

SB 326 Compliance Requirements for Elevated Exterior Elements

California’s Senate Bill 326, which took effect in 2018, requires inspections of certain elevated exterior elements in residential buildings. This law mandates that buildings with three or more units inspect balconies, decks, stairs, railings, and similar structures to ensure they meet current building standards.

The law applies to buildings constructed before January 1, 2010. Property owners must have a third party inspection performed by a licensed engineer or architect. The inspection must document the structural integrity of all elevated exterior elements and identify any non-conformance with current code requirements.

SB 326 compliance requires more than a visual walkthrough. The inspection must assess load-bearing capacity, connection points, waterproofing, material condition, and railing safety. The inspector produces a formal report detailing findings and recommending repairs or further evaluation by a structural engineer.

Property owners often ask whether their building falls under SB 326 or the newer SB 721. The distinction matters. SB 326 applies to multi-unit residential buildings with elevated exterior elements. If your property has balconies or decks on a residential building with three or more units, SB 326 likely applies. Failing to comply can result in fines, legal liability, and mandatory repair orders from local authorities.

Watch Out
Many property owners confuse SB 326 with SB 721 or believe one law supersedes the other. In reality, both laws often apply to the same property. A building may be subject to SB 326 inspection requirements AND SB 721 balcony-specific deadlines simultaneously. Misunderstanding which law applies can result in missed deadlines and regulatory penalties.

SB 721 Balcony Inspection Timeline and Deadlines

California’s Senate Bill 721, effective January 1, 2022, established stricter requirements and aggressive timelines for balcony inspections in residential buildings. SB 721 applies to residential buildings with three or more units and focuses specifically on balconies, decks, and exterior stairs.

The key difference between SB 721 and SB 326 is urgency. SB 721 requires initial inspections to be completed by January 1, 2025, with follow-up inspections every six years. This compressed timeline reflects California’s response to multiple balcony failures and the need for rapid risk mitigation.

The SB 721 inspection timeline works as follows. Property owners must hire a licensed structural engineer or architect to inspect all balconies and elevated exterior elements. The inspection must be completed and documented before the January 1, 2025 deadline. Once the initial inspection is complete, property owners must schedule follow-up inspections every six years to maintain compliance.

For properties that discovered significant defects during their initial SB 721 inspection, the law allows a phased repair approach. Critical safety issues must be addressed immediately. Non-critical repairs can be scheduled within a reasonable timeframe, provided the property owner submits a repair timeline to local authorities.

The regulatory compliance requirement extends beyond inspection. Property owners must maintain documentation of all inspections, repair work, and follow-up assessments. This documentation must be available for municipal review and demonstrates due diligence in managing building safety.

Professional inspector examining a residential balcony with clipboard and measuring tools, close-up of structural assessment work on elevated exterior element with natural daylight

Structural Engineering Services and Technical Evaluation

When a third party inspection identifies potential structural issues, the next step is often a detailed structural engineering evaluation. This deeper assessment determines whether defects pose immediate safety risks or can be addressed through planned maintenance.

Structural engineering services involve detailed load calculations, material testing, and computer modeling to assess how balconies and elevated elements perform under stress. An engineer examines connection points where the balcony attaches to the building, evaluates the condition of fasteners and welds, and assesses whether the structure can safely support occupant loads.

The technical evaluation process typically includes:

  • Visual inspection of all structural components and connections
  • Measurement of deflection or movement in the structure
  • Assessment of water intrusion and moisture damage
  • Evaluation of material properties and deterioration patterns
  • Load-bearing capacity analysis
  • Recommendations for repair, reinforcement, or replacement

A qualified structural engineer produces a detailed report that specifies exactly what repairs are needed, the urgency of each repair, and estimated costs. This report becomes the basis for contractor bidding and repair scheduling.

Many property owners are surprised to learn that a third party inspection and a structural engineering evaluation serve different purposes. The third party inspection answers the question: “Does this structure meet code?” The structural engineering evaluation answers: “How much longer can this structure safely serve its intended purpose, and what repairs will extend its life?”

Pro Tip
Request that your structural engineer provide a prioritized repair list with timeframes. Not all defects require immediate action. A clear priority ranking helps property managers budget repairs strategically and avoid unnecessary emergency costs.

The Third Party Inspection Process: Step-by-Step

The third party inspection process follows a structured methodology designed to ensure comprehensive assessment and regulatory compliance. Understanding the steps helps property owners prepare and reduces surprises.

Step 1: Schedule and Pre-Inspection Planning

Contact a licensed inspection agency to schedule your third party inspection. Provide information about your building’s age, construction type, and any known issues. The inspector will review building permits and architectural plans to understand the original design intent and construction standards.

Step 2: On-Site Visual Assessment

The inspector arrives with measuring tools, moisture meters, and documentation equipment. They examine every elevated exterior element, balconies, decks, stairs, railings, and fastening systems. The visual assessment includes checking for visible cracks, rust, wood rot, water staining, and loose connections.

Step 3: Detailed Structural Evaluation

The inspector measures structural components, tests material integrity, and documents any defects. They photograph problem areas and record measurements. For wood elements, they probe for rot. For steel, they check for rust and corrosion. For concrete, they assess spalling and rebar exposure.

Step 4: Testing and Sampling

Depending on findings, the inspector may conduct additional testing. This might include moisture testing to assess water intrusion, fastener testing to verify connection integrity, or material sampling for laboratory analysis. Testing adds cost but provides definitive answers about hidden damage.

Step 5: Documentation and Reporting

Book inspection →

The inspector compiles findings into a formal report that includes photographs, measurements, code citations, and repair recommendations. The report specifies which defects require immediate attention and which can be addressed during planned maintenance cycles.

Step 6: Regulatory Submission

For SB 326 and SB 721 compliance, the completed inspection report must be submitted to your local building department. The submission creates an official record that your property has been inspected and documents any non-conformance with current codes.

The entire process typically takes 2-4 weeks from scheduling to final report delivery, depending on building size and complexity. Apex Balcony manages this timeline efficiently while maintaining the thoroughness that regulatory compliance demands.

Common Inspection Pitfalls and How to Avoid Them

Property owners and managers often make mistakes during the inspection process that compromise results or create unnecessary costs. Understanding these pitfalls helps you navigate the process successfully.

Pitfall 1: Choosing an Inspector Based on Price Alone

The cheapest inspection quote often reflects less experienced inspectors or abbreviated assessment methods. A thorough third party inspection requires time, expertise, and attention to detail. Inspectors who rush through the process miss early-stage deterioration that more experienced professionals would catch.

The solution is to request references and verify that your inspector holds appropriate licenses and certifications. Ask about their experience with your building type and construction era. A slightly higher inspection cost now prevents far more expensive emergency repairs later.

Pitfall 2: Failing to Prepare Access

Inspectors need safe, unobstructed access to all elevated elements. Properties where residents have stored items on balconies or blocked stairwells create delays and incomplete assessments. Before inspection day, notify residents to clear balconies and ensure common areas are accessible.

Pitfall 3: Ignoring Moisture and Water Intrusion

Many property managers focus on visible structural damage while overlooking moisture problems. Water intrusion is often the root cause of accelerated deterioration. An inspector who doesn’t thoroughly assess water damage misses the underlying problem, leading to repeat failures.

Ensure your inspection includes moisture testing and assessment of waterproofing systems. Ask the inspector to identify sources of water intrusion and recommend waterproofing improvements alongside structural repairs.

Pitfall 4: Delaying Repairs After Inspection

Property owners sometimes receive inspection reports and postpone repairs indefinitely. This approach creates liability exposure and allows minor defects to become major problems. Once an inspection identifies non-conformance with code, property owners have a legal obligation to address it.

Create a repair timeline immediately after receiving the inspection report. Prioritize critical safety issues and schedule non-critical repairs within a reasonable window. Document your repair plan and communicate it to residents.

Watch Out
Delaying repairs after a third party inspection creates documented liability. If an injury occurs on an element that was flagged in an inspection report but left unrepaired, property owners face significantly higher legal exposure. Courts view delayed repairs as negligence.

Pitfall 5: Hiring Contractors Without Comparing Repair Estimates

After inspection, property owners must hire contractors to perform repairs. Obtaining multiple repair estimates allows you to compare approaches, timelines, and costs. Some contractors propose more extensive repairs than necessary; others may underestimate the scope of work.

Request detailed repair proposals that reference the inspection report findings. Ensure contractors understand the specific defects and the code requirements driving the repairs. Compare estimates from at least three contractors before making a selection.

Pitfall 6: Neglecting Follow-Up Inspections

SB 721 requires follow-up inspections every six years. Many property owners complete the initial inspection but lose track of the deadline. Missing the follow-up inspection deadline creates regulatory violations and liability exposure.

Set calendar reminders for your next inspection deadline. Schedule the follow-up inspection 2-3 months before the deadline to ensure the work is completed on time. Maintain a file documenting all inspection reports and repair work for regulatory review.

Conclusion


Third party inspection is no longer optional for California property owners managing multi-unit residential buildings. SB 326 and SB 721 compliance is mandatory, and the consequences of non-compliance, fines, liability exposure, and resident safety risks, far exceed the cost of professional inspection.

The process begins with choosing an experienced inspection agency that understands California’s regulatory landscape and the specific requirements for your property type. Apex Balcony brings decades of construction and design expertise to every third party inspection, identifying structural defects early and providing clear repair recommendations that keep your residents safe and your property compliant. Our licensed inspectors understand SB 326 and SB 721 requirements and deliver documentation that satisfies regulatory oversight.

California Building Standards Code Chapter 3.2 on exterior elements establishes the baseline code requirements that third party inspections must verify. Senate Bill 721 text and implementation guidance details the specific inspection timeline and requirements for residential balconies. Structural Engineers Association of California guidance on third party inspection standards provides best practices for thorough structural assessment.

Don’t wait for a regulatory notice or a resident complaint to schedule your third party inspection. Book an inspection with Apex Balcony today and take control of your building’s safety and compliance.

Frequently Asked Questions

What is a third party inspection in the context of property maintenance?

A third party inspection is an independent assessment of building components, typically elevated exterior elements like balconies, decks, and stairways, conducted by a certified inspector who has no financial stake in the property. Third party inspections verify compliance with building codes, identify structural defects, and provide objective technical documentation. They are required under state regulations like SB 326 and SB 721 to ensure resident safety and legal compliance.

How do third party inspections ensure compliance with SB 326 and SB 721?

SB 326 compliance requirements mandate that multifamily buildings conduct structural inspections of balconies and elevated exterior elements. SB 721 balcony inspection timeline requirements set specific deadlines for completion. Third party inspectors use standardized assessment protocols to evaluate structural integrity, identify non-conformance with code standards, and document findings in technical reports. These reports create a regulatory record that protects property owners and demonstrates good-faith compliance efforts to enforcement agencies.

Why are third party inspections required for elevated exterior elements?

Third party inspections are required because elevated exterior elements pose significant safety risks if they deteriorate undetected. Balcony collapses and failures can cause severe injury or death. Independent inspections by certified professionals ensure objective assessment free from owner bias, identify early signs of structural failure before catastrophic collapse, and create liability protection through documented compliance. Regulatory agencies mandate these inspections to protect residents and hold property owners accountable for maintaining safe conditions.

How often should properties conduct third party inspections for balcony safety?

Inspection frequency depends on your property’s age, condition, and applicable regulations. SB 721 balcony inspection timeline requirements typically mandate inspections every 6 years for buildings over 15 years old, with initial inspections due by specific deadlines based on construction date. Newer buildings or those with recent repairs may have longer intervals. Properties with identified defects may require more frequent follow-up inspections. Consult with a certified inspection agency to determine your specific timeline based on your building’s characteristics and local requirements.

Book inspection

Posted in Blog

Alternatives to Traditional Balcony Wood Sealing

Posted on September 2, 2026 by Apex Balcony admin
Alternatives to Traditional Balcony Wood Sealing

Table of Contents

  • Why Property Owners Are Moving Beyond Traditional Wood Sealers
  • Liquid Polyurethane Coatings: Film-Forming Protection
  • Fiberglass-Reinforced Membrane Systems for Long-Term Durability
  • SB 326 Balcony Inspection Requirements and Sealing Standards
  • Composite Decking: Eliminating Sealing Altogether
  • Maintenance Schedule for Elevated Wood Decks and Alternative Coatings
  • Professional Balcony Inspection Services and Material Selection
  • Cost-Benefit Analysis: 10-Year Performance and Total Ownership
  • Frequently Asked Questions

Last Updated: September 2, 2026

Why Property Owners Are Moving Beyond Traditional Wood Sealers

Traditional wood sealers have dominated balcony maintenance for decades, but property owners increasingly recognize their limitations. Constant reapplication cycles, moisture infiltration failures, and ongoing maintenance costs are pushing building managers toward alternatives to traditional balcony wood sealing that offer superior durability and lower lifetime expenses.

Structural failures linked to inadequate wood protection have made compliance with California’s SB 326 and SB 721 balcony safety mandates non-negotiable. When inspectors identify failing sealers during mandatory inspections, property owners face a choice: retreat with the same approach or invest in solutions designed to prevent the problem entirely.

At Apex Balcony, we’ve worked with hundreds of building owners navigating this decision. Most discover that newer sealing technologies and alternative materials eliminate the annual maintenance treadmill while providing the structural protection California law requires. This guide breaks down the most viable alternatives to traditional balcony wood sealing, comparing their performance, costs, and suitability for different property types.

Key Takeaway
The real cost of traditional wood sealers isn’t the upfront price, it’s the cumulative expense of repeated applications, failed inspections, and eventual structural repairs. Modern alternatives shift that equation dramatically.

Liquid Polyurethane Coatings: Film-Forming Protection

Liquid polyurethane represents the most accessible upgrade from traditional sealers. These film-forming coatings create a continuous waterproof membrane across the deck surface, unlike penetrating sealers that absorb into the wood grain.

Polyurethane bonds to wood, concrete, fiberglass, and vinyl surfaces, forming a flexible protective layer that resists peeling and cracking as the substrate expands and contracts with temperature changes. This flexibility is critical on elevated decks where seasonal movement is constant.

Liquid Rubber Polyurethane Deck Coating exemplifies this category. The product resists UV degradation, and carries low-VOC formulations (the EPA). Coverage typically ranges from 200 to 400 square feet per gallon depending on surface texture.

A typical residential balcony can be coated in a single day with minimal disruption. Unlike fiberglass systems that require professional installation, polyurethane coatings accommodate both DIY and professional application, making it viable for small buildings where hiring contractors for every unit becomes prohibitively expensive.

Surface preparation determines success. Existing sealers must be stripped, wood sanded to bare substrate, and any rot addressed before application. Most failures occur because property managers apply new coating over degraded old sealers rather than properly preparing the surface.

Watch Out
Applying polyurethane over existing failed sealers is the most common mistake. The new coating will fail within 2-3 years. Proper surface stripping is non-negotiable for longevity.

Curing time typically spans 7 to 14 days before the deck is fully usable. Plan application during dry weather windows in spring or fall for optimal results.

Fiberglass-Reinforced Membrane Systems for Long-Term Durability

Fiberglass-reinforced membranes represent a significant step up in durability and structural protection. Systems like Life Deck FM combine fiberglass matting embedded in acrylic coatings to create a reinforced waterproofing layer that prevents water from penetrating small cracks and gaps.

Professional applying fiberglass-reinforced membrane to wooden balcony surface with trowel, showing the protective layer installation process in natural daylight

The fiberglass reinforcement adds structural integrity, preventing the membrane from tearing when underlying wood shifts. This is especially valuable in coastal properties where salt spray accelerates wood degradation and temperature swings are extreme.

Lifespan for fiberglass systems extends to 20 years or more, compared to 3-5 years for traditional sealers (astm.org). This longevity shifts the cost calculus dramatically when managing a 50-unit complex. Fewer applications mean less labor, less tenant disruption, and more predictable maintenance budgets.

Installation requires professional expertise. The surface must be properly prepared, the membrane applied in controlled conditions, and curing monitored to ensure adhesion. Contractors typically charge on a per-square-foot basis, with pricing varying by region, surface complexity, and existing damage.

Fiberglass membranes also work well under lightweight concrete overlays, making them compatible with properties planning to add a finished topping layer.

SB 326 Balcony Inspection Requirements and Sealing Standards

California’s SB 326 mandates that residential buildings with three or more units conduct structural inspections of balconies, decks, and exterior stairs every six years. The law emerged from high-profile balcony collapses, including the 2015 Berkeley incident that killed six residents, traced to water damage and wood rot that traditional sealers failed to prevent.

Inspectors evaluate the integrity of structural members, fasteners, connections, and waterproofing systems. A failed sealer is often the first indication of deeper structural problems. When an inspector identifies water penetration, wood rot, or fastener corrosion, the property owner must remediate the issue and submit a follow-up inspection report.

This regulatory framework fundamentally changes the economics of sealing choices. A traditional sealer that fails inspection creates a compliance violation and forces emergency repairs. Modern alternatives to traditional balcony wood sealing that pass inspection the first time avoid these cascade costs.

Pro Tip
SB 326 inspections reveal problems that traditional sealers masked. Use the inspection findings to guide your sealing choice, don’t just retreat with the same approach that failed.

SB 721, which applies to multifamily properties, carries similar requirements with slightly different timelines. Both laws treat waterproofing as a structural safety issue, not cosmetic maintenance.

Composite Decking: Eliminating Sealing Altogether

Composite decking offers a fundamentally different approach: eliminate the need for sealing by replacing wood with engineered material. Trex and similar manufacturers produce boards from recycled plastics and wood fibers, creating a product that resists rot, insects, mold, and UV degradation without any protective coating.

Residential balcony constructed with composite decking boards in natural wood-tone finish, showing clean lines and finished appearance without visible sealing or weathering

Composite decking requires no annual sealing, no stripping, no reapplication cycles. A simple rinse with a hose removes surface dirt. The material is splinter-free, resistant to staining, and available in multiple colors and finishes that mimic natural wood grain.

For new construction or major renovation projects, composite decking eliminates the sealing problem entirely. The upfront material cost is higher than treated lumber, but the total cost of ownership over 20 years often favors composite because you remove the ongoing maintenance burden and inspection failure risk.

Composite can become hot in direct sunlight and is heavier than wood, which can affect structural load calculations for some balcony designs. Deep scratches and gouges are permanent. For existing wood balconies, replacing the entire deck structure with composite is expensive and disruptive.

However, composite works well for new railings, stairs, and other elevated elements where replacement is already planned. Mixing composite elements with sealed wood creates a hybrid approach that reduces the total area requiring ongoing sealer maintenance.

Book inspection →

Maintenance Schedule for Elevated Wood Decks and Alternative Coatings

Understanding maintenance cycles is essential when comparing sealing alternatives. Different systems require different frequencies and effort levels.

Traditional penetrating sealers need reapplication every 2-3 years. For a 50-unit building, this translates to significant labor and coordination costs.

Liquid polyurethane coatings extend the cycle to 5-7 years, reducing reapplication frequency but still requiring periodic maintenance. The coating can be spot-repaired if small areas fail, but large sections typically need complete recoating.

Fiberglass-reinforced membranes shift the paradigm to 15-20 years between major applications. Maintenance becomes inspecting the membrane for damage, addressing any cracks promptly, and cleaning debris. This dramatically reduces the maintenance burden and makes budgeting more predictable.

Sealing SystemReapplication FrequencyAnnual Labor Cost10-Year Total CostInspection Risk
Traditional SealerEvery 2-3 yearsModerateHighHigh
Liquid PolyurethaneEvery 5-7 yearsLowModerateModerate
Fiberglass MembraneEvery 15-20 yearsLowLowLow
Composite DeckingNeverMinimalLowestLowest

Composite decking requires minimal maintenance: annual cleaning and occasional inspection for damage. No sealing, no stripping, no reapplication cycles.

Pro Tip
Create a maintenance calendar tied to your sealing system choice. Document every application, inspection, and repair. This record protects you during [SB 326](/balcony-inspections-sb-721-sb-326-guide/) compliance reviews.

Professional Balcony Inspection Services and Material Selection

Selecting the right sealing alternative requires understanding your property’s specific conditions. Climate, exposure, building age, existing damage, and budget constraints all influence the decision.

Professional inspectors evaluate these factors systematically. They identify areas of existing water damage, assess the condition of fasteners and connections, and recommend sealing systems matched to your property’s risk profile.

Apex Balcony’s inspection process begins with a comprehensive structural evaluation. We identify water penetration patterns, wood rot, fastener corrosion, and membrane failures. From this baseline, we recommend sealing alternatives that address the specific vulnerabilities identified in your property.

For coastal properties with salt spray exposure, fiberglass membranes or liquid polyurethane offer better protection than traditional sealers. For inland properties with moderate exposure, liquid polyurethane may be sufficient. For properties planning major renovations, composite decking becomes economically viable.

Professional inspectors also understand regional climate performance data. A system that works well in temperate climates may fail in areas with extreme freeze-thaw cycles or intense UV exposure.

Cost-Benefit Analysis: 10-Year Performance and Total Ownership

The true cost of sealing alternatives emerges over a decade, not in the initial application. Traditional sealers appear cheap upfront but accumulate labor and material costs through repeated applications.

Consider a 50-unit apartment building with 2,000 square feet of balcony surface per unit. Traditional sealer applied every 2.5 years costs roughly $5-8 per square foot per application. Over 10 years, that’s 4 applications at $500,000-$800,000 in material and labor costs.

Liquid polyurethane costs more per application, roughly $12-15 per square foot, but extends the cycle to 6 years. Two applications over 10 years total $200,000-$300,000, plus reduced labor disruption and lower inspection failure risk.

Fiberglass membranes cost $20-30 per square foot installed but require only one application over 10 years. Total cost is $400,000-$600,000, but with minimal maintenance and very low inspection failure risk.

Composite decking costs $40-60 per square foot installed but eliminates sealing entirely. For a major renovation project, this becomes the most economical long-term choice despite high upfront cost.

These calculations assume no inspection failures or emergency repairs. When traditional sealers fail inspection, the cost spike becomes dramatic. Emergency stripping and expedited application can double or triple the per-unit cost.

Building owners managing tight reserve funds often default to traditional sealers because of lower upfront cost. But this choice frequently leads to inspection failures, emergency repairs, and ultimately higher total cost. Evaluating alternatives on a 10-year basis reveals that mid-range options like liquid polyurethane or fiberglass membranes often provide better value.


Choosing the right alternatives to traditional balcony wood sealing requires balancing upfront cost, maintenance burden, compliance risk, and long-term durability. Traditional sealers offer the lowest entry point but create ongoing maintenance obligations and inspection vulnerability. Liquid polyurethane coatings provide a practical middle ground with extended reapplication cycles. Fiberglass membranes deliver superior long-term protection for properties willing to invest upfront. Composite decking eliminates sealing entirely but suits only renovation or new construction scenarios.

Apex Balcony’s inspection process identifies which alternative matches your property’s specific conditions and budget constraints. Our licensed inspectors understand California’s SB 326 and SB 721 requirements and recommend sealing systems that satisfy regulatory compliance while minimizing lifetime ownership costs. Book an inspection to assess your property’s current condition and receive a tailored recommendation for the sealing alternative that protects your residents and your reserve fund.

Frequently Asked Questions

Q: What is the difference between penetrating oils and film-forming sealers for balconies?

A: Penetrating sealers absorb into the wood grain, allowing it to breathe while providing moisture resistance; they require frequent reapplication. Film-forming sealers create a protective surface layer that lasts longer but can trap moisture if improperly applied. For elevated balconies subject to moisture exposure, film-forming coatings and membrane systems offer superior protection against water damage and wood rot.

Q: Are there eco-friendly alternatives to standard balcony wood sealants?

A: Yes. Low-VOC liquid polyurethane coatings and water-based formulas reduce environmental impact compared to oil-based sealers. Composite decking made from recycled plastics and wood fiber eliminates sealing entirely. Fiberglass-reinforced membrane systems also provide sustainable protection. These alternatives align with modern building standards while minimizing harmful chemical exposure and reducing maintenance waste over the product’s lifespan.

Q: How do I know which sealing alternative meets SB 326 balcony inspection requirements?

A: SB 326 requires that balconies prevent water intrusion and structural failure. Licensed inspectors evaluate whether your chosen alternative, whether liquid coating, membrane, or composite material, adequately protects against moisture penetration and wood deterioration. Professional balcony inspection services verify that your selected solution meets compliance standards and provides the durability required for elevated exterior elements. Consult with an inspector before committing to a specific product.

Q: What maintenance schedule should I follow for elevated wood decks with alternative coatings?

A: Liquid polyurethane coatings typically need reapplication depending on climate and foot traffic. Fiberglass-reinforced membranes can last 20+ years with minimal maintenance, primarily visual inspection for damage. Composite decking requires only periodic cleaning and no resealing. Regular inspections identify early signs of wear, peeling, or water infiltration, helping you address issues before they compromise structural integrity or violate SB 326 requirements.

Book inspection

Posted in Blog

Balcony Maintenance & Liability Protection: A Guide

Posted on September 2, 2026 by Apex Balcony admin
Balcony Maintenance & Liability Protection: A Guide

Table of Contents

  • Why Balcony Maintenance Is Critical for Liability Protection
  • Common Causes of Balcony Structural Failure
  • SB 326 Inspection Requirements and Your Legal Obligations
  • Liability Risks of Deferred Maintenance
  • Hiring a Licensed Balcony Inspector
  • Documentation and Risk Mitigation Strategies
  • Preventative Maintenance Best Practices
  • Conclusion: Protecting Your Property and Residents
  • Frequently Asked Questions

Last Updated: August 31, 2026

Why Balcony Maintenance Is Critical for Liability Protection

Balcony failures start small, a hairline crack, water pooling behind sealant, rust bleeding through paint, and most property owners miss the early warnings. Then comes collapse, injuries, lawsuits, and the question that haunts every HOA board: “Why didn’t we catch this sooner?”

Balcony maintenance liability is one of the highest-risk exposures in multifamily property management. A single structural failure triggers personal injury claims, regulatory fines, and criminal negligence charges. The liability falls on you personally if you’re on the board or in management.

California law doesn’t give you time to delay. SB 326 and SB 721 impose strict inspection timelines and liability standards (leginfo.legislature.ca.gov). Miss a deadline or overlook a defect, and your insurance won’t cover you.

This guide covers the legal requirements, real risks of deferred maintenance, how to hire the right inspector, and documentation practices that hold up in litigation.

Common Causes of Balcony Structural Failure

Balcony collapse typically results from water intrusion, corrosion of steel reinforcement, dry rot in wood framing, or exceeded load-bearing capacity.

Water is the primary culprit. When moisture penetrates the balcony deck or seeps behind railings, it attacks structural elements underneath. In concrete balconies, water reaches the steel rebar and triggers oxidation. In wood-framed systems, it causes dry rot that weakens load-bearing joists. Sealant failure, cracked caulk, deteriorated flashing, or gaps around penetrations allow water to penetrate.

Close-up of severely deteriorated balcony railing with visible rust stains, peeling paint, and water-damaged wood framing showing deep cracks and wood rot discoloration

Corrosion of reinforcing steel is particularly dangerous because it’s invisible until failure is imminent. When rebar oxidizes, it expands, pushing against concrete and causing spalling, the surface breaks away in chunks. Once spalling begins, the process accelerates. Exposed rebar corrodes faster, concrete deteriorates more, and structural capacity declines rapidly.

Drainage system failures compound the problem. Balconies need positive drainage to shed water quickly. When drains clog, gutters overflow, or the deck slopes incorrectly, water pools. Standing water penetrates every crack and gap. Property managers who defer maintenance on drainage systems are inviting failure.

Unpermitted repairs and modifications create hidden liabilities. A contractor patches a balcony deck without proper waterproofing. Someone adds a hot tub without checking load limits. These shortcuts feel like cost savings until they cause collapse and become evidence of negligence.

Age alone doesn’t cause failure, but deferred maintenance does. A properly maintained 40-year-old balcony will outlast a neglected 10-year-old one. The difference is whether water has been kept out and structural integrity preserved.

SB 326 Inspection Requirements and Your Legal Obligations

California’s SB 326, effective January 1, 2018, requires detailed structural inspections of exterior elevated elements on residential buildings with three or more units. The law applies to balconies, decks, stairs, and other elevated components that could fail and injure residents or the public.

You must conduct a detailed structural inspection within nine years of the building’s original completion date, then every nine years thereafter (leginfo.legislature.ca.gov). For buildings completed before January 1, 2018, the first inspection deadline was January 1, 2025. If your building missed that deadline, you’re already in violation.

The inspection must be performed by a licensed engineer (civil or structural) or an architect (leginfo.legislature.ca.gov). The inspector must examine structural condition, identify defects, and assign a grade based on structural integrity. The report must document findings in detail.

Here’s where liability becomes personal: if an inspection reveals defects, California law requires you to notify residents and take corrective action. You can’t ignore the report or wait for funding. The law holds property owners and HOA boards accountable for acting on inspection findings. Failure to act creates documented negligence if an incident occurs.

The grading system matters. An “A” grade means good condition. A “B” grade indicates minor defects needing repair. A “C” grade means significant structural defects requiring repairs. A “D” grade indicates the element is unsafe and must be closed or repaired immediately. If your inspector assigns a C or D grade and you don’t act, you’ve created a paper trail proving you knew about the hazard.

SB 721, effective January 1, 2026, raises the bar further by expanding inspection requirements, shortening timelines for certain buildings, and imposing stricter liability standards on property owners who fail to maintain balconies safely.

The legal obligation is clear: inspect, document, and remediate.

Liability Risks of Deferred Maintenance

Deferred maintenance is a choice, and courts treat it that way. When a balcony fails and someone is injured, the first question isn’t “Was the building old?” It’s “Did the owner know about the defect and fail to fix it?”

If your inspection report shows a C-grade balcony and you did nothing, you’ve admitted knowledge and negligence in writing. The plaintiff’s attorney will use that report as Exhibit A. Your defense becomes nearly impossible. Insurance companies know this. Many policies specifically exclude coverage for damages resulting from known defects that weren’t repaired.

The financial exposure is staggering. A single balcony collapse can result in multiple injury claims, wrongful death suits, and regulatory fines. Settlements often exceed $1 million. In the 2015 Berkeley incident, six people died in a balcony collapse. The property owner faced criminal charges, civil liability, and regulatory penalties.

HOA board members face personal liability in many states. If the board votes to defer repairs despite an inspection report, board members can be sued individually. Insurance may not cover personal liability for board decisions that ignore professional recommendations.

Regulatory fines add another layer. California’s Department of Housing and Community Development can impose penalties for SB 326 violations. These are designed to force compliance.

The cost of addressing defects early is always less than the cost of litigation, settlements, and regulatory penalties. A $50,000 balcony repair prevents a $2 million lawsuit.

Hiring a Licensed Balcony Inspector

Not all inspectors are equal. Your inspector must be a licensed structural engineer or architect, not a general contractor or handyman. California law is specific: only licensed professionals can certify SB 326 compliance.

Licensed structural engineer in safety vest and hard hat conducting detailed balcony inspection using measurement tools and laser level, with clipboard and documentation materials visible, examining concrete railing closely

Start by verifying credentials. Ask for proof of licensure and check the California Department of Consumer Affairs database to confirm the inspector holds a current, active license. Ask how many balcony inspections they’ve completed. Someone who’s inspected 500 balconies will catch defects that a generalist might miss.

Ask about their inspection methodology. Do they use moisture meters to detect hidden water intrusion? Do they take core samples? Will they document findings with photos and measurements? A thorough inspection takes time. If an inspector quotes a suspiciously low price or promises to finish your building in a day, that’s a warning sign.

Discuss their reporting process. Will you get a detailed written report with photos, measurements, and specific repair recommendations? Will they grade each element according to SB 326 standards? The report is your legal protection and needs to be thorough and defensible.

Ask about their experience with your building type. A balcony system in a 1970s concrete building fails differently than one in a 2000s wood-frame building.

Finally, confirm they carry errors and omissions insurance. If their inspection misses a defect and someone is injured, you want recourse.

Apex Balcony’s inspectors bring decades of combined construction and design experience. We specialize in California SB 326 and SB 721 compliance and conduct detailed inspections of all elevated exterior elements. Our reports are thorough, defensible, and designed to guide you toward necessary repairs with confidence. We work with buildings of all sizes and understand the specific challenges each faces.

Documentation and Risk Mitigation Strategies

Your inspection report is your legal shield. It proves you knew about defects and took action. But the report alone isn’t enough. You need a documented system showing due diligence at every step.

Create a balcony maintenance log recording every inspection, repair, and preventative maintenance activity. Include dates, descriptions, contractor names, and costs. When a defect is identified, document the date it was reported, when residents were notified, and when repairs began. This timeline proves you acted responsibly.

Photograph everything, before repairs begin, during the work, and after completion. Photos create a visual record of defects and remediation that’s powerful in litigation.

Establish a repair timeline and stick to it. When your inspection report identifies defects, prioritize them: immediate safety hazards first, then significant structural issues, then minor defects. Communicate the timeline to residents.

Book inspection →

Maintain communication records. Email board decisions about balcony maintenance to all members. Document that the board reviewed inspection findings and approved repairs. These communications prove the board took the issue seriously.

Create a preventative maintenance schedule. Establish a regular inspection cycle, perhaps annual visual inspections between formal SB 326 inspections. Schedule sealant replacement before it fails. Clean drains before they clog.

Keep insurance updated. After inspection findings, inform your insurance carrier immediately. Some policies require notice within specific timeframes. Failure to notify can void coverage.

Document contractor vetting. When you hire someone to perform repairs, verify their license and insurance. Request references. Keep copies of these verification steps.

Preventative Maintenance Best Practices

Preventative maintenance is the most cost-effective liability strategy.

Sealant and Waterproofing: Inspect sealants annually. Look for cracks, gaps, or areas where sealant has pulled away from the substrate. Replace compromised sealant immediately. Waterproofing failures accelerate deterioration.

Drainage Systems: Keep all drains and gutters clear. Schedule cleaning at least twice per year. Ensure water drains away from the building. Poor drainage is one of the easiest problems to prevent and most damaging if neglected.

Visual Inspections: Conduct quarterly walkthroughs of all balconies. Look for visible cracks, rust stains, peeling paint, soft spots in wood, or water pooling. Document what you see. Minor issues caught early are inexpensive to fix.

Railing and Guardrail Inspection: Check that railings are secure and meet code requirements. Grab them and test for movement. Loose railings are safety hazards and code violations.

Load Monitoring: Educate residents about load limits. Include load limits in lease agreements and resident communications. Make it clear that unauthorized modifications are prohibited.

Contractor Vetting: When repairs are needed, hire licensed professionals with balcony experience. Verify credentials before work begins. Require written warranties on materials and workmanship.

Seasonal Considerations: Climate affects balcony deterioration rates. In freeze-thaw climates, water that penetrates concrete expands when frozen, accelerating damage. In coastal areas, salt spray accelerates corrosion. Adjust your maintenance schedule based on local climate risks.

Documentation: Keep records of all maintenance activities. This creates a history showing responsible stewardship.

Conclusion: Protecting Your Property and Residents

Balcony maintenance isn’t an optional expense or deferred problem. It’s a liability management requirement. California law is explicit: inspect, document, and remediate. Courts hold property owners accountable for following this sequence. Insurance doesn’t cover negligence.

Invest in professional inspections, address findings promptly, and maintain preventative practices. This approach costs money upfront but prevents catastrophic liability exposure. The alternative, hoping nothing fails, is gambling with residents’ safety and your personal financial security.

Apex Balcony helps property owners across California navigate this landscape with confidence. Our licensed inspectors conduct thorough structural assessments that identify early signs of failure. We provide detailed reports that guide your repair decisions and create the documentation you need for liability protection. We work with buildings of all sizes and understand the specific challenges HOA boards and property managers face.

Book an inspection with Apex Balcony today. Let’s identify what your balconies need and create a clear path to compliance and safety.


Frequently Asked Questions

What’s the difference between SB 326 and SB 721?

SB 326, effective since 2018, requires detailed structural inspections of exterior elevated elements every nine years. SB 721, taking effect January 1, 2026, expands these requirements and shortens timelines for certain buildings. Both laws impose strict liability on property owners who fail to maintain balconies safely. If your building hasn’t had an SB 326 inspection since 2025, you may already be out of compliance.

Can I use a general contractor instead of a licensed engineer for inspections?

No. California law requires that SB 326 inspections be performed by a licensed structural engineer or architect. Using an unlicensed inspector creates liability because the inspection won’t satisfy legal requirements.

How much will repairs cost after an inspection?

Repair costs vary dramatically based on inspection findings. The inspection report will help you understand the scope and prioritize repairs.

What happens if my building failed an inspection and I haven’t done repairs yet?

You’re exposed to liability. If an incident occurs, the inspection report becomes evidence of negligence. Your insurance may not cover damages. The best course of action is to contact a licensed inspector immediately, get a current assessment, and develop a repair timeline.

Can I defer repairs if funding isn’t available?

Legally, no. California law requires that identified defects be repaired. You can phase repairs over time if necessary, but you must have a documented plan and be actively working through it. Indefinite deferral while residents occupy the building is negligence.

How do I know if my building needs SB 721 compliance?

SB 721 applies to residential buildings with three or more units. If your building is a multifamily property with three or more units, you’re subject to SB 721. The law takes effect January 1, 2026. If you’re uncertain whether your building qualifies, contact Apex Balcony for a consultation.

Frequently Asked Questions

What are the legal consequences of failing to maintain balconies?

Property owners and HOAs can face significant liability exposure when balcony maintenance is deferred. Negligence claims arise when structural failure causes injury or death. Courts assess whether owners knew or should have known about hazardous conditions. Failure to comply with SB 326 or SB 721 inspection mandates can result in fines and increased liability in litigation. Insurance may deny claims if inspections were not performed or documented. Criminal charges have been pursued in cases involving preventable deaths.

How do SB 326 and SB 721 impact property liability?

SB 326 requires inspections of balconies and elevated exterior elements in buildings with three or more units. SB 721 expanded these requirements and set stricter timelines. Compliance demonstrates due diligence and reasonable care, which strengthens your legal defense. Non-compliance creates presumptive negligence, courts assume you failed your duty to residents. Documented inspections and remediation records are critical evidence that you acted responsibly. Insurance carriers often require proof of SB 326/SB 721 compliance before covering claims.

How often should elevated exterior elements be inspected for safety?

SB 326 and SB 721 require initial inspections within specified timeframes based on building age and type. Follow-up inspections are typically required every six years for buildings in good condition, or sooner if issues are found. However, climate, exposure to moisture, and visible signs of distress may warrant more frequent inspections. Documentation of inspection frequency is essential for demonstrating compliance and due diligence in liability defense.

Can property owners be held personally liable for balcony structural failure?

Yes. Property owners and HOA board members can face personal liability if negligence is proven. Courts examine whether owners knew about hazardous conditions and failed to act. Lack of inspection records strengthens negligence claims. However, documented inspections, reasonable repair timelines, and professional remediation efforts demonstrate good-faith compliance and reduce personal liability exposure. Insurance and proper documentation are your primary defenses against personal judgment.

Book inspection

Posted in Blog

5 Best Balcony Waterproofing Materials for HOAs

Posted on September 2, 2026 by Apex Balcony admin
5 Best Balcony Waterproofing Materials for HOAs

Table of Contents

  • Why Balcony Waterproofing Materials Matter for HOAs
  • Quick Comparison Table: Balcony Waterproofing Materials at a Glance
  • 1. Polyurethane Coatings: Fast, Durable, and Cost-Effective
    • Sikalastic-726 Balcony One Shot
    • Tremco Vulkem OC810 Pedestrian Deck Coating
  • 2. Cementitious Systems: Structural Strength and Code Compliance
    • Pli-Dek Waterproof Decking Systems
    • Westcoat ALX Waterproofing System
  • 3. Vinyl Membranes: Low Maintenance and Long-Term Value
    • Duradek Vinyl Deck Membranes
  • SB 326 Balcony Inspection Requirements and Material Selection
  • Signs of Balcony Structural Failure to Watch For
  • Balcony Waterproofing Maintenance Schedule for HOAs
  • Choosing the Right Material for Your HOA
  • Frequently Asked Questions

Last Updated: September 1, 2026

Why Balcony Waterproofing Materials Matter for HOAs

Water intrusion into balconies ranks among the costliest problems facing homeowners associations. When moisture penetrates concrete, wood framing, or structural elements, it triggers cascading damage: rust on rebar, wood rot, mold growth, and eventual structural compromise. California’s SB 326 and SB 721 laws now mandate that HOAs inspect and certify balcony safety, which means waterproofing condition directly affects your legal compliance and liability exposure.

Choosing the right balcony waterproofing materials means selecting a system that withstands California’s climate cycles, resists pedestrian traffic, meets building codes, and lasts for decades without costly recoating.

Quick Comparison Table: Balcony Waterproofing Materials at a Glance

Material TypeBest ForSubstrateDurabilityMaintenanceInstallation Speed
Polyurethane CoatingsFast turnarounds, cost-conscious HOAsConcrete10-15 yearsLow1-3 days
Cementitious SystemsCode compliance, structural strengthPlywood or concrete15-20 yearsModerate5-10 days
Vinyl MembranesLow maintenance, long-term valueConcrete or wood15-20+ yearsMinimal2-5 days
Liquid-Applied MembranesCustom finishes, decorative optionsConcrete12-18 yearsModerate3-7 days
Sheet MembranesWood-frame balconies with concrete toppingWood20+ yearsMinimal1-2 days

1. Polyurethane Coatings: Fast, Durable, and Cost-Effective

Polyurethane coatings deliver waterproofing and a finished surface in a single application. They’re liquid-applied, cure quickly, and bond directly to concrete. For HOAs facing budget pressure and tight schedules, polyurethane systems offer speed without sacrificing durability.

The material flexes with concrete’s natural expansion and contraction, resisting crack-bridging failures. UV-stable formulations hold their color under intense sun exposure. Most polyurethane coatings last 10-15 years before requiring maintenance recoating (peer-reviewed research). Installation must happen in dry conditions, which can complicate scheduling in coastal or rainy climates.

Sikalastic-726 Balcony One Shot

Sikalastic-726 is a two-component aliphatic polyurethane engineered for balcony pedestrian traffic. It applies as a single 35-mil coat with no primer needed on properly prepared concrete. The texture is integrally molded in for slip resistance, providing waterproofing and safety surface in one step.

Most polyurethane systems require multiple coats; Sikalastic-726 collapses this into one application, cutting labor time significantly. It’s UV-resistant and handles deicing salts without degradation.

Pro Tip
Sikalastic-726 requires concrete moisture content below 3% before application. Use a calcium chloride moisture test to verify. Rushing this step is the leading cause of adhesion failure.

Tremco Vulkem OC810 Pedestrian Deck Coating

Tremco Vulkem OC810 is a single-component aliphatic polyurethane designed for light pedestrian traffic on balconies and roof decks. It applies in one coat, cures quickly, and offers UV stability with rubber aggregate for slip resistance.

Single-component means no mixing and faster application by crews less experienced with two-part systems.


2. Cementitious Systems: Structural Strength and Code Compliance

Cementitious waterproofing systems use fiber-reinforced cement as the base material, often applied over a membrane layer and finished with a topcoat. They create a concrete-like surface that’s durable, slip-resistant, and deeply integrated with the substrate.

The primary advantage is structural integrity. Cementitious coatings bond mechanically to the substrate and resist abrasion from foot traffic. They handle thermal cycling without delamination and meet stringent building codes. California’s Title 24 energy standards favor these systems because they can incorporate solar-reflective finishes.

Installation takes 5-10 days and is labor-intensive, involving multiple layers, substrate preparation, membrane application, reinforcing mesh, and topcoat. If the substrate has structural issues, the system won’t fix them; it will only seal them temporarily.

Pli-Dek Waterproof Decking Systems

Pli-Dek is a fiberglass-reinforced cementitious system engineered for balconies and elevated decks. It’s ICC-ES approved and explicitly complies with California SB 326 and SB 721 requirements. The system includes a seamless waterproof barrier, slip-resistant surface, and customizable decorative finishes.

Pli-Dek handles both plywood and concrete substrates. When your inspector certifies balcony condition under SB 326, a Pli-Dek installation provides documented proof of code-compliant waterproofing, reducing liability exposure.

Watch Out
Pli-Dek systems require structural repairs to be completed BEFORE waterproofing installation. If your inspection reveals rotted wood or failed framing, those must be replaced first. Waterproofing over deteriorated substrate is a code violation and will fail inspection.

Westcoat ALX Waterproofing System

Westcoat ALX is a fiberglass-reinforced cementitious system designed for plywood decks. It includes a sheet membrane base, metal lath reinforcement, and a topcoat that can incorporate solar-reflective technology to meet California Title 24 energy requirements.

ALX is strong for high-traffic areas because metal lath reinforcement distributes loads and prevents crack propagation. The system accommodates structural movement better than single-coat systems, which matters for older buildings with settling issues.


3. Vinyl Membranes: Low Maintenance and Long-Term Value

Vinyl membranes are sheet-applied waterproofing systems that combine waterproofing and finished surface in a single product. They’re installed by authorized dealers, come in multiple colors and textures, and require minimal maintenance, just periodic cleaning.

A vinyl membrane is installed once and typically lasts 15-20+ years without recoating. There’s no need for topcoat renewal, no UV degradation to manage, and no adhesion failures from moisture infiltration. For HOAs with limited reserve budgets, the low maintenance profile is attractive.

Vinyl membranes cost more initially than liquid-applied coatings and must be installed by authorized dealers, limiting contractor flexibility.

Duradek Vinyl Deck Membranes

Duradek is a vinyl deck membrane system installed only by trained, authorized Duradek dealers. It’s a single-product solution: waterproofing, finished surface, and slip resistance all in one layer. The material is textured, UV-resistant, and includes mold and mildew inhibitors.

Duradek comes with a 15-year warranty and a realistic 20-30 year lifespan if properly installed. Once installed, maintenance is just occasional cleaning, no recoating required.

Best For
HOAs with multi-year reserve budgets and properties where balconies will remain in service for 15+ years without major renovation. The higher upfront cost is offset by minimal maintenance and long service life.

SB 326 Balcony Inspection Requirements and Material Selection

California’s SB 326 requires that HOAs inspect all exterior elevated elements, including balconies, decks, stairs, and railings, every nine years and certify their structural integrity. The law doesn’t mandate specific waterproofing materials, but it requires that whatever system is in place be documented and certified as code-compliant.

Some systems come with built-in code compliance documentation. Pli-Dek and Westcoat ALX are ICC-ES evaluated and explicitly compliant with SB 326 requirements. Polyurethane coatings and vinyl membranes don’t inherently carry SB 326 certification, though they can still be code-compliant if properly installed over sound substrate.

For HOAs managing SB 326 compliance, choose a waterproofing material that comes with ICC-ES evaluation or explicit code compliance documentation. This simplifies your inspection process and reduces the risk of certification delays.

Book inspection →

California SB 326 requirements for balcony inspections


Signs of Balcony Structural Failure to Watch For

Water stains on ceilings below balconies are the first warning. They indicate water is penetrating the waterproofing layer and pooling above the structural deck.

Visible cracks in the concrete or coating suggest structural movement or substrate failure beneath the waterproofing. Rust stains on balcony undersides mean water is corroding steel reinforcement inside the concrete. Once rebar begins rusting, structural integrity degrades rapidly.

Close-up of a deteriorating balcony edge showing water stains, cracked concrete, and rust streaks on metal reinforcement with visible moisture damage and peeling coating

Soft or spongy spots in wood-framed balconies indicate rot. If a screwdriver penetrates wood easily, water has compromised structural integrity. Delamination or peeling of existing coatings means the old waterproofing is failing and water is likely already infiltrating the substrate.

Watch Out
If your inspection reveals rust, rot, or structural cracks, structural repairs must be completed first, or new waterproofing will fail prematurely.

Balcony Waterproofing Maintenance Schedule for HOAs

Once waterproofing is installed, maintenance determines how long it actually lasts. A 10-year system can fail in 5 years if neglected, or last 15 years with proper care.

Monthly: Inspect for standing water or visible damage. Clear any debris blocking drainage.

Quarterly: Clean the balcony surface to remove dirt, algae, and organic growth. Use a soft-bristle brush and mild detergent. Never pressure wash polyurethane or cementitious coatings.

Annually: Perform a detailed visual inspection before winter. Look for new cracks, seam separation, or coating wear. Check flashing and edge details for gaps or deterioration.

Every 3-5 years: Schedule a professional inspection. Polyurethane coatings should be inspected every 3 years for wear patterns. Cementitious systems and vinyl membranes can extend to 5 years.

Before winter: Ensure all drains and scuppers are clear. Standing water in freeze-thaw climates will expand and crack the waterproofing layer.

Property manager or maintenance worker inspecting a balcony surface, checking for cracks and wear patterns, holding a clipboard and taking notes, with natural daylight lighting

Recoating schedule: Polyurethane coatings typically need recoating after 10-15 years. Cementitious systems and vinyl membranes last longer and may not require recoating during the typical 30-year building cycle.

The cost of preventive maintenance is negligible compared to the cost of water damage.


Choosing the Right Material for Your HOA

Your choice depends on four factors: substrate type, budget, timeline, and maintenance tolerance.

Concrete balconies with tight timelines: Polyurethane coatings (Sikalastic-726 or Tremco Vulkem OC810) are your fastest option. Installation takes 1-3 days, and the balcony is usable within a week.

Plywood balconies requiring code compliance: Cementitious systems (Pli-Dek or Westcoat ALX) are the best choice. They’re ICC-ES evaluated, explicitly compliant with SB 326, and provide structural strength.

Properties prioritizing low maintenance: Vinyl membranes (Duradek) offer the longest service life with minimal upkeep. Upfront cost is higher, but 20-year longevity and no recoating requirements offset the initial investment.

Mixed-substrate properties or complex flashing details: Liquid-applied membranes allow custom detailing around penetrations and transitions.

For most California HOAs managing SB 326 compliance, a professional inspection is the first step.


Frequently Asked Questions

Q: What is the best type of waterproofing for a balcony?

A: The best balcony waterproofing material depends on your substrate, budget, and traffic patterns. Polyurethane coatings like Sikalastic-726 offer fast installation and durability for light traffic. Cementitious systems like Pli-Dek provide structural strength and code compliance for concrete or plywood decks. Vinyl membranes like Duradek deliver low maintenance and 15+ year lifespans. For California HOAs, ensure your choice meets SB 326 compliance requirements and accommodates thermal expansion and moisture vapor transmission.

Q: How do I know if my balcony shows signs of balcony structural failure?

A: Key warning signs include water stains or discoloration on ceilings below, visible cracks in concrete or wood framing, rust on metal flashing or rebar, soft or spongy wood when probed, mold or mildew growth, and gaps between the balcony and building envelope. If you notice any of these, schedule a professional inspection immediately. Early detection prevents costly repairs and resident safety issues.

Q: How often should I perform balcony waterproofing maintenance?

A: Establish a balcony waterproofing maintenance schedule with inspections at least twice yearly (spring and fall), after severe weather, and annually after the first five years of installation. Check for debris accumulation, cracks, seam integrity, and drainage blockages. Clean gutters and drain pathways monthly. Document all findings. Most systems require recoating or resealing every 5-10 years depending on the material type and traffic exposure. Professional inspections every 3-5 years catch deterioration early.

Q: What does SB 326 balcony inspection requirements mean for my HOA’s waterproofing choices?

A: SB 326 mandates that California HOAs inspect all balconies and elevated exterior elements for structural safety and water intrusion. Your waterproofing material must be capable of preventing water infiltration into the structural frame and living spaces. Choose materials with proven crack-bridging ability, seam integrity, and UV resistance. Cementitious and polyurethane systems typically meet these standards. Hire a licensed inspector to verify compliance and identify repairs needed before selecting your waterproofing system.

Book inspection

Posted in Blog

Recent Posts

  • ADU Structural Engineering Requirements for California Permits
  • 7 Signs Your Home Needs a Structural Engineering Inspection
  • Definition of a Balcony: Types, Codes & Safety
  • Cantilever Beam Deck Construction: Code Rules
  • Third Party Inspection: A Guide for Property Owners

Recent Comments

No comments to show.

Archives

  • September 2026
  • August 2026
  • July 2026
  • June 2026

Categories

  • Blog
Logo
Created by Unilime.Group
  • Balcony Law
  • About us
  • Inspection services
  • FAQ
  • Blog

Call us ‪+1 818-806-7885‬
License: CSLB #1101305

Apex Balcony Inspection
‪+1 818-806-7885‬
[email protected]
4645 Van Nuys Blvd #201
Sherman Oaks CA 91403

Created by Unilime.Group