Logo
  • Balcony Law
  • About us
  • Inspection services
  • FAQ
  • Blog
  • Call us ‪+1 818-806-7885
  • Book now

Month: November 2026

What Landlords Need to Know About Balcony Safety Compliance

Posted on November 22, 2026November 22, 2026 by Apex Balcony admin
What Landlords Need to Know About Balcony Safety Compliance

Last Updated: November 20, 2026

Quick Summary

Balcony safety compliance for landlords is the legal duty to keep every elevated outdoor structure safe, inspected, and documented, covering railings, walking surfaces, supports, and waterproofing. California SB 721 requires periodic inspections of exterior elevated elements on covered multifamily buildings by a licensed professional, documented in writing.

  • A Berkeley balcony collapse in 2015 killed six people and pushed state lawmakers to act.
  • Lease clauses generally do not eliminate landlord liability for structural safety.
  • Routine visual checks are monthly to quarterly; professional inspections follow the statutory schedule.
  • Log findings as Critical, Serious, or Monitor, and escalate critical findings the same day.
  • Keep inspection reports, photos, repair invoices, and tenant notices for at least the statutory retention period.
Is your building SB 721 compliant?Apex Balcony inspects balconies, decks, and stairways for California landlords and HOAs, with reports built for compliance.

Book Your Inspection

Table of Contents

  • Why Balcony Safety Compliance Matters for Landlords
    • The Human and Financial Cost of Neglect
    • Your Duty of Care and Liability Exposure
  • California SB 721 Balcony Inspection Requirements
    • Which Buildings Are Covered and When Inspections Are Due
  • Landlord Balcony Inspection Checklist
    • Structural Integrity and Signs of Deterioration
    • Railings, Balustrades, and Guardrail Safety
  • Routine Visual Checks vs. Professional Inspections
  • How to Write a Balcony Safety Compliance for Landlords Letter
  • Balcony Inspection Report and Documentation for Insurance
    • The Compliance Workflow, Step by Step
    • Escalation Criteria: What Triggers Immediate Action
    • Tenant Communication Templates and Timelines
    • The Insurance File
  • Building Codes, Local Regulations, and Tenant Responsibilities
    • The Codes That Actually Govern a Balcony
    • A Jurisdiction Profile You Can Build in an Afternoon
    • Tenant Responsibilities That Actually Reduce Your Risk
  • Book Your Balcony Safety Inspection with Apex Balcony
  • Frequently Asked Questions

Why Balcony Safety Compliance Matters for Landlords

Balcony safety compliance for landlords is the legal duty to keep every elevated outdoor structure safe, inspected, and documented, railings, walking surfaces, supports, and waterproofing. This guide covers what you must do, when, and how to prove it.

The stakes are not abstract. A Berkeley balcony collapse in 2015 killed six people (Berkeley balcony collapse leaves 6 people dead). Incidents like these have pushed state lawmakers to act.

The Human and Financial Cost of Neglect

A failed balcony rarely fails without warning. Cracks, rust stains, soft wood, and pooling water show up first. Ignore them and the repair bill grows while the risk grows faster.

A single injury claim can outrun the value of the building, and insurers now ask pointed questions about inspection records before renewing a policy.

Your Duty of Care and Liability Exposure

Duty of care is the legal obligation to protect people who use your property from foreseeable harm, residents, guests, delivery workers, and anyone else who steps onto a balcony.

Liability exposure shows up in three places:

  • Civil lawsuits from injured parties
  • Fines and enforcement actions from local building departments
  • Insurance denial when records show you knew about a hazard and did nothing

A common mistake is assuming a lease clause shifts this risk to the tenant. Landlord liability for structural safety is generally not eliminated by lease terms.

California SB 721 Balcony Inspection Requirements

California SB 721 requires periodic inspections of exterior elevated elements on covered multifamily buildings by a licensed professional, documented in writing. Review the statute itself to confirm which buildings and elements are covered.

Which Buildings Are Covered and When Inspections Are Due

Inspection deadlines are set by the statute and tied to the building’s compliance period. If you own a covered building and have not checked your due date, do it now.

For a detailed breakdown of deadlines and building eligibility, see our guide to SB 721 inspection requirements for landlords.

Landlord Balcony Inspection Checklist

A landlord balcony inspection checklist is a structured list you work through on every walkthrough, covering structure, railings, surfaces, drainage, and connections. Use our California Balcony Safety Inspection Checklist to perform or prepare for the inspection described in this section.
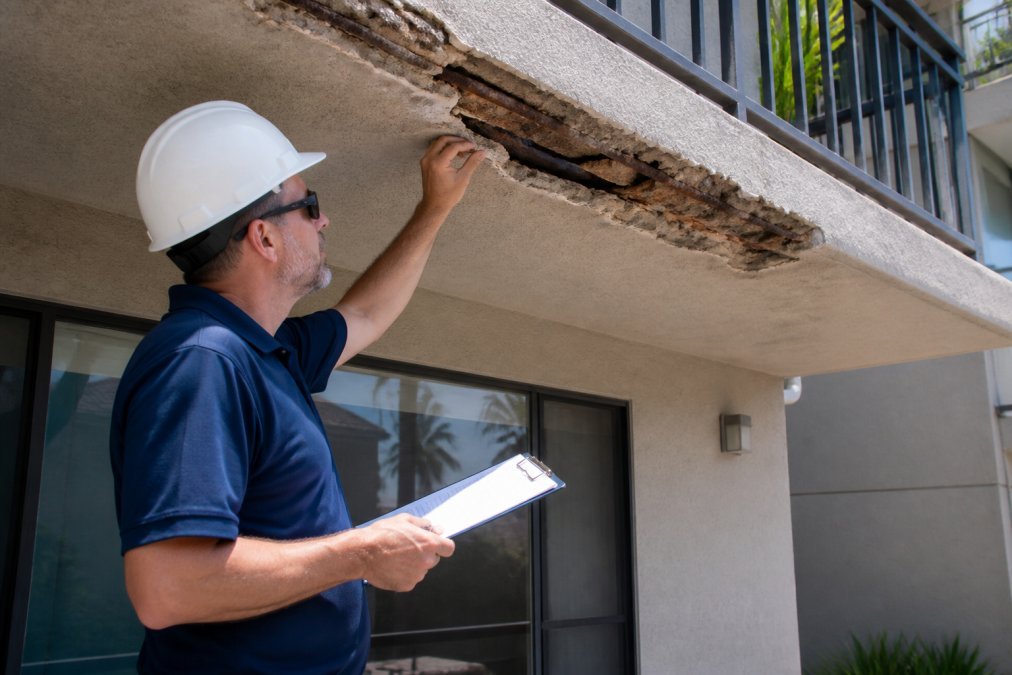
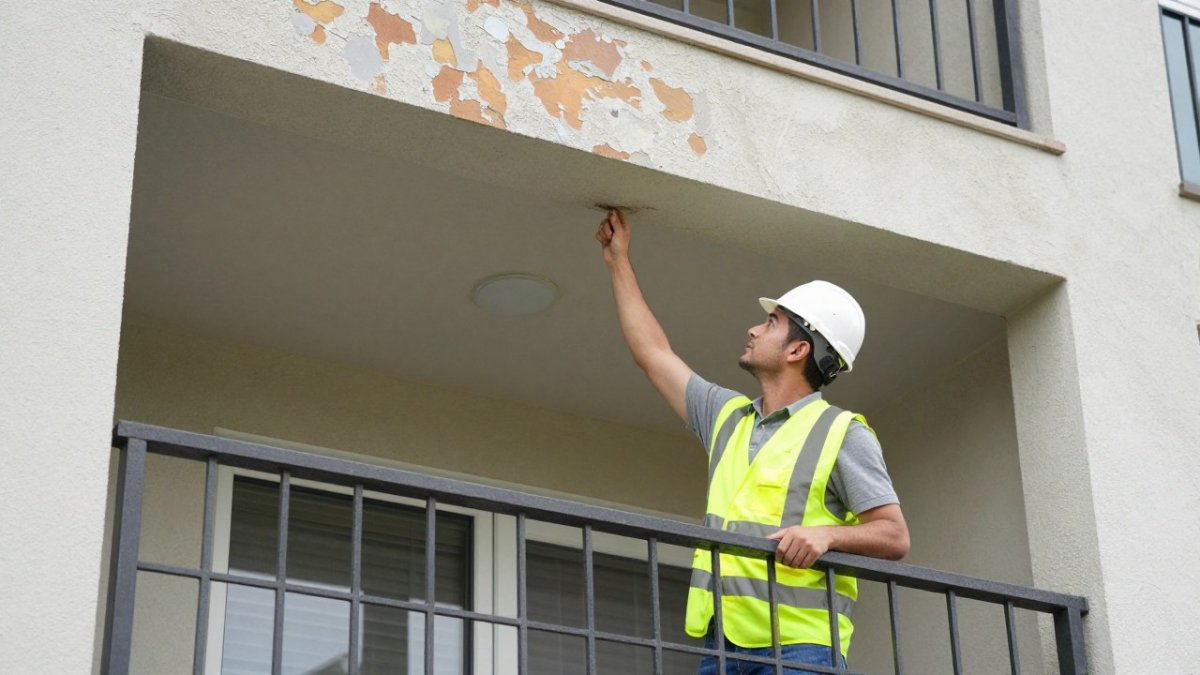
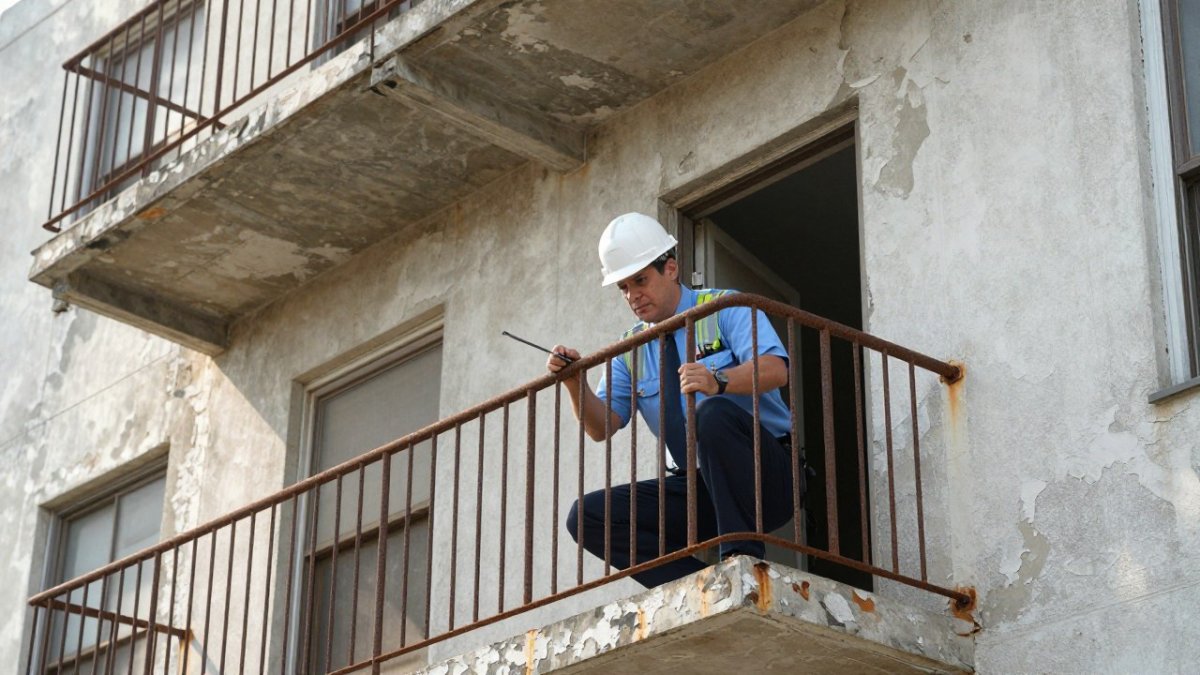
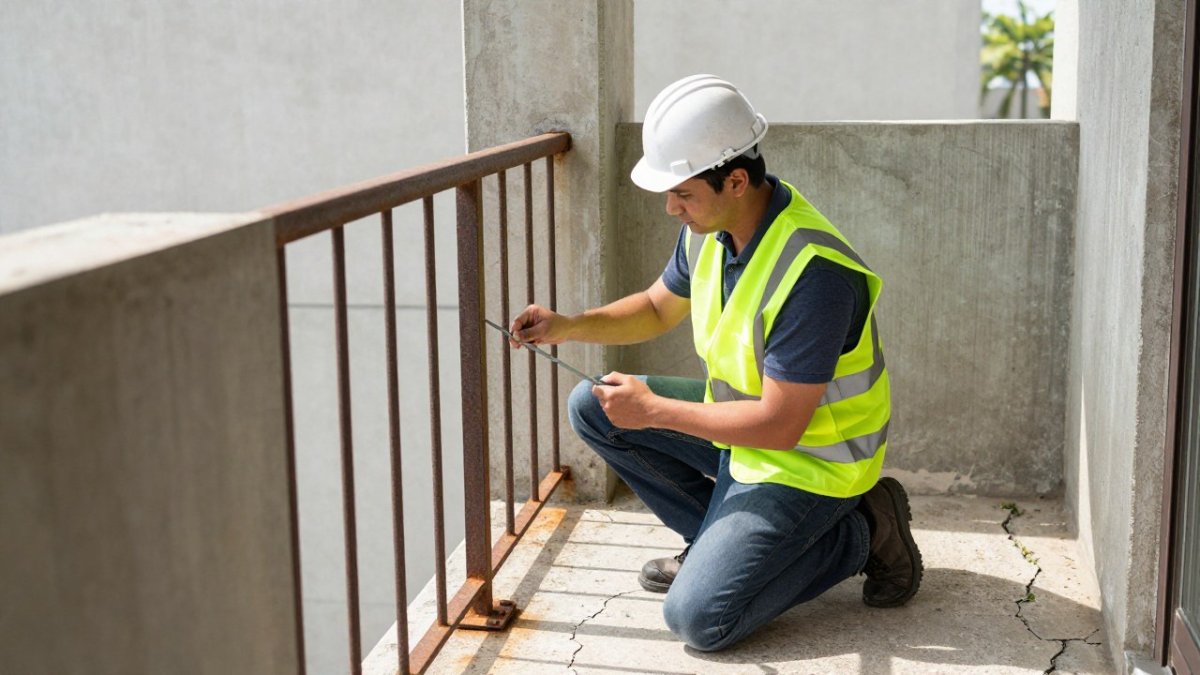
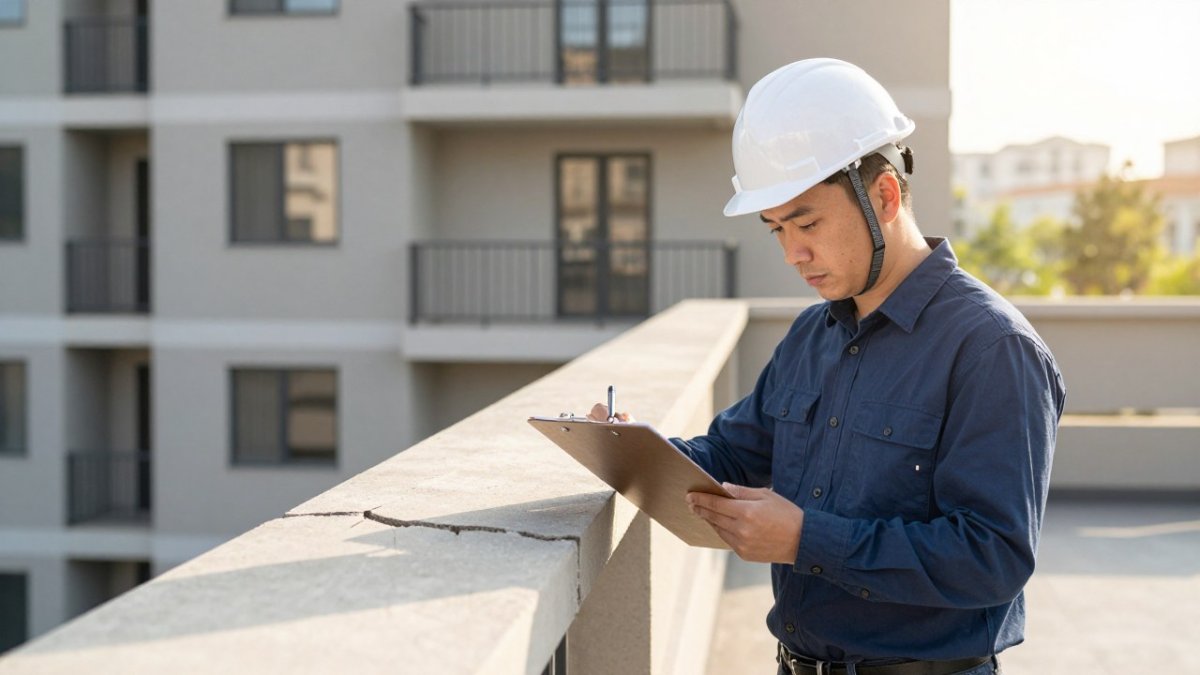
An inspector in a white hard hat examines a deteriorated, cracked concrete balcony ceiling while holding a clipboard beside a modern building.

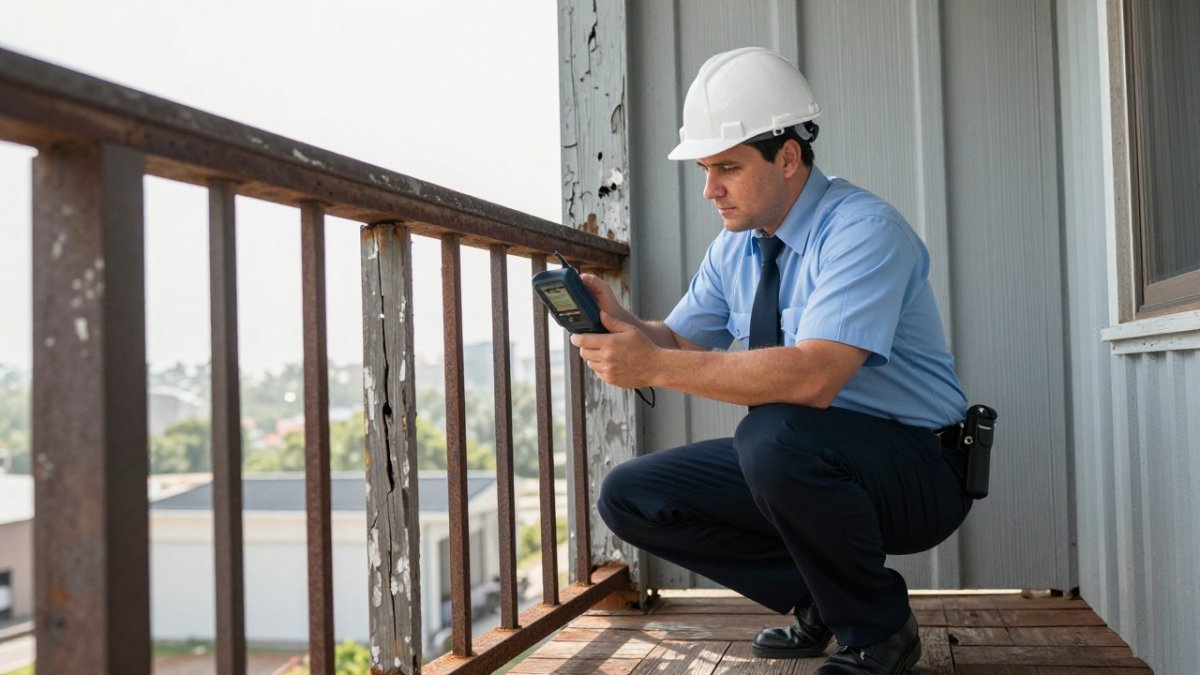
Start with a visual walkthrough from below, then move up top. Note anything that looks different from the last visit.

  • Cracks in concrete slabs, columns, or soffits
  • Rust stains or exposed rebar
  • Soft, spongy, or splintering wood

Structural Integrity and Signs of Deterioration

Structural integrity is the ability of a balcony’s supports and connections to carry the loads placed on them. When it fails, it usually fails at the connections first.

Watch for these warning signs:

  • Diagonal cracks that grow over time
  • Crumbling concrete at the edges
  • Dark streaks that suggest water intrusion

Water intrusion is a common contributor to balcony deterioration. Water gets in, wood rots or steel corrodes, and load capacity can drop without obvious warning.

Railings, Balustrades, and Guardrail Safety

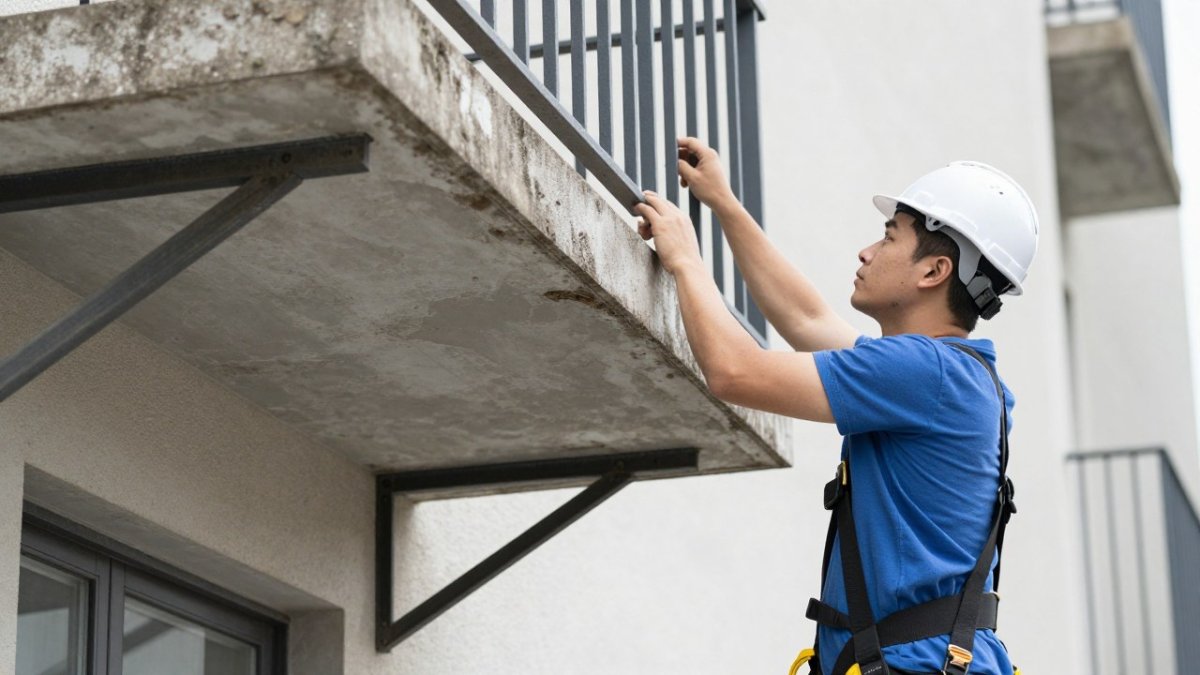
Railings are the last line of defense against a fall. A guardrail must hold firm when someone leans on it, and baluster gaps must be narrow enough to stop a child from slipping through.

Check these points every visit:

  • Push hard on each post. Any give means a problem.
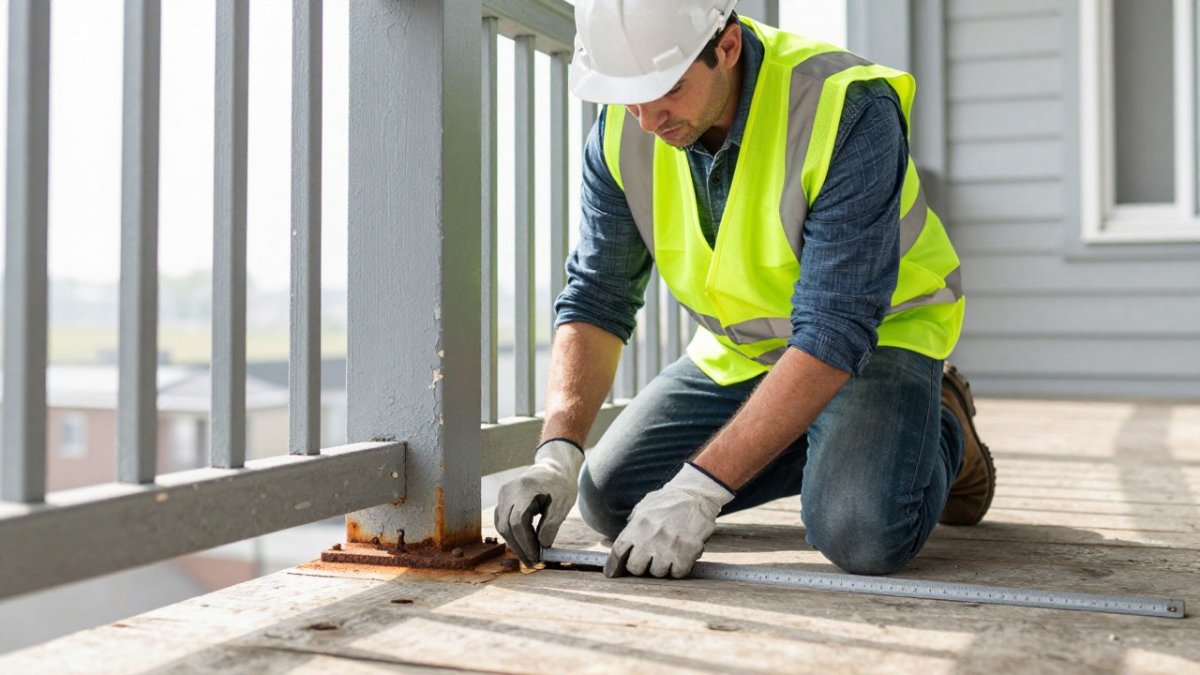
  • Look for rust at the base plate and anchors.
  • Confirm handrails are secure and continuous.

Routine Visual Checks vs. Professional Inspections

Routine visual checks and professional inspections are not the same thing. A visual check is a quick, frequent look for changes.

Here is how they compare:

FeatureRoutine Visual CheckProfessional Inspection
Who performs itOwner or property managerLicensed inspector
FrequencyMonthly to quarterlyPer statutory schedule
DepthSurface observationsStructural and material assessment
OutputNotes and photosSigned written report
Legal weightSupports your recordsMeets compliance requirements

A visual check catches problems early. A professional inspection proves compliance and gives you a report that holds up under scrutiny.

Watch out: treating a quick walkthrough as a substitute for a licensed inspection can leave a gap in your compliance record.

How to Write a Balcony Safety Compliance for Landlords Letter

A balcony safety compliance for landlords letter is a written notice to tenants about an upcoming inspection, stating the date, the reason, what access is needed, and what tenants should do to prepare.

Send it early, keep it plain, and include these elements:

  • The inspection date and a backup window
  • The legal basis for the inspection
  • Which areas need access

Keep a copy of every letter. It becomes part of your compliance file.

For help drafting proper notice language and handling tenant questions, see our guide on how to communicate safety inspection schedules to tenants.

Balcony Inspection Report and Documentation for Insurance

A balcony inspection report is the signed written record of what the inspector found and what needs fixing. It is the single most important document in your compliance file, but a report alone is not a compliance system. Insurers and auditors want a closed loop: inspection scheduled, findings logged, hazards escalated, repairs signed off, tenants notified, and records retained.

The Compliance Workflow, Step by Step

  1. Schedule the inspection before the deadline. Work backward from the statutory due date and book with enough lead time to reschedule if weather or access fails. Put the due date and booked date in a shared calendar with a reminder 60 days out.
  2. Send tenant notice. Use a written notice stating the date, backup window, legal basis, areas needing access, what to clear from the balcony, a contact name and phone number, and how long the inspection takes. Keep a copy in the compliance file.
  3. Conduct the inspection and collect the report. Confirm the inspector’s credential matches the statute and that the report is signed and dated.
  4. Log every finding with a severity rating. Use a three-tier scale: Critical (imminent risk of collapse or fall, restrict access immediately), Serious (deterioration that will become critical without repair, schedule repair on a defined timeline), and Monitor (early-stage wear, re-check at the next visual walkthrough).
  5. Escalate critical findings the same day. Restrict access, notify tenants in writing, and engage a licensed engineer or contractor for a repair scope. Do not wait for the next scheduled inspection.
  6. Complete repairs and obtain sign-off. Keep the contractor’s invoice, completion date, and photos of the repaired condition. If the repair changes the structure, confirm whether a re-inspection is required.
  7. Reopen the balcony only after sign-off. Document the reopening date and the basis for it.
  8. Retain the file. Keep the inspection report, inspector credentials, photos, repair invoices, tenant notices, acknowledgment records, and visual-check log together for at least the statutory retention period, and longer if your insurer requires it.

Escalation Criteria: What Triggers Immediate Action

Not every finding waits for the next cycle. Treat any of the following as a critical finding that requires same-day access restriction and specialist assessment:

  • Visible movement, sagging, or bounce in the walking surface or supports.
  • Diagonal or widening cracks in concrete, or exposed, corroded rebar.
  • Soft, spongy, or crumbling wood at post bases, ledgers, or connections.

Watch out: leaving a balcony open after documenting a critical finding creates avoidable liability exposure.

Tenant Communication Templates and Timelines

Keep three short templates ready so you are not drafting under pressure:

  • Inspection notice, sent at least the period required by your lease or local law before the visit; states date, window, access, and preparation.
  • Access restriction notice, sent the same day a critical finding is identified; states that the balcony is closed, the reason, the expected duration, and how tenants will be notified when it reopens. Ask for written acknowledgment and log who responded.
  • Reopening notice, sent after repair sign-off; states the reopening date and confirms the balcony is safe for normal use.

Log the date each notice was sent, the method (email, portal, posted notice), and any acknowledgment. If a tenant does not acknowledge, document the follow-up attempt.

The Insurance File

Insurance carriers may ask for records of inspections and repairs. Keeping a clear paper trail supports your position if coverage questions arise. Assemble the file in this order so an underwriter can follow it:

  • The inspection report and the inspector’s credentials.
  • Photos of every defect found, labeled by location and date.
  • The severity log and the escalation record for each critical finding.

To understand how documentation and non-compliance affect your policy, read our breakdown of SB 326 and SB 326 non-compliance insurance implications.

Building Codes, Local Regulations, and Tenant Responsibilities

Building codes set the minimum safety standards for railings, loads, and materials. Local regulations add inspection schedules and reporting rules on top. Both apply at the same time, and neither excuses you from the other.

The Codes That Actually Govern a Balcony

Three layers of rules apply to almost every multifamily balcony in the United States:

  • The model building code adopted by your jurisdiction. Many jurisdictions adopt a version of the International Building Code (IBC) or the International Residential Code (IRC), published by the International Code Council. Confirm the edition and numeric requirements (guardrail height, baluster spacing, live loads) that your local building department has adopted, since local amendments may differ.
  • State and local inspection statutes. These create a legal duty to inspect on a schedule, not just to build correctly. Examples include California SB 721 and California SB 326. Other states and cities have their own facade-inspection or balcony-inspection ordinances, and the trigger, frequency, and inspector qualifications differ, so confirm the rule for each property address rather than assuming one state’s schedule applies everywhere.
  • Occupational and fire rules for shared or commercial balconies. If a balcony is accessible to the public or used by employees, OSHA walking-working-surface and guardrail rules and local fire-code egress requirements can apply in addition to the building code.

A common pattern is for a landlord to read one state’s inspection statute and assume it is universal. It is not. Build a short jurisdiction profile for each property: which code edition is adopted, which inspection statute (if any) applies, who is qualified to inspect, and what the record-retention period is. That jurisdiction-by-jurisdiction approach also matters when evaluating access methods for inspections, since rope descent systems may be subject to requirements distinct from balcony-specific rules.

A Jurisdiction Profile You Can Build in an Afternoon

For each property, record these fields in your compliance file:

  1. Adopted code edition and local amendments, confirm with the local building department, not a blog.
  2. Applicable inspection statute or ordinance, name it, cite the section, and note the covered building types and element types.
  3. Inspector qualification, licensed architect, licensed engineer, certified inspector, or other credential the statute names.
  4. Inspection interval and first-due date, calculate from the statute’s compliance window, not from the date you bought the building.
  5. Report contents and filing destination, some jurisdictions require a report to be filed with the local agency, not just kept on site.
  6. Record-retention period, keep records at least as long as the statute requires, and longer if your insurer asks.

Watch out: treating a neighboring city’s schedule or a generic online summary as your legal requirement can lead to a violation. Confirm the requirement with the local building department.

Tenant Responsibilities That Actually Reduce Your Risk

Tenant duties are not a substitute for landlord duties, but they are a useful early-warning layer. Put these expectations in the lease and reinforce them in writing:

  • Report cracks, rust stains, soft wood, wobbly railings, or standing water immediately through a documented channel (a maintenance portal or written notice, not a phone call that leaves no record).
  • Do not overload the balcony with grills, planters, furniture, or storage; confirm the posted or lease-stated load limit and keep heavy items near the supported edge, not the cantilevered tip.
  • Keep drains and scuppers clear of leaves and debris.

Landlord responsibilities that run alongside them:

  • Schedule and pay for required inspections.
  • Complete safety-critical repairs within a defined timeframe, and restrict access to any balcony that is not safe.
  • Keep records for the required period and make them available to the inspector and insurer.

A shared duty of care works best when both sides know their role and every report leaves a paper trail. Give tenants a simple reporting channel, log every report, and close the loop in writing.

Book Your Balcony Safety Inspection with Apex Balcony

Compliance is a process, not a one-time event.

That is where we come in. Apex Balcony provides professional balcony safety inspections for California property owners.

We have worked with hundreds of building owners. If you are ready to protect your residents and your assets, book a balcony safety inspection with our team.


The real risk is not the inspection fee. It is the repair you never scheduled and the report you never wrote.

Frequently Asked Questions

What are landlords responsible for when it comes to balcony safety?

Landlords must maintain balconies, decks, and stairways in safe condition, which includes regular visual checks and professional inspections required by law. In California, SB 721 requires inspections of balconies and other elevated exterior elements for buildings with three or more units. Landlords also have a duty of care to warn tenants of hazards, restrict access to unsafe areas, and keep records of inspections and repairs. Failing to meet these responsibilities can lead to liability for injuries or property damage.

How often should landlords inspect balconies?

California SB 721 requires periodic professional inspections of balconies, decks, and stairways for covered buildings; confirm the current interval in the statute. Between professional inspections, landlords should perform routine visual checks at least annually and after any extreme weather event. A simple landlord balcony inspection checklist can help you spot cracks, corrosion, loose railings, or water damage early. Document each check and address any issues promptly to maintain balcony safety compliance.

What is California SB 721, and which rental buildings does it cover?

California SB 721 is a law that mandates periodic inspections of balconies, decks, and other elevated exterior elements in rental buildings with three or more dwelling units. Confirm the buildings covered and the qualified inspector types in the current statute. The law aims to prevent balcony collapses by identifying structural issues early. Compliance deadlines vary based on building type and location.

What should landlords do if a balcony inspection finds structural damage?

If an inspection reveals structural damage, landlords must act quickly to protect tenants. First, restrict access to the affected balcony until repairs are completed. Notify tenants in writing about the hazard and the repair timeline. Hire a licensed contractor to perform the necessary repairs, and obtain all required permits. Keep detailed records of the inspection report, repair invoices, and communication with tenants. This documentation demonstrates your commitment to balcony safety compliance and can help with insurance claims or legal defense.

GoogleAdd apexbalcony.com as a preferred source on Google →
Posted in BlogTagged balcony safety, balcony safety compliance for landlords, balcony safety compliance for landlords letter, california sb 721 balcony inspection requirements, landlord balcony inspection checklistLeave a Comment on What Landlords Need to Know About Balcony Safety Compliance

Best Hardware for Cantilevered Deck Connections: A Connector Guide

Posted on November 22, 2026November 22, 2026 by Apex Balcony admin
Best Hardware for Cantilevered Deck Connections: A Connector Guide

Quick Summary

The best hardware for cantilevered deck connections is a connector whose published uplift and download capacity meets the loads at the cantilever root, installed with its exact fastener schedule. Face-mount, concealed-flange, and skewed hangers can each work when their catalog ratings match the joist size and loads. Cantilevered deck connections need that verification, because hardware alone cannot fix undersized framing.

  • At the cantilever root, the hanger must resist both downward load and uplift from the overhang.
  • Face-mount hangers are often reasonable at the root if published uplift capacity meets the design uplift load.
  • Using screws in place of specified nails voids a hanger’s published capacity.
  • Skewed hangers are rated only at their factory angle and should not be substituted with field-bent hangers.
  • A hanger cannot correct framing that is too short or undersized for the cantilever length.
Book inspection

Table of Contents

  • Why Cantilevered Deck Connections Need Specialized Hardware
  • How Load Travels Through a Cantilevered Deck
  • Joist to Beam Connection Deck Hardware Options
    • Face-Mount Hangers
    • Concealed-Flange Hangers
    • Skewed and Specialty Hangers
    • When a Hanger Is the Wrong Tool at the Root
    • Installation Sequence at the Root
  • Deck Joist to Post Connection and Beam-to-Post Hardware
  • Simpson Strong-Tie Deck Connectors Compared by Capacity
    • Where to Find the Numbers
    • Comparing Hanger Families by Published Capacity
    • Beam-to-Post and Post-Base Capacity
    • What the Tables Do Not Tell You
    • A Practical Comparison Workflow
  • Railing Post to Deck Connection and Lateral-Load Ties
  • Choosing Hardware, Fasteners and Corrosion Protection for Your Next Repair
  • Frequently Asked Questions

Why Cantilevered Deck Connections Need Specialized Hardware

Cantilevered decks extend past their support points, which changes how every connection in the structure carries load, so cantilevered deck connections deserve closer attention than standard framing. Standard deck hardware is generally designed for joists that sit fully on a beam, so using it unchanged at a cantilever can leave the connection working outside its intended range.

Questions about whether the hardware on an existing cantilever is still appropriate are common among HOA boards and property managers. Answering them starts with understanding where the forces go. The connectors you choose determine whether those forces reach the structure safely.

How Load Travels Through a Cantilevered Deck

A cantilevered deck carries weight through a chain of connections. Loads move from decking to joists, from joists to beams, and from beams to posts or the building.

Two loads matter most. Gravity load pushes straight down from people, furniture, and snow. Lateral load pushes sideways, such as from a crowd leaning on a railing or wind against the structure.

Understanding this path helps you choose hardware that matches each point in the chain rather than applying one product everywhere. For the deeper construction and code rules behind these load paths, see cantilever beam deck construction code rules.

Joist to Beam Connection Deck Hardware Options

The joist-to-beam connection at the cantilever root is the single most heavily loaded connection in a cantilevered deck. Unlike a simple span, where the joist bears on the beam and the hanger mainly holds the joist in place, a cantilevered joist transfers both downward load and uplift through the same connection. The back span pushes down on the beam while the overhang tries to lift the joist, and the hanger must resist both. That is why hanger selection at the root deserves more scrutiny than the same hanger used mid-span.

Contractor installing a galvanized joist hanger on a beam for secure cantilevered deck connections

Face-Mount Hangers

Face-mount hangers attach to the face of the beam and cradle the joist from the side. They are the most common choice because they install quickly and are available in sizes for nearly every nominal joist dimension.

Watch out: face-mount hangers installed with the wrong nail size or with screws substituted for the specified nails lose their published capacity. The fastener schedule printed on the hanger or in the catalog is not a suggestion.

Concealed-Flange Hangers

Concealed-flange hangers hide most of the metal inside the joist, which gives a cleaner appearance from below. The trade-off is installation tolerance: the joist must be cut and fit precisely, and the fasteners must be driven at the angles the manufacturer specifies. Concealed-flange hangers are commonly used where the underside of the deck is visible, but they are less forgiving of field modifications than face-mount styles. Proper structural integration remains essential when transitioning to synthetic materials, a process detailed further in this composite deck installation guide.

Skewed and Specialty Hangers

When a joist meets the beam at an angle, common on octagonal or angled deck layouts, a skewed hanger keeps the connection aligned with the joist. Skewed hangers are manufactured for specific angles, and the published capacity applies only at that angle. Field-bent hangers are not equivalent to factory-skewed hangers and should not be substituted. Specialty hangers exist for double joists, dropped beams, and other conditions, but each is rated for its listed application only.

When a Hanger Is the Wrong Tool at the Root

A hanger is a connector, not a structural upgrade. If the cantilever is longer than the joist size and species can support, or if the back span is too short to resist the uplift the overhang creates, no hanger will correct the framing deficiency. The connection can be perfectly installed and still be part of an assembly that is not adequate. Signs that hardware alone will not solve the problem include joist deflection or sag at the overhang, visible movement at the root connection, and a back span that is short relative to the cantilever length.

Installation Sequence at the Root

The order of work matters. Set the beam, lay out the joist locations, cut the joists to the correct back-span and overhang lengths, then install the hangers with the specified fasteners before the decking goes down. Installing hangers after the joists are in place often forces the installer to use shorter or fewer fasteners than the schedule requires. Verify the fastener schedule against the catalog page for the exact model installed, and record the model number and fastener type for future inspection.

Deck Joist to Post Connection and Beam-to-Post Hardware

Below the beam, the load continues through posts. Post bases and standoff hardware keep the post off the concrete or footing, which limits moisture and rot. Beam-to-post connectors then tie the beam to the post so the two work as one unit.

Build a Stronger Deck: Joist Connections

Simpson Strong-Tie

Corrosion matters here more than almost anywhere else. Posts and footings sit in wet conditions, so hardware should be rated for the exposure it will face. Galvanized or stainless steel options are commonly used for this reason, and it is worth checking their coating against the lumber type you’re using, especially treated lumber.

Simpson Strong-Tie Deck Connectors Compared by Capacity

Deck hardware guidance often recommends connectors by category without comparing published capacities. This section compares them. For a cantilevered deck, the connector at the root of the cantilever is the one doing the hardest work, and its rated capacity is the number that determines whether the assembly is adequate. Simpson Strong-Tie publishes allowable load tables for every connector it sells, and those tables are the correct starting point for any comparison.

Where to Find the Numbers

Every Simpson Strong-Tie connector has a published load table in its product catalog and on the manufacturer’s website. The table lists allowable download, uplift, and lateral loads for each product, along with the fastener schedule and the lumber species and grade assumed in the test. A connector’s capacity is only valid when installed with the exact fasteners, in the exact member sizes, and at the exact angles listed. Change any of those variables and the published number no longer applies.

Comparing Hanger Families by Published Capacity

Face-mount hangers, concealed-flange hangers, and skewed hangers are not interchangeable by capacity. Within each family, Simpson publishes a range of models sized for different joist depths and widths, and the allowable download capacity varies substantially across that range. The practical comparison method is:

  1. Identify the joist size and species at the cantilever root.
  2. Look up the hanger models listed for that joist in the current catalog.
  3. Compare the allowable download and uplift values for each model against the loads your design requires.
  4. Confirm the fastener schedule, nail size, nail type, and fill, matches what the capacity table assumes.

A hanger that looks heavier than another is not necessarily stronger for your specific joist and load combination. The catalog table, not the visual bulk of the steel, is the authority.

Beam-to-Post and Post-Base Capacity

Beam-to-post connectors and post bases follow the same logic. Simpson publishes allowable uplift and lateral capacities for each model, and those values depend on the post size, the beam size, and the fastener schedule. Post bases with standoff height are rated differently from flush bases, and the standoff model you choose affects both moisture protection and capacity. Compare the published values for the post size you are actually using rather than assuming a larger base is always stronger.

What the Tables Do Not Tell You

Published capacities assume the connected members are sound, the fasteners are installed correctly, and the load path below the connection is adequate. They do not tell you whether a cantilever of a given length is permissible, that depends on span, lumber species and grade, joist dimensions, live and dead loads, and local code.

Watch out: substituting a different fastener, a shorter nail, a screw in place of a nail, or a different coating, voids the published capacity even if the connector looks identical. The table is only valid for the exact fastener schedule printed beside it.

A Practical Comparison Workflow

For a cantilever repair or new build, the comparison sequence is: determine the loads at the cantilever root, select the connector family that fits the framing geometry, pull the published capacity table for that family, and verify the allowable download and uplift exceed the required loads with the specified fasteners. If no catalog model meets the requirement at the available member size, the connection needs engineered design, not a larger-looking off-the-shelf part.

The table below sets out the four-step comparison sequence the article describes for checking published capacities.

StepWhat to doNote
1Identify joist size and species at the cantilever rootSets which models apply
2Look up listed hanger models in the current catalogMatched to that joist
3Compare allowable download and uplift valuesAgainst required design loads
4Confirm the fastener schedule matches the tableNail size, type and fill

Railing Post to Deck Connection and Lateral-Load Ties

Railings are often where lateral loads become most visible. A person leaning against a railing pushes the post sideways, and that force travels into the deck framing.

Lateral-load ties and railing post connectors help distribute that sideways force into the structure. Many common mistakes involve fastening a railing post only to the decking rather than to the framing beneath it.

Check the railing requirements for your jurisdiction, since local codes govern guardrail and post connection details. Our team can review how your railing ties into the framing during an inspection.

Choosing Hardware, Fasteners and Corrosion Protection for Your Next Repair

Hardware selection is only part of the job. Fasteners and coatings determine whether the connection performs as designed over time.

Start by confirming the connector’s listed application, then match the fastener type and length to the manufacturer’s installation table. Use the coating rated for your exposure, and avoid mixing metals that can accelerate corrosion.

Before any repair, have the existing cantilever assessed. Damaged or undersized connections can look intact from the outside. If you’re managing a multi-unit property, our inspections can help your board decide where repairs should start. You can book an inspection through the Apex Balcony website.

Frequently Asked Questions

What hardware is best for a cantilevered deck connection?

Engineered galvanized or stainless steel connectors rated for the specific load, such as face-mount or concealed-flange joist hangers, post bases and lateral-load ties, are typically the starting point. The right choice depends on the joist size, cantilever length and the fastener schedule published by the manufacturer. Check the rated uplift and lateral capacity in the manufacturer’s current catalog and confirm the design with a licensed engineer or your local building department before installing anything.

Can standard joist hangers be used for cantilevered deck framing?

Standard joist hangers are designed for gravity loads on simple spans, so they often do not account for the uplift and rotation forces a cantilever creates. Cantilevered framing usually calls for hangers and connectors listed for that application, installed with the fastener type and count the manufacturer specifies. Using the wrong hanger can leave the connection under-rated, so verify the listing before substituting parts.

How do you connect a deck railing post to the framing?

Railing posts are typically attached through the rim joist or the deck framing with through-bolts or structural post connectors, not with decking screws alone. The connection must resist the lateral loads that people place on the rail. Confirm the attachment method against the guardrail requirements in your local code, and have a qualified inspector review posts that will carry significant load.

Why does Apex Balcony recommend a professional inspection for existing cantilevered decks?

Corrosion, loose fasteners and water damage at connections often go unnoticed until a failure occurs. Apex Balcony’s licensed inspectors evaluate balconies, decks and stairways for signs of structural distress and help HOAs and property owners understand what repairs are needed for California compliance. Current pricing depends on the size and scope of the property, so visit the Apex Balcony website for a quote.

GoogleAdd apexbalcony.com as a preferred source on Google →
Posted in BlogTagged best hardware for cantilevered deck connections, cantilevered deck connections, deck joist to post connection, joist to beam connection deck, simpson strong-tie deck connectorsLeave a Comment on Best Hardware for Cantilevered Deck Connections: A Connector Guide

7 SB 721 Inspection Payment Options for Property Owners

Posted on November 21, 2026November 21, 2026 by Apex Balcony admin
7 SB 721 Inspection Payment Options for Property Owners

Last Updated: November 19, 2026

Quick Summary

SB 721 inspection payment options include checks from HOA accounts, ACH bank transfers, credit cards, installment plans, and reserve fund draws. Accepted methods vary by provider, so confirm them directly with Apex Balcony, and tie final payment to delivery of the written report.

  • An inspection fee covers the site visit and written report, not repairs.
  • ACH transfers typically clear within 1-3 business days for larger buildings.
  • Ask for the deposit amount and refund conditions in writing before paying.
  • Release final payment only after receiving the complete report with photos.
  • In condominium associations, the HOA typically pays from reserves or a special assessment.
Unsure what your SB 721 inspection should cost?Apex Balcony provides licensed SB 721 and SB 326 inspections with clear, written payment terms.

Book Your Inspection

Table of Contents

  • What SB 721 Requires and Why Payment Comes Up First
  • SB 721 Inspection Cost: What Drives the Fee
    • Per-Unit Versus Flat-Fee Pricing
    • What a Fee Does and Does Not Cover
  • Comparing Payment Methods for an SB 721 Inspection
    • Payment Timing: Deposit, Progress, and Final Balance
    • Financing and Payment Plans
    • Who Pays in Different Ownership Arrangements
    • Budgeting and Cost Allocation
    • Payment Safeguards and Quote Comparison
    • Payment Options for Urgent Repairs
  • What a Complete SB 721 Inspection Quote Should Include
  • SB 721 Inspection Deposit: When It Is Required and How to Protect It
  • Reading Your SB 721 Inspection Invoice and Timing Final Payment
  • Who Pays: Owners, HOAs, and Property Managers
    • Condominium Associations
    • Individual Landlords and Apartment Owners
    • Property Managers
    • Common-Interest Developments
    • Legal Obligation Versus Contract Terms
  • Book Your SB 721 Inspection With Clear Payment Terms
  • Frequently Asked Questions

What SB 721 Requires and Why Payment Comes Up First

California’s SB 721 inspection payment options matter because the law itself is mandatory, not optional. SB 721 requires periodic inspection of exterior elevated elements (EEEs) on multi-unit residential buildings, and someone has to write the check.

The statute, documented in California Health and Safety Code Section 17973, requires that balconies, decks, stairways, and walkways be inspected by a qualified professional on a set schedule.

Below, we break down what drives the fee, how to pay it, and how to protect your money at every step.

SB 721 Inspection Cost: What Drives the Fee

An SB 721 inspection cost is not a single fixed number. Pricing depends on how many units you have, how many EEEs each unit carries, and how much documentation is required. Contact Apex Balcony directly for current pricing or a quote.

Three factors move the number most:

  • Unit count and EEE count. More balconies and stairways mean more time on site.
  • Access difficulty. Buildings where not every unit can be entered require more coordination.
  • Report depth. Photo documentation and written findings add billable hours.

Per-Unit Versus Flat-Fee Pricing

Some inspectors quote per unit and others as a flat fee for the whole building. Pricing structure and current rates are best confirmed directly with Apex Balcony when requesting a quote.

What a Fee Does and Does Not Cover

An inspection fee generally relates to the site visit and written report, and does not cover repairs. That distinction trips up a lot of boards. If you want to understand how inspection dollars compare to corrective work, read our breakdown of what an SB 721 inspection actually costs versus repairs. For a fuller budgeting walkthrough, see how to budget for SB 721 compliance inspections.

Comparing Payment Methods for an SB 721 Inspection

Payment methods vary by provider. The table below summarizes common options and where each fits, but accepted methods should be confirmed with Apex Balcony directly.

Payment MethodTimingBest ForWatch Out For
Check from HOA accountOn invoice due dateBoards needing a paper trailSlow mail delays scheduling
ACH bank transferWithin 1-3 business daysLarger buildings, faster clearingRequires bank details on file
Credit cardAt booking or on invoiceSmall owners wanting pointsProcessing surcharges may apply
Installment planSplit across milestonesOwners facing repair bills tooConfirm terms in writing
Reserve fund drawAfter board voteHOAs with funded reservesBoard approval adds lead time

A common mistake is paying the full amount before the report is delivered. Tying final payment to receipt of the written findings is a practical safeguard.

Payment Timing: Deposit, Progress, and Final Balance

Inspection agreements vary by provider. Ask Apex Balcony to state the deposit, any progress payment, and the final balance trigger in writing. Ask your inspector to state each trigger in writing, “due on completion of fieldwork” and “due on delivery of report” are different dates, and the gap between them can be weeks.

Watch out: a quote that says only “50% deposit” without naming the trigger for the remaining balance leaves room for the provider to invoice before the report is in your hands.

Financing and Payment Plans

Before booking any inspection, ask the provider in writing whether installment options exist, whether any fee applies, whether a deposit is refundable if the inspection is rescheduled, and whether any personal guarantee is required.

Who Pays in Different Ownership Arrangements

Payment responsibility follows ownership and governing documents, not the inspection contract alone. In a condominium association, the HOA typically pays from reserves or a special assessment because the EEEs are usually common-interest property. Individual landlords of apartment buildings pay directly from operating funds. Property managers often coordinate scheduling and payment but disburse owner funds, so the owner remains the payer of record.

Budgeting and Cost Allocation

Separate the inspection fee from remediation costs in your budget. The inspection fee is a known, quotable expense; repair costs are unknown until the report identifies deficiencies. A practical framework is to budget the inspection fee in the current fiscal year, reserve a contingency line for follow-up visits and minor corrections, and treat major structural repairs as a separate capital item that may require a special assessment or reserve draw.

Payment Safeguards and Quote Comparison

Compare written quotes line by line, not by total alone. A lower total that excludes report photography, follow-up visits, or permit coordination is not a lower cost. Use this checklist before you send money:

  • The quote states the number of units and EEEs to be inspected
  • The fee structure is identified as per-unit or flat-fee
  • The report deliverables and photographic documentation are described
  • The deposit amount and refund conditions are in writing
  • The final payment trigger is tied to report delivery
  • Exclusions (repairs, follow-up visits, re-inspections) are listed
  • The inspector’s license and insurance certificate are on file
  • The cancellation and rescheduling policy is stated

Ask for the exclusions section in writing before signing any quote.

Payment Options for Urgent Repairs

If the inspection identifies a condition requiring prompt repair, payment planning shifts from the inspection fee to the repair contract. Obtain at least two separate bids for the repair work, confirm whether the repair contractor requires a deposit and what triggers the balance, and ask whether the inspector offers a re-inspection after repairs and how that is billed. Keep the inspection invoice and the repair invoices separate in your records so you can show which costs were diagnostic and which were corrective.

What a Complete SB 721 Inspection Quote Should Include

A complete SB 721 inspection quote states the scope, the fee structure, and the payment schedule in one document. If any of those three is missing, ask for a revised quote before signing.

Your quote should spell out:

  • The number of units and EEEs to be inspected
  • Whether the fee is per unit or flat
  • What the written report and photographic documentation include
  • The deposit amount and when it is due
  • The final payment trigger
  • Any exclusions, such as repairs or follow-up visits

Review the exclusions section of any quote carefully, since follow-up visits may be billed separately.

SB 721 Inspection Deposit: When It Is Required and How to Protect It

An SB 721 inspection deposit is common, and it is usually reasonable. Providers ask for it to reserve the schedule and cover initial labor. The question is not whether a deposit is fair, but how to protect it.

Ask for these before you send money:

  • A written agreement naming the deposit amount and refund conditions
  • Proof of the inspector’s license and insurance
  • A clear cancellation and rescheduling policy
  • Confirmation that the deposit is applied to the total fee, not added on top

Watch out: paying a large deposit to a provider who cannot show a license or insurance certificate is the fastest way to lose money. Verify credentials first, always.

Reading Your SB 721 Inspection Invoice and Timing Final Payment

An SB 721 inspection invoice should match the quote line for line. Compare the two before you pay. If the invoice shows charges the quote did not mention, pause and ask for an explanation in writing.

Final payment timing is your use. We recommend releasing final payment only after you receive the complete written report with photographic documentation. That gives you a chance to confirm every EEE was actually inspected. If something is missing, you still have room to resolve it. Hold back the final payment until the deliverable is in hand.

Who Pays: Owners, HOAs, and Property Managers

Responsibility for payment depends on how the building is owned and managed, and on what the governing documents say. The inspection statute creates the obligation to inspect; it does not by itself assign the invoice. That assignment comes from the ownership structure, the governing documents, and the contract you sign with the inspector.

Condominium Associations

In a condominium association, the HOA typically pays from reserves or a special assessment because the EEEs are usually common-interest property. The board’s authority to draw on reserves or levy an assessment is set by the governing documents and state law, and a board vote is usually required before funds are released. Confirm in the minutes that the board authorized the expenditure and the assessment methodology, so owners can see the basis for their share.

Individual Landlords and Apartment Owners

Individual landlords of apartment buildings pay directly from operating funds. The inspection fee is a business expense, and the owner is the payer of record even when a property manager handles scheduling. Keep the invoice in the owner’s name so the expense is documented for tax and accounting purposes.

Property Managers

Property managers often coordinate the process but pay from owner funds. The management agreement should state whether the manager has authority to commit the owner to an inspection contract and at what dollar threshold. A common pattern is a spending limit above which owner approval is required. Clarify that limit before the manager books the inspection. Once the approval threshold is clear, the manager can book a professional property inspection without exceeding the authority granted in the management agreement.

Common-Interest Developments

In common-interest developments, the board’s authority to draw on reserves or levy an assessment is set by the governing documents and state law. Some declarations assign responsibility for limited common elements to the unit owner rather than the association, which can shift the inspection cost. Read the declaration’s maintenance and repair provisions before assuming the association pays.

Legal Obligation Versus Contract Terms

Distinguish the legal obligation to inspect from the contract term that says who writes the check. The statute may place the duty on the owner or association, while the inspection contract may name a manager or agent as the payer.

Small buildings get overlooked here. If you own a three-unit property, our guide to SB 721 requirements for 3-unit buildings covers the specific rules and cost expectations. Property managers who need clarity on their own exposure should read about balcony inspection liability for property managers.

Book Your SB 721 Inspection With Clear Payment Terms

The real challenge is not finding an inspector. It is finding one who gives you clear payment terms, a written quote, and a report you can rely on. Apex Balcony handles all three.

Property manager and inspector reviewing SB 721 inspection paperwork on a balcony

If you are still weighing providers, our Balcony1 vs EmpireWorks inspection services comparison walks through how to verify credentials before you commit.


The worst outcome is paying for an inspection that leaves you with more questions than answers. Get a written quote, protect your deposit, and tie final payment to a complete report.

Frequently Asked Questions

Do you pay an SB 721 inspection company before or after the inspection?

It depends on the provider. Payment schedules vary by provider. Ask for the payment schedule in writing before you sign anything, and confirm current terms with Apex Balcony directly.

Can an SB 721 inspection company require a deposit?

Deposit requirements vary by provider. What matters is the terms: how much is due, whether it is refundable if you reschedule, and what triggers the balance. Get the deposit amount and refund policy in the written quote. For an HOA, confirm the board has approved the expenditure before anyone pays, since reserve fund withdrawals usually need a formal vote.

Are SB 721 inspection fees different from repair costs?

Yes, and they should never appear on the same line. The inspection fee pays for the assessment and the written report. Corrective work on balconies, decks, stairs, and walkways is a separate scope with its own quote.

What should an SB 721 inspection quote include?

When requesting a quote, ask that it state the buildings and exterior elevated elements covered, the report format, the payment schedule, and any exclusions. Comparing quotes line by line, not just by the total, helps clarify what is included.

GoogleAdd apexbalcony.com as a preferred source on Google →
Posted in BlogTagged sb 721 inspection, sb 721 inspection cost, sb 721 inspection deposit, sb 721 inspection invoice, sb 721 inspection payment options, sb 721 inspection quoteLeave a Comment on 7 SB 721 Inspection Payment Options for Property Owners

Are Hidden Balcony Framing Problems Showing Up in Your Building?

Posted on November 20, 2026November 20, 2026 by Apex Balcony admin
Are Hidden Balcony Framing Problems Showing Up in Your Building?

Last Updated: November 18, 2026

Quick Summary

Hidden balcony framing damage shows up as cracks or bulges in stucco near the balcony, rust streaks below railing bases, soft or spongy deck areas, sagging, and wobbly railing posts. Water entering at the ledger, flashing, or post penetrations is the usual cause, so any of these signs warrants a qualified inspection.

  • Cracks along the wall-to-deck line often follow the ledger connection.
  • Rust streaks below railing bases point to a failed seal at the post penetration.
  • A hollow-sounding bulge in stucco often means moisture is trapped behind the finish.
  • Soft spots or bounce can signal rot in the joists or beams underneath the deck.
  • Do not probe soft spots with a screwdriver or knife; note the location and call an inspector.
Book inspection

Table of Contents

  • Why Hidden Balcony Framing Damage Is So Hard to Spot
  • Visual Warning Signs of Hidden Balcony Framing Damage
    • Stucco and Siding Clues
    • Sagging, Bounce, and Soft Spots
    • Cracks, Spalling, and Bulging Finishes
    • Rust, Corrosion, and Fastener Clues
  • Balcony Water Damage and Wood Rot Behind the Surface
  • Loose Balcony Railing Warning Signs You Should Not Ignore
  • How to Inspect a Balcony for Safety Without Disturbing the Structure
    • What a Safe Visual Check Can and Cannot Tell You
    • Step-by-Step Safe Visual Checklist
    • Where Hidden Framing Actually Lives
    • How a Qualified Inspector Diagnoses Concealed Damage
    • Triage by Urgency: When to Restrict Access
    • Keep a Simple Log
  • California Balcony Inspection Requirements and Who Must Comply
  • Scheduling a Professional Inspection Before Damage Gets Worse
  • Frequently Asked Questions

Why Hidden Balcony Framing Damage Is So Hard to Spot

Hidden balcony framing damage is often invisible from the street. Water gets into the wood or steel inside the balcony structure while the exterior finish can look fine for years.

Most balconies have a wood or steel frame, a waterproof membrane, and a finish layer such as stucco, tile, or coating.

A few things make this hard for owners and boards to catch:

  • Damage is concealed behind finishes and under the deck surface
  • Early rot and corrosion can look like normal weathering
  • Residents often report problems only after something feels wrong

Knowing the signs early gives you time to act before a repair becomes a safety issue.

Visual Warning Signs of Hidden Balcony Framing Damage

Many hidden framing problems leave visible clues, but location matters more than the clue itself. A crack near a railing post tells a different story than one along the wall line where the balcony attaches.

Property manager inspecting weathered stucco for hidden balcony framing damage on an apartment complex
Visible signLikely concealed locationFraming member most often involved
Crack or gap along the wall-to-deck lineLedger connectionLedger board, rim board, joist ends
Rust streaks below railing basesPost penetrationsRailing posts, blocking, joist tops
Bulge or hollow sound in stucco near the edgeRim board and joist endsRim board, band joist, ledger flashing
Sag or dip in the deck surfaceMid-span or cantileverJoists, beams, cantilever framing
Soft or spongy deck areaDecking over joistsJoist tops, decking, fasteners
Dark staining on the undersideWater path from aboveJoists, beams, subfloor, hangers
Leaning or wobbling railing postPost base and blockingPost base, blocking, deck framing

These signs tell you where to look next. Rust near a fastener may mean water is reaching the connection. A crack along the ledger line can mean structural movement.

Stucco and Siding Clues

Stucco and siding often show hidden damage first because they sit directly over the rim board, ledger, and joist ends. Water behind the finish can cause cracking, bulging, or staining, often in straight lines along framing members or around fasteners.

Check the wall above and beside the balcony for these clues:

  • Hairline cracks that widen over time
  • Bulges that feel hollow when tapped
  • Staining that starts at the balcony edge and runs down the wall

A bulge or hollow sound can mean moisture is trapped behind the finish. Do not poke or pry at the stucco. Note the location, take photos, and have a qualified inspector look at it.

Sagging, Bounce, and Soft Spots

Sagging and bounce are signs the framing may be losing strength. A balcony should feel firm underfoot. If the floor dips, flexes more than it used to, or feels spongy, the structure may be failing.

Watch for these signs:

  • A visible dip or slope in the deck surface
  • Floor boards that move, bounce, or creak under normal weight
  • Soft or spongy spots on the deck surface

Soft spots and bounce often point to rot in the joists or beams underneath. Bounce in one area usually points to a single joist or short span; bounce across the whole deck can point to beam or ledger movement.

Cracks, Spalling, and Bulging Finishes

Cracks and spalling are easy to dismiss as cosmetic, but direction and location matter. A hairline crack in a field of stucco is usually not structural. A crack along the ledger line, wrapping a railing post, or following a joist is more likely to track a framing problem.

  • Cracks that run horizontally along the wall-to-deck line often follow the ledger.
  • Cracks that radiate from a railing post base often follow the post blocking.
  • Spalled concrete or tile that has separated from the substrate can indicate movement or water behind the finish.

Rust, Corrosion, and Fastener Clues

Rust is a directional clue. Rust streaks running downward from a fastener mean water is reaching it from above. Rust around a railing base means water is entering the post penetration.

  • Rust streaks below a railing base point to a failed seal at the post penetration.
  • Rust on joist hangers or ledger brackets points to moisture at the connection.
  • White or powdery corrosion on galvanized hardware means the coating has failed.

These signs tell you where to look next, but they cannot confirm how far damage has spread. Visual clues are a reason to call a qualified inspector, not a substitute for one.

Balcony Water Damage and Wood Rot Behind the Surface

Water is the most common cause of hidden balcony framing damage. Wood that stays wet for long periods begins to rot, and rot spreads quietly through the framing.

Is Your Coastal Balcony Secretly Rotting? (Look for these 3 signs)

Bay Cities Construction

Water usually enters through a few common paths:

  • Gaps at the ledger where the balcony attaches to the building
  • Failed or missing flashing and waterproofing membranes
  • Cracks in the deck surface that let water seep in

Once water is inside, it can stay trapped for months, and that constant moisture drives rot and corrosion.

Signs of water damage and rot include:

  • Black or dark stains on wood or stucco near the balcony edge
  • Wood that feels soft, spongy, or crumbles when pressed
  • A musty smell near the balcony underside

Wood rot often starts out of sight.

A repair plan usually depends on how far the rot has spread, and that takes a qualified inspection to determine.

Loose Balcony Railing Warning Signs You Should Not Ignore

Railings are part of any balcony’s safety system. A railing that moves or pulls away from the structure can be a serious hazard, often pointing to damage in the posts, fasteners, or the surface they attach to.

Check the railing for these warning signs:

  • Wobbling or movement when pushed firmly
  • Posts that lean, tilt, or pull away from the deck
  • Loose or missing bolts, screws, or brackets

A railing that moves should be treated as unsafe until a qualified person has checked it. Do not lean on it, climb on it, or let children play near it.

Loose railings can result from rotted wood around the base, corroded steel connections, or fasteners pulled out of weakened framing. Because a loose railing can signal weakened framing below the deck, a timber deck inspection guide can help keep the focus on checking the structure rather than just tightening the fasteners.

How to Inspect a Balcony for Safety Without Disturbing the Structure

Owners, board members, and property managers can do a basic visual check without touching the structure, but it has clear limits. This section covers what you can safely observe, what you should never probe or dismantle, how a qualified inspector assesses concealed framing, and how to triage an urgent safety condition.

What a Safe Visual Check Can and Cannot Tell You

A visual check from the ground or a stable vantage point can tell you where to look and whether a problem is changing over time. It cannot confirm whether framing is rotted, whether a ledger is pulling away, or whether a railing will hold.

What a safe check can do:

  • Identify the location of cracks, stains, bulges, and rust streaks
  • Compare current conditions against photos from prior months or years
  • Document whether a sign is spreading or stable

What a safe check cannot do:

  • Confirm rot, corrosion, or section loss inside framing
  • Measure moisture content in wood or stucco
  • Assess fastener embedment or ledger attachment

Step-by-Step Safe Visual Checklist

Follow these steps from the ground or a stable, safe surface. Do not climb onto a balcony you suspect is unsafe.

  1. Stay on the ground or on a stable, safe surface. Do not climb onto a balcony to check it.
  2. Look at the balcony from the street or from a neighbor’s safe vantage point.
  3. Check the wall and stucco above and beside the balcony for cracks, bulges, and staining.
  4. Look at the balcony underside for rust, peeling paint, dark spots, and water staining.
  5. Note any sagging or uneven lines along the deck edge.
  6. Check railings from a distance for leaning, gaps, or rust at the base.
  7. Take photos of anything that looks wrong and date them.
  8. Record each finding with its location, so a professional can review it.

Watch out: Do not probe soft spots with a screwdriver, awl, or knife. Probing can push through a finish that is holding back water, enlarge a small defect, and create a safety hazard where none existed. Note the location and let a qualified inspector probe where appropriate.

Where Hidden Framing Actually Lives

The keyword concerns framing, so it helps to know where concealed members sit. On a typical wood-framed balcony, the framing you cannot see includes:

  • Joist ends where they bear on the ledger or rim board
  • The ledger board itself, where it attaches to the building
  • Rim boards and band joists at the outer edge

These are the locations where water collects and where rot and corrosion start. A crack or stain near one of them is more significant than a crack in the middle of a finish field.

How a Qualified Inspector Diagnoses Concealed Damage

A qualified inspector uses a combination of visual assessment, moisture readings, and selective access. The exact approach depends on the building type, the finish, and the reported symptoms.

  • Moisture readings: A pin-type or pinless meter is used on wood, stucco, and concrete to find elevated moisture behind finishes, with readings compared across the structure to find wet zones.
  • Probing where appropriate: An inspector may selectively probe wood at concealed locations, such as joist ends or post bases, to check for softness, with the owner’s knowledge.
  • Borescopes: A small camera inserted through a drilled hole or existing gap can view concealed framing without major demolition.

Visual signs alone cannot confirm structural condition, which is why a diagnostic inspection matters.

Triage by Urgency: When to Restrict Access

Some conditions warrant immediate action before any inspection is scheduled. Use the following triage guide.

  • Severe sagging or a visible dip that has appeared suddenly: Restrict access to the balcony and any area below it. Contact a qualified professional the same day.
  • Sudden movement, a new gap at the wall, or a railing that has pulled loose: Keep people off the balcony and away from the area below. Contact a qualified professional immediately.
  • Falling material, spalled concrete, or loose stucco: Cordon off the area below and contact a qualified professional.

Watch out: Do not assume a balcony is safe because it looks solid from below. A failed deck can fall without warning, and the underside often shows the first sign of a problem.

Keep a Simple Log

Keep a simple log of what you observed. Include the date, the balcony location, and what you saw. Over time, this log shows whether a problem is getting worse, which helps when you call for an inspection. A dated photo log is often the most useful document an owner or board can hand to an inspector.

California Balcony Inspection Requirements and Who Must Comply

In California, balcony safety rules are shaped by state law.

Who usually needs to pay attention to these rules?

  • Homeowners associations managing multi-unit developments
  • Owners of multifamily residential buildings
  • Property management companies overseeing apartment complexes

For condominium and HOA buildings, the association board usually has the duty to arrange inspections and keep records.

Good record keeping matters. Keep inspection reports, repair records, and notices to residents in one place.

The California Department of Housing and Community Development and local building departments publish guidance on building safety.

Scheduling a Professional Inspection Before Damage Gets Worse

Visual checks help, but they cannot see inside the framing. A qualified professional inspection is the most reliable way to confirm whether hidden damage is present and how serious it is.

Call a qualified professional when you see any of the following:

  • Sagging, bounce, or soft spots in the deck
  • Cracks or bulges in stucco that connect to the balcony
  • Rot, black spots, or soft wood near the balcony edge

Acting early gives you more choices. A professional can identify the source of water intrusion and estimate the extent of damage.

To schedule an inspection, book an inspection with Apex Balcony.

Frequently Asked Questions

What are the signs of structural damage in a balcony?

The most common signs are a balcony that feels soft or bouncy underfoot, visible sagging or a dip in the deck surface, cracked or bulging stucco near where the balcony attaches to the building, rust streaks or stains on metal brackets, and wood that crumbles or splinters when pressed with a screwdriver. Water stains on the ceiling below the balcony often point to moisture moving through the framing. Any of these signs warrants a professional structural evaluation, because hidden rot and corrosion can progress well beyond what is visible at the surface.

Can balcony framing rot behind stucco or siding?

Yes. When water gets past stucco cracks, failed sealant, or poorly flashed connections, it can soak into the wood framing and fasteners behind the finish without showing obvious surface damage for a long time. Fungal decay can weaken joists and ledger connections while the exterior still looks intact. This is why a visual check alone is not enough, and why a qualified inspector may need to examine concealed areas where access is safe and permitted.

Can a loose railing indicate hidden balcony damage?

A railing that moves, rocks, or pulls away from the deck can indicate that the posts, base plates, or fasteners anchoring it are corroded, rotted, or pulled from weakened framing. Loose railings are a serious safety concern because they are expected to resist people leaning or falling against them. If a railing moves, keep people off the balcony and arrange a professional inspection promptly rather than tightening it and assuming the problem is resolved.

When should a balcony be inspected by a professional?

A professional inspection is warranted when you notice sagging, soft or spongy boards, cracked or bulging stucco at the balcony connection, rusted fasteners, loose railings, or water stains below the balcony. Multi-unit properties in California also have inspection obligations under state balcony laws, so owners and HOA boards should not wait for visible failure. If you are unsure whether a condition is serious, treat it as urgent until a qualified person has evaluated it.

GoogleAdd apexbalcony.com as a preferred source on Google →
Posted in BlogTagged balcony water damage and wood rot, hidden balcony framing, how to inspect a balcony for safety, loose balcony railing warning signs, signs of hidden balcony framing damageLeave a Comment on Are Hidden Balcony Framing Problems Showing Up in Your Building?

Apartment Building Maintenance Budget: A Step-by-Step Guide

Posted on November 19, 2026November 19, 2026 by Apex Balcony admin
Apartment Building Maintenance Budget: A Step-by-Step Guide

Last Updated: November 17, 2026

Quick Summary

A maintenance budget for an apartment building should be built from your own past spending, not a guess. Pull three to five years of invoices and work orders, sort costs into routine, system and exterior work, then budget each line from a vendor quote or prior-year actual.

  • Pull the last three years of work orders before setting the budget.
  • Use a basis column so every estimate traces to a quote, invoice, or schedule.
  • Divide the total annual budget by unit count to get cost per apartment.
  • Fund capital replacements through a separate reserve, not the operating budget.
  • Review the reserve quarterly against spending and annually against vendor quotes.
Is your balcony budget realistic?Apex Balcony inspects balconies, decks, and stairways for SB 721 and SB 326 compliance.

Book inspection

Table of Contents

  • How Much Should an Apartment Building Budget for Maintenance Each Year?
  • Reviewing Historical Maintenance Spending and Property Age
  • Apartment Building Maintenance Budget Template: Line-Item Breakdown
    • Building systems and components
    • Recurring tasks and common areas
    • Unit-level work
    • Reserve and contingency lines
  • Apartment Maintenance Budget Example for a 12-Unit Building
  • Annual Maintenance Cost per Apartment: How to Calculate It
  • Preventive Maintenance Budget for Apartments and Capital Replacements
  • Scheduling Your Maintenance Reserve and Next Budget Review
  • Frequently Asked Questions

How Much Should an Apartment Building Budget for Maintenance Each Year?

A maintenance budget planning process for apartment buildings starts with one question: how much will the building cost to keep running safely each year? At Apex Balcony, we work with California property owners and HOA boards who face this question every budget cycle. The honest answer is that no single number fits every building, but a sound starting point exists.

Many owners set aside a fixed share of gross rent or a flat amount per unit each year. Treat any rule of thumb as a rough starting point and adjust it to your building’s actual history.

Watch out: setting the budget from memory instead of from invoices almost always underfunds the reserve. Pull the last three years of work orders first.

Reviewing Historical Maintenance Spending and Property Age

Your past spending is the best predictor of your future spending. Start by pulling every work order, vendor invoice, and repair receipt from the last three to five years.

Sort the costs into three groups:

  • Routine repairs: leaks, light fixtures, door hardware
  • System work: HVAC, plumbing, electrical, roofing
  • Exterior and structural work: balconies, decks, stairways, railings

Property age matters too. A building that is 40 years old will usually need more structural attention than one built recently. Balconies and exterior elements deserve close attention, because they age faster when exposed to weather.

Apartment Building Maintenance Budget Template: Line-Item Breakdown

A line-item template makes your budget easier to defend to residents, lenders, and board members. The structure below separates building-system work from recurring tasks and from unit-level turnover work. Copy the columns and rows into a spreadsheet and adapt the labels to your property.

Property manager and board member reviewing a printed maintenance budget in a sunlit apartment building lobby

Use five columns for every line:

  1. Line item, the specific system, task, or unit-level job
  2. Basis, how the estimate was built (vendor contract, prior-year actual, unit count, or component schedule)
  3. Prior-year actual, what you actually spent, pulled from invoices, not memory
  4. Current-year estimate, the number you are budgeting
  5. Note, a one-line explanation of any variance over roughly 10%

Building systems and components

These lines cover the equipment and assemblies that keep the building operating. Estimate each from a current vendor quote or a service contract.

  • HVAC service contract and filter changes
  • Boiler or central plant service, if applicable
  • Plumbing and drain maintenance, including sewer line jetting
  • Electrical system checks and panel inspections
  • Roof inspection and repair allowance
  • Elevator service contract and annual inspection, if applicable
  • Fire alarm, sprinkler, and extinguisher service
  • Exterior structural inspections, including balconies, stairways, and railings
  • Parking lot, sidewalk, and drainage repair

Recurring tasks and common areas

These are predictable, calendar-driven costs. Build them from the contract or from last year’s invoices, and schedule them by frequency so nothing lands in the wrong quarter.

  • Common area cleaning (weekly or per contract)
  • Landscaping and irrigation (seasonal)
  • Pest control (monthly or quarterly)
  • Gutter and drain cleaning (twice a year in most climates)
  • Life-safety device testing (per code schedule)
  • Trash and recycling service
  • Snow removal or storm prep, if applicable

Unit-level work

Unit-level costs are driven by turnover and by calls from residents, so they are harder to forecast than contracts. Estimate them from the last three years of work orders divided by the number of turns.

  • Turnover make-ready: paint, cleaning, flooring, and fixture replacement
  • Appliance repair and replacement
  • Resident work orders for leaks, outlets, and hardware
  • Lock and key changes

Reserve and contingency lines

Keep these separate from operating lines so a single large project does not drain the operating budget.

  • Capital replacement reserve (roof, elevator, boiler, balcony systems)
  • Emergency repair contingency, set as a share of the operating total
  • Professional services: engineering, inspection, and compliance reviews

For each line, record the prior-year actual, the current-year estimate, and a short note explaining the difference. Vendor quotes should be dated and kept on file.

Watch out: a template with no basis column invites round-number guesses; every estimate should trace to a quote, an invoice, or a component schedule.

!A property manager and a board member reviewing a printed maintenance budget spreadsheet together in a sunlit apartment building lobby

Apartment Maintenance Budget Example for a 12-Unit Building

The example below shows the method, not a benchmark. Every figure is illustrative and must be replaced with your own vendor quotes and invoice history. What matters is how the lines are built and how the total translates into a per-unit number and a monthly reserve contribution.

Assume a 12-unit building with a service contract for HVAC, a contracted cleaning and landscaping schedule, and a capital reserve that is funded separately.

Line itemBasisAnnual estimate
HVAC service contractVendor quote$3,600
Plumbing and drain maintenancePrior-year actual plus 5%$2,400
Electrical checksVendor quote$900
Roof inspection and repair allowancePrior-year actual$1,200
Common area cleaningContract$4,800
Landscaping and irrigationContract$3,600
Pest controlContract$1,200
Gutter and drain cleaningTwo visits per year$800
Unit turnover make-readyThree turns at $1,500$4,500
Resident work ordersPrior-year actual$2,400
Emergency contingency10% of operating total$2,540
Operating subtotal$27,940
Capital replacement reserveSeparate funding schedule$9,000
Total annual maintenance budget$36,940

Two calculations turn this table into a planning tool:

  • Cost per apartment: divide the total by 12 units, which gives roughly $3,078 per unit per year. Track that number year over year; a rising figure signals the building needs attention, and a falling figure can mean deferred maintenance is building up.
  • Monthly reserve contribution: divide the capital reserve by 12, which gives $750 per month. Funding the reserve monthly keeps cash available for seasonal and unexpected work instead of forcing a special assessment.

The same method scales to other building profiles. A newer 40-unit property will carry a lower per-unit reserve because major components are early in their service life, while an older 8-unit property may carry a higher per-unit figure because exterior and structural work is closer to replacement. Run the table for your own building rather than borrowing another property’s total. Regular operational expenses like those handled by Rangel Janitorial should be factored into your recurring maintenance projections to ensure that your total budget accurately reflects the ongoing upkeep of common areas.

Walk through each line, confirm it against your records, and adjust for any known upcoming work. A worked example helps board members see how the pieces add up and where the reserve is actually going.

Annual Cost by Operating Line Item, 12-Unit Example

HVAC service contract $3,600
Plumbing and drain maintenance $2,400
Electrical checks $900
Roof inspection and repair allowance $1,200
Common area cleaning $4,800
Landscaping and irrigation $3,600
Pest control $1,200
Gutter and drain cleaning $800
Unit turnover make-ready $4,500
Resident work orders $2,400

Annual Maintenance Cost per Apartment: How to Calculate It

To find your cost per apartment, divide your total annual maintenance budget by the number of units. This gives you a simple benchmark you can compare year over year.

Calculate it this way:

  1. Add up all annual maintenance line items.
  2. Divide the total by the number of apartment units.
  3. Record the result and track it each year.

A rising cost per unit signals that your building needs attention or that your reserve needs to grow. A falling number is not always good news, since it can mean deferred maintenance is building up.

Preventive Maintenance Budget for Apartments and Capital Replacements

Preventive maintenance costs less than emergency repair, but it still needs its own line in the budget. Plan for regular inspections, cleaning of drains and gutters, and scheduled service on major systems.

Capital replacements are different from routine upkeep. A new roof or a full balcony replacement is a large, infrequent expense. Keep those costs in a separate reserve so one large project does not drain your operating budget.

For California balconies, the California Department of Housing and Community Development balcony safety guidance describes the inspection and safety context that affects how much you should plan to spend on exterior elements.

Apex Balcony’s inspectors identify early signs of structural failure in elevated exterior elements. You can book an inspection with Apex Balcony to get a clear picture of what your building needs.

Scheduling Your Maintenance Reserve and Next Budget Review

Set a review schedule before you finish this year’s budget. Most boards review the maintenance reserve at least once a year, and after any major repair or inspection.

Build a simple calendar:

  • Quarterly: review actual spending against the budget
  • Annually: update line items and vendor quotes
  • After any inspection: adjust the reserve for newly found issues

Tie your reserve review to your inspection schedule. Follow a practical guide to conducting annual balcony safety inspections to set the right timing for each review. Learn more about preventative maintenance versus reactive repairs for HOAs to decide how to split your reserve between planned and emergency work.

Next step: Start with three years of invoices, build your line-item template, and schedule your first balcony inspection.


Frequently Asked Questions

How do you create a maintenance budget for an apartment building?

Start with the last three years of maintenance and repair invoices, then group them by building system such as plumbing, electrical, HVAC, roofing, elevators, and common areas. Adjust those totals for property age and known deferred work, then add a line for preventive service contracts and a reserve for emergency repairs. Divide the final total by the number of units to see your cost per unit, and compare it against a rule-of-thumb range to check whether the figure is realistic. Review the budget at least once a year against actual spending so variances are caught early.

How much should an apartment building budget for maintenance each year?

Many owners start with a planning figure based on a per-unit amount and adjust it up for older buildings, buildings with elevators or large common areas, and buildings with deferred maintenance. Your own historical spending is more reliable than any general benchmark, so use it as the baseline. Inflation and vendor price changes should be built into the estimate rather than ignored. Because pricing depends on the scope of work, the vendors you use, and local labor rates, get current quotes for any large project rather than relying on a published average.

What expenses should an apartment maintenance budget include?

A complete budget covers routine repairs, preventive maintenance contracts, utilities for common areas, landscaping, pest control, janitorial services, and vendor fees, plus a separate capital reserve for major replacements such as roofing, boilers, elevators, and building exterior elements. Balcony, deck, and stairway inspections and repairs belong in the reserve plan, especially under California requirements for SB 326 and SB 721. Keeping capital replacements separate from operating maintenance makes it easier to see what the building spends each month and what it must save for future work.

How do I plan for emergency repairs in an apartment building budget?

Set aside a contingency line in the operating budget, typically tied to a percentage of your planned maintenance spending, and keep it separate from the long-term capital reserve. Review how often emergencies have occurred in past years so the contingency reflects real history. If the reserve is drawn down, plan how it will be refilled in the next budget cycle. A written inspection schedule also reduces emergencies by catching structural problems before they become urgent repairs.

GoogleAdd apexbalcony.com as a preferred source on Google →
Posted in BlogTagged apartment building maintenance budget template, apartment maintenance budget example, maintenance budget, maintenance budget planning for apartment buildingsLeave a Comment on Apartment Building Maintenance Budget: A Step-by-Step Guide

Is Your Older Balcony Safe? A Structural Assessment Guide

Posted on November 18, 2026November 18, 2026 by Apex Balcony admin
Is Your Older Balcony Safe? A Structural Assessment Guide

Quick Summary

A balcony structural assessment is a professional review of a balcony’s load-bearing parts, including the slab, framing, wall connections and railings. An engineer or qualified inspector confirms the balcony can safely hold the people and loads it was built for. Older buildings need these assessments more often because materials age and original construction methods may not meet today’s standards.

  • Start with records review: original drawings, prior reports, repair permits and warranties.
  • Rank every finding by severity and record its location, tier and photograph.
  • Restrict access right away to any balcony showing sagging, movement or loose railings.
  • Water intrusion can rot wall framing behind the ledger connection without visible signs outside.
  • Under SB 326 and SB 721, qualifying multifamily balconies need licensed inspection within set timeframes.
Book inspection

Table of Contents

  • Why Older Buildings Need Regular Balcony Structural Assessments
  • Balcony Structural Failure Signs to Look For
  • Step-by-Step Balcony Inspection Checklist for Older Buildings
    • Load-Bearing Components: Slabs, Joists, Beams, Posts and Columns
    • Connections, Ledger Attachment and Concealed Deterioration
  • Urgent Hazards Versus Routine Maintenance: How to Triage Findings
  • Balcony Inspection Requirements Under California SB 326 and SB 721
  • What an Engineering Report Should Contain and How to Prepare for Your Assessment
  • Booking Your Balcony Structural Assessment With Apex Balcony
  • Frequently Asked Questions

Why Older Buildings Need Regular Balcony Structural Assessments

Balconies on older buildings carry more risk than most owners realize. Years of weather, moisture and heavy use wear down the concrete, steel and wood that hold them up.

A balcony structural assessment is a professional review of the load-bearing parts of an elevated exterior element. An engineer or qualified inspector checks the slab, the framing, the connections to the building and the railings.

Older buildings need these assessments more often than newer ones. Materials age, and the original construction methods may not match today’s standards. Many balconies in California were built decades ago, long before current inspection rules existed.

California law now sets the timeline for many property owners. Under SB 326 and SB 721, certain multifamily buildings must have their balconies, decks and stairways inspected by licensed professionals. Regular assessments help owners stay on schedule and avoid penalties.

Key reasons to schedule regular assessments:

  • Catch corrosion and rot before they weaken structural members
  • Meet state inspection deadlines under SB 326 and SB 721
  • Reduce liability if a resident is injured
  • Plan repairs and reserve funding with real condition data

Waiting for a visible problem is a common mistake. By the time a balcony sags, cracks or pulls away from the building, the damage is often well advanced. A scheduled assessment finds the early warning signs that most residents never notice.

Balcony Structural Failure Signs to Look For

Warning signs of structural failure are often subtle at first. Residents may notice small changes long before a serious problem shows up. Knowing what to look for helps owners and property managers act quickly.

Watch for these common signs:

  • Cracks in the concrete slab, especially wide or growing ones
  • Rust stains or flaking on steel brackets, rods and railings
  • Spalling, where chunks of concrete break away and expose rebar
  • Soft, spongy or discolored wood on decks and framing
  • Sagging or a visible slope in the balcony floor
  • Railings that wobble or pull loose from the structure
  • Water stains or damp patches on the ceiling below

Pay close attention to these two risks:

  • Exposed or rusting rebar, which signals that the steel inside the concrete is failing
  • Gaps or movement where the balcony meets the building wall

Water is one of the biggest causes of balcony failure. Moisture gets into cracks, freezes, expands and widens the damage over time. Cracks that look minor during dry months can grow quickly during the rainy season.

Any sign of movement needs prompt attention. A balcony that shifts, drops or pulls away from the wall should be restricted from use until a professional has evaluated it.

Step-by-Step Balcony Inspection Checklist for Older Buildings

A consistent process helps you catch problems that a quick glance would miss.

Inspector checking a weathered apartment balcony slab and steel brackets for a balcony structural assessment

Phase 1, Records review (before anyone goes on site). Pull the original drawings, any prior inspection reports, repair permits, and warranty documents.

Phase 2, Distance survey from below and from adjacent units. Walk the perimeter and view each balcony from underneath and from the side before stepping onto it. Look for sagging, cracks, staining, and separation at the wall.

Phase 5, Documentation and severity ranking. Photograph every finding, note its location, and rank it using the triage framework in the next section. A finding without a location and a severity rating is hard to act on later.

Phase 6, Report and follow-up. Issue the report, schedule the recommended repairs, and set a reinspection date. The follow-up step is what turns an assessment into a maintenance plan.

Construction-era differences to keep in mind.

Watch out: do not let a records review substitute for a site visit, or a site visit substitute for records, on older buildings the two together are what reveal whether a past repair is holding or failing.

Each balcony should be checked on the same schedule. Consistent records make it much easier to spot changes over time.

Load-Bearing Components: Slabs, Joists, Beams, Posts and Columns

The load-bearing parts carry the weight of the balcony and everyone on it. Inspect each one closely.

  • Slabs: Look for cracks wider than a hairline, bulging, or areas that sound hollow when tapped with a hammer.
  • Joists and beams: Check for sagging, splitting, rot or heavy rust.
  • Posts and columns: Confirm they are plumb, firmly anchored and free of deterioration at the base.

Concrete that has lost its protective cover over the steel reinforcement is a serious concern. When the steel corrodes, it expands and cracks the concrete even more. Early repair is far cheaper than full replacement.

Connections, Ledger Attachment and Concealed Deterioration

The connection between the balcony and the building is one of the most important points to inspect. The ledger attachment, where the balcony frame bolts to the wall, is especially critical.

Check for:

  • Loose, corroded or missing bolts and fasteners
  • Gaps or separation between the ledger and the building
  • Water intrusion that rots the wall framing behind the connection

Some problems stay hidden. Water can soak into the wall cavity and damage framing that you cannot see from the outside. Staining on interior walls or ceilings near the balcony is often the first clue. When these signs appear, a deeper inspection is needed, often including selective opening of the wall or soffit so the connection can be viewed directly.

The article’s inspection process runs through a fixed sequence of phases, each with its own focus.

PhaseFocusWhat to check
1, Records reviewBefore site visitOriginal drawings, prior reports, repair permits, warranties
2, Distance surveyFrom below and adjacent unitsSagging, cracks, staining, separation at the wall
3, Close inspectionOn the balconySlab surface, railings, wall connections, decks and stairs
5, DocumentationSeverity rankingPhotos, locations, triage tier for every finding
6, Report and follow-upAfter inspectionRepairs scheduled, reinspection date set

Urgent Hazards Versus Routine Maintenance: How to Triage Findings

Not every finding needs the same response. Sorting problems by urgency helps you spend money wisely and avoid unnecessary panic. The framework below sorts findings into three tiers.

Tier 1, Immediate hazard: restrict access and call a professional today.

  • Sagging, movement, or a balcony that feels unstable underfoot
  • Loose or failing railings, or guardrails that no longer meet the required height or loading
  • Cracked, separated, or failing ledger connections
  • Exposed, heavily corroded structural steel or reinforcement
  • Any gap that has opened between the balcony and the building wall

Action: restrict the balcony from use, notify residents, and arrange an evaluation before the balcony is reopened. Do not wait for the next scheduled inspection cycle.

Tier 2, Priority repair: schedule within the current repair cycle.

  • Cracks wider than a hairline that are growing between inspections
  • Spalling that has exposed reinforcement but not yet caused section loss
  • Rust staining on structural steel without visible section loss
  • Soft or discolored wood on framing members that still carry load
  • Water intrusion that has reached the wall cavity but has not yet rotted framing

Action: schedule a repair and a reinspection date. Tier 2 findings are the ones that become Tier 1 if left through a rainy season.

Tier 3, Routine maintenance: address in the normal maintenance plan.

  • Hairline cracks in the surface
  • Minor paint loss or cosmetic wear
  • Light surface staining without structural cracking
  • Sealant that needs renewal

Action: fold into the annual maintenance budget and recheck at the next assessment.

A finding moves up a tier when it is growing or when water intrusion is present. When in doubt, treat the finding as urgent and call a professional. Restrict access to any balcony with a suspected structural hazard until it has been evaluated.

What to record for each finding. Location, description, tier, photograph, and the date the tier was assigned. That record is what lets a board or owner show, later, that a finding was identified and acted on in a reasonable time.

Balcony Inspection Requirements Under California SB 326 and SB 721

California law sets specific inspection duties for many multifamily property owners. SB 326 and SB 721 both address the safety of elevated exterior elements such as balconies, decks and stairways.

Under these laws, qualifying buildings must have these elements inspected by a licensed professional within set timeframes, and owners who miss those deadlines may face penalties.

Owners should confirm which requirements apply to their property by checking the current statutory text or consulting legal counsel. Apex Balcony can help you understand how these requirements apply to your buildings.

Keep copies of every inspection report and repair record. Good documentation protects the board, the owners and the residents.

What an Engineering Report Should Contain and How to Prepare for Your Assessment

A useful engineering report is clear, specific and complete. It should include:

  • The date and scope of the inspection
  • A description of each balcony and its components
  • Photos and notes for every finding
  • A severity rating for each issue
  • Clear repair recommendations and suggested timelines

Preparing for the assessment makes it faster and more productive. Clear the balconies of furniture and plants, confirm access to units where needed, and gather past inspection and repair records. Let residents know when inspectors will be on site.

When reviewing a report, check that it addresses every balcony in the scope and explains each recommendation in plain language. A report that is vague or missing photos makes it harder to plan repairs and defend your decisions later.

Booking Your Balcony Structural Assessment With Apex Balcony

Older balconies should not be left to chance. Early detection protects residents, keeps your property compliant with California law and gives your board the information it needs to plan repairs.

Apex Balcony provides professional inspection services for California HOAs, multifamily owners and property managers. Our licensed inspectors focus on balconies, decks and stairways, and our reports are intended to support SB 326 and SB 721 compliance.

Contact Apex Balcony to schedule your balcony structural assessment today. Book inspection and get a clear, documented picture of your building’s condition.

Frequently Asked Questions

Are balconies considered structural?

Yes. A balcony is a load-bearing element when it carries people, furniture and snow or rain loads and transfers them through the slab, joists, beams and posts into the main building. Because the balcony is supported by the building, failures in its connections or framing can affect the building itself. This is why California’s SB 326 and SB 721 treat balconies, decks and stairways as elevated exterior elements that must be inspected for structural safety rather than treated as cosmetic features.

What does a balcony inspection consist of?

A structural balcony inspection typically includes a visual review of the slab, joists, beams, posts and columns, an examination of the ledger attachment and other connections to the building, a check of railings and guards, and an assessment of water intrusion, corrosion and concrete deterioration such as cracking or spalling. Where concealed damage is suspected, the inspector may use probing, moisture readings or selective removal of finishes. The findings are documented in a written report with recommended repairs and priorities.

How often should balconies in older buildings be inspected?

Older buildings should have balconies assessed on a recurring schedule rather than only after a problem appears. California’s SB 326 and SB 721 set inspection requirements for qualifying multifamily and common-interest properties, and the exact interval depends on the building’s age, its exposure to moisture and the findings of prior inspections. Owners should confirm the applicable timing for their property and schedule follow-up inspections whenever repairs are recommended.

What happens if an inspection finds balcony damage?

When damage is found, the inspector should classify each item by urgency. Hazards that compromise load capacity or railing safety need prompt action, which may include restricting access until repairs are made. Lower-priority items such as surface cracking or minor corrosion can usually be scheduled into routine maintenance. The owner or board should then obtain repair estimates, document the work and keep the engineering report on file for compliance and liability purposes.

GoogleAdd apexbalcony.com as a preferred source on Google →
Posted in BlogTagged balcony inspection checklist, balcony inspection requirements, balcony structural assessment, balcony structural assessment for older buildings, balcony structural failure signsLeave a Comment on Is Your Older Balcony Safe? A Structural Assessment Guide

5 SB 326 Inspection Penalty Risks California HOAs Miss

Posted on November 17, 2026November 17, 2026 by Apex Balcony admin
5 SB 326 Inspection Penalty Risks California HOAs Miss

Last Updated: November 16, 2026

Quick Summary

SB 326 penalties for noncompliance typically begin with a notice of violation, then escalate to citations and accruing fines if the association misses the compliance deadline. The amounts are set by each local ordinance and can vary, so boards should confirm the exact schedule with the issuing department. Acting quickly on the first notice usually gives the association the most leverage.

  • Associations must arrange inspections of covered exterior elevated elements on a set schedule.
  • Inspections must be documented in a written report describing what was examined.
  • Quoted daily penalty figures should be verified against the specific local ordinance that applies.
  • Penalties typically begin after a stated cure period, not on the original inspection due date.
  • Missing a notice’s appeal deadline generally forecloses the challenge, so track it separately from the cure date.
Is your HOA on track for SB 326?Apex Balcony inspects covered exterior elements and delivers a documented report for California condominium associations.

Book Your Inspection

Table of Contents

  • What SB 326 Requires of Condominium Associations
    • Which Buildings and Exterior Elevated Elements Are Covered
    • Inspection Deadlines and Recurring Inspection Intervals
  • SB 326 Penalties for Noncompliance: Legal Basis and Authority
    • Where the Penalty Authority Comes From and Who Enforces It
    • Why Commonly Repeated Daily Fine Estimates Need Context
    • The Civil Liability Layer That Sits Alongside Enforcement
  • SB 326 Inspection Penalty Scenarios and Realistic Cost Exposure
  • SB 326 Inspection Report Requirements and Who Can Perform the Inspection
  • SB 326 Inspection Cost and How It Compares to Penalty Exposure
  • Notice, Appeal, and Enforcement Process After a Missed Deadline
    • What the Notice Usually Contains
    • A Practical Response Sequence
    • How Appeals and Hearings Typically Work
    • What Usually Closes the File
  • SB 721 and SB 326: Which Law Applies to Your Property
  • Responsibility and Cost Allocation Within an HOA
  • Frequently Asked Questions

What SB 326 Requires of Condominium Associations

Associations that fail to inspect exterior elevated elements on a set schedule can face consequences under the law, and local building officials can enforce it.

California Legislative Information, text of SB 326

The law targets the parts of a building that residents stand on and walk past every day. Those parts can rot or weaken without any warning sign visible from the ground.

  • Associations must arrange inspections of covered elements
  • Inspections must be documented in a written report
  • Repairs that affect safety must be addressed promptly

Watch out: Some boards assume a recent repair job counts as an inspection. It does not.

Which Buildings and Exterior Elevated Elements Are Covered

SB 326 applies to condominium buildings with exterior elevated elements. These are things like balconies, decks, stairways, and walkways that sit above ground level and support people or weight.

The law focuses on structures where failure could injure residents. A ground-level patio on a single-family home is not the same kind of element. If your property has any raised wood or framed structure serving residents, check whether it falls under the rule.

Inspection Deadlines and Recurring Inspection Intervals

The inspection clock matters more than most boards expect. SB 326 sets deadlines for an initial inspection and then requires repeat inspections on a recurring cycle. Missing the first deadline does not pause the clock.

Boards should put every deadline on a shared calendar with two or three reminders. Many associations use their property manager’s tracking system to avoid surprises.

SB 326 Penalties for Noncompliance: Legal Basis and Authority

Boards often encounter daily fine figures online without a clear source. Understanding where penalty authority comes from is what lets a board plan with confidence.

California Legislative Information, text of SB 326

Where the Penalty Authority Comes From and Who Enforces It

California Department of Housing and Community Development, building standards resources

A common pattern is a three-stage sequence: an initial notice with a compliance deadline, a second notice or administrative citation if the deadline passes, and then accruing penalties or referral for further action. Most practitioners find that the first notice is the point where the association has the most leverage, because the enforcement file is still short and a documented inspection can close it.

Why Commonly Repeated Daily Fine Estimates Need Context

Quoted daily penalty figures should be verified against the specific local ordinance that applies. Several variables can change the real number:

  • The local schedule. Each city or county sets its own citation and penalty amounts, and some scale them by violation type or by repeat-offense history.
  • The compliance window. Penalties typically begin after a stated cure period, not on the date the inspection was originally due.
  • Enforcement discretion. Building officials can often continue a matter, accept a compliance plan, or reduce an assessment when the association demonstrates good-faith corrective action.

A fair way to read any quoted daily figure is as a ceiling under one jurisdiction’s rules. Before a board budgets around it, confirm three things with the issuing department: the ordinance or code section cited, the date penalties start accruing, and whether a compliance plan pauses accrual.

Watch out: treating a quoted maximum as a guaranteed outcome can push a board into either unnecessary spending or, worse, a false sense of safety if the actual local schedule is higher.

The Civil Liability Layer That Sits Alongside Enforcement

Separate from any administrative penalty, boards should review potential liability exposure with coverage counsel and their insurer, since some policies treat known code violations differently from sudden failures.

SB 326 Inspection Penalty Scenarios and Realistic Cost Exposure

Consider a board that receives a notice of violation for a late inspection. Its first step is to schedule the inspection and respond to the notice within the stated deadline.

What Does SB 326 Mean for Condo Owners? How Balcony Inspections Can Make Your Building Unlendable

Inside Los Angeles Real Estate

Now consider a board that ignores the notice. The penalty exposure grows, and the association may also face liability exposure if a resident is hurt on an unchecked balcony. Insurance coverage for that scenario should be reviewed with your broker.

  • Respond to any notice within its stated deadline
  • Schedule the inspection before enforcement escalates
  • Document every communication with the building department

SB 326 Inspection Report Requirements and Who Can Perform the Inspection

The inspection report is the document that proves compliance, so its content matters. A report should describe what was examined, what condition was found, and what repairs are needed.

Under SB 326, the inspection must be performed by a qualified person. Confirm the credential before you hire anyone.

California Board for Professional Engineers, Land Surveyors, and Geologists

Keep a copy of the report in your association records and share the required summary with owners as the law directs.

SB 326 Inspection Cost and How It Compares to Penalty Exposure

Inspection costs depend on building size, the number of elements inspected, and how much documentation the association needs. Pricing depends on your property’s details, so a quote is the right way to get an accurate number.

Boards often compare the inspection cost against the penalty and liability exposure of skipping it. A modest inspection expense is usually easier to justify once the potential costs of noncompliance are on the table.

Notice, Appeal, and Enforcement Process After a Missed Deadline

A missed inspection deadline creates a paper trail, and how the association handles that trail determines whether the matter closes or escalates. The sequence below reflects how local code enforcement commonly works; confirm the specifics with the department that issued your notice, because procedures and deadlines are set locally.

Flowchart of the notice and appeal process for managing SB 326 penalties in an HOA board meeting setting.

What the Notice Usually Contains

A notice of violation or administrative citation typically identifies the property, the code section or ordinance alleged to be violated, the corrective action required, a compliance deadline, the penalty amount or schedule if one applies, and the appeal or hearing rights available. Read for four items in particular: the response date, the named issuing officer or department contact, the cited authority, and the appeal window.

California Department of Housing and Community Development, enforcement information

A Practical Response Sequence

  1. Log the notice the day it arrives. Record the issue date, response deadline, appeal deadline, and the name and direct line of the contact. Calendar reminders at seven days and two days before each date.
  2. Contact the issuing department before the deadline. Ask whether a compliance plan or extension is available, what documentation will close the file, and whether penalties are held during a good-faith cure. Get the answer in writing where possible.
  3. Schedule the qualified inspection immediately. Do not wait for the enforcement question to resolve. The inspection report is the evidence that ends most matters.
  4. Submit the report and a short cover letter. The letter should reference the notice number, state the inspection date and inspector credentials, summarize findings, and describe the repair plan and timeline for any hazardous conditions.
  5. Document every communication. Keep emails, call notes, and submission confirmations in the association’s compliance file.
  6. Preserve appeal rights even if you intend to cure. Filing a timely appeal or requesting a hearing does not usually prevent compliance, and it keeps options open if the assessment is disputed.

How Appeals and Hearings Typically Work

Appeal procedures are local. Appeal procedures vary by jurisdiction and should be confirmed with the issuing department. The grounds that tend to matter are factual (the element was inspected, the report exists, the deadline was met) and procedural (notice was defective, the cited authority does not apply, the penalty was miscalculated).

Watch out: missing an appeal deadline generally forecloses the challenge even if the underlying violation is later resolved, so treat the appeal date as separate from the cure date.

What Usually Closes the File

Confirm with the issuing department what documentation will close the file. A short narrative that maps each finding to a corrective action is more persuasive than a report submitted alone. After closure, retain the notice, the report, the correspondence, and the closure confirmation together, the same records support the next recurring inspection cycle and any insurance or disclosure question that follows.

The sequence below summarises the steps an association typically takes after a missed deadline, with the timing points that matter most.

StepWhat to doTime or frequency
Log the noticeRecord issue, response, and appeal datesThe day it arrives
Contact the issuing departmentAsk about compliance plans and penalty holdsBefore the response deadline
Schedule qualified inspectionDo not wait for enforcement to resolveImmediately
Submit report and cover letterReference notice number and summarize findingsBy the response deadline
Document communicationsKeep emails, call notes, and confirmationsThroughout
Preserve appeal rightsFile a timely appeal or hearing requestWithin the appeal window

SB 721 and SB 326: Which Law Applies to Your Property

Boards often confuse SB 721 and SB 326. Both deal with balcony and elevated element safety, but they apply to different property types and set different duties.

Start by identifying your building type and whether it is a condominium association. That answer usually shows which rule applies.

For a deeper look at how these rules compare, see Balcony Inspection Report Requirements and our guide on SB 326 inspection cost.

Responsibility and Cost Allocation Within an HOA

Responsibility for inspections and repairs is often split between the association and individual owners.

Boards should review their CC&Rs before a repair dispute begins. Clear records of who owns and maintains each element make cost decisions far easier.

If you are weighing who should perform the inspection work, How to Choose a Balcony Inspection Company lays out what to check before you hire.

For help with the legal steps that follow a missed deadline, see Legal Steps for Forcing HOA Balcony Repairs in 2026.


Missing an SB 326 deadline is a risk you can control.

Frequently Asked Questions

What is the deadline for SB 326 inspections?

SB 326, codified in the California Civil Code, requires condominium associations with qualifying exterior elevated elements to have those elements inspected by a qualified person within a set period, and then on a recurring cycle after that first inspection. Associations should confirm the exact dates that apply to their building in the statute and with their local building department, since the schedule depends on the building’s construction and when it was first subject to the requirement. Tracking these dates on a shared calendar and assigning one board member to own the deadline helps prevent a missed inspection.

What penalties can an HOA face for not complying with SB 326?

Enforcement of SB 326 noncompliance involves local building departments, and penalty structures should be confirmed with the issuing agency. The total exposure depends on how long the violation lasts, how many violations exist, and how the local agency chooses to enforce. Fine figures repeated online often differ, so boards should verify the penalty authority in the statute and their local ordinance rather than relying on a single estimate.

How much does an SB 326 inspection cost?

Apex Balcony has not published fixed pricing for SB 326 inspections, and cost depends on the size of the building, the number of exterior elevated elements, the access required, and whether sampling or follow-up work is needed. Board members comparing proposals should ask each provider what is included, such as the inspection report, photographs, and recommended repair notes. For current pricing or a quote, contact Apex Balcony directly through its website.

What is the difference between SB 721 and SB 326?

SB 721 and SB 326 both address balcony and exterior elevated element safety in California, but they apply to different property types and carry different obligations. Because the applicable law depends on the property’s ownership structure and occupancy, an owner should confirm which statute applies before scheduling an inspection.

GoogleAdd apexbalcony.com as a preferred source on Google →
Posted in BlogTagged sb 326 fact sheet, sb 326 inspection cost, sb 326 inspection penalties for noncompliance, sb 326 inspection report, sb 326 penalties, sb 721 and sb 326Leave a Comment on 5 SB 326 Inspection Penalty Risks California HOAs Miss

What Are the Structural Retrofit Options for Apartment Buildings?

Posted on November 16, 2026November 16, 2026 by Apex Balcony admin
What Are the Structural Retrofit Options for Apartment Buildings?

Last Updated: November 14, 2026

Quick Summary

Structural retrofit options for apartment buildings include steel moment frames, steel bracing, plywood and concrete shear walls, foundation anchoring, cantilever columns, and fiber-reinforced polymer repair. The right structural retrofit depends on the building’s structural system, the specific weakness an engineering evaluation identifies, and how much disruption the property can absorb.

  • Steel moment frames suit soft-story ground floors and open parking but cost more in materials and need foundation support.
  • Plywood shear walls add rigidity to wood-frame buildings but reduce window and door openings in affected units.
  • Foundation anchoring fixes unbolted sill plates and cripple walls but does not solve an upper-floor weakness alone.
  • A structural assessment by a licensed engineer comes before any retrofit method is chosen.
  • Retrofit usually wins when the structure is sound and the weakness is localized.
Not sure which retrofit your building needs?Apex Balcony inspects balconies, decks, and stairways and documents what your building actually needs.

Book a Structural Inspection

Table of Contents

  • Structural Retrofit Options for Apartment Buildings: A Comparison Framework
    • Quick Comparison: Steel Frames vs. Shear Walls vs. Foundation Work
  • Apartment Building Seismic Retrofit: Matching Systems to Structural Weaknesses
    • Steel Moment Frames and Steel Bracing
    • Plywood Shear Walls and Concrete Shear Walls
    • Foundation Anchoring, Cripple-Wall Bracing, and Settlement Repair
    • Fiber-Reinforced Polymer (FRP) and Concrete Repair
    • Diaphragm, Collector, and Nonstructural Upgrades
    • Matching the System to the Weakness
  • Soft-Story Retrofit for Apartment Buildings: Fixing the Ground-Floor Weakness
  • Structural Assessment for Multifamily Buildings: What to Expect Before You Choose a Method
  • Apartment Building Retrofit vs Replacement: How Owners and Boards Should Decide
  • Cost Drivers, Permits, and Keeping Residents Safe During Construction
    • What Drives Retrofit Cost
    • Lifecycle Economics: Retrofit vs. Replacement vs. Deferred Maintenance
    • Permits, Codes, and Jurisdictional Variation
    • Keeping Residents Safe and Housed During Construction
  • Next Step: Book a Structural and Balcony Inspection Before You Commit to a Retrofit
  • Frequently Asked Questions

Structural Retrofit Options for Apartment Buildings: A Comparison Framework

Structural retrofit is the process of strengthening an existing building’s frame, foundation, and load path so it can resist forces it was never originally designed to carry. Owners often ask which retrofit method is best before anyone has confirmed what the building actually needs. That order is backwards.

The right structural retrofit options for apartment buildings depend on three things: the building’s structural system, the specific weakness an engineering evaluation identifies, and how much disruption the property can absorb. Below, we break down steel moment frames, shear walls, foundation work, and soft-story solutions, then show how to match each one to a real building condition.

Quick Comparison: Steel Frames vs. Shear Walls vs. Foundation Work

Here is the short version before the detail:

Retrofit SystemBest ForMain Trade-offResident Disruption
Steel moment frameSoft-story ground floors, open parkingHigher material cost, needs foundation supportModerate; ground-floor access affected
Steel bracingAdding lateral stiffness in tight footprintsConsumes floor or wall spaceModerate
Plywood shear wallWood-frame buildings with solid wall linesReduces window and door openingsHigh in affected units
Foundation anchoringCripple-wall and sill-plate weaknessesDoes not fix an upper-floor weakness on its ownLow to moderate
Cantilever columnReplacing vulnerable posts at soft storiesLimited lateral resistance aloneModerate

The table is a starting point, not a decision. Each system solves a different problem.

Apartment Building Seismic Retrofit: Matching Systems to Structural Weaknesses

The biggest mistake we see is choosing a system before the engineering evaluation names the weakness. An apartment building seismic retrofit works when the method matches the failure mode, and fails when it does not.

Structural engineer inspecting a steel moment frame during an apartment building structural retrofit.

Steel Moment Frames and Steel Bracing

Steel moment frames suit buildings with a weak or open ground floor, such as tuck-under parking. The frame resists lateral movement through rigid beam-to-column connections, and it works best when set into a sturdy foundation.

Both options cost more in materials than wood solutions. They also demand careful foundation work, because a strong frame on a weak footing transfers the problem rather than solving it.

Plywood Shear Walls and Concrete Shear Walls

Plywood shear walls are a common approach in wood-frame retrofits. They add building rigidity by bracing wall lines against lateral forces.

Concrete shear walls serve the same function in concrete and masonry apartment buildings, and they are typically cast in place or shotcrete-applied to existing wall lines. They add significant mass and stiffness, which helps with drift control but increases foundation demand.

Foundation Anchoring, Cripple-Wall Bracing, and Settlement Repair

Foundation anchoring addresses a different weakness entirely. Cripple walls and sill plates that are not bolted to the foundation let the building shift off its base. Anchoring and reinforcement here are relatively low-disruption, but they do not fix an upper-floor or soft-story problem by themselves. Where the foundation itself has settled or cracked, underpinning or grouting may be needed before any superstructure retrofit makes sense.

Fiber-Reinforced Polymer (FRP) and Concrete Repair

FRP systems wrap or bond high-strength fiber sheets to concrete columns, beams, and walls to restore or add capacity without adding much weight or thickness. They are useful where a concrete member is deteriorated or under-strength but the building cannot absorb the mass or footprint of a new shear wall. FRP is not a lateral system on its own; it is a targeted strengthening tool that complements frames, walls, and bracing.

Diaphragm, Collector, and Nonstructural Upgrades

A retrofit that strengthens the lateral system but ignores the diaphragm, the floor and roof planes that transfer forces to the walls and frames, leaves the load path incomplete. Collectors and drag struts, parapet bracing, and anchorage of heavy nonstructural elements are frequently part of a real scope, and they are often where change orders appear if they are not priced up front.

Matching the System to the Weakness

Use the failure mode, not the marketing, to narrow the options:

  • Open or soft ground floor: steel moment frame, cantilever column, or steel bracing, paired with foundation strengthening.
  • Wood-frame building with continuous wall lines: plywood shear walls, with anchoring at the base.
  • Concrete or masonry building with under-strength members: concrete shear walls or FRP, depending on mass and footprint constraints.

For the specific compliance deadlines and structural strengthening requirements that apply to residential buildings, see our guide to seismic retrofit requirements for residential buildings.

Soft-Story Retrofit for Apartment Buildings: Fixing the Ground-Floor Weakness

A soft-story building has a ground floor that is significantly more open or flexible than the floors above it.

LA Soft Story Retrofit – Understanding the LA Ordinance and Retrofit Solutions

Simpson Strong-Tie

Soft-story retrofit for apartment buildings usually combines a steel moment frame or cantilever column system with foundation strengthening, so the ground floor gains lateral-force resistance without losing its usable open space.

Watch out: retrofitting only the ground floor while ignoring a weak foundation below it leaves the load path broken. The frame and the footing have to be designed together.

Structural Assessment for Multifamily Buildings: What to Expect Before You Choose a Method

A structural assessment for multifamily buildings is a licensed engineer’s evaluation of the building’s condition, load path, and vulnerabilities, delivered as a written report you can use for scoping and permits.

Expect the engineer to review original drawings, walk the building, and document defects. You can read more about what assessors typically look for in common structural defects in multi-family buildings.

For a walkthrough of how the process runs from scheduling to report, see our step-by-step guide to multi-unit building inspections.

Apartment Building Retrofit vs Replacement: How Owners and Boards Should Decide

Retrofit usually wins when the structure is sound and the weakness is localized. Replacement enters the conversation when damage is widespread, the building cannot be brought into code compliance at reasonable cost, or the site itself is the problem.

Boards should weigh four factors: the engineering report’s findings, the remaining useful life of major systems, the disruption to residents during construction, and the long-term capital plan. A retrofit that solves today’s weakness but triggers another major project in five years is rarely the cheaper path.

This is a capital-planning decision, not just an engineering one. Get the assessment first, then compare retrofit scope against replacement on total lifecycle cost.

Cost Drivers, Permits, and Keeping Residents Safe During Construction

Most retrofit articles stop at “costs vary.” That is true but not useful to an owner or board trying to build a capital plan. The sections below break the cost into its drivers, explain how permits and code requirements shape scope, and lay out what occupied-building construction actually looks like.

What Drives Retrofit Cost

Retrofit cost is driven by building size, structural condition, the extent of upgrades, access to the work areas, and local permit requirements. No honest contractor quotes a number before seeing the building. Within those broad drivers, a few specifics move the number most:

  • Scope of the lateral system. A localized foundation anchoring package is a different order of magnitude from a full soft-story steel frame with new footings.
  • Foundation and anchorage work. Excavation, new footings, and doweling into existing concrete are labor-intensive and often discovered late.
  • Access and staging. Urban infill sites with no laydown area, limited crane access, or shared alleys carry a premium.

For context on repair pricing, see our breakdown of the cost of balcony structural repairs.

Lifecycle Economics: Retrofit vs. Replacement vs. Deferred Maintenance

The cheapest bid is rarely the cheapest project. Compare options on total lifecycle cost, not first cost:

  • Retrofit preserves the existing structure and rental income, but adds maintenance obligations for the new systems and may trigger follow-on upgrades.
  • Replacement resets the building’s useful life but carries demolition, relocation, and lost-income costs that rarely appear in a simple comparison.
  • Deferred maintenance looks free until a repair becomes an emergency, at which point the premium for emergency mobilization and temporary shoring is substantial.

Financing matters here too. Special assessments, reserve-fund draws, and commercial loans each carry different timing and cost implications, and lenders increasingly ask for the engineering report before committing.

Permits, Codes, and Jurisdictional Variation

Permits and code compliance vary by jurisdiction, so confirm local requirements early. A few practical points:

  • Triggering ordinances. Some jurisdictions require retrofit of soft-story, unreinforced masonry, or concrete buildings on a published schedule. Confirm whether the building is subject to a mandate before scoping voluntary work.
  • Current code vs. existing conditions. A retrofit is typically designed to a current or adopted standard, but the extent of triggered upgrades, accessibility, fire, energy, depends on the scope and the local building official.
  • Plan review timelines. Structural permits for occupied buildings often require separate plan review and inspection sequences; build those into the schedule.

Keeping Residents Safe and Housed During Construction

Resident safety during construction deserves equal attention to cost. Practical measures include:

  • Phasing by building section or stack so that no more than a defined share of units is out of service at once.
  • Maintaining egress. Keep exits, corridors, and stairways clear, and coordinate any temporary closures with the fire official.
  • Temporary access. Provide alternate routes for parking, entry, and ADA access when the ground floor is under construction.

A retrofit that is well scoped, permitted, and phased is a capital project. One that is not becomes a resident-relations problem with a structural price tag.

Next Step: Book a Structural and Balcony Inspection Before You Commit to a Retrofit

The hardest part of a structural retrofit is not choosing a system. It is committing money before you know what the building actually needs.

Apex Balcony provides licensed inspectors with decades of combined construction and design experience, specialized expertise in SB 326 and SB 721 compliance, and comprehensive inspection of balconies, decks, and stairways. When early signs point to broader structural concerns, Sash Group Design Remodel can help frame the next steps for a renovation that addresses the building as a whole.

If you are ready to hire the right professional for that inspection, our guide to hiring structural engineers for inspections covers what to ask and what to verify.


The real risk is not the cost of a retrofit.

Get started with Apex Balcony and get a clear, documented picture of your building’s structural condition before you commit to any retrofit scope.

Frequently Asked Questions

What are the main structural retrofit options for apartment buildings?

The main options are steel moment frames, steel bracing, plywood shear walls, and foundation strengthening with anchoring. Soft-story buildings typically use steel moment frames or strong-walls at the ground floor. Buildings with continuous wall lines often use plywood shear walls. Many projects combine methods, such as adding shear walls while anchoring the foundation. A licensed structural engineer matches the system to your building’s lateral-force resistance, load path, and existing condition. The right choice depends on your building type, not on a single best method.

How does a soft-story retrofit for apartment buildings differ from a full seismic retrofit?

A soft-story retrofit targets one specific weakness: a ground floor that is open for parking or retail and lacks lateral-force resistance. The work usually adds steel moment frames or shear walls at that level and ties them into the foundation. A full apartment building seismic retrofit addresses the whole structural system, including upper floors, roof connections, and foundation anchoring. Soft-story work is narrower in scope and often less disruptive, but it does not fix weaknesses elsewhere in the building. Start with a structural assessment for multifamily buildings to confirm which scope applies.

Is it better to retrofit an older apartment building or replace it?

Retrofit is usually the lower-cost path when the building is in reasonable condition and the structural issues are localized. Replacement becomes the better choice when damage is widespread, the layout cannot meet current needs, or repeated repairs have not solved water intrusion and framing decay. Owners should compare the apartment building retrofit vs replacement decision on total capital cost, lost rent during construction, and remaining useful life. A structural assessment gives you the condition data to make that comparison. Get a written scope and engineer’s opinion before committing either way.

Can balconies, decks, and exterior stairs be included in a structural assessment?

Yes. A structural assessment for multifamily buildings should cover elevated exterior elements, including balconies, decks, stairways, and their connections to the building. These elements carry residents daily and are exposed to water and weather, so they deteriorate faster than interior framing. In California, SB 326 and SB 721 address inspection of these elements for many multifamily properties. Combining a balcony inspection with your retrofit planning lets one engineer flag connection and anchoring issues before construction starts, which can change the retrofit scope.

GoogleAdd apexbalcony.com as a preferred source on Google →
Posted in BlogTagged apartment building seismic retrofit, soft-story retrofit for apartment buildings, structural retrofit, structural retrofit options for apartment buildingsLeave a Comment on What Are the Structural Retrofit Options for Apartment Buildings?

Apartment Building Structural Maintenance Plan: A Guide

Posted on November 15, 2026November 15, 2026 by Apex Balcony admin
Apartment Building Structural Maintenance Plan: A Guide

Last Updated: November 13, 2026

Quick Summary

A structural maintenance plan is a written schedule that assigns every load-bearing and weather-exposed building element an inspection interval, an owner, and a repair trigger. A usable plan covers four things: the asset inventory, the inspection calendar, the repair decision rules, and the record trail.

  • List every balcony, deck, stairway, and elevated walkway by building, floor, and unit in the asset inventory.
  • A structural inspection checklist covers walking surfaces, guardrails, connections and flashing, drainage, the underside, and the membrane.
  • Cheap tasks done often, like clearing drains twice yearly, prevent expensive tasks done urgently.
  • Fund recoating from operating reserves and plan membrane replacement into the reserve study.
  • Compare contractor bids line by line on unit rates, not totals, because a cheaper bid usually reflects a smaller scope.
Is your building’s maintenance plan actually working?Apex Balcony inspects balconies, decks, and stairways for SB 326 and SB 721 compliance.

Book a Balcony Inspection

Table of Contents

  • Why a Structural Maintenance Plan Matters for Apartment Buildings
  • What to Include in an Apartment Building Maintenance Plan Template
    • Core Components Every Template Needs
    • Records and Documentation for HOA Boards
  • A Structural Inspection Checklist for Apartment Buildings
  • Building an Apartment Building Preventive Maintenance Schedule
    • Maintenance Frequency, Trigger, and Budget Line
    • Scenario Budgets by Deck Size and Damage Level
    • Seasonal Windows for Multifamily Properties
  • Balcony Inspection Requirements California Property Owners Must Know
  • How to Compare Contractor Estimates and Scope of Work
    • Line-Item Bid Comparison Sheet
    • Normalizing Bids Across Scope Differences
    • Apartment-Specific Costs Competitors Omit
  • Lifecycle Costs and Multifamily Planning for Occupied Buildings
  • Booking Your Structural Inspection with Apex Balcony
  • Frequently Asked Questions

Why a Structural Maintenance Plan Matters for Apartment Buildings

A structural maintenance plan is a written schedule that assigns every load-bearing and weather-exposed building element an inspection interval, an owner, and a repair trigger. For apartment buildings, that plan is the difference between a routine repair and a catastrophic failure. The 2015 Berkeley balcony collapse that killed six people changed how California regulates elevated exterior elements, and the Malibu collapse in 2021 reinforced the lesson: deferred maintenance on balconies and walking decks is not a cosmetic issue.

Below, we break down what a working plan contains, how to build an inspection checklist, and how to compare contractor bids without getting taken. The stakes here are legal, financial, and human.

What to Include in an Apartment Building Maintenance Plan Template

A usable apartment building maintenance plan template covers four things: the asset inventory, the inspection calendar, the repair decision rules, and the record trail. Skip any one of them and the plan becomes a document nobody opens.

Core Components Every Template Needs

Start with a complete asset inventory. List every balcony, deck, stairway, and elevated walkway by building, floor, and unit. Note the substrate type (concrete, wood-framed, or steel), the waterproofing membrane system, and the installation year where records allow.

Then add the inspection calendar. Each asset gets a frequency tied to its material and exposure. Concrete balconies on the coast weather differently than protected interior decks.

Finally, write the repair decision rules. Define what triggers a patch, what triggers a membrane replacement, and what triggers immediate closure. Vague thresholds get ignored under budget pressure.

Records and Documentation for HOA Boards

Documentation is where most boards fall short. Keep inspection reports, photos with dates, contractor scopes, permits, and repair invoices in one indexed file. When a dispute or audit arrives, that file is your defense.

A common mistake is storing reports by contractor instead of by asset. File by building and element, so a future inspector can trace the full history of one balcony in minutes.

A Structural Inspection Checklist for Apartment Buildings

A structural inspection checklist for apartment buildings should cover six areas: walking surfaces, guardrails and handrails, connections and flashing, drainage, the underside and framing, and the waterproofing membrane. Each item needs a pass, monitor, or fail rating with a photo.

Licensed inspector examining a cracked apartment balcony for a structural maintenance plan

Walk the checklist in the same order every time. Consistency is what makes reports comparable year over year.

  • Walking surface: check for cracks, spalling, soft spots, and trip hazards
  • Guardrails: test height, spacing, and anchor stability by hand
  • Flashing and connections: look for separation where the deck meets the wall
  • Drainage: confirm scuppers and drains flow freely, no ponding
  • Underside: inspect for water staining, efflorescence, and exposed rebar
  • Membrane: check for blistering, seams lifting, and punctures

For the specific structural requirements that apply to apartment balconies, see our guide to structural inspection requirements for apartment balconies.

Building an Apartment Building Preventive Maintenance Schedule

An apartment building preventive maintenance schedule maps each asset to a frequency, a seasonal window, and a budget line. The goal is to catch membrane failure before water intrusion reaches the subfloor, and to give the board a defensible number to fund each year rather than a surprise capital call.

Maintenance Frequency, Trigger, and Budget Line

TaskFrequencyTypical TriggerWho PerformsBudget Profile
Visual walk-throughQuarterlySeasonal changeIn-house maintenanceLowest; staff time only
Drain and scupper clearingTwice yearlyRain seasonIn-house or handymanLow; hourly labor
Sealant and flashing checkAnnuallyPre-winterWaterproofing contractorModerate; per-linear-foot pricing
Membrane inspectionAnnuallyPre-winterLicensed inspectorModerate; per-asset inspection fee
Full structural inspectionPer legal cycleCompliance deadlineLicensed inspectorHigher; per-building fee
Membrane recoatingOn condition (typically 5-10 years)Chalking, hairline cracksWaterproofing contractorPer-square-foot coating cost
Membrane replacementOn condition (typically 15-25 years)Failure or ageWaterproofing contractorHighest; capital project

The logic is simple. Cheap tasks done often prevent expensive tasks done urgently. A board that clears drains twice a year spends far less than one that replaces a rotted subfloor.

Scenario Budgets by Deck Size and Damage Level

ScenarioSmall Deck (under 100 sq ft)Medium Deck (100-250 sq ft)Large Deck (250-500 sq ft)
Routine recoating (surface prep + coating)Low four figuresMid four figuresHigh four figures
Membrane replacement (demo, new membrane, flashing, finish)Low five figuresMid five figuresHigh five figures
Concealed damage (subfloor or framing repair added)Add roughly 30-60% to membrane replacementAdd roughly 30-60%Add roughly 30-60%

A common pattern is that the recoating line is funded from operating reserves, while membrane replacement and concealed-damage work must be planned into the reserve study. Boards that lump all three into one line tend to defer the capital work until a leak forces the issue.

Seasonal Windows for Multifamily Properties

Schedule exterior work when the membrane can cure and when residents are least disrupted. In most climates, late spring through early fall is the recoating and replacement window; pre-winter is the inspection and sealant window. Avoid scheduling membrane work during the rainy season, when a failed cure can void the manufacturer’s warranty.

California properties also carry a legal inspection cycle for balconies. Our California balcony law inspection frequency guide lays out the mandated intervals so your schedule matches the statute.

Balcony Inspection Requirements California Property Owners Must Know

California balcony inspection requirements come from two statutes, and owners routinely confuse them. SB 326 governs balconies, decks, stairways, and elevated elements in covered multifamily buildings, generally those with three or more units. SB 721 applies to exterior elevated elements on certain buildings.

How to Compare Contractor Estimates and Scope of Work

Comparing contractor estimates means comparing scope line by line, not just totals. A bid that is thousands of dollars cheaper usually reflects a smaller scope: less demolition, thinner membrane, or no subfloor repair. This section gives you a line-item structure for comparing bids.

Line-Item Bid Comparison Sheet

Ask every bidder to break the estimate into the same line items. If a contractor will not itemize, that is itself a signal. Use this checklist as the required format:

  • Demolition and removal, square footage, deck count, and disposal method stated
  • Substrate repair, priced as a unit rate per square foot, with a stated cap or allowance for concealed damage
  • Flashing and termination details, linear feet priced, with the detail method named (surface-mounted vs. reglet)
  • Drainage, scuppers, drains, and slope correction priced separately
  • Membrane product, manufacturer, product name, thickness, and warranty length named
  • Finish or coating, product named, number of coats stated
  • Permits and inspection scheduling, included or excluded, with fee amount
  • Disposal, dumpster, haul-off, and landfill fees included
  • Access and height, scaffolding, lift, or crane costs itemized
  • Tenant coordination, temporary closures, protection of units below, and phasing priced
  • Warranty, labor and material warranty terms, start date, and exclusions
  • Payment schedule, deposit, progress payments, and retainage stated

Normalizing Bids Across Scope Differences

Once every bid is itemized, compare unit rates rather than totals. A bid with a lower total but a missing flashing line is not cheaper, it is incomplete. Convert each line to a per-square-foot or per-linear-foot figure and compare like for like. Where a line is missing entirely, add a reasonable allowance before comparing.

A practical approach is to build a bid comparison sheet and score each bidder on three axes: completeness of scope, unit-rate competitiveness, and warranty terms. The lowest total rarely wins on all three.

Apartment-Specific Costs Competitors Omit

On an occupied apartment building, three additional cost lines commonly appear in bids:

  • Access and protection, protecting units below from debris and water, and providing safe egress for residents during work
  • Phasing, working by stack or by building section so residents are not displaced all at once
  • Coordination, property manager time, tenant notices, and scheduling around lease cycles

If you need licensed firms to bid against, our guide to finding licensed balcony repair contractors in California explains what credentials to verify.

Lifecycle Costs and Multifamily Planning for Occupied Buildings

Lifecycle cost planning asks what an asset will cost to own over its full service life, not what it costs to fix today. For occupied apartment buildings, that calculation has to include tenant disruption.

A membrane replacement on an occupied building means access coordination, temporary closures, and phased work by stack. Those logistics add cost that a vacant-building estimate never shows.

Boards that plan ahead group repairs into phases and align them with reserve fund cycles. That spreads the capital hit and keeps the building safe between phases. After an inspection or audit, our guide on how to prioritize building repairs after an audit walks through ranking work by risk and urgency.

Booking Your Structural Inspection with Apex Balcony

The gap between a plan on paper and a safe building is a licensed inspection. Apex Balcony works with building owners and HOA boards across the state, and our licensed inspectors bring decades of combined construction and design experience to every walk-through.

We specialize in SB 326 and SB 721 compliance, and we inspect every elevated exterior element: balconies, decks, and stairways. Our reports identify early signs of structural failure and give you a clear path to the repairs that actually matter.

You do not have to guess at your building’s condition or your legal exposure. Contact Apex Balcony to learn more about inspection services for your property.


Your board has a deadline whether or not it has a plan. Book an inspection with Apex Balcony and get a licensed assessment of every balcony, deck, and stairway on the property, with a report you can take straight to the board.

Frequently Asked Questions

What should an apartment building structural maintenance plan include?

A solid structural maintenance plan covers four things: an inventory of all elevated exterior elements (balconies, decks, stairways, walkways), a scheduled inspection calendar with frequency tied to each element’s risk, a documentation system for inspection reports and repair records, and a repair prioritization process. It should also name who is responsible for each task, whether that is the HOA board, property manager, or a licensed inspector. Without those four pieces, a plan is just a list of good intentions.

How often should an apartment building be inspected for structural issues?

Most multifamily properties benefit from a visual walkthrough annually and a deeper structural inspection every three to five years, but the right interval depends on building age, climate exposure, and material type. In California, balconies and elevated elements carry separate statutory inspection timelines under SB 326 and SB 721. Your preventive maintenance schedule should account for both routine checks and any legally mandated inspection deadlines so you are not caught off guard.

How do balcony inspection requirements California sets affect my maintenance plan?

California law requires periodic inspections of elevated exterior elements on certain multifamily buildings, with deadlines and qualifications tied to building type and size. Those requirements should be built into your maintenance plan as fixed calendar items, not treated as one-off events.

How can preventive maintenance reduce structural repair costs?

Small problems caught early are cheaper than failures caught late. A cracked sealant joint or a clogged drainage path costs little to correct, but the same issue left alone can let moisture reach the subfloor and framing, turning a minor repair into a membrane replacement or structural fix. A preventive maintenance schedule spreads inspection and upkeep costs across years and gives your board time to budget for repairs instead of funding emergencies from reserves.

GoogleAdd apexbalcony.com as a preferred source on Google →
Posted in BlogTagged apartment building maintenance plan template, apartment building structural maintenance plan, structural inspection checklist for apartment buildings, structural maintenance planLeave a Comment on Apartment Building Structural Maintenance Plan: A Guide

Apartment Deck Waterproofing Cost Factors Explained

Posted on November 14, 2026November 14, 2026 by Apex Balcony admin
Apartment Deck Waterproofing Cost Factors Explained

Last Updated: November 12, 2026

Quick Summary

Apartment deck waterproofing cost depends mainly on three things: the area being treated, the condition of the structure beneath the membrane, and the access the job requires in an occupied building. Labor, protection of occupied units, and repairs to hidden damage usually drive the real spread between bids more than the membrane itself.

  • Membrane material is often a smaller share of the bill than owners expect.
  • Smaller decks often cost more per square foot because setup and cleanup effort stays roughly the same.
  • Decks above occupied units may need scaffolding, hoists, or staged work, each adding time.
  • Bids that exclude subfloor repair often become change orders once the old membrane is removed.
  • Get a condition assessment before requesting bids so the scope can be defined and budgeted.
Is your deck due for an inspection?Apex Balcony inspects balconies, decks, and stairways to help California buildings stay compliant and safe.

Book inspection

Table of Contents

  • What Drives Apartment Deck Waterproofing Costs
  • Deck Size, Surface Area, and Access Conditions
  • Membrane Types and Their Material Costs
  • How Existing Damage Changes the Scope: Repair Versus Replacement
  • Balcony Inspection and Waterproofing: What the Assessment Should Cover
  • How to Compare Deck Waterproofing Estimates
  • Planning Your Next Step: Getting an Inspection and Budget for Your Building
  • Frequently Asked Questions

What Drives Apartment Deck Waterproofing Costs

A deck waterproofing cost estimate for an apartment deck is not a single number. It reflects how much membrane needs replacing, what has already failed underneath, and how hard the crew must work to reach it. Most of the price comes down to three things: the area being treated, the condition of the structure beneath the membrane, and the access the job requires in a building people still live in.

Owners often ask first for a per-square-foot rate. Those figures exist, but they only mean something once you know what the rate includes. NAHB construction cost resources tracks how material and labor inputs move over time, which helps explain why bids for similar decks can vary from year to year.

The membrane itself is usually a smaller share of the bill than owners expect. Labor, protection of occupied units, and repairs to hidden damage tend to drive the real spread between bids.

Watch out: A low bid that excludes subfloor repair often becomes a change order once the old membrane is removed.

Deck Size, Surface Area, and Access Conditions

Surface area sets the baseline. A small balcony and a long podium deck may use the same membrane type, but the larger deck spreads setup costs across more square feet, which can lower the per-square-foot rate. Smaller decks often cost more per square foot because mobilization, material handling, and cleanup take roughly the same effort regardless of size.

Access matters just as much. Decks above occupied units, on upper floors, or in tight courtyards require scaffolding, hoists, or staged work to keep residents safe. Each of those adds time. Contractors also need to protect landscaping, parked cars, and common areas, and that protection has a cost.

Access conditions can change the cost of two decks of the same size. Your estimate should show access items as separate lines so the board can see what drives the difference.

Membrane Types and Their Material Costs

The membrane system is the most visible cost. Common options include liquid-applied membranes, sheet membranes, and cementitious or hybrid systems. Each has tradeoffs in material price, installation time, and expected service life.

  • Liquid-applied membranes: Often flexible and suited to complex shapes and penetrations. Installation is labor-intensive, and thickness and curing conditions affect performance. Material costs are moderate, but skilled application matters.
  • Sheet membranes: Can be quick to lay on large, flat surfaces. Seams and edge details require careful work, and they may be less forgiving around many penetrations.
  • Cementitious and hybrid systems: Can add durability in heavy-traffic areas. They are often heavier and may require more substrate preparation.

Ask every bidder to name the exact product, its thickness or sheet gauge, and the warranty terms. Two bids that both say “waterproofing membrane” can describe very different systems. Compare the scope, not just the total.

Pros and cons at a glance:

  • Liquid-applied: flexible and adaptable to odd shapes, but quality depends heavily on the applicator
  • Sheet: faster on simple decks, but seams and details need close inspection
  • Cementitious: durable under traffic, but heavier and more demanding on the structure

The article compares the main membrane systems and their tradeoffs, which a quick reference table can summarise.

Membrane typeBest forKey difference
Liquid-appliedComplex shapes and penetrationsFlexible; quality depends on applicator
SheetLarge, flat surfacesQuick to lay; seams need close inspection
Cementitious and hybridHeavy-traffic areasDurable; heavier and more substrate prep

How Existing Damage Changes the Scope: Repair Versus Replacement

Before any membrane goes down, the crew removes the old system and inspects what lies underneath. This is where estimates most often change. Water that has penetrated the deck can rot wood framing, corrode steel, or crack concrete. Each finding adds scope.

A surface-level failure, such as a worn coating with sound substrate, may allow spot repair and recoating. Widespread water intrusion usually calls for full removal, subfloor replacement, and a new membrane. Structural damage may need engineering review before any waterproofing begins. Because the scope of structural repairs can shift the work from surface treatment to major reconstruction, the same assessment of underlying damage also helps explain why roof replacement quotes vary.

To make budgets comparable, separate the work into three damage scenarios.

Owners should ask bidders how they will handle hidden damage: whether they include a unit rate for subfloor replacement, who approves additional work, and how quickly change orders are documented. A clear unit price for replacement material protects the building from surprise invoices.

Watch out: A bid that prices only the visible membrane work and leaves subfloor repair as an open-ended allowance is not comparable to one with firm unit rates, and the difference often surfaces only after demolition begins.

Balcony Inspection and Waterproofing: What the Assessment Should Cover

A thorough assessment comes before any bid is final. It should document the membrane’s condition, drainage paths, flashing at the wall and door connections, the state of railings and attachments, and any visible or probable water staining in the units below. For an occupied apartment building, the assessment should also record how crews will reach each deck, where tenants and vehicles will be protected, and which units may need temporary access or closure during work.

Inspector examining a balcony underside to assess deck waterproofing cost needs

Many associations also use a structural inspection to meet local requirements. In California, owners of multi-unit properties with elevated decks often coordinate these assessments with state balcony safety rules. Review current requirements with counsel or your property manager, and confirm with the California Department of Housing and Community Development for the latest program details. Across jurisdictions, responsibility can vary with building documents and whether a deck is a common element or a limited-use area, so the board should confirm in writing who owns the repair obligation before budgeting.

A good inspection report gives the board three things: photographs of the deteriorated areas, a condition rating for each deck, and a recommended scope with separate line items for repair and replacement. Without those, you cannot compare bids meaningfully. The report should also flag concealed-damage risk: visible symptoms often understate what lies beneath the membrane, which is why a reliable quote depends on an inspection that probes substrate condition, not just surface appearance.

For apartment buildings, plan the inspection around occupancy. Coordinate access with property managers, give tenants advance notice of unit entries, and schedule noisy demolition or membrane removal during agreed hours. Protect units below with containment and verify drainage so water used in cleaning or testing does not reach lower floors. These logistics carry real cost, and a bid that ignores them will either add charges later or cut corners.

Finally, treat the inspection as the start of a lifecycle plan. Compare initial installation cost with expected service life, inspection intervals, routine maintenance, and likely replacement timing. A membrane that costs more upfront but lasts longer and needs less frequent repair can be the lower-cost choice over the building’s reserve horizon. The board should record the expected service life and maintenance schedule alongside the budget so future boards can plan replacements before leaks force emergency spending.

How to Compare Deck Waterproofing Estimates

Compare estimates line by line, not by the bottom number. Start by confirming that each bidder inspected the same decks and assumed the same scope. A bid that covers only membrane application while another includes demolition, substrate repair, and flashing is not a fair comparison.

Use this checklist when reviewing bids:

  • Square footage and deck count match across all bids
  • Membrane product, thickness, and manufacturer are named
  • Demolition and disposal are itemized
  • Subfloor repair has a unit price for replacement material
  • Access, protection, and scheduling costs are shown separately
  • Warranty length and what it covers are stated in writing
  • Insurance certificates and license numbers are provided
  • Payment schedule is tied to completed milestones

Ask each contractor for references from comparable apartment or condominium projects. Confirm that they carry liability insurance and workers’ compensation coverage. A cheap bid from a firm with no verifiable references can cost far more after the first leak.

Keep the board’s decision-making transparent. Share the bids and the inspection findings with owners, document the reasons for the chosen contractor, and retain copies of the scope and warranty.

Planning Your Next Step: Getting an Inspection and Budget for Your Building

Start with a condition assessment before requesting bids. That single step turns vague worry into a defined scope you can budget against. Owners who wait until a leak appears usually face higher repair bills and tenant complaints.

If you are preparing a budget, U.S. Department of Housing and Urban Development guidance on multifamily property maintenance offers general resources on capital planning and reserve funding that many boards find useful.

Apex Balcony provides licensed inspectors who examine balconies, decks, and stairways for California property owners and HOA boards. book a balcony inspection to start with a clear picture of the condition of your building. For a sense of typical repair scope, see our balcony repair cost estimation guide, and for per-square-foot membrane figures, read balcony waterproofing cost per square foot.

Start with a site inspection, get written scopes from qualified contractors, and budget for hidden damage before the first membrane comes off. That order protects residents, reserves, and the building’s long-term value.


Frequently Asked Questions

How much does it cost to waterproof an apartment deck?

Cost depends on deck size, the membrane system chosen, access conditions, and how much substrate or subfloor damage is found. Pricing varies widely by project, so Apex Balcony does not publish general rates. Contact Apex Balcony through its website for a quote based on your building’s deck dimensions and inspection findings. Comparing estimates that list the same scope, membrane type, and damage assumptions gives the most reliable picture of what your project will cost.

What factors affect apartment deck waterproofing costs?

The main drivers are deck surface area, project type (balcony, walking deck, or podium deck), access conditions for crews and materials, the membrane system selected, and the extent of water damage, rot, or structural repair. Occupied buildings can add cost through scheduling, protection of neighboring units, and phased work. An inspection that documents these conditions is the most reliable way to understand which factors apply to your building.

Does repairing deck damage increase waterproofing costs?

Yes, damage often raises the scope. Repairing failed flashing, replacing rotted sections, or fixing a compromised subfloor must happen before a new membrane can be installed correctly. Minor surface issues may be handled as repairs, while widespread membrane failure usually points toward full replacement. Because the extent of damage is often unknown until surfaces are opened, estimates should state how hidden conditions will be handled.

How often does an apartment deck waterproofing system need to be replaced?

Service life varies with membrane type, climate, drainage performance, and maintenance. Regular inspections help catch cracking, ponding water, or failed sealant early, which can extend the system’s life and reduce repair scope. Owners and HOA boards should plan reserve funds with a lifecycle view and ask contractors to explain expected service life for the membrane proposed.

GoogleAdd apexbalcony.com as a preferred source on Google →
Posted in BlogTagged apartment balcony repair costs, apartment deck waterproofing cost factors, apartment deck waterproofing cost per square foot, deck waterproofing cost, deck waterproofing estimate

Posts navigation

Older posts

Recent Posts

  • What Landlords Need to Know About Balcony Safety Compliance
  • Best Hardware for Cantilevered Deck Connections: A Connector Guide
  • 7 SB 721 Inspection Payment Options for Property Owners
  • Are Hidden Balcony Framing Problems Showing Up in Your Building?
  • Apartment Building Maintenance Budget: A Step-by-Step Guide

Recent Comments

No comments to show.

Archives

  • November 2026
  • October 2026
  • September 2026
  • August 2026
  • July 2026
  • June 2026

Categories

  • Blog
Logo
Created by Unilime.Group
  • Balcony Law
  • About us
  • Inspection services
  • FAQ
  • Blog

Call us ‪+1 818-806-7885‬
License: CSLB #1101305

Apex Balcony Inspection
‪+1 818-806-7885‬
[email protected]
4645 Van Nuys Blvd #201
Sherman Oaks CA 91403

Created by Unilime.Group