

Quick Summary
The best hardware for cantilevered deck connections is a connector whose published uplift and download capacity meets the loads at the cantilever root, installed with its exact fastener schedule. Face-mount, concealed-flange, and skewed hangers can each work when their catalog ratings match the joist size and loads. Cantilevered deck connections need that verification, because hardware alone cannot fix undersized framing.
- At the cantilever root, the hanger must resist both downward load and uplift from the overhang.
- Face-mount hangers are often reasonable at the root if published uplift capacity meets the design uplift load.
- Using screws in place of specified nails voids a hanger’s published capacity.
- Skewed hangers are rated only at their factory angle and should not be substituted with field-bent hangers.
- A hanger cannot correct framing that is too short or undersized for the cantilever length.
Table of Contents
- Why Cantilevered Deck Connections Need Specialized Hardware
- How Load Travels Through a Cantilevered Deck
- Joist to Beam Connection Deck Hardware Options
- Deck Joist to Post Connection and Beam-to-Post Hardware
- Simpson Strong-Tie Deck Connectors Compared by Capacity
- Railing Post to Deck Connection and Lateral-Load Ties
- Choosing Hardware, Fasteners and Corrosion Protection for Your Next Repair
- Frequently Asked Questions
Why Cantilevered Deck Connections Need Specialized Hardware
Cantilevered decks extend past their support points, which changes how every connection in the structure carries load, so cantilevered deck connections deserve closer attention than standard framing. Standard deck hardware is generally designed for joists that sit fully on a beam, so using it unchanged at a cantilever can leave the connection working outside its intended range.
Questions about whether the hardware on an existing cantilever is still appropriate are common among HOA boards and property managers. Answering them starts with understanding where the forces go. The connectors you choose determine whether those forces reach the structure safely.
How Load Travels Through a Cantilevered Deck
A cantilevered deck carries weight through a chain of connections. Loads move from decking to joists, from joists to beams, and from beams to posts or the building.
Two loads matter most. Gravity load pushes straight down from people, furniture, and snow. Lateral load pushes sideways, such as from a crowd leaning on a railing or wind against the structure.
Understanding this path helps you choose hardware that matches each point in the chain rather than applying one product everywhere. For the deeper construction and code rules behind these load paths, see cantilever beam deck construction code rules.
Joist to Beam Connection Deck Hardware Options
The joist-to-beam connection at the cantilever root is the single most heavily loaded connection in a cantilevered deck. Unlike a simple span, where the joist bears on the beam and the hanger mainly holds the joist in place, a cantilevered joist transfers both downward load and uplift through the same connection. The back span pushes down on the beam while the overhang tries to lift the joist, and the hanger must resist both. That is why hanger selection at the root deserves more scrutiny than the same hanger used mid-span.
Face-Mount Hangers
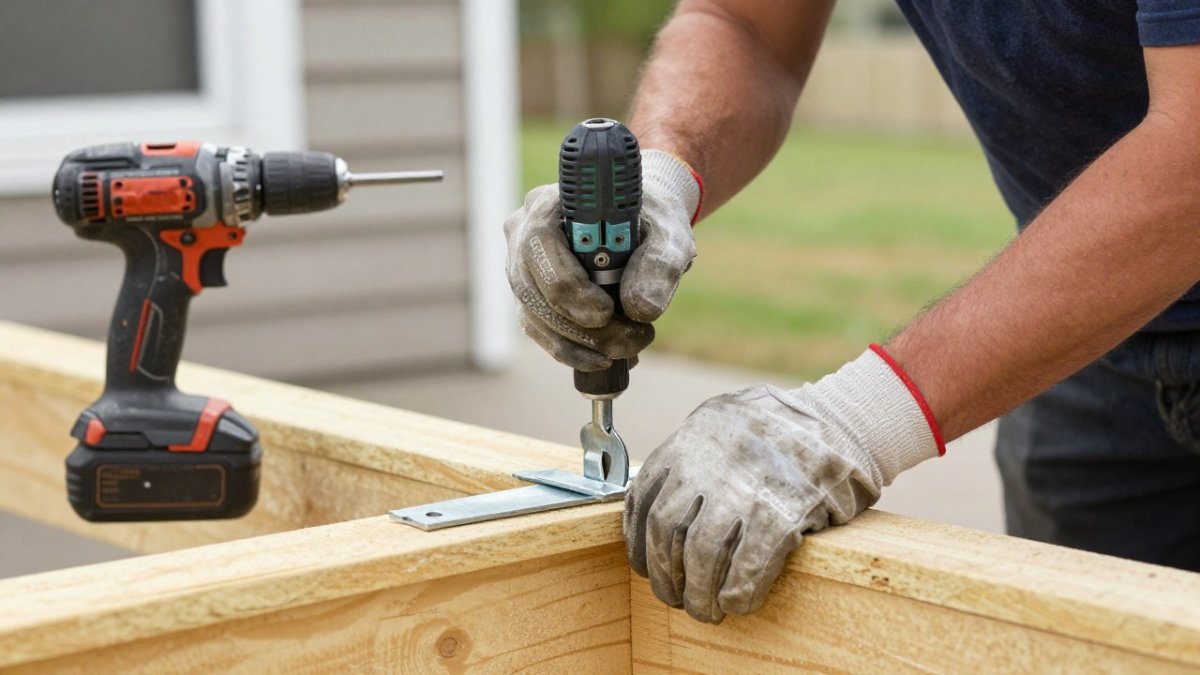
Face-mount hangers attach to the face of the beam and cradle the joist from the side. They are the most common choice because they install quickly and are available in sizes for nearly every nominal joist dimension.
Watch out: face-mount hangers installed with the wrong nail size or with screws substituted for the specified nails lose their published capacity. The fastener schedule printed on the hanger or in the catalog is not a suggestion.
Concealed-Flange Hangers
Concealed-flange hangers hide most of the metal inside the joist, which gives a cleaner appearance from below. The trade-off is installation tolerance: the joist must be cut and fit precisely, and the fasteners must be driven at the angles the manufacturer specifies. Concealed-flange hangers are commonly used where the underside of the deck is visible, but they are less forgiving of field modifications than face-mount styles. Proper structural integration remains essential when transitioning to synthetic materials, a process detailed further in this composite deck installation guide.
Skewed and Specialty Hangers
When a joist meets the beam at an angle, common on octagonal or angled deck layouts, a skewed hanger keeps the connection aligned with the joist. Skewed hangers are manufactured for specific angles, and the published capacity applies only at that angle. Field-bent hangers are not equivalent to factory-skewed hangers and should not be substituted. Specialty hangers exist for double joists, dropped beams, and other conditions, but each is rated for its listed application only.
When a Hanger Is the Wrong Tool at the Root
A hanger is a connector, not a structural upgrade. If the cantilever is longer than the joist size and species can support, or if the back span is too short to resist the uplift the overhang creates, no hanger will correct the framing deficiency. The connection can be perfectly installed and still be part of an assembly that is not adequate. Signs that hardware alone will not solve the problem include joist deflection or sag at the overhang, visible movement at the root connection, and a back span that is short relative to the cantilever length.
Installation Sequence at the Root
The order of work matters. Set the beam, lay out the joist locations, cut the joists to the correct back-span and overhang lengths, then install the hangers with the specified fasteners before the decking goes down. Installing hangers after the joists are in place often forces the installer to use shorter or fewer fasteners than the schedule requires. Verify the fastener schedule against the catalog page for the exact model installed, and record the model number and fastener type for future inspection.
Deck Joist to Post Connection and Beam-to-Post Hardware
Below the beam, the load continues through posts. Post bases and standoff hardware keep the post off the concrete or footing, which limits moisture and rot. Beam-to-post connectors then tie the beam to the post so the two work as one unit.
Corrosion matters here more than almost anywhere else. Posts and footings sit in wet conditions, so hardware should be rated for the exposure it will face. Galvanized or stainless steel options are commonly used for this reason, and it is worth checking their coating against the lumber type you’re using, especially treated lumber.
Simpson Strong-Tie Deck Connectors Compared by Capacity
Deck hardware guidance often recommends connectors by category without comparing published capacities. This section compares them. For a cantilevered deck, the connector at the root of the cantilever is the one doing the hardest work, and its rated capacity is the number that determines whether the assembly is adequate. Simpson Strong-Tie publishes allowable load tables for every connector it sells, and those tables are the correct starting point for any comparison.
Where to Find the Numbers
Every Simpson Strong-Tie connector has a published load table in its product catalog and on the manufacturer’s website. The table lists allowable download, uplift, and lateral loads for each product, along with the fastener schedule and the lumber species and grade assumed in the test. A connector’s capacity is only valid when installed with the exact fasteners, in the exact member sizes, and at the exact angles listed. Change any of those variables and the published number no longer applies.
Comparing Hanger Families by Published Capacity
Face-mount hangers, concealed-flange hangers, and skewed hangers are not interchangeable by capacity. Within each family, Simpson publishes a range of models sized for different joist depths and widths, and the allowable download capacity varies substantially across that range. The practical comparison method is:
- Identify the joist size and species at the cantilever root.
- Look up the hanger models listed for that joist in the current catalog.
- Compare the allowable download and uplift values for each model against the loads your design requires.
- Confirm the fastener schedule, nail size, nail type, and fill, matches what the capacity table assumes.
A hanger that looks heavier than another is not necessarily stronger for your specific joist and load combination. The catalog table, not the visual bulk of the steel, is the authority.
Beam-to-Post and Post-Base Capacity
Beam-to-post connectors and post bases follow the same logic. Simpson publishes allowable uplift and lateral capacities for each model, and those values depend on the post size, the beam size, and the fastener schedule. Post bases with standoff height are rated differently from flush bases, and the standoff model you choose affects both moisture protection and capacity. Compare the published values for the post size you are actually using rather than assuming a larger base is always stronger.
What the Tables Do Not Tell You
Published capacities assume the connected members are sound, the fasteners are installed correctly, and the load path below the connection is adequate. They do not tell you whether a cantilever of a given length is permissible, that depends on span, lumber species and grade, joist dimensions, live and dead loads, and local code.
Watch out: substituting a different fastener, a shorter nail, a screw in place of a nail, or a different coating, voids the published capacity even if the connector looks identical. The table is only valid for the exact fastener schedule printed beside it.
A Practical Comparison Workflow
For a cantilever repair or new build, the comparison sequence is: determine the loads at the cantilever root, select the connector family that fits the framing geometry, pull the published capacity table for that family, and verify the allowable download and uplift exceed the required loads with the specified fasteners. If no catalog model meets the requirement at the available member size, the connection needs engineered design, not a larger-looking off-the-shelf part.
The table below sets out the four-step comparison sequence the article describes for checking published capacities.
| Step | What to do | Note |
|---|---|---|
| 1 | Identify joist size and species at the cantilever root | Sets which models apply |
| 2 | Look up listed hanger models in the current catalog | Matched to that joist |
| 3 | Compare allowable download and uplift values | Against required design loads |
| 4 | Confirm the fastener schedule matches the table | Nail size, type and fill |
Railing Post to Deck Connection and Lateral-Load Ties
Railings are often where lateral loads become most visible. A person leaning against a railing pushes the post sideways, and that force travels into the deck framing.
Lateral-load ties and railing post connectors help distribute that sideways force into the structure. Many common mistakes involve fastening a railing post only to the decking rather than to the framing beneath it.
Check the railing requirements for your jurisdiction, since local codes govern guardrail and post connection details. Our team can review how your railing ties into the framing during an inspection.
Choosing Hardware, Fasteners and Corrosion Protection for Your Next Repair
Hardware selection is only part of the job. Fasteners and coatings determine whether the connection performs as designed over time.
Start by confirming the connector’s listed application, then match the fastener type and length to the manufacturer’s installation table. Use the coating rated for your exposure, and avoid mixing metals that can accelerate corrosion.
Before any repair, have the existing cantilever assessed. Damaged or undersized connections can look intact from the outside. If you’re managing a multi-unit property, our inspections can help your board decide where repairs should start. You can book an inspection through the Apex Balcony website.
Frequently Asked Questions
What hardware is best for a cantilevered deck connection?
Engineered galvanized or stainless steel connectors rated for the specific load, such as face-mount or concealed-flange joist hangers, post bases and lateral-load ties, are typically the starting point. The right choice depends on the joist size, cantilever length and the fastener schedule published by the manufacturer. Check the rated uplift and lateral capacity in the manufacturer’s current catalog and confirm the design with a licensed engineer or your local building department before installing anything.
Can standard joist hangers be used for cantilevered deck framing?
Standard joist hangers are designed for gravity loads on simple spans, so they often do not account for the uplift and rotation forces a cantilever creates. Cantilevered framing usually calls for hangers and connectors listed for that application, installed with the fastener type and count the manufacturer specifies. Using the wrong hanger can leave the connection under-rated, so verify the listing before substituting parts.
How do you connect a deck railing post to the framing?
Railing posts are typically attached through the rim joist or the deck framing with through-bolts or structural post connectors, not with decking screws alone. The connection must resist the lateral loads that people place on the rail. Confirm the attachment method against the guardrail requirements in your local code, and have a qualified inspector review posts that will carry significant load.
Why does Apex Balcony recommend a professional inspection for existing cantilevered decks?
Corrosion, loose fasteners and water damage at connections often go unnoticed until a failure occurs. Apex Balcony’s licensed inspectors evaluate balconies, decks and stairways for signs of structural distress and help HOAs and property owners understand what repairs are needed for California compliance. Current pricing depends on the size and scope of the property, so visit the Apex Balcony website for a quote.
