Logo
  • Balcony Law
  • About us
  • Inspection services
  • FAQ
  • Blog
  • Call us ‪+1 818-806-7885
  • Book now

Tag: sb 326 balcony inspection requirements

How to Fix Wobbly Balcony Railings Safely

Posted on October 3, 2026 by Apex Balcony admin
How to Fix Wobbly Balcony Railings Safely

Table of Contents

  • Why Wobbly Balcony Railings Are a Safety Hazard
  • Identifying the Source of the Wobble
    • Material-Specific Diagnostic Framework
    • Loose Fasteners and Bolts
    • Wood Rot and Decay in the Rim Joist
    • Damaged Post Anchors and Connections
  • Signs of Balcony Structural Failure You Cannot Ignore
  • Step-by-Step Repair Guide for Wobbly Railings
    • Step 1: Tighten loose carriage bolts and lag screws
    • Step 2: Install metal brackets and reinforcers
    • Step 3: Add blocking between rim joists for lateral stability
    • Step 4: Use shims for minor stabilization
    • Step 5: Perform a safety inspection and load-bearing check
  • SB 326 Balcony Inspection Requirements and Code Compliance
  • When to Hire a Structural Engineer for Balcony Safety
  • Common Mistakes to Avoid During Repairs
  • Preventative Maintenance to Stop Future Wobbling
    • Material-Specific Maintenance Schedules
    • Code Compliance and Inspection Documentation
    • Seasonal Risk Factors
    • Maintenance Checklist
    • When to Call a Professional for Maintenance
  • Frequently Asked Questions

Last Updated: October 2, 2026

Why Wobbly Balcony Railings Are a Safety Hazard

A wobbly balcony railing is a structural failure waiting to happen. When railings move under pressure, they’ve lost their ability to catch someone who stumbles or leans against them, their core purpose.

Balcony collapses have killed residents across the country.

This guide covers how to identify, repair, and prevent wobbly balcony railings. We’ll walk you through diagnosis, DIY repair steps, and when to hire a structural engineer.

Identifying the Source of the Wobble

Wobbly railings fail for three main reasons: loose fasteners, rotted wood, or failed connections. The repair method depends heavily on your railing material.

Material-Specific Diagnostic Framework

Wood railings are vulnerable to fastener loosening and wood rot. Pressure-treated lumber shrinks over time, causing bolts to back out; untreated wood absorbs moisture and rots.

Composite railings (PVC, vinyl, or wood-plastic blend) rarely rot but fail when plastic expands and contracts with temperature, loosening fasteners.

Metal railings (aluminum, steel, or wrought iron) corrode at connection points where dissimilar metals meet. Welds crack under stress and bolts seize in corroded holes.

Loose Fasteners and Bolts

Grab the railing firmly and push it side to side. If it moves, check every bolt, screw, and fastener connecting the railing to the deck structure. Loose fasteners are the easiest fix.

Look for:

  • Carriage bolts that have backed out
  • Lag screws that have lost tension due to wood shrinkage
  • Missing washers or lock washers
  • Bolts that spin freely without tightening
  • On composite railings: fasteners pulling through the material
  • On metal railings: bolts frozen by corrosion
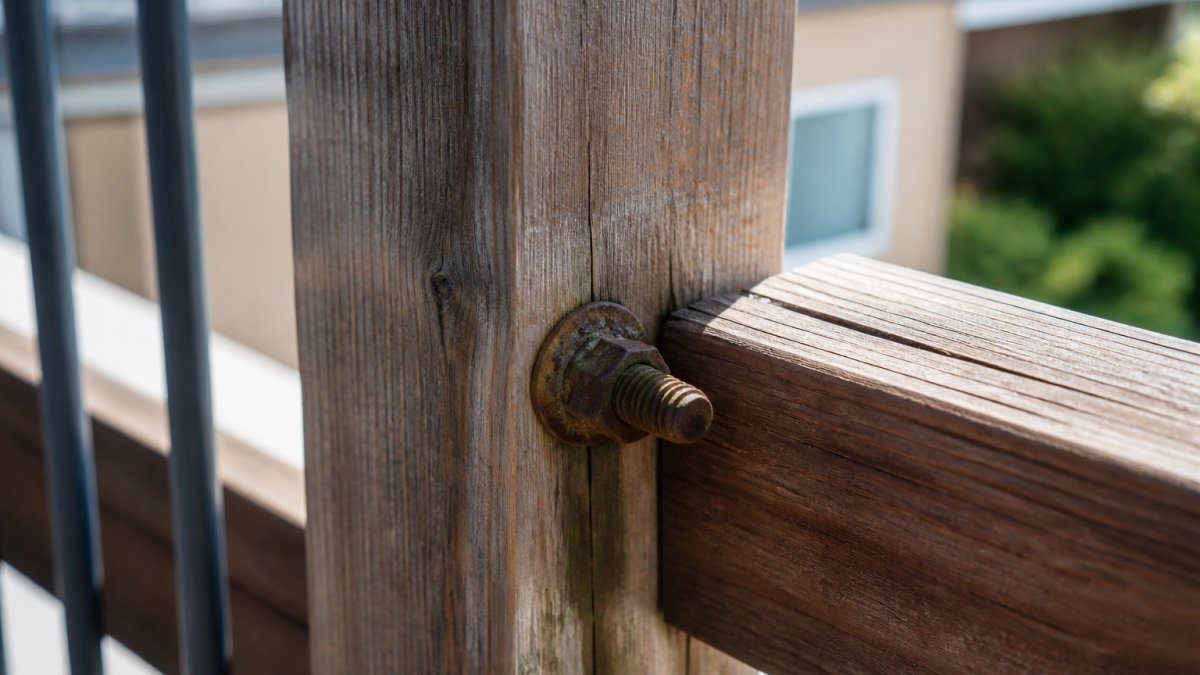
Close-up of a loose carriage bolt on wooden deck railing with visible rust and corrosion on the fastener and surrounding wood grain

Wood Rot and Decay in the Rim Joist

Push on the wood where the railing connects. Soft, spongy wood means rot has set in and weakens the entire connection.

Signs of wood rot include:

  • Soft spots that compress when you press your thumb
  • Dark discoloration or staining
  • Crumbling wood texture
  • Peeling or bubbling paint
  • Musty smell near the connection point
  • Visible gaps between the railing post and the rim joist

Small, isolated soft spots (less than 2 inches) can be treated with wood hardener and reinforced with metal brackets.

Composite and metal railings don’t rot, but wood fastening points beneath them can. If a composite or metal railing is wobbly, inspect the wood rim joist directly.

Damaged Post Anchors and Connections

Post anchors connect the vertical posts to the rim joist and deck frame. When these fail, the entire railing becomes unstable. Inspect for:

  • Bent or twisted metal
  • Corrosion or rust, especially at welds
  • Cracks in welds or bolt holes
  • Bolts pulling through the material
  • Separation between the anchor and the rim joist

Damaged anchors must be replaced entirely; they cannot be repaired. The repair method depends on the railing material and the extent of damage to the underlying structure.

Signs of Balcony Structural Failure You Cannot Ignore

Stop repairs immediately and call a structural engineer if you see these conditions:

  • Visible cracks in the deck or framing
  • Separation between the railing and the deck
  • Posts that lean or are out of plumb
  • Sagging or uneven deck surface
  • Water pooling on the deck
  • Large sections of rotted wood
  • Metal corrosion that has eaten through fasteners

These signal structural failure beyond DIY repair. A professional inspection is required.

Step-by-Step Repair Guide for Wobbly Railings

Follow these steps if you found loose fasteners, minor rot, or accessible damaged anchors. Stop if you encounter conditions beyond these scenarios.

Step 1: Tighten loose carriage bolts and lag screws

What you’ll need:

  • Wrench set (or socket set for carriage bolts)
  • Screwdriver (for lag screws)
  • Washers and lock washers (if missing)
  • Replacement bolts (if damaged)

Process:

  1. Locate each bolt or screw connecting the railing to the rim joist
  2. Test with your wrench; it should be snug with moderate pressure
  3. Tighten in quarter-turn increments, checking for movement after each turn
  4. Do not over-tighten; you’ll strip threads or crush the wood
  5. If a bolt spins without tightening, tighten the nut on the other side

Check your work: Push the railing firmly. It should not move. If it still wobbles, move to Step 2.

Step 2: Install metal brackets and reinforcers

Metal brackets add lateral stability when fasteners alone aren’t enough. Install by:

  1. Position the bracket to bridge the connection between the post and the rim joist
  2. Use exterior-rated fasteners (galvanized or stainless steel)
  3. Pre-drill holes to avoid splitting the wood
  4. Bolt the bracket in place with washers under each bolt head
  5. Use lock washers to prevent bolts from backing out

Step 3: Add blocking between rim joists for lateral stability

Blocking (solid wood or metal bracing between rim joists) prevents the railing from moving side to side. Install by:

  1. Measure the distance between rim joists
  2. Cut pressure-treated lumber to fit snugly
  3. Position the blocking horizontally between the joists
  4. Bolt or screw the blocking to both joists using exterior-rated fasteners
  5. Space multiple blocks 16 to 24 inches apart

Step 4: Use shims for minor stabilization

Shims are thin wedges that fill gaps and take up slack. Install by:

Book inspection →

  1. Identify gaps between the railing and the rim joist
  2. Drive shims into the gap until snug
  3. Trim excess shim material with a saw
  4. Paint or seal the shim to prevent water infiltration
  5. Re-tighten fasteners after shimming

Step 5: Perform a safety inspection and load-bearing check

After repairs, verify that the railing can handle the load it’s designed to bear. Building code requires railings to resist 200 pounds of horizontal force without moving more than 1 inch.

Test by:

  1. Apply steady horizontal pressure at the top rail with your body weight
  2. The railing should not move noticeably
  3. Check all fasteners again, tighten any that have loosened
  4. Inspect the wood around fasteners for new cracks
  5. Walk the length of the railing and listen for creaks

If the railing still moves or you hear wood cracking, contact a structural engineer.

SB 326 Balcony Inspection Requirements and Code Compliance

California law (SB 326, effective January 1, 2019) requires regular inspections of balconies on multi-unit residential buildings with three or more units. Inspections must be completed by a licensed professional engineer, architect, or certified inspector and identify structural defects, water intrusion, and safety hazards. Failing to comply exposes property owners to fines and liability.

When to Hire a Structural Engineer for Balcony Safety

Hire a structural engineer if you encounter:

  • Large areas of wood rot affecting structural members
  • Visible cracks in the deck frame or posts
  • Separation between the railing and the deck structure
  • Posts that are leaning or out of plumb
  • Failed metal connections or welds
  • Water damage affecting multiple deck boards
  • Any condition that makes you uncertain about safety

A structural engineer assesses whether the railing can be repaired or must be replaced and provides documentation for insurance and code compliance.

Common Mistakes to Avoid During Repairs

Avoid these mistakes:

  • Using interior fasteners outdoors. Use only exterior-rated, galvanized, or stainless steel fasteners.
  • Over-tightening bolts. Tighten until snug, then stop.
  • Ignoring rot. Address it immediately or the repair will fail.
  • Skipping the inspection. Diagnose the problem correctly before fixing.
  • Mixing fastener types. Use matching bolts, washers, and anchors from the same system.
  • Failing to seal exposed wood. Seal everything with exterior paint or sealant.

Preventative Maintenance to Stop Future Wobbling

Regular maintenance catches small problems before they become dangerous. Maintenance schedules vary by railing material and climate.

Material-Specific Maintenance Schedules

Wood railings require the most frequent attention. Wood shrinks and swells with seasonal moisture changes, causing fasteners to loosen.

  • Monthly: Visual inspection for new movement, cracks, or water pooling
  • Spring: Tighten all fasteners; inspect for ice damage and moisture intrusion
  • Fall: Clear debris, inspect for rot, tighten fasteners before freeze-thaw cycles
  • Every 1-2 years: Re-tighten all bolts and lag screws
  • Every 3-5 years: Seal or paint the railing
  • After heavy rain: Inspect the rim joist and post bases for water damage

Composite railings are more stable but require attention at connection points. Composite expands and contracts with temperature, loosening fasteners.

  • Quarterly: Check fasteners for looseness
  • Twice yearly: Inspect fastener holes for enlargement
  • Every 2-3 years: Replace any fasteners showing corrosion; use stainless steel bolts only
  • As needed: Clean the composite surface to prevent algae growth

Metal railings are vulnerable to corrosion at connection points and welds.

  • Quarterly: Inspect for rust staining or corrosion around fasteners and welds
  • Twice yearly: Clean corrosion with a wire brush; apply a rust inhibitor
  • Every 1-2 years: Check welds for cracks
  • As needed: Replace corroded fasteners with stainless steel or galvanized alternatives

Code Compliance and Inspection Documentation

Building codes require railings to resist 200 pounds of horizontal force without moving more than 1 inch. Keep maintenance records to demonstrate compliance.

Document your maintenance:

  • Record the date and results of each inspection
  • Note any fasteners tightened, replaced, or repaired
  • Photograph any damage or repairs
  • Keep receipts for materials and professional inspections

If your building has three or more residential units, check whether your jurisdiction requires professional balcony inspections. Many states have adopted standards similar to California’s SB 326, which mandates visual inspections every 6 years.

Seasonal Risk Factors

Winter: Freeze-thaw cycles force water into cracks and fastener holes. Salt accelerates corrosion on metal fasteners.

Spring: Melting snow and spring rain expose rot and water damage. Check for soft spots and water pooling.

Summer: UV radiation degrades paint and sealant. High temperatures cause composite and metal to expand, loosening fasteners.

Fall: Falling leaves trap moisture. Clear debris regularly. Tighten fasteners before winter.

Maintenance Checklist

Maintenance TaskFrequencyMaterialImpact
Tighten fastenersEvery 1-2 yearsWoodPrevents wobble from wood shrinkage
Tighten fastenersEvery 2-3 yearsCompositePrevents loosening from thermal expansion
Inspect for corrosionQuarterlyMetalCatches rust before it weakens fasteners
Inspect for rotTwice yearlyWoodCatches decay before it spreads
Seal cracksAs neededWoodStops water infiltration
Paint or stainEvery 3-5 yearsWoodProtects wood from weather damage
Clear debrisMonthlyAllPrevents water pooling and rot
Professional inspectionEvery 6 yearsAll (multi-unit buildings)Meets code compliance; documents safety

When to Call a Professional for Maintenance

If you find rot affecting more than 10% of the rim joist, corrosion that has eaten through fastener holes, or cracks in metal welds, stop maintenance work and contact a structural engineer. These conditions require professional assessment and repair, not routine maintenance. Understanding the complexity of these structural repair techniques helps homeowners recognize when environmental factors have compromised the integrity of their deck framing.

Frequently Asked Questions

Is a wobbly balcony railing considered an emergency?

Yes. Wobbly balcony railings indicate structural failure and pose an immediate safety risk to residents. Building codes require railings to withstand 200 pounds of lateral force without movement. Any visible wobble suggests fasteners are failing, wood rot is present, or post anchors are compromised. Do not delay repairs. If the wobble is severe, restrict access to the balcony until a structural engineer assesses the damage.

Can I fix a loose railing myself or do I need a structural engineer?

Minor fixes like tightening loose carriage bolts and lag screws can be DIY tasks if you have basic tools and experience. However, if you discover wood rot, corroded fasteners, damaged post anchors, or lateral movement that persists after tightening, hire a structural engineer. Multifamily properties in California with three or more units must comply with SB 326 and SB 721, which typically require professional inspection.

What are the legal requirements for balcony railing stability?

Building codes require balcony railings to resist 200 pounds of lateral force applied at the top rail without deflection or failure. In California, SB 326 requires inspection of balconies in buildings with three or more units, and SB 721 mandates repairs be completed within specified timelines. Non-compliance can result in fines, liability for injuries, and forced closure of balconies. Consult local building officials or a structural engineer to confirm which law applies to your property.

What materials work best for reinforcing wobbly railings?

Use galvanized hardware and exterior-rated fasteners to prevent corrosion and fastener failure. Pressure-treated lumber resists rot and decay in outdoor environments. Metal brackets and reinforcers distribute load and add rigidity. Lock washers prevent bolts from loosening due to vibration. Pre-drill all fastener holes to avoid splitting wood and ensure proper torque application. Avoid mixing materials (wood to steel) without proper washers and sealants, as dissimilar metals accelerate corrosion.
Book inspection

Posted in BlogTagged hiring a structural engineer for balcony safety, how to fix wobbly balcony railings safely, sb 326 balcony inspection requirements, signs of balcony structural failure, wobbly balcony railings

Concrete Spalling: What It Is and Why It Matters

Posted on October 2, 2026 by Apex Balcony admin
Concrete Spalling: What It Is and Why It Matters

Table of Contents

  • What Is Concrete Spalling
    • How Spalling Differs from Other Concrete Damage
  • Primary Causes of Concrete Spalling
    • Freeze-Thaw Cycles and Moisture Infiltration
    • Reinforcement Corrosion and Rebar Oxidation
    • Poor Installation and Curing Techniques
  • Signs of Structural Concrete Failure You Should Not Ignore
  • Why Concrete Spalling Matters for Structural Integrity
    • Progressive Deterioration and Safety Risk
  • SB 326 Balcony Inspection Requirements and Spalling Detection
  • Concrete Spalling Repair Cost and Your Options
    • DIY vs. Professional Repair Threshold
    • Preventative Maintenance Schedule
  • Frequently Asked Questions

Last Updated: October 1, 2026

What Is Concrete Spalling

Concrete spalling is the process where the surface layer of concrete breaks away, exposing the underlying material and reinforcement beneath. When concrete spalls, chunks of the outer surface flake, chip, or peel off in fragments ranging from small surface pits to large chunks that compromise structural integrity.

Once spalling begins, it accelerates: water penetrates deeper, freeze-thaw cycles intensify damage, and exposed reinforcement steel corrodes, creating a deterioration cycle that affects the entire structural system.

Concrete spalling is an early warning sign of serious structural problems. Many property owners confuse it with normal aging, allowing water to penetrate deep into the structure, corroding rebar and compromising load-bearing capacity.

How Spalling Differs from Other Concrete Damage

Delamination occurs when concrete layers separate internally without visible surface damage, detected by hollow sounds when tapping. Surface scaling is thin-sheet loss from salt exposure or improper curing.

Spalling exposes aggregate and reinforcement, penetrating inches deep, unlike scaling’s millimeter-level loss or delamination’s hidden internal separation. This visibility enables early detection.

Repair strategy differs: scaling requires protective coating, delamination needs epoxy injection, and spalling demands immediate intervention to prevent rapid reinforcement corrosion.

Primary Causes of Concrete Spalling

Concrete spalling results from specific environmental stresses and construction defects. Understanding root causes enables preventative maintenance before repairs become expensive.

What Causes Concrete Spalling? Identify And Prevent Chipping, Pitting And Flaking Quicker And Easier

CoverTec Products

Freeze-Thaw Cycles and Moisture Infiltration

The most common cause in winter climates is the freeze-thaw cycle. Water enters through cracks and pores, then expands roughly 9% when frozen, creating internal pressure that forces the surface to break away.

Water enters through surface cracks, poor sealants, inadequate drainage, and capillary action. Trapped in concrete pores, it expands with each freeze cycle and penetrates deeper with each thaw, causing cumulative damage visible as spalling.

Spalling appears most frequently on horizontal surfaces like balconies, decks, and stairs that collect and hold water. Severity depends on concrete porosity and water access to reinforcement.

Reinforcement Corrosion and Rebar Oxidation

Steel reinforcement is protected by concrete’s alkaline environment, which creates a protective oxide layer. When water and oxygen reach the rebar through cracks or spalling, corrosion begins immediately.

Rebar oxidation produces rust occupying three to four times the original steel volume. This expansion forces concrete outward, creating a self-reinforcing cycle: spalling exposes more rebar, which corrodes faster, causing more spalling.

In dry climates, corrosion progresses slowly. In coastal areas or regions using deicing salts, chloride ions accelerate rebar corrosion dramatically. Once visible spalling appears, reinforcement is often already significantly compromised.

Poor Installation and Curing Techniques

Concrete mixed with excess water, a common shortcut, has higher porosity and lower strength, absorbing water readily and failing faster under freeze-thaw stress.

Improper curing, drying too quickly, removing blankets early, or exposing concrete to temperature swings, creates weak, porous concrete. Poor finishing techniques also create weak surface layers prone to spalling.

Inadequate air entrainment is another common defect. Properly entrained concrete contains air bubbles that provide expansion space during freeze-thaw cycles. Without them, concrete is extremely vulnerable to spalling.

Signs of Structural Concrete Failure You Should Not Ignore

Spalling progresses in visible stages. Early detection matters because repair costs escalate sharply once corrosion of the reinforcement begins. The signs start subtle and become unmistakable if you know what to look for.

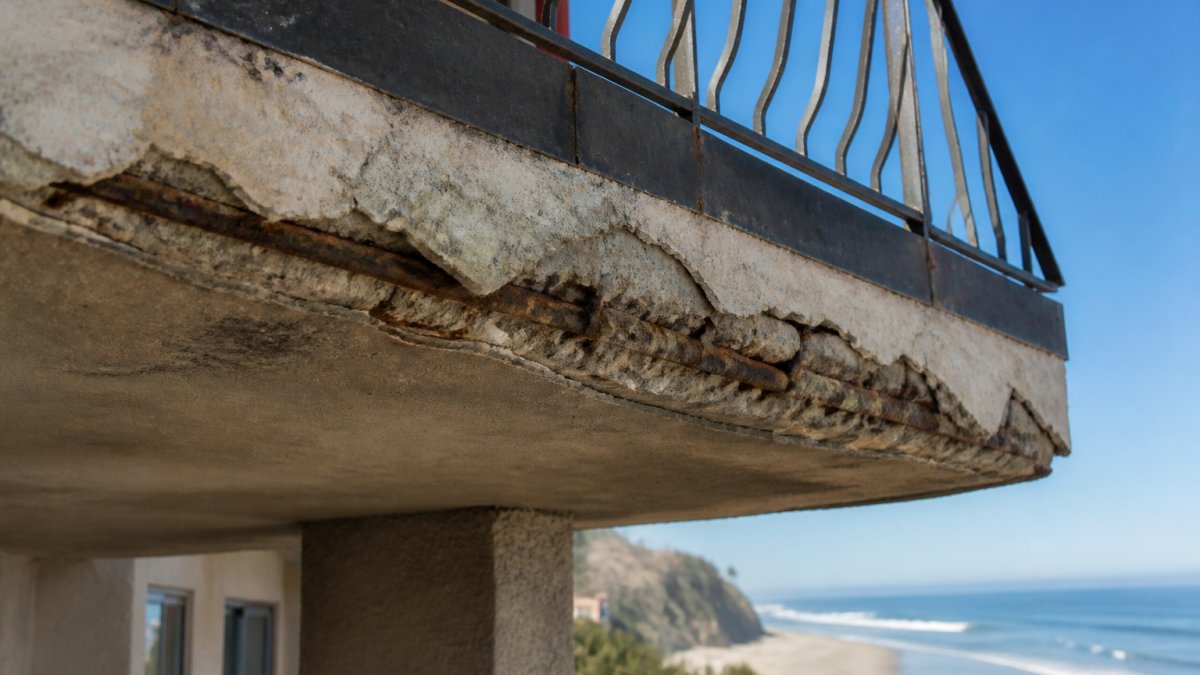
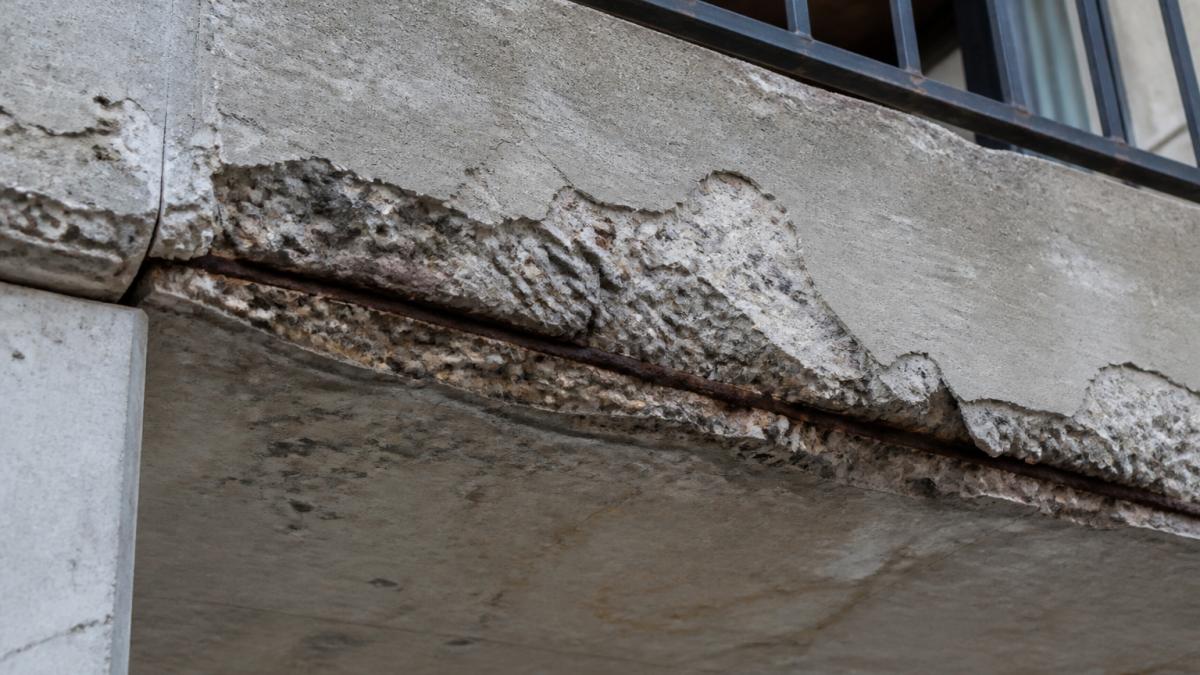
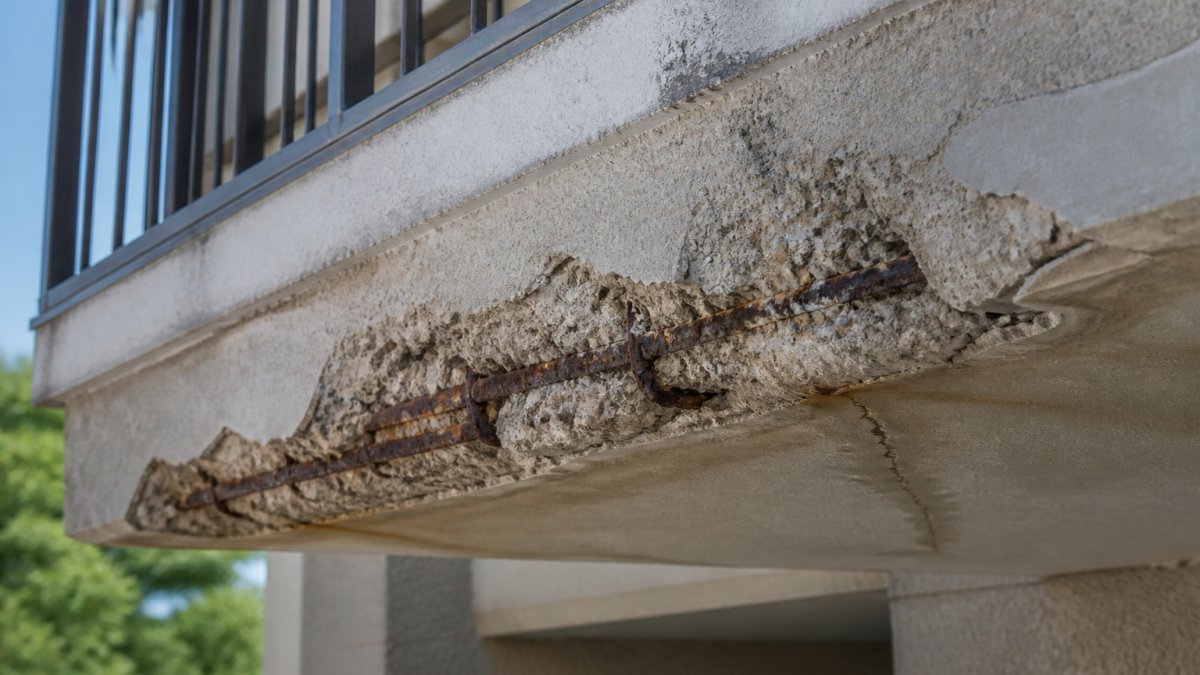
Close-up of concrete balcony surface showing visible spalling with chunks of concrete flaking away, exposing aggregate and rust-stained reinforcement steel, natural outdoor lighting

Surface flaking and small chips are first indicators, light-colored fragments or small pits signal water penetration and early freeze-thaw stress.

Advanced spalling shows larger chunks missing, visible aggregate, rust staining indicating rebar corrosion, soft or crumbly substrate, and radiating cracks suggesting active internal pressure.

Hollow sounds when tapping indicate internal delamination. Combined with visible spalling, this suggests advanced deterioration. Water damage around adjacent windows or doors indicates water penetration into the building interior.

Book inspection →

These signs demand professional assessment. Surface spalling that’s limited to a few small areas might be addressed with patching and sealing. Spalling that covers large areas, exposes significant rebar, or shows signs of active corrosion typically requires concrete removal and replacement or epoxy injection of the damaged area.

Why Concrete Spalling Matters for Structural Integrity

Spalling isn’t just an aesthetic problem. It directly compromises the structural system that holds the building safe. The concrete substrate provides the primary load path for balconies, decks, and elevated elements. Once spalling exposes and corrodes the reinforcement, load-bearing capacity decreases.

The structural concern escalates quickly. A small spalled area reduces load capacity locally. Multiple spalled areas or spalling that extends across a significant portion of a structural element can reduce the element’s capacity below the loads it actually carries. This creates a safety risk: the balcony or deck may no longer safely support the weight of occupants and furnishings.

Water infiltration through spalled concrete also affects adjacent structural elements. Water running through a spalled balcony can saturate the concrete floor slab behind it, corroding reinforcement in the floor system itself. Water can penetrate into the building interior, damaging insulation, finishes, and creating conditions for mold growth. The structural damage extends beyond the visible spalling.

Progressive deterioration accelerates once spalling begins. Each season of freeze-thaw cycles, each rainfall, each exposure to moisture worsens the damage. Repair costs that might have been modest when spalling was first detected become substantial once corrosion has progressed significantly.

Progressive Deterioration and Safety Risk

The danger of spalling is that it’s progressive. Unlike a single structural failure event, spalling develops gradually, and the damage compounds. Initial surface spalling might seem minor. But if left unaddressed, that small area becomes the entry point for water penetration that corrodes reinforcement across a much larger area of the structure.

Safety risk emerges when structural capacity drops below actual loads. A balcony designed to safely support 40 pounds per square foot of occupant load might, after significant spalling and corrosion, safely support only 25 pounds per square foot. This creates a latent hazard: the balcony appears functional but is no longer safe.

The 2015 Berkeley balcony collapse and the May 2021 Malibu incident demonstrated the consequences of unaddressed spalling and corrosion. These failures didn’t happen suddenly, they resulted from years of water infiltration, rebar corrosion, and progressive concrete deterioration. By the time visible failure occurred, the structural damage was catastrophic.

SB 326 Balcony Inspection Requirements and Spalling Detection

California’s SB 326 law requires that buildings with three or more units have balconies, decks, and exterior stairs inspected by a licensed structural engineer or architect. The inspection must assess structural integrity and identify defects that affect safety. Spalling is one of the primary defects that triggers repair requirements under SB 326.

The law mandates that any element found to be in a state of disrepair must be repaired or replaced. Spalling that exposes reinforcement is considered a state of disrepair. Even spalling that hasn’t yet exposed rebar must be evaluated for the extent of water penetration and corrosion risk. The inspection process identifies which spalled areas require immediate repair and which can be monitored.

Property owners have specific timelines under SB 326. Structural defects must be reported to residents, and a repair plan must be submitted to the local building department. Repairs must be completed within the timeframe specified by the local jurisdiction, typically 6 to 24 months depending on severity. Non-compliance can result in fines and liability for injuries resulting from the defective condition. Proactive property management requires a consistent inspection protocol to identify structural defects before they escalate into costly legal or safety liabilities.

SB 326 compliance requires professional assessment by someone qualified to evaluate concrete deterioration and structural implications. This is where professional inspection services become essential. A qualified inspector can distinguish between cosmetic surface damage and structural defects requiring repair, assess the extent of reinforcement corrosion, and recommend appropriate repair strategies.

Concrete Spalling Repair Cost and Your Options

Repair costs for concrete spalling vary dramatically based on the extent of damage, the area affected, and the repair method chosen. A small spalled area on one balcony might cost a few hundred dollars to patch. Spalling that affects multiple units or requires removal and replacement of concrete sections can easily exceed tens of thousands of dollars.

The repair cost depends on several factors: whether the spalling is limited to surface areas or extends deep into the concrete, whether reinforcement is exposed and corroded, the size of the affected area, and accessibility for repair work.

DIY vs. Professional Repair Threshold

Small surface spalling might seem like a DIY project. Cleaning out the damaged concrete, applying a concrete patching compound, and sealing the repair is straightforward work. However, DIY repair of concrete spalling carries real risks.

Preventative Maintenance Schedule

Preventing spalling is far more cost-effective than repairing it. A preventative maintenance program addresses the root causes: moisture infiltration and freeze-thaw stress.


Frequently Asked Questions

What is the most common cause of concrete spalling?

Freeze-thaw cycles combined with moisture infiltration cause the majority of concrete spalling cases. Water enters the concrete through cracks or poor curing, then freezes and expands during winter months, creating internal pressure that forces the surface to break away. In buildings with steel reinforcement, chloride ion penetration and rebar oxidation also trigger spalling as the expanding rust pushes against the concrete substrate.

How serious is concrete spalling and does it lead to structural failure?

Concrete spalling progresses from a cosmetic issue to a structural concern if left untreated. Early surface pitting and flaking may seem minor, but as spalling deepens, it exposes rebar and compromises compressive strength. In elevated elements like balconies, this deterioration accelerates structural failure risk. The 2015 Berkeley balcony collapse and 2021 Malibu incident underscore how spalling left unaddressed can have fatal consequences.

Can concrete spalling be fixed, and what does repair typically involve?

Yes, concrete spalling can be repaired, but the approach depends on severity and location. Surface scaling and minor pitting may respond to patching compound or concrete repair mortar applied to the damaged area. Deeper spalling affecting reinforcement may require epoxy injection, bonding failure correction, or removal and replacement of the affected section. Professional assessment determines whether repair is sufficient or if replacement is necessary.

What should I look for when inspecting my property for signs of structural concrete failure?

Watch for surface flaking, exposed aggregate, visible rebar, water staining, and cracks radiating from spalled areas. On balconies and decks, pay close attention to edges, undersides, and areas near railings where water tends to collect. Soft or crumbling concrete when probed, efflorescence (white powder deposits), and uneven surfaces are all warning signs. If you suspect spalling, a licensed structural inspector can provide a detailed assessment.

Book inspection

Posted in BlogTagged concrete spalling, concrete spalling repair cost, sb 326 balcony inspection requirements, signs of structural concrete failure, what is concrete spalling and why it matters

Why Balcony Structural Decay Happens in Coastal Areas

Posted on October 1, 2026 by Apex Balcony admin
Why Balcony Structural Decay Happens in Coastal Areas

Table of Contents

  • How Salt-Laden Air Accelerates Balcony Structural Decay
  • Moisture Intrusion and Water Seepage in Coastal Environments
  • Corrosion of Metal Components and Fasteners
  • Signs of Dry Rot in Exterior Decks and Load-Bearing Joists
  • SB 326 Balcony Inspection Requirements and Safety Compliance
  • Cost of Balcony Structural Inspection and What to Expect
  • Preventative Maintenance and Early Detection Strategies
  • Frequently Asked Questions

Last Updated: October 1, 2026

How Salt-Laden Air Accelerates Balcony Structural Decay

Salt-laden air is one of the primary culprits behind balcony structural decay in coastal environments. When salt spray from ocean water becomes airborne and settles on metal components, concrete, and wood, it initiates a cascade of corrosion and deterioration that compounds over time. This process doesn’t happen overnight, it’s gradual, relentless, and often invisible until significant damage has already occurred.

The chemistry is straightforward: airborne chlorides penetrate protective coatings and bind to metal surfaces, creating an electrochemical reaction that breaks down the material. Galvanized steel, which is common in balcony construction, offers some resistance, but even galvanized components succumb to salt spray exposure over years. Wood absorbs salt-laden moisture, leading to swelling, shrinkage, and eventual dry rot. Concrete experiences similar salt intrusion, which corrodes embedded rebar and accelerates structural failure.

Apex Balcony has worked with hundreds of building owners. The closer a property sits to the ocean, the more aggressive the environment becomes. Buildings within a quarter-mile of the shoreline face the most severe conditions.

Prevention starts with understanding your micro-climate. A building on a cliff overlooking the Pacific faces different salt exposure than one a mile inland. Wind patterns, building orientation, and surrounding structures all influence how much salt spray reaches your balcony. Identifying your specific exposure level is the first step toward effective maintenance.

Moisture Intrusion and Water Seepage in Coastal Environments

Moisture intrusion is the second major driver of balcony structural decay, and it works in tandem with salt exposure to accelerate failure. Water seepage penetrates the building envelope through cracks, failed sealants, and gaps in flashing. Once inside, moisture becomes trapped within the structural assembly, creating conditions for rot, corrosion, and mold growth.

Coastal environments amplify this problem. Higher humidity, frequent fog, and salt spray-laden moisture create persistent dampness that inland properties rarely experience. Water doesn’t simply evaporate, it lingers, soaking into wood joists, concrete, and the spaces between structural components. The combination of salt and moisture is particularly destructive: salt accelerates corrosion while moisture keeps the metal surface wet enough for the reaction to continue.

Flashing failures are the most common source of water seepage in balconies. Flashing is the metal or rubber seal that directs water away from the building. When flashing deteriorates, cracks, or pulls away from the structure, water runs directly into the assembly below. Over time, this water seeps into ledger boards, joists, and the rim joist, the critical load-bearing components that hold the balcony to the building.

Sealants around penetrations, joints, and edges are equally important. Coastal UV exposure and salt spray degrade sealants faster than in mild climates. A sealant that might last 10 years inland may fail in 5-7 years at the coast. Once sealants fail, water finds its way into every gap.

The real danger emerges when moisture reaches the ledger board, the horizontal member that attaches the balcony to the house. If water intrudes here and remains trapped, the wood begins to rot from the inside out. By the time visible damage appears on the surface, significant structural compromise may already exist.

Corrosion of Metal Components and Fasteners

Metal corrosion is the third pillar of coastal balcony failure. Balconies rely on metal fasteners, brackets, handrails, and reinforcement to function safely. In coastal environments, these components corrode at accelerated rates, losing structural capacity and integrity.

Galvanized steel is the standard for coastal construction because it offers better corrosion resistance than bare steel. However, galvanizing is not permanent. Salt spray and chloride exposure gradually break down the zinc coating, exposing the underlying steel to rust. Once rust begins, it accelerates, rust is porous and traps moisture, creating a cycle of continued corrosion.

Stainless steel offers superior corrosion resistance but is expensive and not universally used. Some builders cut corners by using standard galvanized fasteners in coastal applications. These fasteners corrode within 5-10 years, weakening the connections that hold the balcony together.

Handrails, brackets, and support posts face the same threat. Corroded fasteners lose their grip. Corroded metal loses thickness and strength. A bracket that was once capable of supporting 500 pounds of lateral force might only handle 300 pounds after years of corrosion. This degradation is invisible from ground level but critical to safety.

Metal oxidation also creates expansion problems. As steel rusts, it expands. This expansion can crack concrete, push against adjacent materials, and create stress points that lead to failure. The rust itself is weaker than the original steel, making the corroded area a point of structural weakness.

Book inspection →

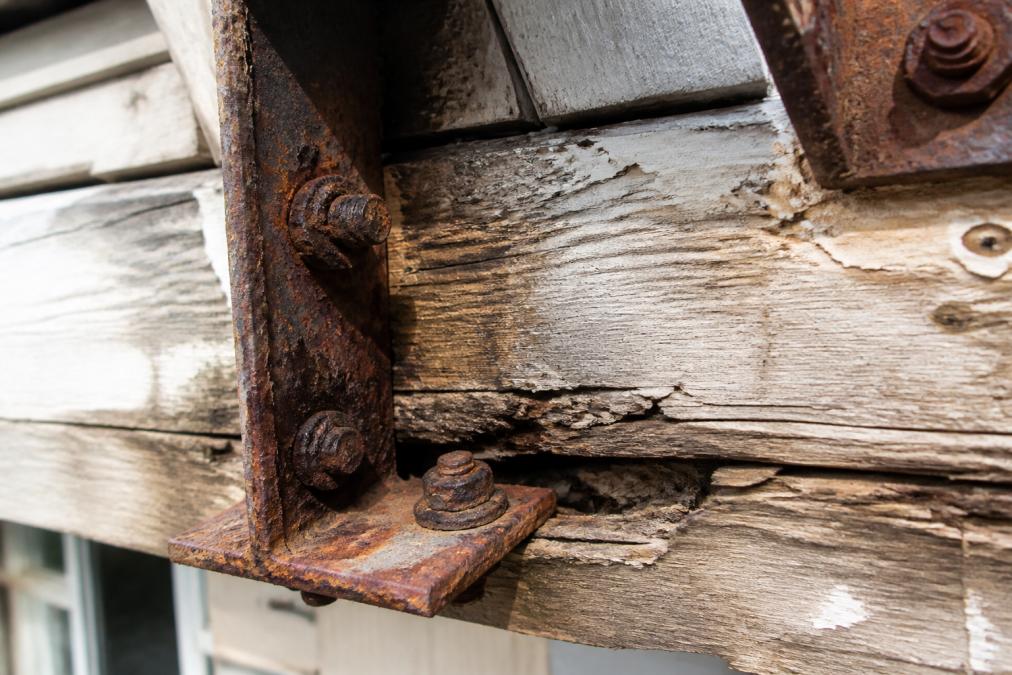
Close-up of heavily corroded metal bolts and brackets on a coastal balcony structure showing rust discoloration and material loss, with weathered wood framing visible in background

Signs of Dry Rot in Exterior Decks and Load-Bearing Joists

Dry rot is the term commonly used for wood decay in exterior structures, though the wood is rarely truly “dry”, it’s usually damp enough to support fungal growth. Dry rot begins when wood moisture content exceeds 20-25%, which is common in coastal environments. Fungal spores germinate, spread through the wood, and break down the cellulose that gives wood its strength.

The early signs are subtle. Discoloration appears first, wood turns darker or develops a grayish cast. The surface may feel soft or spongy. Paint may blister or peel because the underlying wood is moving as it swells and shrinks with moisture changes. Cracks may appear in a distinctive cube-like pattern as the wood shrinks.

By the time structural failure becomes obvious, significant decay has usually occurred. A joist that looks solid on the surface may be 50% compromised internally. When load-bearing joists fail, the entire balcony is at risk of collapse.

Load-bearing joists are the horizontal members that span from the ledger board to the outer rim joist, supporting the weight of the deck and occupants. These are among the most critical components. If they fail, the balcony fails. Coastal properties must pay particular attention to joist condition because the combination of moisture, salt, and temperature cycling accelerates decay dramatically.

Preventative inspection is essential. A professional inspector can probe suspect wood to assess decay depth and structural capacity. Early detection allows for targeted repairs before failure becomes imminent. Many property owners wait until visible damage appears, by which time repairs are more expensive and the safety risk is higher.

SB 326 Balcony Inspection Requirements and Safety Compliance

California’s Senate Bill 326 (SB 326) mandates structural inspections of exterior elevated elements, balconies, decks, and stairways, on residential buildings with three or more units. The law applies to properties constructed before January 1, 2008, and requires inspections to be completed by January 1, 2025, with a five-year cycle thereafter. These mandatory assessments serve as a critical baseline for identifying early signs of deterioration, yet consistent maintenance remains the most effective strategy for preventing exterior damage through the regular removal of salt and moisture buildup.

SB 326 exists because of balcony failures and collapses that resulted in injuries and deaths.

Watch Out
Missing the SB 326 inspection deadline or failing to address identified deficiencies exposes property owners to significant legal and financial liability. If an incident occurs on an uninspected balcony, the property owner’s negligence becomes indefensible.

Cost of Balcony Structural Inspection and What to Expect

The cost of a balcony structural inspection depends on building size, complexity, and accessibility. A professional inspection typically includes a visual assessment of all exterior elevated elements, probe testing of wood for decay, fastener evaluation, and a detailed written report documenting findings and recommendations. Pricing depends on quantity, dates, and delivery. Please visit our website for current prices or a quote.

Pro Tip
Request references from past clients and ask specifically about properties in coastal environments. An inspector with experience in your area understands the unique challenges your building faces and can spot problems early.

Preventative Maintenance and Early Detection Strategies

The most cost-effective approach to managing balcony structural decay is prevention. Preventative maintenance catches problems early, when repairs are less expensive and less disruptive. Early detection also reduces safety risk, a failing balcony that is identified before collapse is far preferable to one that fails unexpectedly.

Visual inspection checklist for property managers:

  • Check flashing and sealants around balcony edges and penetrations
  • Look for paint blistering, cracking, or peeling on wood surfaces
  • Inspect metal handrails and brackets for rust or corrosion
  • Check for water staining or evidence of seepage on the building facade below balconies
  • Look for soft or spongy wood when probing with a screwdriver (light pressure only)
  • Inspect the ledger board connection to the building for gaps or movement
  • Check for visible cracks in concrete or mortar
  • Look for mold, mildew, or algae growth indicating moisture problems

Frequently Asked Questions

How does salt air accelerate structural decay in balconies?

Airborne chlorides from ocean spray deposit on metal fasteners, railings, and structural components, triggering oxidation and corrosion. These salt particles penetrate paint and sealants, exposing steel and galvanized surfaces to accelerated rust formation. Combined with humidity and temperature cycling, salt-laden air weakens the structural integrity of balcony support systems within just a few years.

What are the early warning signs of balcony rot and structural failure?

Look for soft or spongy wood when you press on joists and ledger boards, visible discoloration or darkening of wood surfaces, paint peeling or blistering, rust stains on metal components, water pooling or staining on concrete, gaps between the balcony and house, and visible separation of flashing. Moisture intrusion often causes dry rot to develop inside wood before exterior damage becomes obvious. If you notice any of these signs, a professional structural inspection is essential to assess load-bearing capacity and safety.

Which law applies to my building, SB 326 or SB 721?

SB 326 applies to residential buildings with three or more units built before January 1, 2008, and requires inspection of balconies and exterior elevated elements. SB 721 applies to the same building types and requires the same inspections. Both laws mandate that you hire a licensed architect, structural engineer, or certified inspector to assess structural integrity and code compliance. Contact your local building department or a licensed inspector to confirm which statute applies to your specific property.

How often should coastal balconies be inspected for structural integrity?

Coastal balconies should be inspected annually by property owners. However, salt spray and humidity accelerate decay, so many coastal property managers conduct professional inspections every 3 to 5 years to catch corrosion and moisture damage early. After major storms, saltwater intrusion events, or visible damage, request an immediate inspection. Preventative inspections are far less costly than emergency repairs or structural replacement.

Book inspection

Posted in BlogTagged balcony structural decay, cost of balcony structural inspection, sb 326 balcony inspection requirements, signs of dry rot in exterior decks, why balcony structural decay happens in coastal areas

Is Liquid Applied Waterproofing Worth It for Balconies?

Posted on September 29, 2026 by Apex Balcony admin
Is Liquid Applied Waterproofing Worth It for Balconies?

Table of Contents

  • What Liquid Applied Waterproofing Actually Does for Balconies
  • Signs of Balcony Water Damage and When You Need Waterproofing
  • Liquid Applied Membranes vs. Other Waterproofing Methods
    • Sheet Membranes and Their Limitations
    • Sealants and Coatings: A Temporary Fix
  • Balcony Waterproofing Cost Breakdown and ROI
  • SB 326 Balcony Inspection Requirements and Waterproofing
  • Professional Installation vs. DIY: Risks and Reality
  • The Real Durability and Lifespan of Liquid Applied Systems
  • Is Liquid Applied Waterproofing Worth the Investment?
  • Frequently Asked Questions

Last Updated: September 28, 2026

What Liquid Applied Waterproofing Actually Does for Balconies

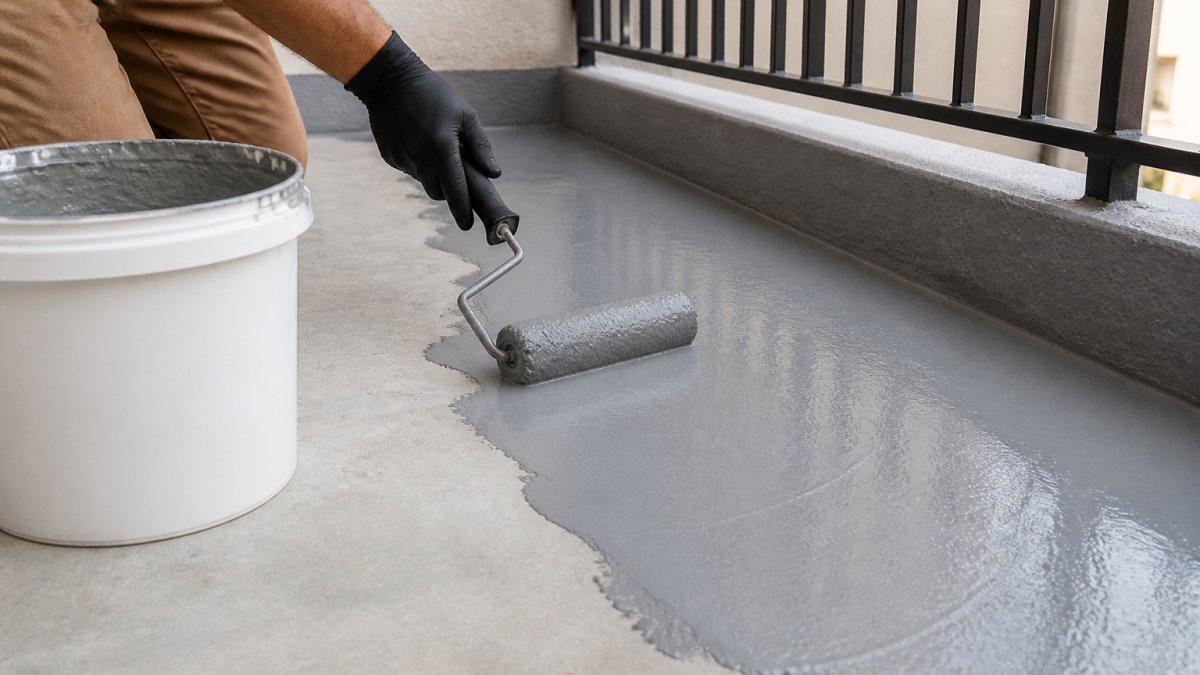
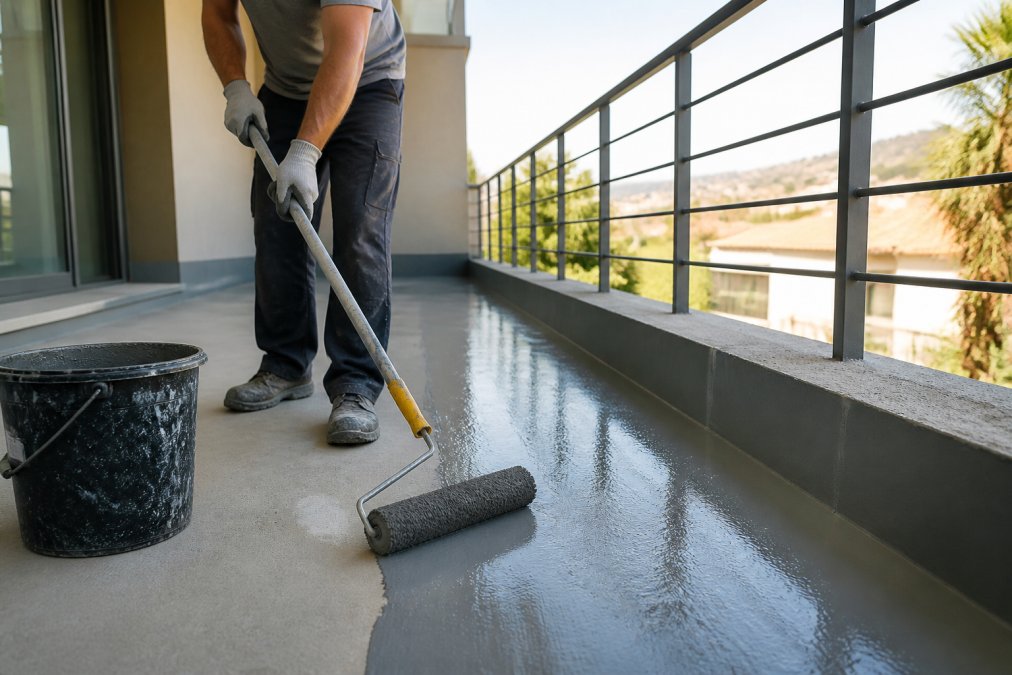
Liquid applied waterproofing creates a seamless, monolithic barrier that prevents water from penetrating concrete and substrate materials. Unlike sheet membranes or traditional sealants, this approach bonds directly to the surface and fills micro-cracks that water exploits. The right waterproofing system can add years to a balcony’s structural life by stopping moisture before it reaches the frame and rebar underneath.

The core function is straightforward: water is the enemy of concrete. Once it seeps past the surface, it triggers corrosion in rebar, freeze-thaw cycles that crack concrete, and wood rot in framing. A liquid applied membrane creates a physical barrier that stops this cycle at the source. The seamless finish eliminates weak points where water can find its way through seams or overlaps.

What makes liquid applied systems different from other waterproofing techniques is their flexibility. They expand and contract with temperature changes, bridge small cracks as they develop, and maintain adhesion even as the underlying substrate moves. This crack bridging capability is critical in climates with significant thermal expansion or where minor settling occurs.

Pro Tip
The effectiveness of any liquid applied system depends entirely on substrate preparation. Dirt, algae, old sealant residue, and loose concrete all prevent proper adhesion. This is why professional installation matters, most DIY failures trace back to inadequate surface cleaning.

Signs of Balcony Water Damage and When You Need Waterproofing

Water damage on balconies rarely announces itself loudly until the problem is severe. The early warning signs are subtle, which is why many property owners miss the window for preventive treatment. By the time visible damage appears, water has often been working behind the scenes for months or years.

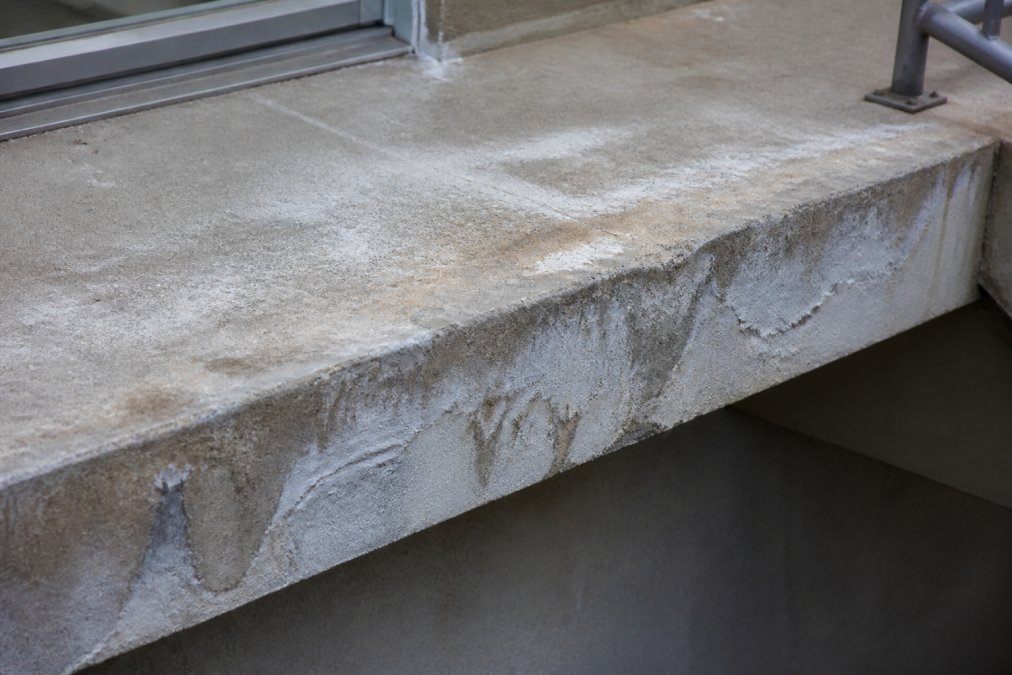
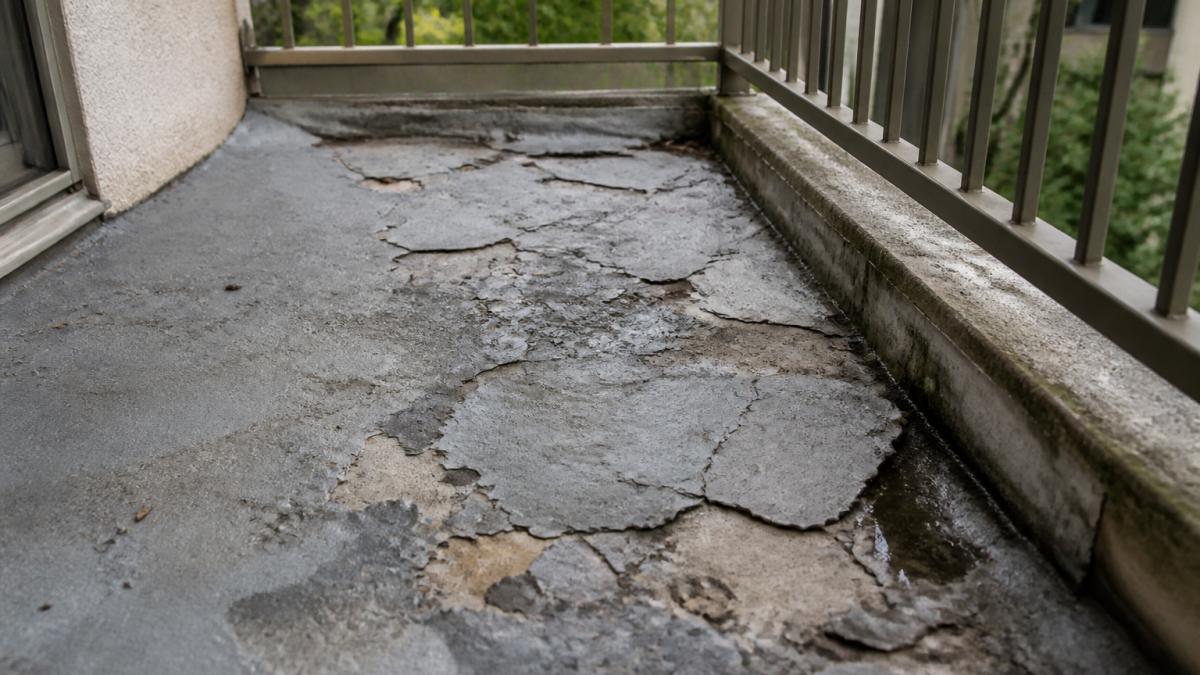
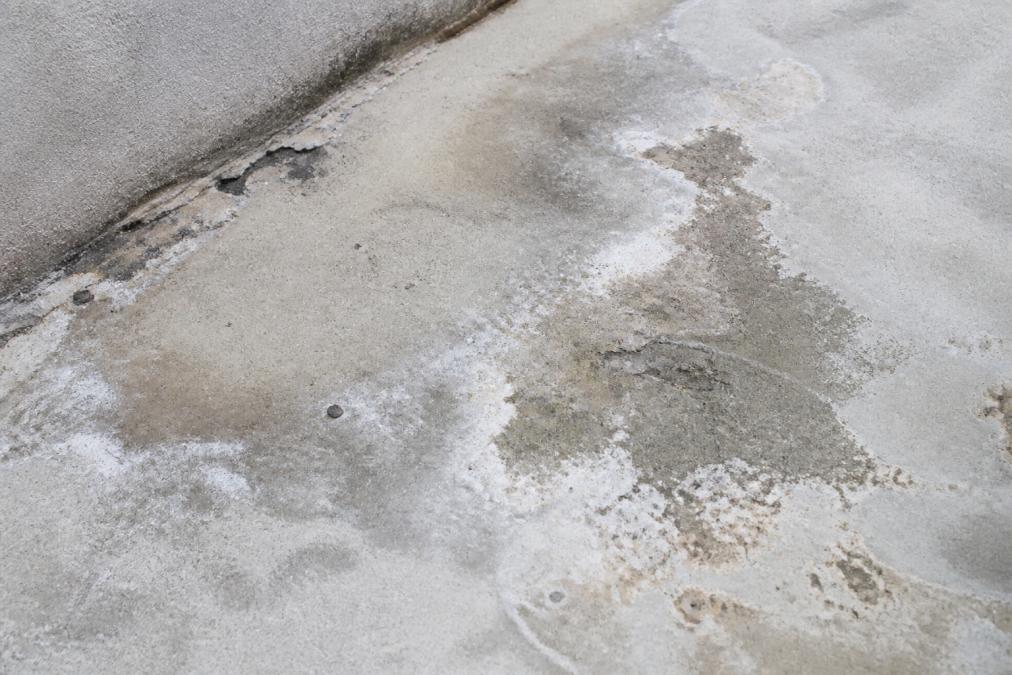
Close-up of concrete balcony surface showing visible water stains, efflorescence deposits, and early signs of deterioration with moisture damage visible on the edge

Look for efflorescence first, white, chalky deposits that appear on concrete surfaces. This is a sign that water is moving through the material and depositing mineral salts as it evaporates. Dark stains, discoloration, or areas where the concrete looks darker than surrounding sections indicate active moisture. Spalling (small pieces of concrete flaking away) means water has already frozen inside the material and is breaking it apart from within.

Balcony railings are another telltale area. If the bolts or fasteners show rust staining, or if the railing feels loose or moves more than it should, water intrusion into the structural connections is likely. Check the underside of the balcony from the unit below, water stains on the ceiling, peeling paint, or soft spots in the substrate are critical signs that the balcony above is leaking.

Ponding water (water that sits on the balcony surface rather than draining) is a red flag. This means either the drainage slope is inadequate or the surface has settled. Either way, standing water accelerates damage dramatically. If you see this, waterproofing becomes urgent rather than preventive.

When to act: If your building is over 10 years old and has never been waterproofed, or if you see any of these signs, an inspection should be your next step. Many California properties are now required to address balcony safety under SB 326 and SB 721 regulations, which often trigger waterproofing recommendations during structural inspections (Bill Text).

Watch Out
Ignoring early water damage is expensive. A small leak that costs $5,000 to waterproof now can become a $50,000+ structural repair in 3-5 years. The cost of prevention is always lower than the cost of remediation.

Liquid Applied Membranes vs. Other Waterproofing Methods

Three main waterproofing approaches compete for balcony protection: liquid applied membranes, sheet membranes, and sealants. Each has legitimate applications, but they’re not interchangeable. Understanding the differences helps you match the right solution to your specific situation.

Waterproofing Balconies: Sheet VS Liquid Membranes – Which is Better?

Gripset Industries PTY Ltd.

Sheet Membranes and Their Limitations

Sheet membranes (also called roll-on or torch-down membranes) have been the industry standard for decades. They’re installed in layers, overlapped at seams, and sometimes heat-welded together. The appeal is straightforward: they’re a proven technology with a long track record.

The problem is equally straightforward: seams are weak points. Water doesn’t respect overlaps. Over time, seams separate due to thermal expansion, substrate movement, or poor installation. A single failed seam can compromise the entire system. Sheet membranes also struggle with complex geometries, corners, railings, penetrations, and irregular surfaces require custom cuts and additional seams.

Installation is labor-intensive and slow, which drives up costs. Sheet membranes also require more surface preparation and are more sensitive to wet conditions during installation.

Sealants and Coatings: A Temporary Fix

Caulks and sealants are the cheapest option and the most common reason why balcony problems get worse instead of better. These products fill cracks and gaps but don’t create a protective barrier over the entire surface. They’re designed for joints and movement, not for waterproofing the full substrate.

Book inspection →

Sealants degrade under UV exposure, thermal cycling, and foot traffic. Most fail within 3-5 years. When they fail, water flows underneath and exploits the cracks they were supposed to seal. This creates a false sense of security, the property owner thinks the balcony is protected when it’s actually more vulnerable than before.

Thin coatings (paint-like products) offer slightly better coverage but the same fundamental problem: they’re not thick enough to bridge cracks or accommodate structural movement. A coating that’s 10-15 mils thick (most thin coatings) cannot match the performance of a liquid applied membrane that’s 40-60 mils thick or thicker.

Sealants and coatings have a role in maintenance, they’re appropriate for annual touch-ups and minor crack filling.

Balcony Waterproofing Cost Breakdown and ROI

Cost is where the real decision happens. Liquid applied waterproofing requires a significant upfront investment, but the return comes from extended structural life and avoided repairs.

Waterproofing MethodTypical LifespanMaintenance FrequencyBest For
Liquid Applied Membrane15-25 yearsAnnual inspectionLong-term protection, complex geometries
Sheet Membrane10-15 yearsEvery 3-5 yearsStandard flat surfaces, budget-conscious
Sealant/Coating3-5 yearsAnnual reapplicationTemporary fixes, maintenance only
Key Takeaway
The cheapest option upfront (sealants) becomes the most expensive option over 20 years because you’re reapplying every 3-5 years. Liquid applied systems cost more initially but deliver the lowest total cost of ownership.

SB 326 Balcony Inspection Requirements and Waterproofing

California’s SB 326 and SB 721 regulations have changed the waterproofing conversation entirely. These laws require structural inspections of balconies, decks, and elevated exterior elements on buildings with three or more units. Inspections must identify water damage, structural deterioration, and safety hazards.

Professional Installation vs. DIY: Risks and Reality

The temptation to DIY waterproofing is understandable, labor costs are high, and the work looks straightforward. This is where many balcony projects go wrong.

Watch Out
One failed DIY waterproofing project often costs more to fix than hiring a professional would have cost initially. The membrane must be removed, the substrate re-prepared, and the system reapplied correctly. Budget for this possibility if you’re considering DIY.

The Real Durability and Lifespan of Liquid Applied Systems

A properly installed liquid applied membrane should last 15-25 years, depending on the specific product, climate, and maintenance. This is significantly longer than sheet membranes or sealants, but it’s not permanent.

Is Liquid Applied Waterproofing Worth the Investment?

The answer depends on your specific situation, but for most California property owners, the investment makes financial and legal sense.

Key Takeaway
Liquid applied waterproofing is worth the investment if you’re protecting a balcony for the long term. The 15-25 year lifespan, superior crack bridging, and seamless finish justify the upfront cost when compared to alternatives that fail sooner or require constant maintenance.

Frequently Asked Questions

What is the best type of waterproofing for a balcony?

Liquid applied waterproofing systems offer seamless protection without seams that can fail, making them superior to sheet membranes for complex balcony shapes. The best choice depends on your substrate, climate, and whether you want a finished walking surface or tile application. Life Specialty Coatings AMAC System and Westcoat MACoat are designed specifically for this purpose, while Laticrete Hydro Ban works best under tile. Professional installation ensures proper mil thickness and adhesion strength, which directly affects long-term durability.

How does liquid applied waterproofing compare to sheet membranes for durability?

Liquid applied membranes create a monolithic, seamless finish with no weak points, while sheet membranes rely on seams that can separate under thermal expansion and freeze-thaw cycles. Liquid systems typically last 15-20 years when properly installed and maintained, compared to 10-15 years for sheet membranes. However, durability depends heavily on substrate preparation, UV resistance of the topcoat, and climate conditions. Freeze-thaw cycles in colder regions can stress both systems, but seamless liquid applications handle crack bridging better than seamed alternatives.

What are the main signs of balcony water damage that indicate I need waterproofing?

Look for water stains, efflorescence (white mineral deposits), spalling concrete, rust stains from rebar, soft or spongy areas, and visible cracks. Ponding water that sits on the surface after rain is a critical warning sign that drainage is failing. If you notice moisture inside the unit below the balcony, wood rot on attached structures, or structural movement, water ingress has already caused damage. An SB 326 inspection will identify these issues, and a professional assessment determines whether liquid applied waterproofing can prevent further deterioration.

How much does liquid applied waterproofing cost compared to the cost of structural repairs?

Waterproofing costs vary based on balcony size, substrate condition, system type, and labor rates in your area. However, preventing water damage through proactive waterproofing is significantly cheaper than addressing structural repairs caused by years of moisture intrusion. Water damage can lead to rebar corrosion, concrete deterioration, and costly structural restoration. Getting a professional assessment through an inspection identifies the scope of needed repairs and helps you understand whether waterproofing alone will solve the problem or if repairs are already necessary.

Does SB 326 require balcony waterproofing?

SB 326 mandates structural inspections of balconies and elevated elements in residential buildings, but it does not explicitly require waterproofing as a solution. However, if an inspection identifies water damage, moisture intrusion, or structural deterioration caused by water, remediation is required. Liquid applied waterproofing is often the recommended solution to prevent future water damage and protect structural integrity. Working with a licensed inspector ensures you understand whether waterproofing is necessary for your specific property and complies with local building codes.

Book inspection

Posted in BlogTagged balcony waterproofing cost breakdown, is liquid applied waterproofing worth it for balconies, liquid applied waterproofing, sb 326 balcony inspection requirements, signs of balcony water damage

How to Identify Balcony Membrane Failure

Posted on September 28, 2026 by Apex Balcony admin
How to Identify Balcony Membrane Failure

Table of Contents

  • What Balcony Membrane Failure Looks Like
    • Water stains on ceilings below
    • Cracked, loose, or drummy tiles
  • SB 326 Balcony Inspection Requirements and Compliance
  • Signs of Dry Rot in Balcony Joists and Framing
    • How moisture ingress leads to structural decay
    • Visual indicators of wood deterioration
  • Step-by-Step Inspection Process for Balcony Membranes
    • Step 1: Examine the surface coating and membrane integrity
    • Step 2: Check flashing and wall-to-deck transitions
    • Step 3: Test with a moisture meter
    • Step 4: Inspect seams, joints, and penetrations
  • Hiring a Licensed Structural Inspector for Professional Assessment
  • Common Mistakes to Avoid During Inspection
  • Seasonal Inspection Checklist
  • Frequently Asked Questions

Last Updated: September 27, 2026

What Balcony Membrane Failure Looks Like

Balcony membrane failure is when the waterproof layer protecting your balcony deck breaks down, allowing water to penetrate into the structure below. This happens slowly at first, but the damage compounds quickly. Once water gets past the membrane and into the framing, you’re looking at structural decay that spreads fast.

The signs of balcony membrane failure are visible if you know what to look for. Water stains on the ceiling below are often the first clue. Cracked or loose tiles on the deck surface are another. Ponding water that sits on the balcony after rain is a major red flag. These aren’t minor cosmetic issues, they’re warnings that your balcony’s structural integrity is at risk.

At Apex Balcony, we’ve worked with hundreds of building owners across California. The patterns are consistent. Most property owners catch these problems too late because they don’t know what to look for. Early detection saves tens of thousands in repairs and keeps residents safe.

Water stains on ceilings below

Water stains on the ceiling of the unit below are the most common first sign of balcony membrane failure. The stain appears as a dark, discolored patch. It may look wet or dry depending on how recently the balcony leaked.

These stains don’t appear overnight. They develop over weeks or months as water seeps through the membrane, past the substrate, and down into the structure. By the time you see the stain, water has already been pooling above for a while.

Check the color and texture. Fresh stains are darker and may feel damp to the touch. Older stains are lighter and crusty. Either way, a water stain means moisture ingress is happening right now. This is not a cosmetic problem you can ignore.

Cracked, loose, or drummy tiles

Walk across the balcony deck and listen. Tap the tiles with your foot or a rubber mallet. A solid tile makes a crisp sound. A tile that’s lost its bond to the substrate sounds hollow, that’s called a drummy tile.

Cracked tiles are obvious. Loose tiles rock slightly when you step on them. Both mean water is getting underneath. Cracks let water in directly. Loose tiles mean the adhesive has failed, usually because water has been trapped underneath for months.

Check the grout lines too. Cracked or missing grout is another entry point for water. Even small gaps let moisture seep down to the membrane and substrate below.

SB 326 Balcony Inspection Requirements and Compliance

California’s SB 326 law requires balcony inspections for residential buildings with three or more units. The law applies to buildings constructed before January 1, 2008. Inspections must be completed by a licensed structural engineer or architect.

The deadline for initial inspections depends on when your building was constructed. Extensions have been granted in some cases, but you should verify your building’s compliance status now.

The inspection report must document the condition of all balconies, decks, and exterior stairs. It must identify defects and rate their severity. If significant defects are found, you have a set timeframe to complete repairs. Non-compliance can result in fines and legal liability if someone is injured.

Apex Balcony specializes in SB 326 compliance for California property owners. We understand the legal requirements and help you navigate the inspection process with minimal disruption to residents.

Signs of Dry Rot in Balcony Joists and Framing

Dry rot is wood decay caused by a fungus that thrives in moist environments. It’s called “dry” rot because the wood becomes brittle and dry as the fungus breaks down the cellulose. Once dry rot starts, it spreads through the framing quickly.

Water Damage on a Balcony | How to Inspect a Balcony | Balcony & Deck Repair Tips

Bay Cities Construction

Dry rot is the most dangerous consequence of balcony membrane failure. The wood loses strength. Structural failure can happen suddenly. In 2015, a balcony collapse in Berkeley California killed six people. The primary cause was dry rot in the joists, which developed because the balcony membrane had failed years earlier.

How moisture ingress leads to structural decay

Water penetration through a failed membrane doesn’t stop at the surface. It soaks into the substrate, usually concrete or wood. From there, it moves into the framing members: joists, rim boards, and ledger boards. The wood stays damp because the balcony structure traps moisture. Ventilation is poor. The wood never fully dries.

Fungal spores are already present in the wood. When moisture levels stay high (above 20% wood moisture content), the fungus activates and begins breaking down the wood fibers. This process can take months or years, but once it starts, it accelerates.

Book inspection →

The decay weakens the wood from the inside out. The wood becomes soft and crumbly. It loses its load-bearing capacity. The balcony sags. Cracks appear in the structure. Eventually, the balcony can collapse under its own weight or the weight of residents and furniture.

Visual indicators of wood deterioration

Look at exposed wood on the balcony structure. Soft, spongy wood is a sign of decay. Press a screwdriver or awl into the wood. If it sinks in easily, the wood has lost structural integrity. Sound wood resists penetration.

Discoloration is another sign. Decayed wood often appears darker or bleached. The surface may be soft and crumbly. In advanced cases, the wood becomes hollow or develops large voids.

Check the ledger board where the balcony attaches to the building. This is a common failure point.

Step-by-Step Inspection Process for Balcony Membranes

A proper balcony membrane inspection requires a systematic approach. You need to examine the surface, check for water penetration, test the substrate, and document everything. This process takes time, but it’s the only way to catch problems early.

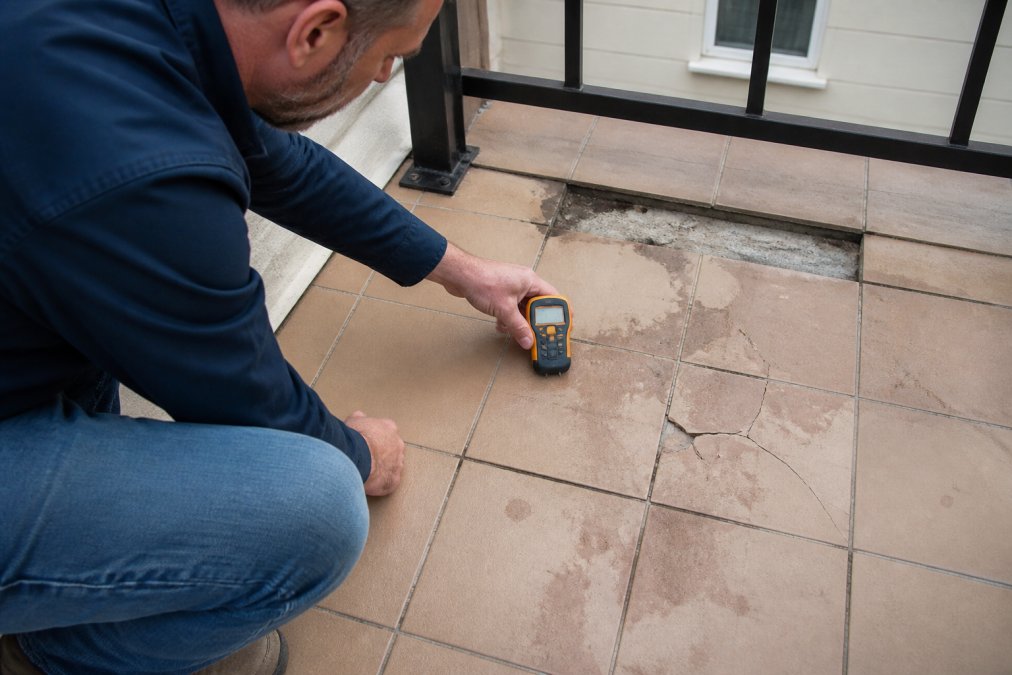
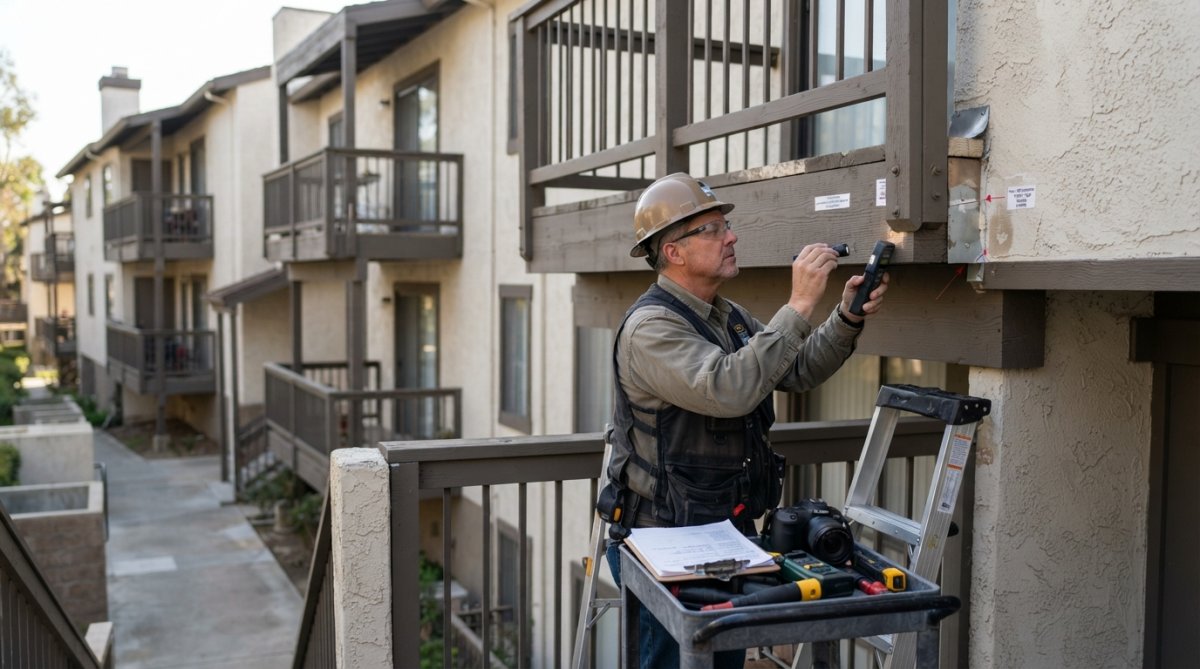
Inspector using a moisture meter to check for balcony membrane failure on cracked tiles

Step 1: Examine the surface coating and membrane integrity

Start at the top of the balcony deck. Look at the surface coating. Is it intact or peeling? Are there cracks, blisters, or areas where the coating has separated from the substrate?

Step 2: Check flashing and wall-to-deck transitions

Flashing is the metal or membrane material that bridges the gap between the balcony deck and the building wall. This is a critical detail. Water runs off the deck and toward the wall. If the flashing isn’t installed correctly, water gets behind it and into the wall.

Step 3: Test with a moisture meter

A moisture meter is an essential tool for identifying hidden water damage. It measures the moisture content of wood and concrete. You can’t see moisture problems with your eyes alone. The meter reveals them. While this device is effective for detecting hidden water damage within the balcony structure, similar moisture intrusion often migrates into the wall cavities where you can identify signs of rot behind siding.

Step 4: Inspect seams, joints, and penetrations

Seams are where two pieces of membrane material meet. Joints are where the deck meets the building. Penetrations are holes where pipes, drains, or other elements pass through the membrane. All of these are potential failure points.

Hiring a Licensed Structural Inspector for Professional Assessment

A professional inspection is the most reliable way to assess balcony membrane failure. A licensed structural engineer or architect has the training and tools to identify problems you might miss. They produce a detailed report that documents the condition and recommends repairs.

Common Mistakes to Avoid During Inspection

Many property owners try to inspect their balconies themselves and miss critical problems. Others hire unqualified inspectors and get inaccurate reports. Avoid these common mistakes.

Seasonal Inspection Checklist

Inspect your balcony at least twice a year: spring and fall. Spring inspection catches winter damage. Fall inspection prepares the balcony for winter weather.

Spring Inspection:

  • Look for water stains on the ceiling below
  • Check for cracks or peeling coating
  • Test flashing and wall-to-deck transitions
  • Look for standing water or ponding areas
  • Check for cracked or loose tiles
  • Test moisture levels with a meter
  • Inspect caulking and sealant condition
  • Look for signs of mold or mildew

Fall Inspection:

  • Clear debris from the deck and drains
  • Check drainage to ensure water flows off properly
  • Inspect coating for damage or wear
  • Test flashing before winter weather arrives
  • Look for cracks that may allow freeze-thaw damage
  • Check caulking around penetrations
  • Document any changes since spring inspection

Frequently Asked Questions

What are the signs of a failed waterproof membrane on a balcony?

Common signs include water stains on ceilings below the balcony, cracked or loose tiles, ponding water that doesn’t drain, visible mold or efflorescence (white salt deposits), and soft or spongy areas in the substrate. Flashing failures at wall-to-deck transitions and corrosion on steel components also indicate membrane failure. If you notice any of these, moisture has likely penetrated the waterproofing layer and begun damaging the structure beneath.

How do SB 326 and SB 721 impact balcony inspection requirements?

SB 326 requires inspection of balconies and elevated elements in buildings three or more units built before 2018. SB 721 extends requirements to newer properties. Both laws mandate licensed structural engineers evaluate for safety and water intrusion. Failure to comply can result in fines and liability. Property owners must document inspections and remediation to maintain legal compliance and protect residents from injury or property damage caused by structural failure.

Can I test for moisture in my balcony myself without hiring an inspector?

Yes, a moisture meter is an affordable tool homeowners can use to detect excess moisture in the substrate. However, a moisture meter alone cannot diagnose the cause of failure, identify hidden damage within the structure, or determine repair scope. Professional inspectors use meters alongside visual assessment, hydrostatic pressure testing, and knowledge of building codes to provide a complete picture. For SB 326 and SB 721 compliance, a licensed structural engineer’s report is legally required.

What is dry rot in balcony joists and why does it happen?

Dry rot is fungal decay in wood caused by persistent moisture exposure, typically from waterproofing membrane failure. When water penetrates the membrane, it saturates wood joists and framing. The fungus breaks down the wood’s structural integrity, causing it to become soft, crumbly, and weak. Signs include discolored or darkened wood, visible gaps, and wood that crushes easily under pressure. Once dry rot begins, it spreads quickly and can compromise the entire balcony structure if not addressed immediately.

Book inspection

Posted in BlogTagged balcony membrane failure, hiring a licensed structural inspector, how to identify balcony membrane failure, sb 326 balcony inspection requirements, signs of dry rot in balcony joists

Repair Minor Balcony Cracks Without Full Replacement

Posted on September 26, 2026 by Apex Balcony admin
Repair Minor Balcony Cracks Without Full Replacement

Table of Contents

  • When Minor Cracks Don’t Require Full Balcony Replacement
  • How to Identify Structural Failure in Elevated Decks
    • Cosmetic vs. Structural Cracks
    • Warning Signs That Demand Professional Inspection
  • Repair Methods for Minor Balcony Cracks
    • Epoxy Injection for Hairline and Structural Cracks
    • Repair Mortars and Patching Compounds for Spalled Concrete
    • Elastomeric Coatings to Bridge Minor Surface Damage
  • Balcony Waterproofing Systems to Prevent Future Damage
    • Vinyl Membrane Decking for Long-Term Protection
    • Torch-On Bitumen Membranes for Heavy-Duty Waterproofing
    • Re-Caulking and Joint Sealant Replacement at Thresholds
  • SB 326 Balcony Inspection Requirements and Compliance
  • DIY vs. Professional Repair: When to Call a Licensed Inspector
  • Long-Term Cost-Benefit Analysis: Repair vs. Full Replacement
  • Preventative Maintenance Schedule to Avoid Major Repairs
  • Frequently Asked Questions

Last Updated: September 25, 2026

When Minor Cracks Don’t Require Full Balcony Replacement

A Berkeley balcony collapse in 2015 killed six people; a Malibu incident in May 2021 nearly replicated that tragedy. Both started with small cracks left unaddressed. Yet minor cracks don’t automatically require full balcony replacement; balcony crack repair offers cost-effective alternatives. Apex Balcony helps California property owners distinguish between cosmetic damage and structural failure. Repair alternatives, from sealant work to epoxy injection, can save tens of thousands of dollars while keeping residents safe. This guide shows you how to identify your damage type, which fixes work best, and when professional inspection is essential.

Key Takeaway
Most minor balcony cracks can be repaired without full replacement. The key is accurate diagnosis, knowing whether you’re dealing with cosmetic surface damage or a structural integrity issue that demands intervention.

How to Identify Structural Failure in Elevated Decks

Distinguishing between cosmetic cracks and structural failure is essential for choosing the right repair. Some cracks result from normal aging and thermal expansion; others signal moisture infiltration or reinforcement corrosion that will worsen without treatment.

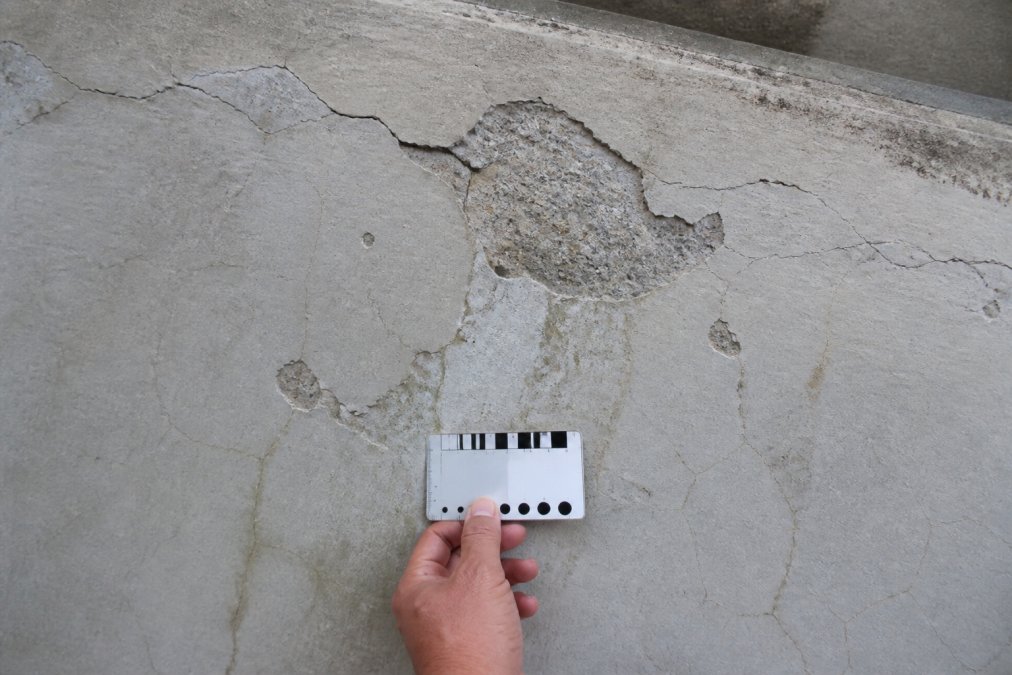
Close-up of concrete balcony surface showing visible spalling, hairline cracks, and water staining patterns indicating structural degradation, with professional measuring gauge for scale

Cosmetic vs. Structural Cracks

Cosmetic cracks are surface-level imperfections affecting appearance but not load-bearing capacity. These typically measure less than 1/8 inch wide, run parallel to the surface, and don’t penetrate the slab. They result from normal concrete shrinkage, UV exposure, and temperature fluctuations.

Structural cracks indicate compromised load-bearing capacity or active deterioration. These exceed 1/8 inch in width, run perpendicular to the slab, show water seepage, or appear with surface delamination. Efflorescence (white mineral deposits) signals moisture traveling through concrete and potential reinforcement corrosion.

Cosmetic repairs address appearance; structural repairs address the underlying cause. Coatings over structural cracks provide temporary protection but don’t restore integrity or stop damage progression.

Warning Signs That Demand Professional Inspection

Contact a licensed inspector if your balcony shows:

  • Visible rebar corrosion: Rust staining indicates moisture has penetrated to reinforcement, accelerating corrosion and compromising tensile strength.
  • Spalled concrete with hollow sound when tapped: Delamination has occurred; concrete is separating from reinforcement.
  • Cracks wider than 1/4 inch: These indicate structural movement or active stress beyond surface repair scope.
  • Water pooling on the surface: Failed waterproofing system creating hydrostatic pressure.
  • Map or alligator cracking patterns: Multiple interconnected cracks suggest systemic issues like carbonation or freeze-thaw damage.
Watch Out
If you see rebar corrosion, extensive spalling, or cracks wider than 1/4 inch, do not attempt DIY repairs. These signs indicate structural failure in progress. Professional inspection is legally required under SB 326 and SB 721 for most California properties anyway, this is your opportunity to address issues before they worsen.

Repair Methods for Minor Balcony Cracks

Once you’ve confirmed that you’re dealing with minor damage rather than structural failure, several proven balcony crack repair methods can restore functionality and prevent future deterioration. The right choice depends on crack width, depth, location, and the underlying cause.

Epoxy Injection for Hairline and Structural Cracks

Epoxy injection seals cracks penetrating through the concrete slab by injecting high-strength resin under pressure, restoring monolithic strength and creating a moisture-resistant seal.

Epoxy injection works best for cracks between 1/16 and 1/2 inch wide. The process begins with substrate cleaning, then injection ports are installed and pressurized equipment forces epoxy through the crack in stages, ensuring complete fill from bottom to top.

The result is a permanently bonded crack that prevents water infiltration and halts reinforcement corrosion. This method restores structural integrity far more effectively than surface coatings alone. However, epoxy injection requires specialized equipment and professional application to ensure proper pressure, timing, and adhesive bond formation.

Repair Mortars and Patching Compounds for Spalled Concrete

When concrete has chipped away or spalled, leaving a void or depression, repair mortars provide a structural solution. These cementitious compounds are specifically formulated to bond strongly to existing concrete substrates while resisting weathering and freeze-thaw cycles.

Quality repair mortars contain shrink-compensated formulations that expand slightly during curing to offset natural concrete shrinkage, maintaining adhesive bond and structural continuity.

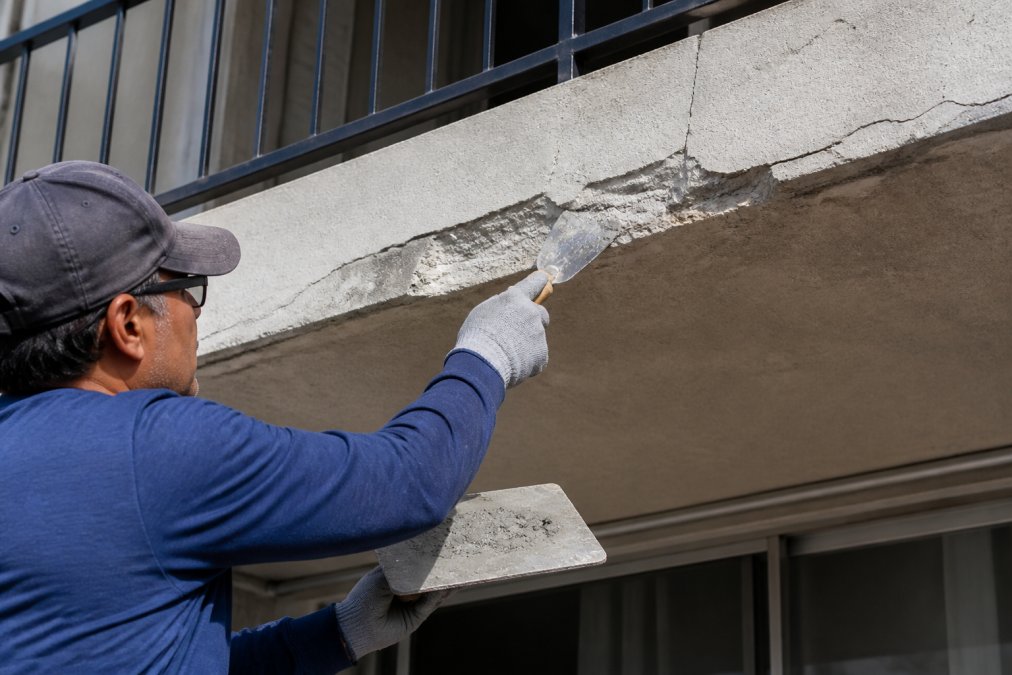
Repair requires thorough substrate preparation: clean with a wire brush, undercut edges to improve bonding, apply mortar to fill the void, and finish flush with the surrounding surface.

Repair mortars are ideal for surface-level spalling on railings, curbs, and edges. They’re cost-effective but cannot address cracks penetrating the entire slab or active water infiltration.

Elastomeric Coatings to Bridge Minor Surface Damage

Elastomeric waterproofing coatings are flexible, high-build paint systems that bridge small cracks and provide a waterproof barrier. These coatings stretch as the concrete expands and contracts with temperature changes, maintaining the seal even when minor movement occurs.

Elastomeric coatings offer ease of application, aesthetic improvement, UV protection, and slowed concrete weathering.

Book inspection →

Elastomeric coatings address symptoms rather than underlying causes. Applied over active structural cracks, they provide temporary protection but don’t restore integrity or stop damage progression.

Elastomeric coatings work best as preventative maintenance over sound concrete.

Balcony Waterproofing Systems to Prevent Future Damage

Preventing future damage is more cost-effective than repairing it. Waterproofing systems address the root cause of deterioration: water infiltration leading to reinforcement corrosion and structural failure.

Vinyl Membrane Decking for Long-Term Protection

Vinyl membrane systems create a continuous waterproof barrier over the entire balcony surface. These synthetic sheet membranes are mechanically fastened or adhered to the concrete substrate, with seams sealed to prevent water penetration at joints.

Torch-On Bitumen Membranes for Heavy-Duty Waterproofing

Torch-on bitumen membranes represent the heavy-duty waterproofing option. These heat-applied membranes create an extremely strong, long-lasting seal ideal for balconies in harsh climates or with heavy foot traffic.

Re-Caulking and Joint Sealant Replacement at Thresholds

Re-caulking at door thresholds and wall transitions is often overlooked but critical. Failed sealants allow water to flow into the building interior and behind the balcony structure.

SB 326 Balcony Inspection Requirements and Compliance

California’s SB 326 (effective January 2019) and SB 721 (effective January 2022) mandate structural inspections for certain residential properties. Understanding which requirements apply to your building is essential for compliance and liability protection.

Pro Tip
Schedule your inspection early in the compliance window rather than waiting until the deadline approaches. Early inspection gives you time to plan repairs, budget appropriately, and avoid rushed decisions under time pressure. If your building hasn’t been inspected yet, contact a licensed inspector now.

DIY vs. Professional Repair: When to Call a Licensed Inspector

Some balcony repairs are appropriate for property owners or maintenance staff to handle. Others require licensed professionals and specialized equipment. Knowing the difference protects both safety and liability.

Long-Term Cost-Benefit Analysis: Repair vs. Full Replacement

The decision between repair and full replacement hinges on cost, severity, and building lifespan. A simple analysis comparing immediate costs misses the larger financial picture.

Preventative Maintenance Schedule to Avoid Major Repairs

The most cost-effective strategy is preventing damage before it requires repair. A simple preventative maintenance schedule catches early signs of deterioration and stops problems before they escalate.


Repair MethodBest ForLifespanProfessional Required
Epoxy InjectionHairline to 1/2″ cracks15+ yearsYes
Repair MortarsSpalled concrete surfaces10-15 yearsRecommended
Elastomeric CoatingsCosmetic cracks, waterproofing5-8 yearsNo
Vinyl MembraneLong-term surface protection10+ yearsYes
Torch-On BitumenHeavy-duty waterproofing15+ yearsYes
Re-CaulkingThreshold and joint sealing1-2 yearsNo

Frequently Asked Questions

Can minor balcony cracks be repaired without replacing the entire structure?

Yes. Hairline cracks and surface spalling can be sealed with epoxy injection, patching compounds, or elastomeric coatings without requiring full balcony replacement. The key is early identification. Cosmetic cracks that do not penetrate the reinforcement layer are excellent candidates for repair. However, cracks showing active movement, signs of rebar corrosion, or structural misalignment require professional assessment to determine if repair is safe or if replacement is necessary.

What are the requirements for balcony inspections under SB 326 and SB 721?

SB 326 requires California HOAs to inspect balconies and elevated decks every six years and provide owners with written notice of defects. SB 721 applies to buildings with three or more units and mandates structural safety inspections. Both laws require licensed professionals to assess concrete deterioration, water damage, rebar corrosion, and load-bearing capacity. Failure to comply can result in fines and liability. Your property management team should schedule an inspection with a licensed balcony inspector to verify compliance and identify repair needs.

How do I know if a balcony crack is structural or cosmetic?

Cosmetic cracks are hairline-width surface fractures that do not penetrate the concrete slab or expose reinforcement. Structural cracks are wider than 1/8 inch, show signs of active movement, or allow water to penetrate deeply. If you see spalled concrete, exposed rebar, water staining on the underside, or cracks that follow a pattern, these indicate structural issues. A licensed inspector can determine severity using visual assessment and moisture testing. When in doubt, request a professional evaluation before attempting repairs.

What is the most cost-effective repair method for minor balcony cracks?

Elastomeric waterproofing coatings are an affordable option for hairline cracks. For deeper cracks, epoxy injection or patching compounds offer better structural bonding at moderate cost. Re-caulking door thresholds and joints is a low-cost preventative measure that stops water infiltration before it causes major damage. The best approach depends on crack depth, location, and underlying cause. A professional inspection will identify which method provides the longest-term protection for your specific situation.

How often should balcony maintenance be performed to prevent major repairs?

Annual inspections are recommended to catch early signs of damage. Re-caulk joints and sealants every 1-2 years, especially after heavy rain or freeze-thaw cycles. Clean debris from balcony surfaces and drainage areas quarterly to prevent water pooling. If you notice hairline cracks, address them within 6 months before water penetration causes reinforcement corrosion. Preventative maintenance costs far less than emergency repairs or full replacement. Document all maintenance activities for SB 326 and SB 721 compliance records.

Book inspection

Posted in BlogTagged alternatives to full balcony replacement for minor cracks, balcony crack repair, balcony waterproofing systems, sb 326 balcony inspection requirements

Multi-Unit Building Inspections: Step-by-Step Guide

Posted on September 24, 2026 by Apex Balcony admin
Multi-Unit Building Inspections: Step-by-Step Guide

Table of Contents

  • Understanding Multi-Unit Building Inspections and Legal Requirements
  • SB 326 Balcony Inspection Requirements and Compliance Standards
  • Preliminary Site Assessment and Building Code Compliance
    • Walkthrough Protocol and Documentation
    • Identifying Life Safety and Fire Protection Gaps
  • Structural Integrity Assessment and Foundation Evaluation
    • Detecting Early Signs of Structural Failure
    • Building Envelope and Moisture Intrusion Inspection
  • Electrical, Plumbing, and HVAC Systems Review
    • Electrical System Inspection: Service, Panels, and Protection
    • Plumbing System Assessment: Supply, Drainage, and Water Quality
    • HVAC System Performance and Maintenance
  • Hiring a Licensed Structural Inspector for Multi-Family Properties
  • Multi-Family Building Maintenance Schedule and Capital Improvement Planning
    • CapEx Forecasting and Reserve Study Integration
    • Maintenance Schedules and Preventative Care
    • Tenant Communication and Liability Risk Management
  • Inspection Reporting and Compliance Documentation
  • Frequently Asked Questions

Last Updated: September 23, 2026

Understanding Multi-Unit Building Inspections and Legal Requirements

Multi-unit building inspections are comprehensive evaluations of residential properties with three or more units that assess structural integrity, safety systems, code compliance, and maintenance needs across balconies, decks, stairways, electrical panels, plumbing, and fire safety systems.

California law mandates regular structural assessments for multi-unit buildings to protect residents and limit liability.

SB 326 Balcony Inspection Requirements and Compliance Standards

Senate Bill 326, which took effect in 2018, requires all residential buildings with three or more units to conduct visual inspections of all exterior elevated elements, balconies, decks, stairways, and similar structures, at least once every nine years. SB 721, enacted in 2019, also mandates inspections for elevated exterior elements.

Watch Out
Missing the SB 326 or SB 721 compliance deadline isn’t a minor administrative oversight, it’s a legal violation that exposes your building and board members to personal liability. If an accident occurs on a non-compliant structure, your insurance may not cover damages.

Preliminary Site Assessment and Building Code Compliance

The preliminary walkthrough establishes baseline conditions, identifies obvious hazards, and determines which systems require deeper investigation.

Structural inspector assessing balcony framing during multi-unit building inspections in daylight

Walkthrough Protocol and Documentation

The walkthrough examines all balconies, decks, stairways, and railings, documenting the building’s age, construction type, and visible deterioration including moisture intrusion, wood rot, rust stains, and separated fasteners.

Identifying Life Safety and Fire Protection Gaps

The inspector evaluates stairway width, handrail continuity, step uniformity, lighting, and egress routes. Fire suppression systems, smoke detectors, and emergency lighting are tested and documented.

Pro Tip
Most property managers discover that water damage in balconies is far more extensive than visible from the exterior. Water enters at fastener holes, flashing gaps, and wood-to-concrete connections, then travels horizontally through structural members before becoming visible. Early detection prevents catastrophic failure.

Structural Integrity Assessment and Foundation Evaluation

Structural assessment determines whether the building can safely support its intended load and resist environmental forces. This phase requires detailed examination of primary structural elements and their connections.

Detecting Early Signs of Structural Failure

Wood deterioration is the most common structural problem in older buildings. The inspector uses specialized tools to detect decay and examines fasteners for corrosion and proper tightness, as corroded fasteners can fail suddenly under load.

Building Envelope and Moisture Intrusion Inspection

The inspector examines roofing, flashing, sealants, windows, doors, and exterior wall systems to identify gaps where water can enter and failed drainage systems.

Electrical, Plumbing, and HVAC Systems Review

Building systems must function safely and meet code requirements. In multi-unit buildings, system failures affect multiple residents and create significant liability exposure.

Electrical System Inspection: Service, Panels, and Protection

Service capacity and grounding: The main panel must have adequate capacity for the building’s electrical load. Undersized service creates fire risk. The inspector verifies proper grounding to earth, which prevents dangerous voltage buildup and electrocution risk.

Watch Out
Outdated wiring and missing GFCI/AFCI protection are among the most common code violations in older multi-unit buildings. These violations create fire and electrocution hazards. Insurance companies may deny claims if electrical fires occur in buildings with known code violations that weren’t corrected.

Plumbing System Assessment: Supply, Drainage, and Water Quality

Plumbing systems in multi-unit buildings are complex because water must be distributed to multiple units and wastewater must be collected and disposed of safely. The inspection focuses on three areas: water supply, drainage, and water damage.

Common leak locations include:

  • Connections between supply lines and fixtures (toilets, sinks, washing machines)
  • Drain line connections in crawl spaces or basements
  • Water heater connections and drain pans
  • Exterior hose bibs and irrigation lines

HVAC System Performance and Maintenance

Heating, ventilation, and air conditioning systems must provide comfortable temperatures and adequate air quality. In multi-unit buildings, HVAC failures affect resident comfort and can create health hazards.

Key Takeaway
Systems that appear to function normally often hide serious problems. A plumbing system with slow leaks can cause extensive hidden damage in walls and crawl spaces. An HVAC system running inefficiently wastes energy and indicates mechanical problems that will worsen. The inspection identifies these issues before they become emergencies and cause resident complaints or property damage.

Hiring a Licensed Structural Inspector for Multi-Family Properties

Select inspectors with Structural Engineer (SE), Professional Engineer (PE), or Certified Building Inspector credentials, liability insurance, and experience with similar buildings. Ask for references and review sample reports. The inspector should explain methodology, timeline, and be willing to discuss findings and repair priorities.

Book inspection →

Multi-Family Building Maintenance Schedule and Capital Improvement Planning

Regular maintenance prevents small problems from becoming catastrophic failures. Inspection findings must be translated into financial forecasts and resident communication strategies.

CapEx Forecasting and Reserve Study Integration

Deficiencies are typically classified into three tiers:

Immediate Safety Hazards (0-30 days): Structural failures, electrical fire risks, or fall hazards requiring repair before continued occupancy. Examples include corroded fasteners on load-bearing connections, missing railings, or exposed electrical wiring.

Maintenance Schedules and Preventative Care

Common preventative tasks include: Quarterly: gutter cleaning, balcony railing inspection, HVAC filter replacement. Semi-annually: caulk and sealant inspection, roof inspection, exterior wood sealing. Annually: comprehensive walkthrough, fire suppression testing, plumbing and electrical inspection. Every 3-5 years: power washing, re-caulking, fastener inspection and tightening.

Tenant Communication and Liability Risk Management

Timing: Communicate findings within 30 days of inspection completion. Delayed communication appears evasive and allows rumors to spread.

Pro Tip
The most important liability protection is a documented decision-making process. If the board reviews inspection findings, discusses repair options, documents the reasoning for prioritization, and communicates decisions to residents, courts view the board as acting in good faith even if a problem later occurs. Lack of documentation is what creates liability exposure.

Inspection Reporting and Compliance Documentation

The inspection report is the official record of building condition. A comprehensive report includes photographs, measurements, condition descriptions, code violations, repair recommendations, and cost estimates. Deficiencies should be prioritized by urgency. Documentation must be preserved for nine years and made available to residents as required by law.


Inspection PhaseKey Focus AreasTypical Timeline
Preliminary WalkthroughExterior condition, obvious hazards, code violations2-4 hours
Structural AssessmentConnections, deterioration, foundation, envelope4-8 hours
Systems ReviewElectrical, plumbing, HVAC, fire safety2-4 hours
DocumentationReport preparation, photography, measurements4-8 hours

California Building Standards Code requirements for multi-unit residential buildings

SB 326 and SB 721 balcony inspection compliance guidelines

Frequently Asked Questions

What are the 7 steps of the inspection process for multi-unit buildings?

Multi-unit building inspections follow a structured sequence: (1) preliminary site assessment and code review, (2) structural integrity evaluation, (3) electrical system inspection including service panels and GFCI protection, (4) plumbing and water distribution review, (5) HVAC system performance check, (6) life safety and fire suppression verification, and (7) comprehensive documentation and reporting. Each step builds on the previous one to create a complete property condition assessment that identifies deficiencies and informs capital improvement planning.

What is the biggest red flag in a multi-unit building inspection?

Active moisture intrusion and signs of structural failure are critical red flags. Water damage, mold growth, rust staining on concrete, or cracking in the building envelope indicate deterioration that can compromise resident safety and lead to expensive repairs. Balcony and deck issues, including soft wood, separation from the main structure, or corroded fasteners, demand immediate attention. These deficiencies create liability exposure and often signal deeper problems requiring urgent capital expenditure.

How do I know if I need SB 326 balcony inspection requirements or SB 721 compliance?

SB 326 applies to most multi-unit residential buildings. SB 721 applies to buildings with four or more stories and buildings constructed before 1995. If your multifamily property has elevated exterior elements and three or more units, you likely fall under one or both mandates. A licensed structural inspector can confirm your specific obligations during an initial assessment and help you understand which compliance pathway applies to your building.

How often are multi-unit buildings required to undergo structural inspections?

Under state law, multifamily residential buildings with three or more units must undergo structural inspections at least once every nine years. This frequency allows property owners to identify early signs of structural failure and plan capital improvements before safety hazards develop. Many property managers establish annual preventative maintenance schedules between inspections to address minor issues and extend building system life. Digital tool integration helps track inspection cycles, deficiency remediation, and maintenance completion dates.

What documentation is required for state-mandated building inspections?

Inspection reports must document all deficiencies with photographs, measurements, and severity ratings. Reports should include a detailed property condition assessment covering structural integrity, building envelope condition, electrical safety, plumbing function, HVAC efficiency, and life safety compliance. Deficiency documentation must specify repair scope, estimated costs, and recommended timelines. Maintain copies of all inspection reports, remediation work orders, and compliance certifications for nine years. This documentation protects your liability exposure and supports occupancy permit renewals.

What are the most common deficiencies found during multi-family property inspections?

Moisture intrusion and wood deterioration top the list, followed by electrical code violations, inadequate fire suppression systems, and structural cracks. Balcony and deck issues, including soft fasteners, separation, and age-related wear, are frequent findings in older multifamily buildings. HVAC systems often lack proper maintenance, and plumbing leaks frequently go undetected until they cause water damage. Egress pathway obstructions and life safety hazards in common areas also appear regularly. Early detection through preventative maintenance schedules reduces repair costs and resident disruption.

What should I look for when hiring a licensed structural inspector?

Verify that your inspector holds current licensure as a structural engineer or qualified building inspector in your state. Ask for references from other multifamily property owners and review their experience with SB 326 and SB 721 compliance specifically. Confirm they carry liability insurance and provide detailed, photographic inspection reports. A qualified inspector should explain findings in clear language, offer capital improvement recommendations, and help you prioritize repairs based on safety risk and cost impact. Avoid inspectors who minimize deficiencies or pressure you toward unnecessary work.

Book inspection

Posted in BlogTagged hiring a licensed structural inspector, multi-unit building inspections, sb 326 balcony inspection requirements, step by step guide to multi-unit building inspections

Balcony Waterproofing Cost Per Square Foot 2026

Posted on September 23, 2026 by Apex Balcony admin
Balcony Waterproofing Cost Per Square Foot 2026

Table of Contents

  • Balcony Waterproofing Cost Breakdown by System Type
  • Factors That Influence Balcony Waterproofing Costs
  • SB 326 Balcony Inspection Requirements and Waterproofing Mandates
  • Balcony Waterproofing Membrane Replacement Cost and Durability
  • Signs of Balcony Water Damage That Trigger Immediate Repairs
  • New Construction vs. Repair: Cost Comparison
  • DIY vs. Professional Waterproofing: What You Actually Save
  • Conclusion
  • Frequently Asked Questions

Last Updated: September 22, 2026

Balcony Waterproofing Cost Breakdown by System Type

The cost of balcony waterproofing per square foot varies significantly depending on the system you choose, ranging from basic sealant applications to comprehensive membrane installations. Property owners often underestimate the long-term value of investing in the right waterproofing system upfront rather than facing costly repairs later. Understanding these differences helps you make an informed decision that protects your building and residents.

Liquid-applied coatings represent one of the most common approaches. These acrylic modified cement or polyurethane sealant products are brushed or sprayed directly onto the balcony surface. Many property managers find these systems appealing because they’re relatively straightforward to apply and provide a continuous moisture barrier. However, they typically require reapplication every 5-7 years, which means ongoing maintenance costs accumulate over time.

Membrane systems, including elastomeric coatings and specialized waterproof membranes, offer longer-lasting protection. These systems create a more durable barrier against water intrusion and are particularly effective for balconies experiencing heavy moisture exposure or freeze-thaw cycles. The installation process demands more careful surface preparation and professional expertise, but the extended lifespan often justifies the higher initial investment.

Sheet membrane installations involve adhering pre-manufactured waterproofing sheets to the substrate. This approach works well for new construction or major renovation projects where you have access to the underlying structural elements. The durability is excellent, though installation complexity and labor intensity drive up project costs.

Pro Tip
A common mistake is choosing the cheapest option without considering climate exposure. Balconies in regions with heavy rainfall or freeze-thaw cycles benefit from premium systems that prevent costly water damage to structural framing and units below.

Factors That Influence Balcony Waterproofing Costs

Several variables determine your final project cost beyond the basic square footage calculation. The existing condition of your balcony plays a major role, if concrete is spalling, if there’s active water intrusion, or if the sub-surface drainage system has failed, you’ll need remedial work before applying any waterproofing system. Surface preparation alone can add significant labor hours to your timeline.

Climate and regional exposure directly impact system selection and pricing. Balconies in coastal areas or regions with heavy precipitation typically require more strong systems with superior UV resistance and flexibility. Northern climates where freeze-thaw cycles occur demand elastomeric coatings that accommodate concrete expansion and contraction without cracking.

Building code compliance requirements vary by jurisdiction. Some municipalities have specific standards for slip-resistant finishes, drainage slope specifications, or structural load requirements that influence material selection. Local permit fees and inspection costs also factor into your total expense, though these are often overlooked in initial estimates.

The age and structural integrity of the balcony structure itself affects waterproofing decisions. Older buildings may require additional reinforcement or flashing replacement before waterproofing can be effective. If the structural framing shows signs of deterioration, you might need engineering assessment and repairs before proceeding with surface waterproofing.

Labor rates in your area significantly impact the bottom line. Urban markets and regions with higher construction costs will naturally command premium pricing for professional installation. The complexity of your balcony layout, whether it’s a simple rectangular deck or an irregular shape with multiple drains, also influences labor requirements.

Key Takeaway
The cheapest waterproofing material won’t save money if it fails prematurely or requires constant maintenance. Factor in durability, climate appropriateness, and your building’s specific structural condition when comparing costs.

SB 326 Balcony Inspection Requirements and Waterproofing Mandates

California’s SB 326 legislation fundamentally changed how building owners approach balcony maintenance and waterproofing. The law requires that buildings with three or more residential units have all balconies, decks, and exterior stairways inspected by a licensed structural engineer or architect every six years. This inspection mandate has made waterproofing assessment and planning a legal requirement rather than an optional maintenance decision.

Balcony Repair Costs | Balcony Waterproofing Prices Explained

Bay Cities Construction

The inspection process identifies water damage, wood deterioration, and structural failures that directly inform whether waterproofing work is needed. If inspectors discover active water intrusion, moisture in structural framing, or signs of past water damage, waterproofing becomes mandatory, not discretionary. Many property owners discover through these inspections that their existing waterproofing has failed and immediate remediation is necessary.

SB 721, a related statute, requires that buildings maintain balconies in a safe condition and address any defects identified during inspection within specific timeframes. If your inspection report documents waterproofing failure or water damage, you’re legally obligated to correct it. This creates a direct link between inspection findings and waterproofing project costs, you cannot defer the work indefinitely.

The inspection requirement has created a more standardized approach to waterproofing assessment across California properties. Rather than property owners guessing whether waterproofing is needed, licensed professionals now evaluate the actual condition and make recommendations based on structural evidence. This has increased transparency around true waterproofing costs, since work is now driven by documented need rather than speculation.

California Department of Consumer Affairs regulations on building inspection standards

Book inspection →

Balcony Waterproofing Membrane Replacement Cost and Durability

When existing waterproofing membranes fail, replacement becomes necessary to prevent structural damage. The waterproofing membrane, whether it’s an elastomeric coating, polyurethane sealant, or sheet membrane system, typically lasts 10-20 years depending on environmental exposure and maintenance. Once it begins failing, water penetrates to the structural framing, concrete substrate, and units below, creating exponentially more expensive problems.

Membrane replacement cost includes removal of the failed system, surface preparation of the underlying concrete or substrate, and installation of the new waterproofing layer. If the balcony has experienced water damage, remediation of compromised structural elements adds to the project scope. Concrete spalling must be repaired, deteriorated wood framing may need replacement, and flashing systems often require attention during this work.

Durability differences between systems justify cost variations. A premium elastomeric membrane system with UV-resistant properties might cost more initially but remains effective for 15-20 years with minimal maintenance. A basic acrylic coating might cost less upfront but requires reapplication every 5-7 years, meaning your true long-term cost is substantially higher when you factor in repeated labor and material expenses across multiple decades.

The curing time for new waterproofing systems affects project scheduling and costs. Some systems require 48-72 hours of dry weather before they’re fully functional, which can extend timelines during rainy seasons. Rushed installation or inadequate curing leads to premature failure and warranty issues, so professional contractors typically build in scheduling buffers that affect overall project duration and cost.

Watch Out
Delaying membrane replacement after signs of failure appear can triple your total costs. Water damage spreads quickly through structural framing, and by the time visible damage appears in units below, the structural repairs required far exceed the cost of timely waterproofing work.

Signs of Balcony Water Damage That Trigger Immediate Repairs

Close-up of concrete balcony surface showing visible water staining, white efflorescence deposits, and early spalling with moisture marks and discoloration patterns

Active water damage visible on a balcony surface demands immediate attention and waterproofing intervention. Efflorescence, the white, chalky deposits that appear on concrete, indicates water is moving through the concrete and carrying minerals to the surface. This is an early warning sign that moisture is penetrating deeper into the structural system.

Concrete spalling, where the surface flakes or chunks away, shows that water has already entered the concrete and is causing internal deterioration. Once spalling begins, the structural integrity of the balcony deck is compromised, and waterproofing alone won’t address the damage, you’ll need concrete repair alongside waterproofing.

Water staining on the soffit or ceiling of the unit below your balcony is a critical indicator that the waterproofing membrane has failed completely.

New Construction vs. Repair: Cost Comparison

Waterproofing new construction balconies costs substantially less than retrofitting existing balconies because the work happens during the initial build phase when structural access is straightforward and surface preparation is minimal. New concrete or substrate is clean and properly graded for drainage, eliminating expensive remedial work. Waterproofing membranes can be installed before other finishes are applied, avoiding the need to remove and replace existing materials.

DIY vs. Professional Waterproofing: What You Actually Save

Many property owners consider DIY waterproofing to reduce costs, but the reality is that balcony waterproofing requires specialized knowledge and equipment that most property managers don’t possess. Surface preparation is the most critical step in waterproofing success, if the substrate isn’t properly cleaned, primed, and graded for drainage, the waterproofing membrane will fail prematurely regardless of material quality.

Pro Tip
Professional waterproofing typically costs 15-25% more than DIY materials alone, but when you factor in warranty protection, liability coverage, and the cost of fixing failed DIY work, professional installation is almost always the more economical choice for multi-unit buildings.

Conclusion


Balcony waterproofing costs in 2026 reflect the complexity of protecting structural systems from water intrusion while meeting California’s SB 326 inspection mandates. Whether you’re managing a small 12-unit building in San Diego or a larger residential complex, understanding the cost drivers, system type, surface condition, climate exposure, and local labor rates, helps you budget accurately and make decisions that protect your residents and assets.

Frequently Asked Questions

How much does balcony waterproofing cost per square foot in 2026?

Balcony waterproofing costs range widely based on system type, material selection, and regional labor rates. Elastomeric coatings typically fall at the lower end, while advanced waterproofing membranes and structural repairs command higher per-square-foot pricing. Surface preparation, drainage slope correction, and existing water damage significantly impact final costs. Request quotes from licensed contractors to get accurate pricing for your specific property and condition.

What factors have the biggest impact on waterproofing project costs?

The primary cost drivers are balcony size and square footage, existing structural damage requiring remediation, surface preparation complexity, material selection (membrane type, UV resistance, slip-resistant finishes), labor rates in your region, permit fees, and curing time for polyurethane sealants or acrylic modified cement products. Properties with prior water intrusion or concrete spalling face higher costs due to sub-surface drainage work and structural repairs before waterproofing can begin.

Are professional waterproofing services required for SB 326 and SB 721 compliance?

SB 326 and SB 721 mandate structural inspections by licensed inspectors to identify water damage, moisture barriers, and balcony integrity issues. While the laws focus on inspection and reporting, professional waterproofing repairs are typically required once damage is documented. Attempting DIY waterproofing on multi-unit residential buildings creates liability risks and may not meet building code compliance standards. Professional contractors ensure proper material overhead, curing protocols, and warranty coverage.

What are the most common signs that a balcony needs immediate waterproofing repairs?

Visible water staining, concrete spalling, efflorescence (white mineral deposits), soft or deteriorating concrete, rust stains from rebar, pooling water that doesn’t drain, and interior water damage directly below the balcony are critical warning signs. Cracks wider than 1/8 inch, peeling coatings, and mold growth indicate moisture barrier failure. If you notice these signs, schedule a professional balcony inspection immediately to assess structural integrity and prevent further water intrusion.

Book inspection

Posted in BlogTagged balcony waterproofing cost, balcony waterproofing membrane replacement cost, cost of balcony waterproofing per square foot 2026, sb 326 balcony inspection requirements

HOA Requirements in 2026: What Boards Need to Know

Posted on September 20, 2026 by Apex Balcony admin
HOA Requirements in 2026: What Boards Need to Know

Table of Contents

  • What’s Changing for HOAs in 2026
  • SB 326 Balcony Inspection Requirements and Timelines
  • HOA Fine Limitations and Enforcement Changes
  • Mandatory Balcony and Elevated Element Inspections
  • HOA Reserve Study Requirements for Financial Planning
  • Open Board Meeting Requirements and Member Voting
  • How to Prepare Your Board for 2026 Compliance
  • Frequently Asked Questions

Last Updated: September 19, 2026

What’s Changing for HOAs in 2026

Understanding HOA requirements 2026 is critical, as California’s new regulations bring significant compliance obligations that reshape how associations operate, enforce rules, and maintain properties.

Boards that don’t adapt face legal liability, member disputes, and fines. We’ve worked with hundreds of building owners, boards that get ahead of compliance protect their communities and avoid costly emergency repairs.

The biggest changes center on three areas: SB 326 balcony inspections, stricter fine limits and enforcement procedures, and mandatory reserve funding studies. Understanding which requirements apply to your property is the essential first step.

SB 326 Balcony Inspection Requirements and Timelines

SB 326 mandates comprehensive inspections of elevated exterior elements, balconies, decks, stairs, and similar structures, in residential buildings with three or more units. The statute created a hard deadline structure that boards cannot ignore.

Buildings constructed before January 1, 2008 face the tightest timeline. These properties must complete initial inspections by January 1, 2025, with follow-up inspections every nine years. If your building missed that 2025 deadline, you’re now in violation, and the board faces immediate compliance obligations. Buildings constructed between January 1, 2008 and December 31, 2013 have until January 1, 2029 for their initial inspection, followed by nine-year cycles. Newer construction (post-2013) must have inspections by January 1, 2030.

The inspection itself isn’t optional documentation, it requires a licensed structural engineer or architect. These professionals assess the structural integrity of every elevated element, identifying water intrusion, concrete deterioration, fastener corrosion, and load-bearing failures. The inspector produces a detailed written report that becomes part of your permanent records. This report drives your reserve study and repair timeline.

Licensed structural engineer examining residential balcony structure, checking concrete deterioration and railing connections with inspection clipboard and measuring tools visible

The inspection reveals existing problems before they become catastrophic failures. A balcony collapse results from years of undetected water damage and structural degradation. The inspection gives you time to plan repairs and budget systematically.

HOA Fine Limitations and Enforcement Changes

California law restricts how aggressively boards can fine residents through strict caps and procedural requirements that make enforcement slower but create specific dispute scenarios.

Fine Caps and Their Real-World Impact

Late fees cannot exceed 10% of the delinquent amount or $10, whichever is greater. This is often insufficient to offset collection costs on persistent delinquencies, so boards must rely on assessment liens and judicial collection.

Architectural violation fines are capped at $100 per day, with a maximum of $1,000 per violation. Boards cannot impose a single massive fine; they must document repeated violations, provide notice, and allow cure periods. A homeowner with an unapproved paint color for 30 days faces a maximum fine of $3,000, not a single $5,000 penalty.

The Mandatory Enforcement Procedure

The enforcement process itself requires multiple sequential steps that boards cannot compress or skip:

  1. Written Notice of Violation: The board must provide written notice describing the specific violation, the rule or regulation violated, and the deadline to cure (typically 30 days). This notice must be delivered via personal service, certified mail, or email if the homeowner has consented to electronic notice.

  2. Cure Period: The homeowner has the statutory right to cure the violation within the specified timeframe. The board cannot impose a fine during this period, even if the violation continues.

  3. Hearing Right: If the homeowner requests a hearing before the fine is imposed, the board must hold one. This hearing is not optional; denying a hearing request invalidates any subsequent fine. The hearing must occur before a neutral decision-maker (often a hearing officer or panel of board members not involved in the violation determination).

  4. Fine Imposition: Only after the cure period expires and (if applicable) a hearing is held can the board impose a fine. The fine must be documented in writing with the date it takes effect.

This process typically takes 60-90 days from initial notice to fine imposition. Boards that rush enforcement without following these procedural requirements risk having fines overturned and facing legal liability for improper collection attempts.

If a board imposes a fine exceeding statutory caps or skips procedural steps, homeowners can challenge the fine in writing, request alternative dispute resolution, file a complaint with the Department of Consumer Affairs, or sue for violation of statutory duties. Courts have consistently ruled that statutory fine caps are mandatory, and boards that exceed them are liable for damages.

Assessment Liens Remain the Board’s Most Effective Tool

While fine caps have been tightened, assessment liens remain the board’s most powerful collection mechanism. When a resident falls behind on assessments, the board can place a lien on the property. This lien doesn’t force immediate payment, but it prevents the owner from refinancing or selling without satisfying the debt. Many delinquencies resolve when owners attempt to refinance or sell and discover the lien.

Liens are not subject to the same fine caps as violation fines. A lien can accrue interest and collection costs, making it a more effective enforcement tool than daily violation fines. However, the board must follow proper notice and procedural requirements to place a lien, and homeowners have the right to challenge improper liens in court.

Book inspection →

Frequent disputes arise over parking, architectural changes, and pet violations. Boards must define what constitutes a single violation versus repeated violations in their enforcement policy. Boards that document violations with photographs, dates, and witness statements are far more likely to prevail in disputes. Specific violation notices create a clear record; vague notices are difficult to defend.

Boards must shift from punitive fines to systematic documentation and liens. Boards that document violations carefully, follow procedural requirements precisely, and use assessment liens are far more effective at enforcing rules and collecting assessments.

Mandatory Balcony and Elevated Element Inspections

SB 326 requires inspections of all elevated exterior elements, balconies, decks, stairs, walkways, by licensed professionals. The inspection report becomes the foundation for reserve study and repair planning, identifying elements requiring immediate repair, repair within 5 years, or monitoring. Informal assessments don’t satisfy the statute; boards that attempt to work around this requirement expose themselves to liability.

HOA Reserve Study Requirements for Financial Planning

Reserve studies must be updated every three years by a professional and must address SB 326 inspection findings. The reserve funding percentage is a disclosure requirement, not a recommendation. Boards must report to members what percentage of full funding the reserve account maintains. Underfunded reserves create cascading problems; boards that maintain adequate reserves avoid crises.

Open Board Meeting Requirements and Member Voting

Board meetings must be open to all members unless the board votes to enter executive session for litigation, contract negotiations, member discipline, or personnel matters. Boards must provide written notice at least four days in advance with date, time, location, and agenda items. General business discussions must occur in open session. Voting requires proper quorum and notice; votes without proper notice or quorum can be overturned.

How to Prepare Your Board for 2026 Compliance

Compliance requires systematic preparation and documented procedures. The following framework provides a step-by-step implementation roadmap.

Phase 1: Audit Your Current Status (Weeks 1-2)

Begin with a comprehensive audit of your association’s compliance position. Determine which SB 326 deadline applies to your building under the HOA requirements 2026: pre-2008 construction (deadline passed; schedule immediately), 2008-2013 construction (deadline January 1, 2029), or post-2013 construction (deadline January 1, 2030). If you’ve completed an inspection, verify the date and confirm your next inspection is scheduled.

Determine when your last reserve study was completed; if more than three years ago, schedule an update.

Phase 4: Member Communication and Training (Weeks 7-12)

Board Member Training: Conduct a compliance training session at the start of each board year. Cover:

  • SB 326 inspection requirements and timelines
  • Fine caps and enforcement procedures
  • Open meeting requirements and executive session rules
  • Reserve funding disclosure requirements
  • Member rights and dispute resolution procedures

Member Communication: Send a letter to all members explaining the 2026 compliance requirements and how they affect the community. Specifically address:

  • The SB 326 inspection schedule and what members can expect
  • Changes to fine procedures and enforcement timelines
  • Reserve funding updates and any planned assessment increases
  • Member rights to attend board meetings and request hearings

This communication reduces member anxiety and demonstrates board transparency.

Phase 5: Implement and Monitor (Ongoing)

Establish a Compliance Calendar: Create a calendar that tracks:

  • SB 326 inspection dates and follow-up inspection due dates
  • Reserve study update due dates
  • Board meeting notice deadlines
  • Member communication deadlines

Document All Enforcement Actions: When the board takes enforcement action, document every step:

  • Date and method of violation notice
  • Cure period offered
  • Whether a hearing was requested and held
  • Hearing outcome
  • Fine amount and date imposed
  • Payment status

Implementation Timeline Summary

  • Weeks 1-2: Complete compliance audit
  • Weeks 3-6: Update governing documents and policies
  • Weeks 4-8: Schedule professional services (inspections, reserve study, legal review)
  • Weeks 7-12: Conduct member and board member communication and training
  • Ongoing: Implement procedures, document actions, monitor compliance calendar

Frequently Asked Questions

Which HOA requirements apply to my building, SB 326 or SB 721?

SB 326 applies to common interest developments (HOAs) with elevated exterior elements built before January 1, 2008. SB 721 covers apartment buildings with three or more units. Most HOA-governed properties fall under SB 326. Check your CC&Rs and building documentation, or contact a compliance professional to confirm which statute governs your property without committing to services upfront.

What happens if we don’t complete SB 326 balcony inspections by the deadline?

Failure to conduct mandatory inspections under SB 326 exposes your HOA to civil liability, potential fines, and legal action from residents. If structural failure occurs and injuries result, the association faces significant liability. Additionally, properties may be unable to sell or refinance without proof of inspection compliance. The Davis-Stirling Common Interest Development Act requires boards to fulfill their fiduciary duty to members.

How much can an HOA fine residents in 2026?

California’s new fine limitations restrict HOAs from imposing excessive penalties. Fines must be proportional to the violation and cannot exceed amounts specified in your governing documents and state law. Boards must provide notice, opportunity to be heard, and alternative dispute resolution before enforcement. Late fees are also restricted. Check your CC&Rs and recent statutory updates for exact limits, as they vary by violation type.

What should our board include in the reserve study for 2026?

HOA reserve studies must document the condition and remaining useful life of all major components, including elevated elements like balconies and decks. The study should project funding needs for repairs and replacements over the next 30 years and recommend reserve contribution levels. This protects the association from unexpected special assessments and demonstrates financial transparency to members. Professional reserve studies help boards make informed budgeting decisions.

Book inspection

Posted in BlogTagged hoa fine limitations, hoa requirements 2026, hoa reserve study requirements, sb 326 balcony inspection requirements

10 Best Practices for Managing Building Safety Audits

Posted on September 19, 2026 by Apex Balcony admin
10 Best Practices for Managing Building Safety Audits

Table of Contents

  • 1. Define Clear Audit Scope and Objectives
  • 2. Understand SB 326 Balcony Inspection Requirements
  • 3. Develop a Building Safety Audit Template
  • 4. Conduct Thorough On-Site Inspections
  • 5. Hire a Licensed Structural Inspector
  • 6. Document Findings and Maintain Audit Trails
  • 7. Create Corrective Action Plans and Track Closeout
  • 8. Build a Safety Culture and Engage Stakeholders
  • Common Mistakes to Avoid
  • Frequently Asked Questions
  • External Resources

Last Updated: September 18, 2026

Building safety audits protect residents and shield property owners from liability. But conducting them effectively requires more than checking boxes. The difference between a cursory inspection and one that actually prevents structural failure comes down to how systematically you approach the process.

This guide covers 10 best practices for managing building safety audits, ensuring you catch problems early, document findings properly, and follow through on repairs.

Quick Overview

PracticeKey FocusOutcome
Define scope and objectivesClarify what you’re inspecting and whyFocused, efficient audit
Understand SB 326 requirementsKnow the legal mandateStay compliant with state law
Create an audit templateStandardize your processConsistent documentation
Conduct thorough inspectionsExamine all elevated exterior elementsCatch structural issues early
Hire licensed inspectorsUse qualified professionalsCredible, defensible findings
Document everythingMaintain audit trailsStrong liability protection
Plan corrective actionsAddress findings systematicallyRepairs get completed
Build safety cultureEngage employees and residentsSustained compliance

1. Define Clear Audit Scope and Objectives

Your building safety audit starts with a critical question: what exactly are you inspecting, and what do you hope to accomplish? Without defined scope, audits become sprawling exercises that waste time and miss important issues.

Identify the specific structures under review (all balconies, specific units, common stairways) and establish measurable objectives: confirm code compliance, identify structural defects, document current conditions, and develop a prioritized repair list.

Document scope and objectives in writing before the audit begins. This audit scope statement keeps the inspection focused and provides evidence you approached it methodically.

Pro Tip
Include the audit date range, the specific buildings or units covered, and the regulatory standard you’re testing against (SB 326, SB 721, or local codes). This clarity prevents scope creep and ensures your inspector doesn’t waste time on areas outside the audit’s purpose.

2. Understand SB 326 Balcony Inspection Requirements

California’s SB 326 and SB 721 mandate inspections of elevated exterior elements in residential buildings with three or more units. SB 326 (effective January 1, 2018) applies to buildings constructed before January 1, 2008. SB 721 (effective January 1, 2020) extends requirements to buildings constructed before January 1, 2015. These are legal mandates with penalties for non-compliance.

A licensed structural engineer or architect must conduct the inspection, examining for dry rot, water intrusion, fastener corrosion, and structural deterioration. Failure to comply can result in fines, permit loss, and liability.

Watch Out
If your building was constructed before January 1, 2015 and has three or more residential units, you likely fall under SB 721 requirements. Delaying this inspection doesn’t make the obligation disappear, it increases your liability exposure. The longer you wait, the more deterioration can occur undetected.

Apex Balcony specializes in these exact inspections, helping property owners understand which regulation applies to their building and ensuring the inspection meets all state requirements.

3. Develop a Building Safety Audit Template

A template ensures every inspector follows the same process and documents findings consistently. Include: property identification, inspector credentials, inspection date, detailed checklists (railings, fasteners, connections, stairs), space for photos and notes, condition ratings, and recommended actions.

The checklist should be specific enough that different inspectors document similar findings. Instead of “inspect railings,” specify: “Check railing height (minimum 42 inches), loose fasteners, rust, wood deterioration, and connections to building structure.”

Digital templates allow inspectors to fill forms on tablets, add photos directly, and sync findings in real time. Include evidence-based findings: photos of corroded fasteners, locations and depth of wood deterioration. This evidence is critical if you need to defend findings later.

Key Takeaway
A well-designed template turns inspection findings into defensible documentation. It ensures compliance with regulatory standards and creates an audit trail that protects you if disputes arise over repair decisions.

4. Conduct Thorough On-Site Inspections

A thorough on-site inspection requires more than a visual walk-around. For each element, include: close visual inspection of all surfaces, tactile testing (probing wood, checking fastener tightness), photographic documentation, measurement of dimensions, and assessment of water intrusion.

Inspect during daylight hours and avoid rainy days when water may mask dry rot. A 50-unit building typically requires a full day or more for thorough inspection.

Record findings in real time using your template. Take photos of defects with close-ups showing extent of damage. Note locations precisely and include measurements and condition ratings. Document any obstacles that prevent full assessment (blocked access, storage) to show you attempted thorough inspection within practical limits.

Pro Tip
Bring tools: a moisture meter to test for water intrusion, a probe to test wood density, a level to check railing height, a measuring tape, and a camera. These tools transform subjective observations into objective data that holds up under scrutiny.

5. Hire a Licensed Structural Inspector

Your inspector must be a licensed structural engineer or architect with specific experience in balcony and deck inspections. A licensed inspector understands building codes, recognizes early signs of structural failure, and assesses whether deterioration is cosmetic or dangerous.

Ask about experience with your building type and age. Request references from other HOAs. Review past reports for detail and specificity. Verify license with the state and confirm professional liability insurance.

Licensed structural engineer conducting detailed balcony inspection, examining wooden beams and fasteners with professional tools, clipboard in hand, natural daylight illuminating the elevated structure

Professional oversight remains critical because even minor modifications to a building’s load-bearing components require rigorous attention to ensuring structural integrity during home additions.

The cost of a qualified inspector is far less than the cost of a balcony failure, which can result in injuries, fatalities, and massive liability.

Apex Balcony brings decades of combined construction and design experience to every inspection. Our licensed inspectors know exactly what to look for in California buildings and understand the specific requirements of SB 326 and SB 721 compliance.

6. Document Findings and Maintain Audit Trails

Documentation discipline is where many audits fail. You can conduct a thorough inspection, but if your findings aren’t documented clearly and completely, you’ve created liability rather than protection.

Record every finding in writing: what was inspected, when, by whom, condition found, supporting evidence (photos, measurements), and what it means. Include discovery and completion dates. Take photos from multiple angles with close-ups and wider shots. Label each photo with location, date, and subject.

Maintain an audit trail: scope document, inspection checklist, inspector notes, photographs, final report, and communications about findings. Store digital copies in a secure location. Your audit trail proves you conducted a proper inspection and acted reasonably on findings.

Watch Out
Don’t sanitize your audit findings. If the inspection identifies a critical defect, document it clearly. Downplaying findings in hopes of avoiding costly repairs creates massive liability if that defect later causes injury. The honest documentation of a serious problem is far better than a cover-up that gets exposed in discovery.

7. Create Corrective Action Plans and Track Closeout

A corrective action plan translates audit findings into concrete repair work. For each finding, specify: the defect, why repair is needed, what work is required, contractor details, estimated cost, target completion date, and responsible person.

Prioritize repairs by urgency. Critical defects that pose immediate safety risks should be addressed first. Moderate defects that will worsen over time should be scheduled within months. Minor defects can be bundled into longer-term maintenance plans.

Track progress. As repairs are completed, document that completion. This means: inspecting the repair work to confirm it was done correctly, obtaining proof from the contractor (photos, signed work orders), updating your corrective action plan to show the completion date, and verifying that the repair meets building code standards.

Use a corrective action tracking system, a spreadsheet or software tool that shows each finding, the planned repair, the deadline, the actual completion date, and the person responsible. This becomes your evidence that you didn’t just identify problems and ignore them.

Some repairs will take time. Budget constraints, contractor availability, or the complexity of the work may mean repairs extend over months or years.

8. Build a Safety Culture and Engage Stakeholders

Audits aren’t one-time events. Sustained safety requires a culture where residents, staff, and board members all understand why safety matters and take responsibility for it.

Key Takeaway
A strong safety culture means residents feel heard, board members understand their responsibility, and staff know what to watch for. When safety is everyone’s concern, problems get reported earlier and addressed faster.

Common Mistakes to Avoid

Hiring unqualified inspectors to save money. A cheap inspection that misses critical defects creates massive liability. The cost of a qualified inspector is insurance against catastrophic failure.


Frequently Asked Questions

How do SB 326 and SB 721 impact building audit requirements?

SB 326 requires inspection of balconies and elevated exterior elements in buildings with three or more units constructed before January 1, 2008. SB 721 expanded these requirements to include buildings constructed before January 1, 2020. Both laws mandate regular inspections to identify structural defects and non-conformance with safety standards. Building owners must document audit findings and maintain compliance records, making structured building safety audits essential for meeting these regulatory standards.

What documentation is required for a professional building safety inspection?

Professional inspections require comprehensive documentation including a detailed audit checklist covering all elevated exterior elements, photographic evidence of structural conditions, written findings identifying hazards and non-conformance items, and a corrective action plan with timelines. Documentation must include the inspector’s credentials, inspection date, scope of work, and specific locations of defects. This audit trail supports regulatory reporting, demonstrates due diligence, and provides evidence for insurance and legal protection if issues arise.

How often should building safety audits be conducted for compliance?

Under SB 326 and SB 721, initial inspections are required, followed by reinspections every six years for buildings that pass, or sooner if structural issues are identified.

What are the most common mistakes made during building safety audits?

Common mistakes include inadequate audit scope that misses critical areas, poor documentation discipline leading to incomplete audit trails, failing to involve stakeholders in the inspection process, and delaying corrective action closeout. Many property owners also underestimate the complexity of SB 326 and SB 721 requirements, attempt inspections without licensed professionals, and neglect to create a formal safety management system. These errors expose buildings to liability, regulatory fines, and safety risks.


External Resources

For additional guidance on building safety standards and inspection requirements:

  • California Building Standards Commission regulations on structural inspections
  • National Association of Home Inspectors standards for structural assessment
  • American Society of Civil Engineers guidelines for building condition assessment

Book inspection

Posted in BlogTagged 10 best practices for managing building safety audits, building safety audit template, building safety audits, hiring a licensed structural inspector, sb 326 balcony inspection requirements

Posts navigation

Older posts

Recent Posts

  • Balcony Waterproofing and Structural Integrity
  • Cost of Balcony Structural Repairs in California
  • Hiring a Structural Engineer for Deck Safety: 2026 Guide
  • Balcony Maintenance Tips for California Homeowners
  • How to Choose a Structural Engineer for Home Renovation

Recent Comments

No comments to show.

Archives

  • October 2026
  • September 2026
  • August 2026
  • July 2026
  • June 2026

Categories

  • Blog
Logo
Created by Unilime.Group
  • Balcony Law
  • About us
  • Inspection services
  • FAQ
  • Blog

Call us ‪+1 818-806-7885‬
License: CSLB #1101305

Apex Balcony Inspection
‪+1 818-806-7885‬
[email protected]
4645 Van Nuys Blvd #201
Sherman Oaks CA 91403

Created by Unilime.Group