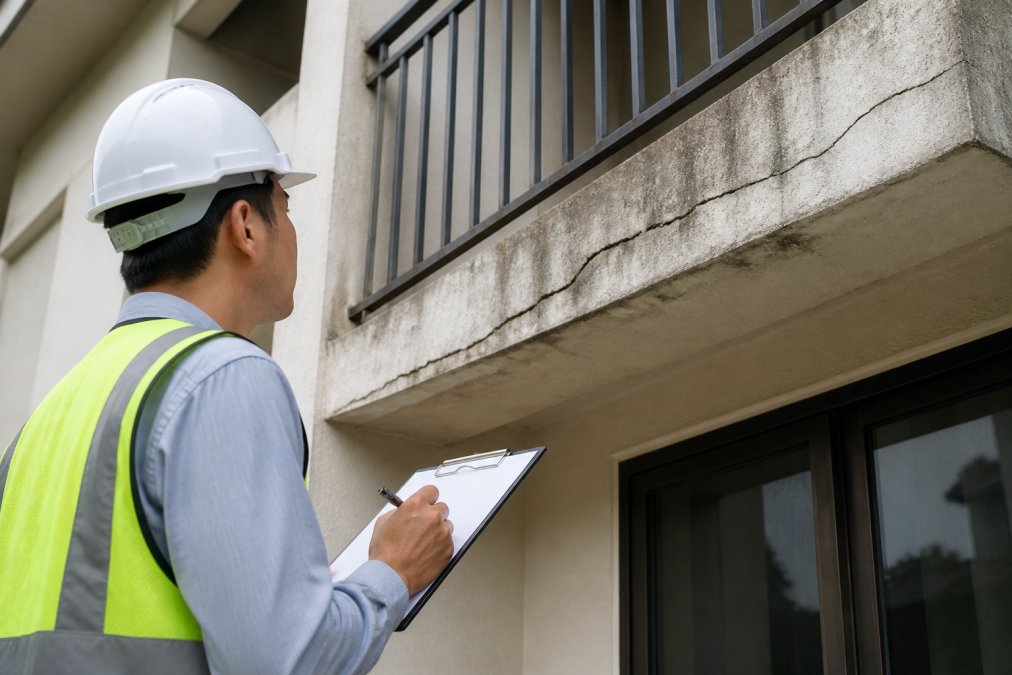
Logo
  • Balcony Law
  • About us
  • Inspection services
  • FAQ
  • Blog
  • Call us ‪+1 818-806-7885
  • Book now

Tag: hiring a licensed structural inspector

How to Identify Balcony Membrane Failure

Posted on September 28, 2026 by Apex Balcony admin
How to Identify Balcony Membrane Failure

Table of Contents

  • What Balcony Membrane Failure Looks Like
    • Water stains on ceilings below
    • Cracked, loose, or drummy tiles
  • SB 326 Balcony Inspection Requirements and Compliance
  • Signs of Dry Rot in Balcony Joists and Framing
    • How moisture ingress leads to structural decay
    • Visual indicators of wood deterioration
  • Step-by-Step Inspection Process for Balcony Membranes
    • Step 1: Examine the surface coating and membrane integrity
    • Step 2: Check flashing and wall-to-deck transitions
    • Step 3: Test with a moisture meter
    • Step 4: Inspect seams, joints, and penetrations
  • Hiring a Licensed Structural Inspector for Professional Assessment
  • Common Mistakes to Avoid During Inspection
  • Seasonal Inspection Checklist
  • Frequently Asked Questions

Last Updated: September 27, 2026

What Balcony Membrane Failure Looks Like

Balcony membrane failure is when the waterproof layer protecting your balcony deck breaks down, allowing water to penetrate into the structure below. This happens slowly at first, but the damage compounds quickly. Once water gets past the membrane and into the framing, you’re looking at structural decay that spreads fast.

The signs of balcony membrane failure are visible if you know what to look for. Water stains on the ceiling below are often the first clue. Cracked or loose tiles on the deck surface are another. Ponding water that sits on the balcony after rain is a major red flag. These aren’t minor cosmetic issues, they’re warnings that your balcony’s structural integrity is at risk.

At Apex Balcony, we’ve worked with hundreds of building owners across California. The patterns are consistent. Most property owners catch these problems too late because they don’t know what to look for. Early detection saves tens of thousands in repairs and keeps residents safe.

Water stains on ceilings below

Water stains on the ceiling of the unit below are the most common first sign of balcony membrane failure. The stain appears as a dark, discolored patch. It may look wet or dry depending on how recently the balcony leaked.

These stains don’t appear overnight. They develop over weeks or months as water seeps through the membrane, past the substrate, and down into the structure. By the time you see the stain, water has already been pooling above for a while.

Check the color and texture. Fresh stains are darker and may feel damp to the touch. Older stains are lighter and crusty. Either way, a water stain means moisture ingress is happening right now. This is not a cosmetic problem you can ignore.

Cracked, loose, or drummy tiles

Walk across the balcony deck and listen. Tap the tiles with your foot or a rubber mallet. A solid tile makes a crisp sound. A tile that’s lost its bond to the substrate sounds hollow, that’s called a drummy tile.

Cracked tiles are obvious. Loose tiles rock slightly when you step on them. Both mean water is getting underneath. Cracks let water in directly. Loose tiles mean the adhesive has failed, usually because water has been trapped underneath for months.

Check the grout lines too. Cracked or missing grout is another entry point for water. Even small gaps let moisture seep down to the membrane and substrate below.

SB 326 Balcony Inspection Requirements and Compliance

California’s SB 326 law requires balcony inspections for residential buildings with three or more units. The law applies to buildings constructed before January 1, 2008. Inspections must be completed by a licensed structural engineer or architect.

The deadline for initial inspections depends on when your building was constructed. Extensions have been granted in some cases, but you should verify your building’s compliance status now.

The inspection report must document the condition of all balconies, decks, and exterior stairs. It must identify defects and rate their severity. If significant defects are found, you have a set timeframe to complete repairs. Non-compliance can result in fines and legal liability if someone is injured.

Apex Balcony specializes in SB 326 compliance for California property owners. We understand the legal requirements and help you navigate the inspection process with minimal disruption to residents.

Signs of Dry Rot in Balcony Joists and Framing

Dry rot is wood decay caused by a fungus that thrives in moist environments. It’s called “dry” rot because the wood becomes brittle and dry as the fungus breaks down the cellulose. Once dry rot starts, it spreads through the framing quickly.

Water Damage on a Balcony | How to Inspect a Balcony | Balcony & Deck Repair Tips

Bay Cities Construction

Dry rot is the most dangerous consequence of balcony membrane failure. The wood loses strength. Structural failure can happen suddenly. In 2015, a balcony collapse in Berkeley California killed six people. The primary cause was dry rot in the joists, which developed because the balcony membrane had failed years earlier.

How moisture ingress leads to structural decay

Water penetration through a failed membrane doesn’t stop at the surface. It soaks into the substrate, usually concrete or wood. From there, it moves into the framing members: joists, rim boards, and ledger boards. The wood stays damp because the balcony structure traps moisture. Ventilation is poor. The wood never fully dries.

Fungal spores are already present in the wood. When moisture levels stay high (above 20% wood moisture content), the fungus activates and begins breaking down the wood fibers. This process can take months or years, but once it starts, it accelerates.

Book inspection →

The decay weakens the wood from the inside out. The wood becomes soft and crumbly. It loses its load-bearing capacity. The balcony sags. Cracks appear in the structure. Eventually, the balcony can collapse under its own weight or the weight of residents and furniture.

Visual indicators of wood deterioration

Look at exposed wood on the balcony structure. Soft, spongy wood is a sign of decay. Press a screwdriver or awl into the wood. If it sinks in easily, the wood has lost structural integrity. Sound wood resists penetration.

Discoloration is another sign. Decayed wood often appears darker or bleached. The surface may be soft and crumbly. In advanced cases, the wood becomes hollow or develops large voids.

Check the ledger board where the balcony attaches to the building. This is a common failure point.

Step-by-Step Inspection Process for Balcony Membranes

A proper balcony membrane inspection requires a systematic approach. You need to examine the surface, check for water penetration, test the substrate, and document everything. This process takes time, but it’s the only way to catch problems early.
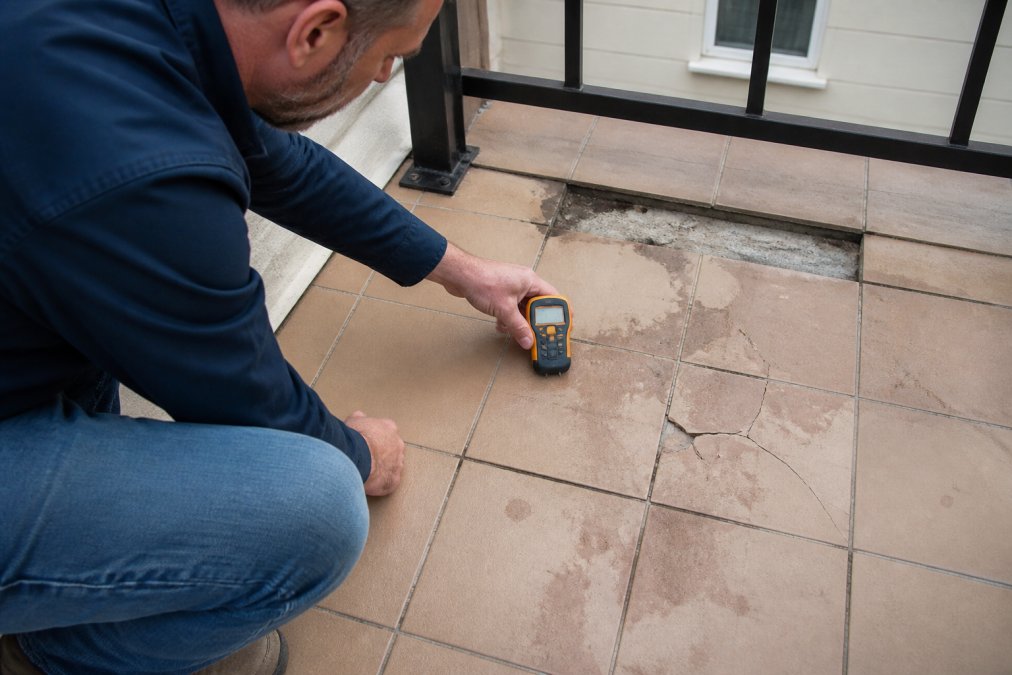
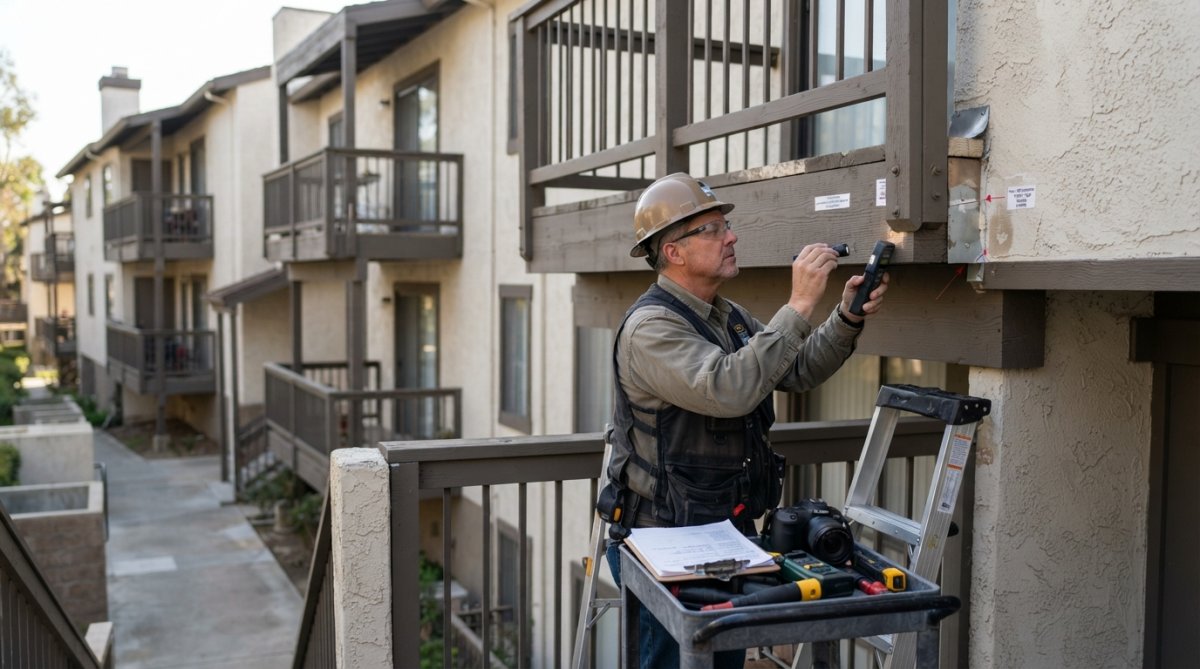
Inspector using a moisture meter to check for balcony membrane failure on cracked tiles

Step 1: Examine the surface coating and membrane integrity

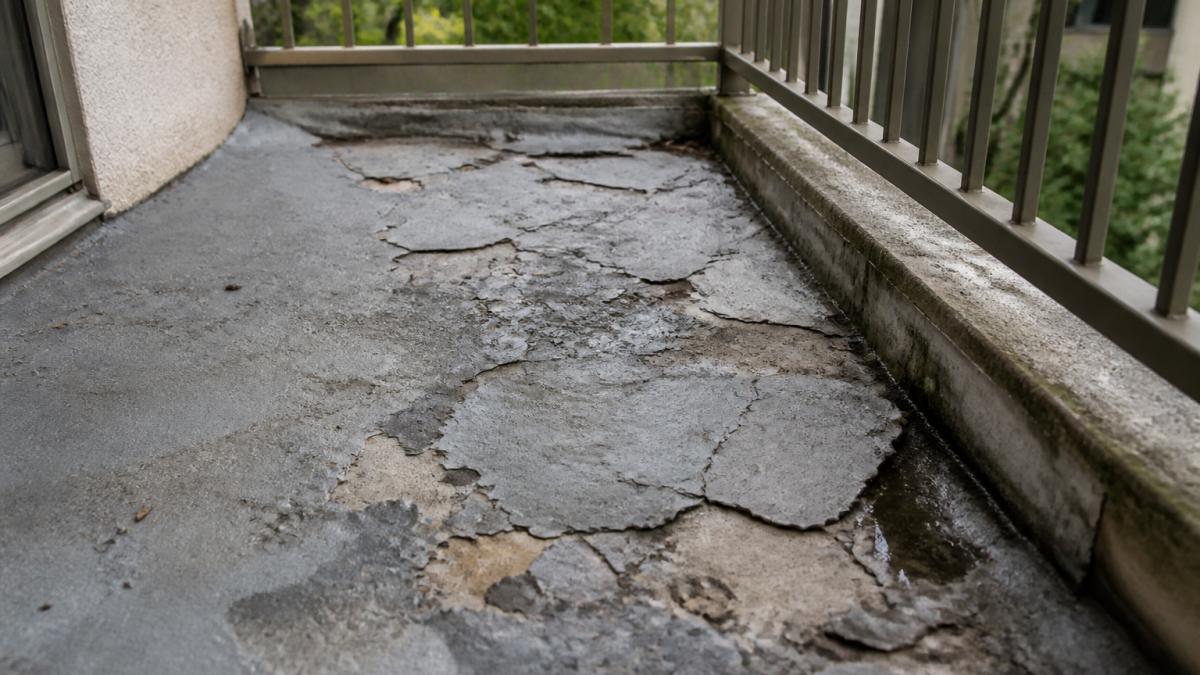
Start at the top of the balcony deck. Look at the surface coating. Is it intact or peeling? Are there cracks, blisters, or areas where the coating has separated from the substrate?

Step 2: Check flashing and wall-to-deck transitions

Flashing is the metal or membrane material that bridges the gap between the balcony deck and the building wall. This is a critical detail. Water runs off the deck and toward the wall. If the flashing isn’t installed correctly, water gets behind it and into the wall.

Step 3: Test with a moisture meter

A moisture meter is an essential tool for identifying hidden water damage. It measures the moisture content of wood and concrete. You can’t see moisture problems with your eyes alone. The meter reveals them. While this device is effective for detecting hidden water damage within the balcony structure, similar moisture intrusion often migrates into the wall cavities where you can identify signs of rot behind siding.

Step 4: Inspect seams, joints, and penetrations

Seams are where two pieces of membrane material meet. Joints are where the deck meets the building. Penetrations are holes where pipes, drains, or other elements pass through the membrane. All of these are potential failure points.

Hiring a Licensed Structural Inspector for Professional Assessment

A professional inspection is the most reliable way to assess balcony membrane failure. A licensed structural engineer or architect has the training and tools to identify problems you might miss. They produce a detailed report that documents the condition and recommends repairs.

Common Mistakes to Avoid During Inspection

Many property owners try to inspect their balconies themselves and miss critical problems. Others hire unqualified inspectors and get inaccurate reports. Avoid these common mistakes.

Seasonal Inspection Checklist

Inspect your balcony at least twice a year: spring and fall. Spring inspection catches winter damage. Fall inspection prepares the balcony for winter weather.

Spring Inspection:

  • Look for water stains on the ceiling below
  • Check for cracks or peeling coating
  • Test flashing and wall-to-deck transitions
  • Look for standing water or ponding areas
  • Check for cracked or loose tiles
  • Test moisture levels with a meter
  • Inspect caulking and sealant condition
  • Look for signs of mold or mildew

Fall Inspection:

  • Clear debris from the deck and drains
  • Check drainage to ensure water flows off properly
  • Inspect coating for damage or wear
  • Test flashing before winter weather arrives
  • Look for cracks that may allow freeze-thaw damage
  • Check caulking around penetrations
  • Document any changes since spring inspection

Frequently Asked Questions

What are the signs of a failed waterproof membrane on a balcony?

Common signs include water stains on ceilings below the balcony, cracked or loose tiles, ponding water that doesn’t drain, visible mold or efflorescence (white salt deposits), and soft or spongy areas in the substrate. Flashing failures at wall-to-deck transitions and corrosion on steel components also indicate membrane failure. If you notice any of these, moisture has likely penetrated the waterproofing layer and begun damaging the structure beneath.

How do SB 326 and SB 721 impact balcony inspection requirements?

SB 326 requires inspection of balconies and elevated elements in buildings three or more units built before 2018. SB 721 extends requirements to newer properties. Both laws mandate licensed structural engineers evaluate for safety and water intrusion. Failure to comply can result in fines and liability. Property owners must document inspections and remediation to maintain legal compliance and protect residents from injury or property damage caused by structural failure.

Can I test for moisture in my balcony myself without hiring an inspector?

Yes, a moisture meter is an affordable tool homeowners can use to detect excess moisture in the substrate. However, a moisture meter alone cannot diagnose the cause of failure, identify hidden damage within the structure, or determine repair scope. Professional inspectors use meters alongside visual assessment, hydrostatic pressure testing, and knowledge of building codes to provide a complete picture. For SB 326 and SB 721 compliance, a licensed structural engineer’s report is legally required.

What is dry rot in balcony joists and why does it happen?

Dry rot is fungal decay in wood caused by persistent moisture exposure, typically from waterproofing membrane failure. When water penetrates the membrane, it saturates wood joists and framing. The fungus breaks down the wood’s structural integrity, causing it to become soft, crumbly, and weak. Signs include discolored or darkened wood, visible gaps, and wood that crushes easily under pressure. Once dry rot begins, it spreads quickly and can compromise the entire balcony structure if not addressed immediately.
Book inspection

Posted in BlogTagged balcony membrane failure, hiring a licensed structural inspector, how to identify balcony membrane failure, sb 326 balcony inspection requirements, signs of dry rot in balcony joists

Multi-Unit Building Inspections: Step-by-Step Guide

Posted on September 24, 2026 by Apex Balcony admin
Multi-Unit Building Inspections: Step-by-Step Guide

Table of Contents

  • Understanding Multi-Unit Building Inspections and Legal Requirements
  • SB 326 Balcony Inspection Requirements and Compliance Standards
  • Preliminary Site Assessment and Building Code Compliance
    • Walkthrough Protocol and Documentation
    • Identifying Life Safety and Fire Protection Gaps
  • Structural Integrity Assessment and Foundation Evaluation
    • Detecting Early Signs of Structural Failure
    • Building Envelope and Moisture Intrusion Inspection
  • Electrical, Plumbing, and HVAC Systems Review
    • Electrical System Inspection: Service, Panels, and Protection
    • Plumbing System Assessment: Supply, Drainage, and Water Quality
    • HVAC System Performance and Maintenance
  • Hiring a Licensed Structural Inspector for Multi-Family Properties
  • Multi-Family Building Maintenance Schedule and Capital Improvement Planning
    • CapEx Forecasting and Reserve Study Integration
    • Maintenance Schedules and Preventative Care
    • Tenant Communication and Liability Risk Management
  • Inspection Reporting and Compliance Documentation
  • Frequently Asked Questions

Last Updated: September 23, 2026

Understanding Multi-Unit Building Inspections and Legal Requirements

Multi-unit building inspections are comprehensive evaluations of residential properties with three or more units that assess structural integrity, safety systems, code compliance, and maintenance needs across balconies, decks, stairways, electrical panels, plumbing, and fire safety systems.

California law mandates regular structural assessments for multi-unit buildings to protect residents and limit liability.

SB 326 Balcony Inspection Requirements and Compliance Standards

Senate Bill 326, which took effect in 2018, requires all residential buildings with three or more units to conduct visual inspections of all exterior elevated elements, balconies, decks, stairways, and similar structures, at least once every nine years. SB 721, enacted in 2019, also mandates inspections for elevated exterior elements.

Watch Out
Missing the SB 326 or SB 721 compliance deadline isn’t a minor administrative oversight, it’s a legal violation that exposes your building and board members to personal liability. If an accident occurs on a non-compliant structure, your insurance may not cover damages.

Preliminary Site Assessment and Building Code Compliance

The preliminary walkthrough establishes baseline conditions, identifies obvious hazards, and determines which systems require deeper investigation.

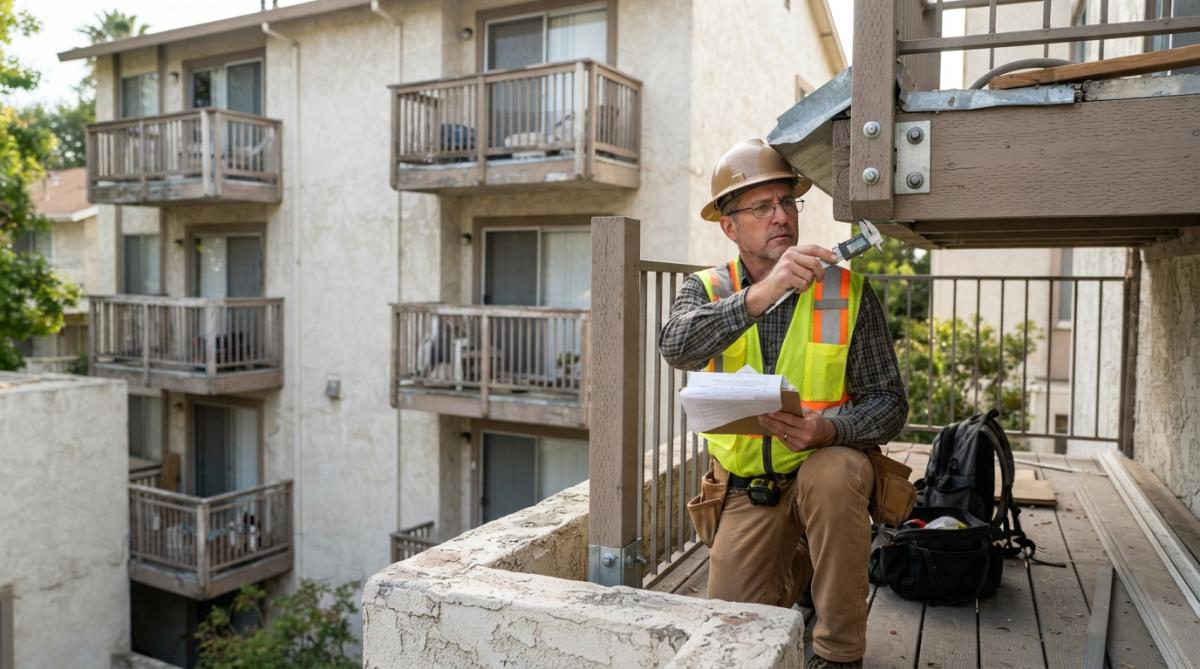
Structural inspector assessing balcony framing during multi-unit building inspections in daylight

Walkthrough Protocol and Documentation

The walkthrough examines all balconies, decks, stairways, and railings, documenting the building’s age, construction type, and visible deterioration including moisture intrusion, wood rot, rust stains, and separated fasteners.

Identifying Life Safety and Fire Protection Gaps

The inspector evaluates stairway width, handrail continuity, step uniformity, lighting, and egress routes. Fire suppression systems, smoke detectors, and emergency lighting are tested and documented.

Pro Tip
Most property managers discover that water damage in balconies is far more extensive than visible from the exterior. Water enters at fastener holes, flashing gaps, and wood-to-concrete connections, then travels horizontally through structural members before becoming visible. Early detection prevents catastrophic failure.

Structural Integrity Assessment and Foundation Evaluation

Structural assessment determines whether the building can safely support its intended load and resist environmental forces. This phase requires detailed examination of primary structural elements and their connections.

Detecting Early Signs of Structural Failure

Wood deterioration is the most common structural problem in older buildings. The inspector uses specialized tools to detect decay and examines fasteners for corrosion and proper tightness, as corroded fasteners can fail suddenly under load.

Building Envelope and Moisture Intrusion Inspection

The inspector examines roofing, flashing, sealants, windows, doors, and exterior wall systems to identify gaps where water can enter and failed drainage systems.

Electrical, Plumbing, and HVAC Systems Review

Building systems must function safely and meet code requirements. In multi-unit buildings, system failures affect multiple residents and create significant liability exposure.

Electrical System Inspection: Service, Panels, and Protection

Service capacity and grounding: The main panel must have adequate capacity for the building’s electrical load. Undersized service creates fire risk. The inspector verifies proper grounding to earth, which prevents dangerous voltage buildup and electrocution risk.

Watch Out
Outdated wiring and missing GFCI/AFCI protection are among the most common code violations in older multi-unit buildings. These violations create fire and electrocution hazards. Insurance companies may deny claims if electrical fires occur in buildings with known code violations that weren’t corrected.

Plumbing System Assessment: Supply, Drainage, and Water Quality

Plumbing systems in multi-unit buildings are complex because water must be distributed to multiple units and wastewater must be collected and disposed of safely. The inspection focuses on three areas: water supply, drainage, and water damage.

Common leak locations include:

  • Connections between supply lines and fixtures (toilets, sinks, washing machines)
  • Drain line connections in crawl spaces or basements
  • Water heater connections and drain pans
  • Exterior hose bibs and irrigation lines

HVAC System Performance and Maintenance

Heating, ventilation, and air conditioning systems must provide comfortable temperatures and adequate air quality. In multi-unit buildings, HVAC failures affect resident comfort and can create health hazards.

Key Takeaway
Systems that appear to function normally often hide serious problems. A plumbing system with slow leaks can cause extensive hidden damage in walls and crawl spaces. An HVAC system running inefficiently wastes energy and indicates mechanical problems that will worsen. The inspection identifies these issues before they become emergencies and cause resident complaints or property damage.

Hiring a Licensed Structural Inspector for Multi-Family Properties

Select inspectors with Structural Engineer (SE), Professional Engineer (PE), or Certified Building Inspector credentials, liability insurance, and experience with similar buildings. Ask for references and review sample reports. The inspector should explain methodology, timeline, and be willing to discuss findings and repair priorities.

Book inspection →

Multi-Family Building Maintenance Schedule and Capital Improvement Planning

Regular maintenance prevents small problems from becoming catastrophic failures. Inspection findings must be translated into financial forecasts and resident communication strategies.

CapEx Forecasting and Reserve Study Integration

Deficiencies are typically classified into three tiers:

Immediate Safety Hazards (0-30 days): Structural failures, electrical fire risks, or fall hazards requiring repair before continued occupancy. Examples include corroded fasteners on load-bearing connections, missing railings, or exposed electrical wiring.

Maintenance Schedules and Preventative Care

Common preventative tasks include: Quarterly: gutter cleaning, balcony railing inspection, HVAC filter replacement. Semi-annually: caulk and sealant inspection, roof inspection, exterior wood sealing. Annually: comprehensive walkthrough, fire suppression testing, plumbing and electrical inspection. Every 3-5 years: power washing, re-caulking, fastener inspection and tightening.

Tenant Communication and Liability Risk Management

Timing: Communicate findings within 30 days of inspection completion. Delayed communication appears evasive and allows rumors to spread.

Pro Tip
The most important liability protection is a documented decision-making process. If the board reviews inspection findings, discusses repair options, documents the reasoning for prioritization, and communicates decisions to residents, courts view the board as acting in good faith even if a problem later occurs. Lack of documentation is what creates liability exposure.

Inspection Reporting and Compliance Documentation

The inspection report is the official record of building condition. A comprehensive report includes photographs, measurements, condition descriptions, code violations, repair recommendations, and cost estimates. Deficiencies should be prioritized by urgency. Documentation must be preserved for nine years and made available to residents as required by law.


Inspection PhaseKey Focus AreasTypical Timeline
Preliminary WalkthroughExterior condition, obvious hazards, code violations2-4 hours
Structural AssessmentConnections, deterioration, foundation, envelope4-8 hours
Systems ReviewElectrical, plumbing, HVAC, fire safety2-4 hours
DocumentationReport preparation, photography, measurements4-8 hours

California Building Standards Code requirements for multi-unit residential buildings

SB 326 and SB 721 balcony inspection compliance guidelines

Frequently Asked Questions

What are the 7 steps of the inspection process for multi-unit buildings?

Multi-unit building inspections follow a structured sequence: (1) preliminary site assessment and code review, (2) structural integrity evaluation, (3) electrical system inspection including service panels and GFCI protection, (4) plumbing and water distribution review, (5) HVAC system performance check, (6) life safety and fire suppression verification, and (7) comprehensive documentation and reporting. Each step builds on the previous one to create a complete property condition assessment that identifies deficiencies and informs capital improvement planning.

What is the biggest red flag in a multi-unit building inspection?

Active moisture intrusion and signs of structural failure are critical red flags. Water damage, mold growth, rust staining on concrete, or cracking in the building envelope indicate deterioration that can compromise resident safety and lead to expensive repairs. Balcony and deck issues, including soft wood, separation from the main structure, or corroded fasteners, demand immediate attention. These deficiencies create liability exposure and often signal deeper problems requiring urgent capital expenditure.

How do I know if I need SB 326 balcony inspection requirements or SB 721 compliance?

SB 326 applies to most multi-unit residential buildings. SB 721 applies to buildings with four or more stories and buildings constructed before 1995. If your multifamily property has elevated exterior elements and three or more units, you likely fall under one or both mandates. A licensed structural inspector can confirm your specific obligations during an initial assessment and help you understand which compliance pathway applies to your building.

How often are multi-unit buildings required to undergo structural inspections?

Under state law, multifamily residential buildings with three or more units must undergo structural inspections at least once every nine years. This frequency allows property owners to identify early signs of structural failure and plan capital improvements before safety hazards develop. Many property managers establish annual preventative maintenance schedules between inspections to address minor issues and extend building system life. Digital tool integration helps track inspection cycles, deficiency remediation, and maintenance completion dates.

What documentation is required for state-mandated building inspections?

Inspection reports must document all deficiencies with photographs, measurements, and severity ratings. Reports should include a detailed property condition assessment covering structural integrity, building envelope condition, electrical safety, plumbing function, HVAC efficiency, and life safety compliance. Deficiency documentation must specify repair scope, estimated costs, and recommended timelines. Maintain copies of all inspection reports, remediation work orders, and compliance certifications for nine years. This documentation protects your liability exposure and supports occupancy permit renewals.

What are the most common deficiencies found during multi-family property inspections?

Moisture intrusion and wood deterioration top the list, followed by electrical code violations, inadequate fire suppression systems, and structural cracks. Balcony and deck issues, including soft fasteners, separation, and age-related wear, are frequent findings in older multifamily buildings. HVAC systems often lack proper maintenance, and plumbing leaks frequently go undetected until they cause water damage. Egress pathway obstructions and life safety hazards in common areas also appear regularly. Early detection through preventative maintenance schedules reduces repair costs and resident disruption.

What should I look for when hiring a licensed structural inspector?

Verify that your inspector holds current licensure as a structural engineer or qualified building inspector in your state. Ask for references from other multifamily property owners and review their experience with SB 326 and SB 721 compliance specifically. Confirm they carry liability insurance and provide detailed, photographic inspection reports. A qualified inspector should explain findings in clear language, offer capital improvement recommendations, and help you prioritize repairs based on safety risk and cost impact. Avoid inspectors who minimize deficiencies or pressure you toward unnecessary work.

Book inspection

Posted in BlogTagged hiring a licensed structural inspector, multi-unit building inspections, sb 326 balcony inspection requirements, step by step guide to multi-unit building inspections

10 Best Practices for Managing Building Safety Audits

Posted on September 19, 2026 by Apex Balcony admin
10 Best Practices for Managing Building Safety Audits

Table of Contents

  • 1. Define Clear Audit Scope and Objectives
  • 2. Understand SB 326 Balcony Inspection Requirements
  • 3. Develop a Building Safety Audit Template
  • 4. Conduct Thorough On-Site Inspections
  • 5. Hire a Licensed Structural Inspector
  • 6. Document Findings and Maintain Audit Trails
  • 7. Create Corrective Action Plans and Track Closeout
  • 8. Build a Safety Culture and Engage Stakeholders
  • Common Mistakes to Avoid
  • Frequently Asked Questions
  • External Resources

Last Updated: September 18, 2026

Building safety audits protect residents and shield property owners from liability. But conducting them effectively requires more than checking boxes. The difference between a cursory inspection and one that actually prevents structural failure comes down to how systematically you approach the process.

This guide covers 10 best practices for managing building safety audits, ensuring you catch problems early, document findings properly, and follow through on repairs.

Quick Overview

PracticeKey FocusOutcome
Define scope and objectivesClarify what you’re inspecting and whyFocused, efficient audit
Understand SB 326 requirementsKnow the legal mandateStay compliant with state law
Create an audit templateStandardize your processConsistent documentation
Conduct thorough inspectionsExamine all elevated exterior elementsCatch structural issues early
Hire licensed inspectorsUse qualified professionalsCredible, defensible findings
Document everythingMaintain audit trailsStrong liability protection
Plan corrective actionsAddress findings systematicallyRepairs get completed
Build safety cultureEngage employees and residentsSustained compliance

1. Define Clear Audit Scope and Objectives

Your building safety audit starts with a critical question: what exactly are you inspecting, and what do you hope to accomplish? Without defined scope, audits become sprawling exercises that waste time and miss important issues.

Identify the specific structures under review (all balconies, specific units, common stairways) and establish measurable objectives: confirm code compliance, identify structural defects, document current conditions, and develop a prioritized repair list.

Document scope and objectives in writing before the audit begins. This audit scope statement keeps the inspection focused and provides evidence you approached it methodically.

Pro Tip
Include the audit date range, the specific buildings or units covered, and the regulatory standard you’re testing against (SB 326, SB 721, or local codes). This clarity prevents scope creep and ensures your inspector doesn’t waste time on areas outside the audit’s purpose.

2. Understand SB 326 Balcony Inspection Requirements

California’s SB 326 and SB 721 mandate inspections of elevated exterior elements in residential buildings with three or more units. SB 326 (effective January 1, 2018) applies to buildings constructed before January 1, 2008. SB 721 (effective January 1, 2020) extends requirements to buildings constructed before January 1, 2015. These are legal mandates with penalties for non-compliance.

A licensed structural engineer or architect must conduct the inspection, examining for dry rot, water intrusion, fastener corrosion, and structural deterioration. Failure to comply can result in fines, permit loss, and liability.

Watch Out
If your building was constructed before January 1, 2015 and has three or more residential units, you likely fall under SB 721 requirements. Delaying this inspection doesn’t make the obligation disappear, it increases your liability exposure. The longer you wait, the more deterioration can occur undetected.

Apex Balcony specializes in these exact inspections, helping property owners understand which regulation applies to their building and ensuring the inspection meets all state requirements.

3. Develop a Building Safety Audit Template

A template ensures every inspector follows the same process and documents findings consistently. Include: property identification, inspector credentials, inspection date, detailed checklists (railings, fasteners, connections, stairs), space for photos and notes, condition ratings, and recommended actions.

The checklist should be specific enough that different inspectors document similar findings. Instead of “inspect railings,” specify: “Check railing height (minimum 42 inches), loose fasteners, rust, wood deterioration, and connections to building structure.”

Digital templates allow inspectors to fill forms on tablets, add photos directly, and sync findings in real time. Include evidence-based findings: photos of corroded fasteners, locations and depth of wood deterioration. This evidence is critical if you need to defend findings later.

Key Takeaway
A well-designed template turns inspection findings into defensible documentation. It ensures compliance with regulatory standards and creates an audit trail that protects you if disputes arise over repair decisions.

4. Conduct Thorough On-Site Inspections

A thorough on-site inspection requires more than a visual walk-around. For each element, include: close visual inspection of all surfaces, tactile testing (probing wood, checking fastener tightness), photographic documentation, measurement of dimensions, and assessment of water intrusion.

Inspect during daylight hours and avoid rainy days when water may mask dry rot. A 50-unit building typically requires a full day or more for thorough inspection.

Record findings in real time using your template. Take photos of defects with close-ups showing extent of damage. Note locations precisely and include measurements and condition ratings. Document any obstacles that prevent full assessment (blocked access, storage) to show you attempted thorough inspection within practical limits.

Pro Tip
Bring tools: a moisture meter to test for water intrusion, a probe to test wood density, a level to check railing height, a measuring tape, and a camera. These tools transform subjective observations into objective data that holds up under scrutiny.

5. Hire a Licensed Structural Inspector

Your inspector must be a licensed structural engineer or architect with specific experience in balcony and deck inspections. A licensed inspector understands building codes, recognizes early signs of structural failure, and assesses whether deterioration is cosmetic or dangerous.

Ask about experience with your building type and age. Request references from other HOAs. Review past reports for detail and specificity. Verify license with the state and confirm professional liability insurance.

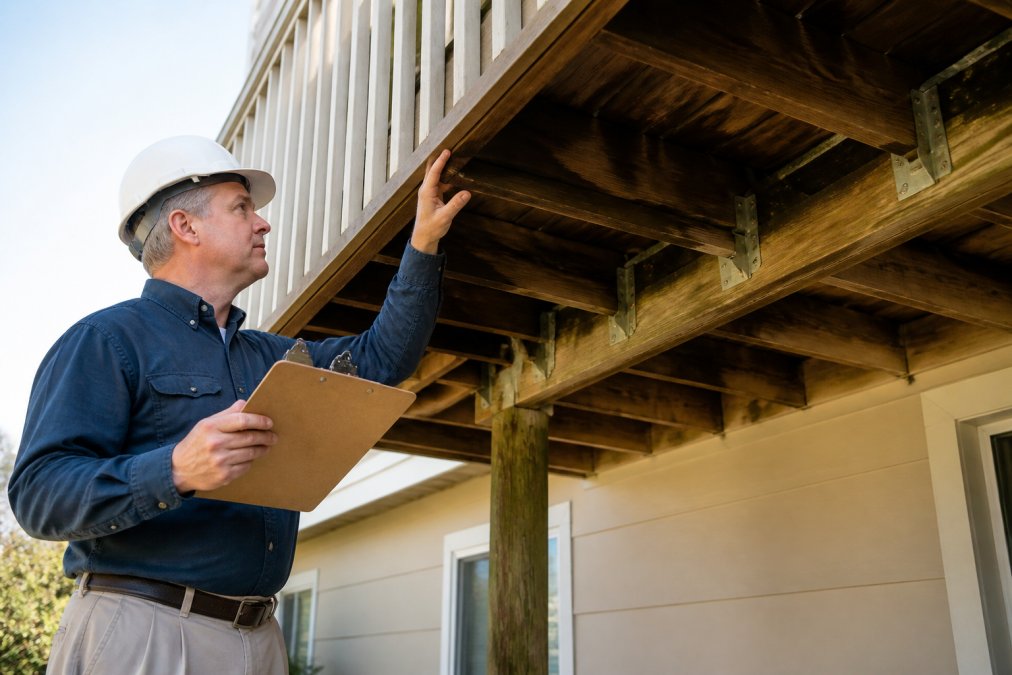
Licensed structural engineer conducting detailed balcony inspection, examining wooden beams and fasteners with professional tools, clipboard in hand, natural daylight illuminating the elevated structure

Professional oversight remains critical because even minor modifications to a building’s load-bearing components require rigorous attention to ensuring structural integrity during home additions.

The cost of a qualified inspector is far less than the cost of a balcony failure, which can result in injuries, fatalities, and massive liability.

Apex Balcony brings decades of combined construction and design experience to every inspection. Our licensed inspectors know exactly what to look for in California buildings and understand the specific requirements of SB 326 and SB 721 compliance.

6. Document Findings and Maintain Audit Trails

Documentation discipline is where many audits fail. You can conduct a thorough inspection, but if your findings aren’t documented clearly and completely, you’ve created liability rather than protection.

Record every finding in writing: what was inspected, when, by whom, condition found, supporting evidence (photos, measurements), and what it means. Include discovery and completion dates. Take photos from multiple angles with close-ups and wider shots. Label each photo with location, date, and subject.

Maintain an audit trail: scope document, inspection checklist, inspector notes, photographs, final report, and communications about findings. Store digital copies in a secure location. Your audit trail proves you conducted a proper inspection and acted reasonably on findings.

Watch Out
Don’t sanitize your audit findings. If the inspection identifies a critical defect, document it clearly. Downplaying findings in hopes of avoiding costly repairs creates massive liability if that defect later causes injury. The honest documentation of a serious problem is far better than a cover-up that gets exposed in discovery.

7. Create Corrective Action Plans and Track Closeout

A corrective action plan translates audit findings into concrete repair work. For each finding, specify: the defect, why repair is needed, what work is required, contractor details, estimated cost, target completion date, and responsible person.

Prioritize repairs by urgency. Critical defects that pose immediate safety risks should be addressed first. Moderate defects that will worsen over time should be scheduled within months. Minor defects can be bundled into longer-term maintenance plans.

Track progress. As repairs are completed, document that completion. This means: inspecting the repair work to confirm it was done correctly, obtaining proof from the contractor (photos, signed work orders), updating your corrective action plan to show the completion date, and verifying that the repair meets building code standards.

Use a corrective action tracking system, a spreadsheet or software tool that shows each finding, the planned repair, the deadline, the actual completion date, and the person responsible. This becomes your evidence that you didn’t just identify problems and ignore them.

Some repairs will take time. Budget constraints, contractor availability, or the complexity of the work may mean repairs extend over months or years.

8. Build a Safety Culture and Engage Stakeholders

Audits aren’t one-time events. Sustained safety requires a culture where residents, staff, and board members all understand why safety matters and take responsibility for it.

Key Takeaway
A strong safety culture means residents feel heard, board members understand their responsibility, and staff know what to watch for. When safety is everyone’s concern, problems get reported earlier and addressed faster.

Common Mistakes to Avoid

Hiring unqualified inspectors to save money. A cheap inspection that misses critical defects creates massive liability. The cost of a qualified inspector is insurance against catastrophic failure.


Frequently Asked Questions

How do SB 326 and SB 721 impact building audit requirements?

SB 326 requires inspection of balconies and elevated exterior elements in buildings with three or more units constructed before January 1, 2008. SB 721 expanded these requirements to include buildings constructed before January 1, 2020. Both laws mandate regular inspections to identify structural defects and non-conformance with safety standards. Building owners must document audit findings and maintain compliance records, making structured building safety audits essential for meeting these regulatory standards.

What documentation is required for a professional building safety inspection?

Professional inspections require comprehensive documentation including a detailed audit checklist covering all elevated exterior elements, photographic evidence of structural conditions, written findings identifying hazards and non-conformance items, and a corrective action plan with timelines. Documentation must include the inspector’s credentials, inspection date, scope of work, and specific locations of defects. This audit trail supports regulatory reporting, demonstrates due diligence, and provides evidence for insurance and legal protection if issues arise.

How often should building safety audits be conducted for compliance?

Under SB 326 and SB 721, initial inspections are required, followed by reinspections every six years for buildings that pass, or sooner if structural issues are identified.

What are the most common mistakes made during building safety audits?

Common mistakes include inadequate audit scope that misses critical areas, poor documentation discipline leading to incomplete audit trails, failing to involve stakeholders in the inspection process, and delaying corrective action closeout. Many property owners also underestimate the complexity of SB 326 and SB 721 requirements, attempt inspections without licensed professionals, and neglect to create a formal safety management system. These errors expose buildings to liability, regulatory fines, and safety risks.


External Resources

For additional guidance on building safety standards and inspection requirements:

  • California Building Standards Commission regulations on structural inspections
  • National Association of Home Inspectors standards for structural assessment
  • American Society of Civil Engineers guidelines for building condition assessment

Book inspection

Posted in BlogTagged 10 best practices for managing building safety audits, building safety audit template, building safety audits, hiring a licensed structural inspector, sb 326 balcony inspection requirements

Recent Posts

  • Cost of Balcony Structural Repairs in California
  • Hiring a Structural Engineer for Deck Safety: 2026 Guide
  • Balcony Maintenance Tips for California Homeowners
  • How to Choose a Structural Engineer for Home Renovation
  • Structural Engineering for Hillside Homes: A Complete Guide

Recent Comments

No comments to show.

Archives

  • October 2026
  • September 2026
  • August 2026
  • July 2026
  • June 2026

Categories

  • Blog
Logo
Created by Unilime.Group
  • Balcony Law
  • About us
  • Inspection services
  • FAQ
  • Blog

Call us ‪+1 818-806-7885‬
License: CSLB #1101305

Apex Balcony Inspection
‪+1 818-806-7885‬
[email protected]
4645 Van Nuys Blvd #201
Sherman Oaks CA 91403

Created by Unilime.Group