Logo
  • Balcony Law
  • About us
  • Inspection services
  • FAQ
  • Blog
  • Call us ‪+1 818-806-7885
  • Book now

Tag: signs of balcony structural failure

How to Fix Wobbly Balcony Railings Safely

Posted on October 3, 2026 by Apex Balcony admin
How to Fix Wobbly Balcony Railings Safely

Table of Contents

  • Why Wobbly Balcony Railings Are a Safety Hazard
  • Identifying the Source of the Wobble
    • Material-Specific Diagnostic Framework
    • Loose Fasteners and Bolts
    • Wood Rot and Decay in the Rim Joist
    • Damaged Post Anchors and Connections
  • Signs of Balcony Structural Failure You Cannot Ignore
  • Step-by-Step Repair Guide for Wobbly Railings
    • Step 1: Tighten loose carriage bolts and lag screws
    • Step 2: Install metal brackets and reinforcers
    • Step 3: Add blocking between rim joists for lateral stability
    • Step 4: Use shims for minor stabilization
    • Step 5: Perform a safety inspection and load-bearing check
  • SB 326 Balcony Inspection Requirements and Code Compliance
  • When to Hire a Structural Engineer for Balcony Safety
  • Common Mistakes to Avoid During Repairs
  • Preventative Maintenance to Stop Future Wobbling
    • Material-Specific Maintenance Schedules
    • Code Compliance and Inspection Documentation
    • Seasonal Risk Factors
    • Maintenance Checklist
    • When to Call a Professional for Maintenance
  • Frequently Asked Questions

Last Updated: October 2, 2026

Why Wobbly Balcony Railings Are a Safety Hazard

A wobbly balcony railing is a structural failure waiting to happen. When railings move under pressure, they’ve lost their ability to catch someone who stumbles or leans against them, their core purpose.

Balcony collapses have killed residents across the country.

This guide covers how to identify, repair, and prevent wobbly balcony railings. We’ll walk you through diagnosis, DIY repair steps, and when to hire a structural engineer.

Identifying the Source of the Wobble

Wobbly railings fail for three main reasons: loose fasteners, rotted wood, or failed connections. The repair method depends heavily on your railing material.

Material-Specific Diagnostic Framework

Wood railings are vulnerable to fastener loosening and wood rot. Pressure-treated lumber shrinks over time, causing bolts to back out; untreated wood absorbs moisture and rots.

Composite railings (PVC, vinyl, or wood-plastic blend) rarely rot but fail when plastic expands and contracts with temperature, loosening fasteners.

Metal railings (aluminum, steel, or wrought iron) corrode at connection points where dissimilar metals meet. Welds crack under stress and bolts seize in corroded holes.

Loose Fasteners and Bolts

Grab the railing firmly and push it side to side. If it moves, check every bolt, screw, and fastener connecting the railing to the deck structure. Loose fasteners are the easiest fix.

Look for:

  • Carriage bolts that have backed out
  • Lag screws that have lost tension due to wood shrinkage
  • Missing washers or lock washers
  • Bolts that spin freely without tightening
  • On composite railings: fasteners pulling through the material
  • On metal railings: bolts frozen by corrosion
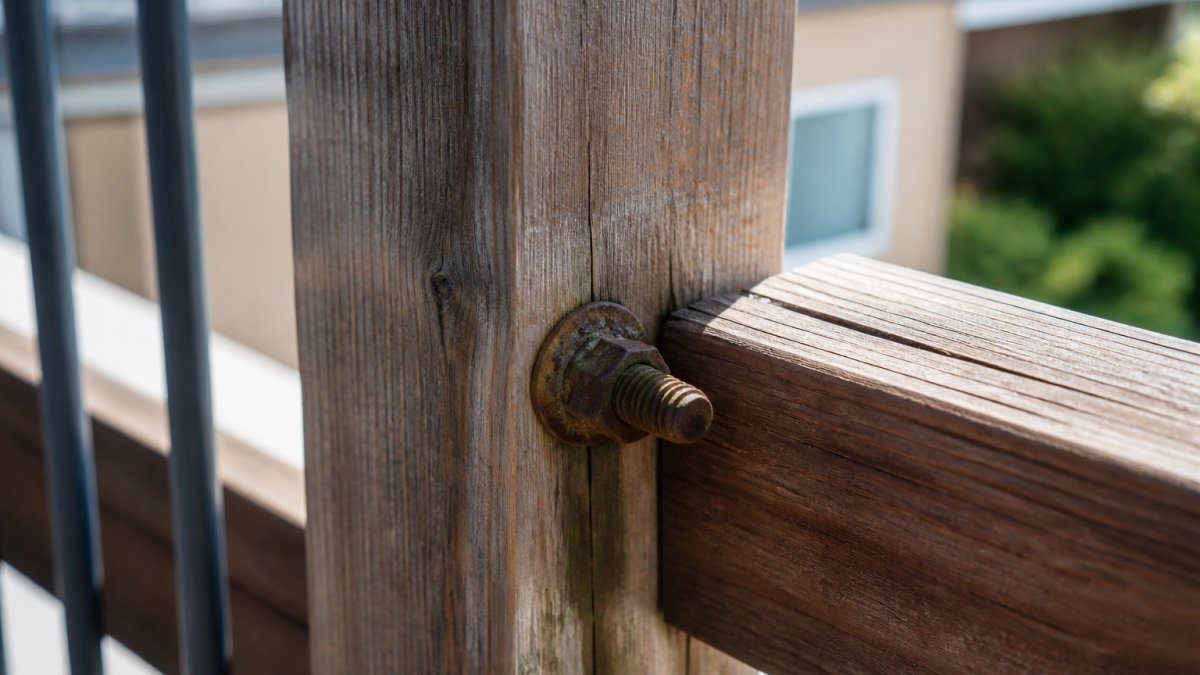
Close-up of a loose carriage bolt on wooden deck railing with visible rust and corrosion on the fastener and surrounding wood grain

Wood Rot and Decay in the Rim Joist

Push on the wood where the railing connects. Soft, spongy wood means rot has set in and weakens the entire connection.

Signs of wood rot include:

  • Soft spots that compress when you press your thumb
  • Dark discoloration or staining
  • Crumbling wood texture
  • Peeling or bubbling paint
  • Musty smell near the connection point
  • Visible gaps between the railing post and the rim joist

Small, isolated soft spots (less than 2 inches) can be treated with wood hardener and reinforced with metal brackets.

Composite and metal railings don’t rot, but wood fastening points beneath them can. If a composite or metal railing is wobbly, inspect the wood rim joist directly.

Damaged Post Anchors and Connections

Post anchors connect the vertical posts to the rim joist and deck frame. When these fail, the entire railing becomes unstable. Inspect for:

  • Bent or twisted metal
  • Corrosion or rust, especially at welds
  • Cracks in welds or bolt holes
  • Bolts pulling through the material
  • Separation between the anchor and the rim joist

Damaged anchors must be replaced entirely; they cannot be repaired. The repair method depends on the railing material and the extent of damage to the underlying structure.

Signs of Balcony Structural Failure You Cannot Ignore

Stop repairs immediately and call a structural engineer if you see these conditions:

  • Visible cracks in the deck or framing
  • Separation between the railing and the deck
  • Posts that lean or are out of plumb
  • Sagging or uneven deck surface
  • Water pooling on the deck
  • Large sections of rotted wood
  • Metal corrosion that has eaten through fasteners

These signal structural failure beyond DIY repair. A professional inspection is required.

Step-by-Step Repair Guide for Wobbly Railings

Follow these steps if you found loose fasteners, minor rot, or accessible damaged anchors. Stop if you encounter conditions beyond these scenarios.

Step 1: Tighten loose carriage bolts and lag screws

What you’ll need:

  • Wrench set (or socket set for carriage bolts)
  • Screwdriver (for lag screws)
  • Washers and lock washers (if missing)
  • Replacement bolts (if damaged)

Process:

  1. Locate each bolt or screw connecting the railing to the rim joist
  2. Test with your wrench; it should be snug with moderate pressure
  3. Tighten in quarter-turn increments, checking for movement after each turn
  4. Do not over-tighten; you’ll strip threads or crush the wood
  5. If a bolt spins without tightening, tighten the nut on the other side

Check your work: Push the railing firmly. It should not move. If it still wobbles, move to Step 2.

Step 2: Install metal brackets and reinforcers

Metal brackets add lateral stability when fasteners alone aren’t enough. Install by:

  1. Position the bracket to bridge the connection between the post and the rim joist
  2. Use exterior-rated fasteners (galvanized or stainless steel)
  3. Pre-drill holes to avoid splitting the wood
  4. Bolt the bracket in place with washers under each bolt head
  5. Use lock washers to prevent bolts from backing out

Step 3: Add blocking between rim joists for lateral stability

Blocking (solid wood or metal bracing between rim joists) prevents the railing from moving side to side. Install by:

  1. Measure the distance between rim joists
  2. Cut pressure-treated lumber to fit snugly
  3. Position the blocking horizontally between the joists
  4. Bolt or screw the blocking to both joists using exterior-rated fasteners
  5. Space multiple blocks 16 to 24 inches apart

Step 4: Use shims for minor stabilization

Shims are thin wedges that fill gaps and take up slack. Install by:

Book inspection →

  1. Identify gaps between the railing and the rim joist
  2. Drive shims into the gap until snug
  3. Trim excess shim material with a saw
  4. Paint or seal the shim to prevent water infiltration
  5. Re-tighten fasteners after shimming

Step 5: Perform a safety inspection and load-bearing check

After repairs, verify that the railing can handle the load it’s designed to bear. Building code requires railings to resist 200 pounds of horizontal force without moving more than 1 inch.

Test by:

  1. Apply steady horizontal pressure at the top rail with your body weight
  2. The railing should not move noticeably
  3. Check all fasteners again, tighten any that have loosened
  4. Inspect the wood around fasteners for new cracks
  5. Walk the length of the railing and listen for creaks

If the railing still moves or you hear wood cracking, contact a structural engineer.

SB 326 Balcony Inspection Requirements and Code Compliance

California law (SB 326, effective January 1, 2019) requires regular inspections of balconies on multi-unit residential buildings with three or more units. Inspections must be completed by a licensed professional engineer, architect, or certified inspector and identify structural defects, water intrusion, and safety hazards. Failing to comply exposes property owners to fines and liability.

When to Hire a Structural Engineer for Balcony Safety

Hire a structural engineer if you encounter:

  • Large areas of wood rot affecting structural members
  • Visible cracks in the deck frame or posts
  • Separation between the railing and the deck structure
  • Posts that are leaning or out of plumb
  • Failed metal connections or welds
  • Water damage affecting multiple deck boards
  • Any condition that makes you uncertain about safety

A structural engineer assesses whether the railing can be repaired or must be replaced and provides documentation for insurance and code compliance.

Common Mistakes to Avoid During Repairs

Avoid these mistakes:

  • Using interior fasteners outdoors. Use only exterior-rated, galvanized, or stainless steel fasteners.
  • Over-tightening bolts. Tighten until snug, then stop.
  • Ignoring rot. Address it immediately or the repair will fail.
  • Skipping the inspection. Diagnose the problem correctly before fixing.
  • Mixing fastener types. Use matching bolts, washers, and anchors from the same system.
  • Failing to seal exposed wood. Seal everything with exterior paint or sealant.

Preventative Maintenance to Stop Future Wobbling

Regular maintenance catches small problems before they become dangerous. Maintenance schedules vary by railing material and climate.

Material-Specific Maintenance Schedules

Wood railings require the most frequent attention. Wood shrinks and swells with seasonal moisture changes, causing fasteners to loosen.

  • Monthly: Visual inspection for new movement, cracks, or water pooling
  • Spring: Tighten all fasteners; inspect for ice damage and moisture intrusion
  • Fall: Clear debris, inspect for rot, tighten fasteners before freeze-thaw cycles
  • Every 1-2 years: Re-tighten all bolts and lag screws
  • Every 3-5 years: Seal or paint the railing
  • After heavy rain: Inspect the rim joist and post bases for water damage

Composite railings are more stable but require attention at connection points. Composite expands and contracts with temperature, loosening fasteners.

  • Quarterly: Check fasteners for looseness
  • Twice yearly: Inspect fastener holes for enlargement
  • Every 2-3 years: Replace any fasteners showing corrosion; use stainless steel bolts only
  • As needed: Clean the composite surface to prevent algae growth

Metal railings are vulnerable to corrosion at connection points and welds.

  • Quarterly: Inspect for rust staining or corrosion around fasteners and welds
  • Twice yearly: Clean corrosion with a wire brush; apply a rust inhibitor
  • Every 1-2 years: Check welds for cracks
  • As needed: Replace corroded fasteners with stainless steel or galvanized alternatives

Code Compliance and Inspection Documentation

Building codes require railings to resist 200 pounds of horizontal force without moving more than 1 inch. Keep maintenance records to demonstrate compliance.

Document your maintenance:

  • Record the date and results of each inspection
  • Note any fasteners tightened, replaced, or repaired
  • Photograph any damage or repairs
  • Keep receipts for materials and professional inspections

If your building has three or more residential units, check whether your jurisdiction requires professional balcony inspections. Many states have adopted standards similar to California’s SB 326, which mandates visual inspections every 6 years.

Seasonal Risk Factors

Winter: Freeze-thaw cycles force water into cracks and fastener holes. Salt accelerates corrosion on metal fasteners.

Spring: Melting snow and spring rain expose rot and water damage. Check for soft spots and water pooling.

Summer: UV radiation degrades paint and sealant. High temperatures cause composite and metal to expand, loosening fasteners.

Fall: Falling leaves trap moisture. Clear debris regularly. Tighten fasteners before winter.

Maintenance Checklist

Maintenance TaskFrequencyMaterialImpact
Tighten fastenersEvery 1-2 yearsWoodPrevents wobble from wood shrinkage
Tighten fastenersEvery 2-3 yearsCompositePrevents loosening from thermal expansion
Inspect for corrosionQuarterlyMetalCatches rust before it weakens fasteners
Inspect for rotTwice yearlyWoodCatches decay before it spreads
Seal cracksAs neededWoodStops water infiltration
Paint or stainEvery 3-5 yearsWoodProtects wood from weather damage
Clear debrisMonthlyAllPrevents water pooling and rot
Professional inspectionEvery 6 yearsAll (multi-unit buildings)Meets code compliance; documents safety

When to Call a Professional for Maintenance

If you find rot affecting more than 10% of the rim joist, corrosion that has eaten through fastener holes, or cracks in metal welds, stop maintenance work and contact a structural engineer. These conditions require professional assessment and repair, not routine maintenance. Understanding the complexity of these structural repair techniques helps homeowners recognize when environmental factors have compromised the integrity of their deck framing.

Frequently Asked Questions

Is a wobbly balcony railing considered an emergency?

Yes. Wobbly balcony railings indicate structural failure and pose an immediate safety risk to residents. Building codes require railings to withstand 200 pounds of lateral force without movement. Any visible wobble suggests fasteners are failing, wood rot is present, or post anchors are compromised. Do not delay repairs. If the wobble is severe, restrict access to the balcony until a structural engineer assesses the damage.

Can I fix a loose railing myself or do I need a structural engineer?

Minor fixes like tightening loose carriage bolts and lag screws can be DIY tasks if you have basic tools and experience. However, if you discover wood rot, corroded fasteners, damaged post anchors, or lateral movement that persists after tightening, hire a structural engineer. Multifamily properties in California with three or more units must comply with SB 326 and SB 721, which typically require professional inspection.

What are the legal requirements for balcony railing stability?

Building codes require balcony railings to resist 200 pounds of lateral force applied at the top rail without deflection or failure. In California, SB 326 requires inspection of balconies in buildings with three or more units, and SB 721 mandates repairs be completed within specified timelines. Non-compliance can result in fines, liability for injuries, and forced closure of balconies. Consult local building officials or a structural engineer to confirm which law applies to your property.

What materials work best for reinforcing wobbly railings?

Use galvanized hardware and exterior-rated fasteners to prevent corrosion and fastener failure. Pressure-treated lumber resists rot and decay in outdoor environments. Metal brackets and reinforcers distribute load and add rigidity. Lock washers prevent bolts from loosening due to vibration. Pre-drill all fastener holes to avoid splitting wood and ensure proper torque application. Avoid mixing materials (wood to steel) without proper washers and sealants, as dissimilar metals accelerate corrosion.
Book inspection

Posted in BlogTagged hiring a structural engineer for balcony safety, how to fix wobbly balcony railings safely, sb 326 balcony inspection requirements, signs of balcony structural failure, wobbly balcony railings

5 Best Waterproofing Systems for Elevated Decks

Posted on September 25, 2026 by Apex Balcony admin
5 Best Waterproofing Systems for Elevated Decks

Table of Contents

  • Quick Comparison Table
  • How We Evaluated Waterproofing Systems for Elevated Decks
    • Substrate Compatibility Matrix
    • Climate-Specific Performance Recommendations
  • 1. Duradek: Heat-Welded PVC Membrane for Long-Term Protection
  • 2. Westcoat ALX System: Fiberglass-Reinforced Cementitious Coating
  • 3. Tufdek: Premium PVC with Heat Reflection Technology
  • 4. AMES Safe-T-Deck: Water-Based Acrylic for High-Traffic Areas
  • Balcony Inspection Requirements and Waterproofing Compliance
  • Signs of Balcony Structural Failure and When to Upgrade Your Waterproofing
    • 10-Year Cost-of-Ownership Analysis: Repair, Recoat, or Replace
    • When Repair Makes Sense vs. When Replacement Is Necessary
    • Preventive Investment Protects Structural Assets
  • Frequently Asked Questions

Last Updated: September 24, 2026

Quick Comparison Table

Waterproofing SystemTypeBest ForKey Advantage
DuradekHeat-welded PVC membraneLong-term protection, minimal maintenanceImmediate walkability, UV-resistant
Westcoat ALX SystemFiberglass-reinforced cementitious coatingHigh-traffic areas, plywood substratesDurable slip-resistant finish
TufdekPremium PVC with heat reflectionHigh-end residential projectsSuperior heat reduction, puncture-resistant
AMES Safe-T-DeckWater-based acrylic coatingMaintenance and recoatingUser-friendly application

How We Evaluated Waterproofing Systems for Elevated Decks

Selecting the right waterproofing system for an elevated deck requires understanding substrate compatibility, climate demands, and long-term durability expectations, and the 5 best waterproofing systems for elevated decks each excel in different conditions. The best choice depends on your substrate type, foot traffic patterns, and maintenance tolerance.

The 5 best waterproofing systems for elevated decks fall into three categories: heat-welded PVC membranes, liquid-applied coatings, and cementitious systems. Membrane systems excel at handling thermal expansion without cracking. Liquid coatings work well for retrofitting and high-traffic areas requiring slip resistance. Cementitious systems deliver durability for plywood decking needing long-term joist protection.

Substrate Compatibility Matrix

Plywood Substrates:
Cementitious coatings like Westcoat ALX perform well on plywood because fiberglass reinforcement accommodates thermal expansion without cracking. Liquid acrylic coatings also work if properly primed. Heat-welded PVC membranes require structurally sound, properly sloped substrates; soft spots or rot must be replaced first.

Concrete Substrates:
Cementitious coatings bond directly to concrete and create a monolithic barrier resisting hydrostatic pressure. Heat-welded PVC membranes require clean, dry surfaces free of cracks wider than 1/8 inch. Liquid coatings work on concrete but require acid etching or grinding for adhesion.

Metal Decking:
Heat-welded PVC membranes are most reliable for metal decking because they are mechanically fastened and heat-welded at seams.

Climate-Specific Performance Recommendations

Climate conditions determine which waterproofing system will deliver the longest service life and lowest maintenance burden.

1. Duradek: Heat-Welded PVC Membrane for Long-Term Protection

Duradek is a pre-manufactured PVC membrane system with heat-welded seams that create a watertight seal resistant to thermal expansion and moisture cycling. Once installed, minimal maintenance is required.

Pros:

  • Heat-welded seams provide permanent watertight protection
  • UV-resistant formulation handles direct sun exposure without degradation
  • Minimal maintenance once installed
  • Slip-resistant surface texture suitable for high-traffic balconies

Cons:

  • Professional installation is mandatory for warranty
  • Higher upfront cost compared to liquid coatings

2. Westcoat ALX System: Fiberglass-Reinforced Cementitious Coating

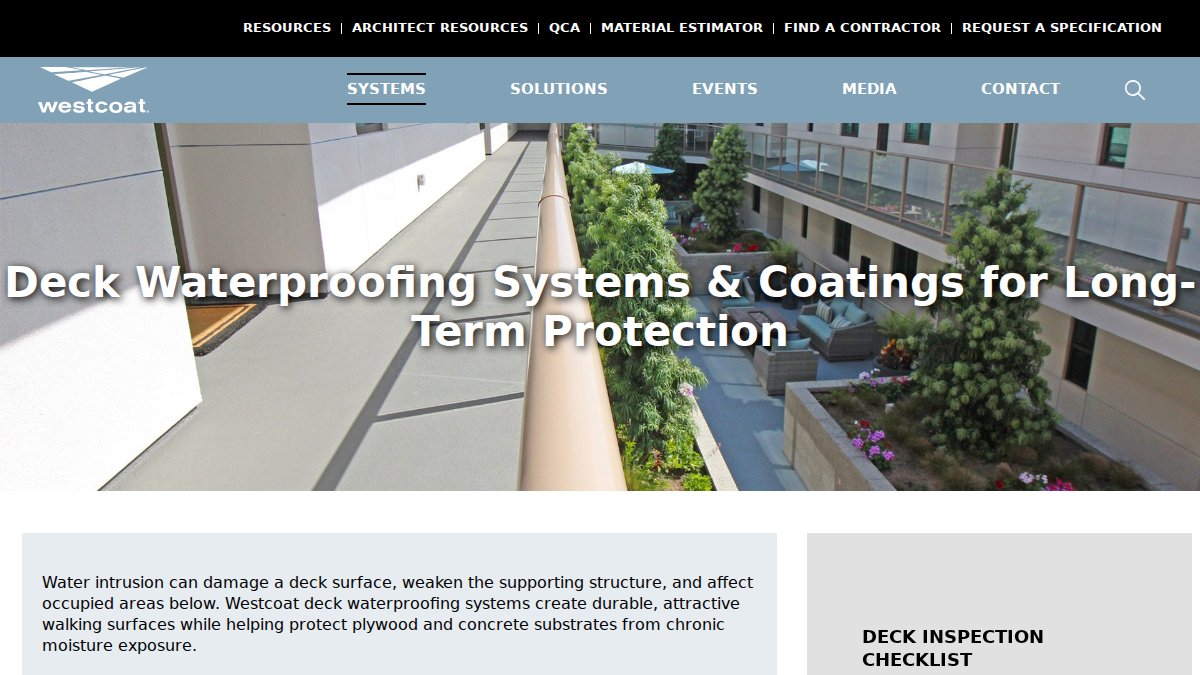
The Westcoat ALX System is a multi-layer cementitious coating with fiberglass reinforcement that bonds to plywood or concrete and hardens into a monolithic, textured barrier for high-traffic decks and balconies.

Screenshot of Waterproof Systems page on westcoat.com
Waterproof Deck Systems for Balconies & Multi-Family Buildings | Westcoat

Pros:

  • Fiberglass reinforcement handles thermal expansion without cracking
  • Seamless, monolithic application eliminates seam vulnerabilities
  • Excellent slip resistance for high-traffic areas
  • Strong adhesion to both plywood and concrete substrates

Cons:

  • Requires professional installation and proper surface preparation
  • Curing time can extend project schedules
  • Texture may trap debris in some climates

3. Tufdek: Premium PVC with Heat Reflection Technology

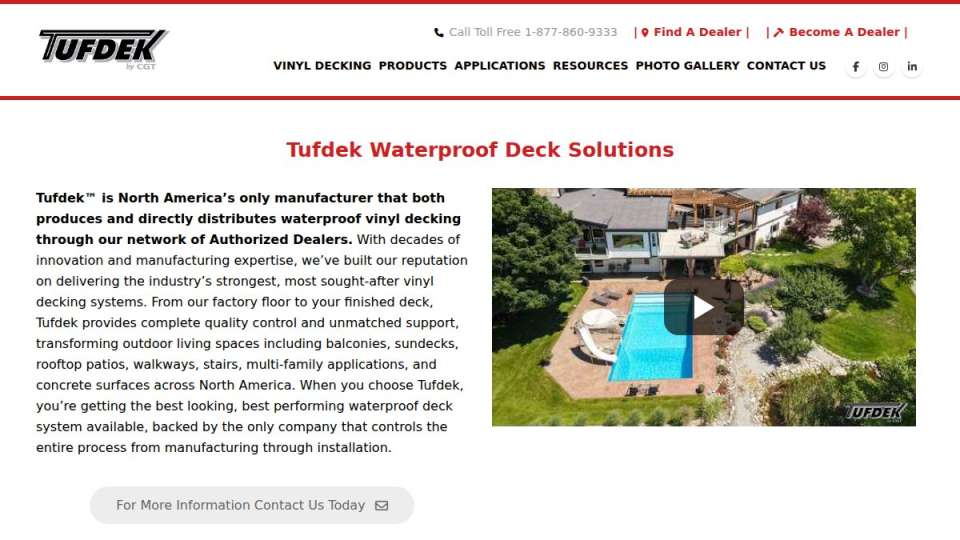
Tufdek is a premium PVC membrane with Cool-Step heat reflection technology that reduces surface temperature, keeping decks cooler underfoot in high-sun climates.

Screenshot of tufdek.com interface
Tufdek™ Waterproof Vinyl Decking – PVC Outdoor Vinyl Flooring

Pros:

  • Cool-Step heat reflection reduces surface temperature significantly
  • Reinforced PVC resists punctures and heavy wear
  • Extensive color and design options for aesthetic flexibility
  • Heat-welded seams ensure permanent waterproofing

Cons:

  • Higher cost compared to basic sealants and standard PVC systems
  • Professional installation is mandatory
  • Heat reflection benefit varies by climate and sun exposure

4. AMES Safe-T-Deck: Water-Based Acrylic for High-Traffic Areas

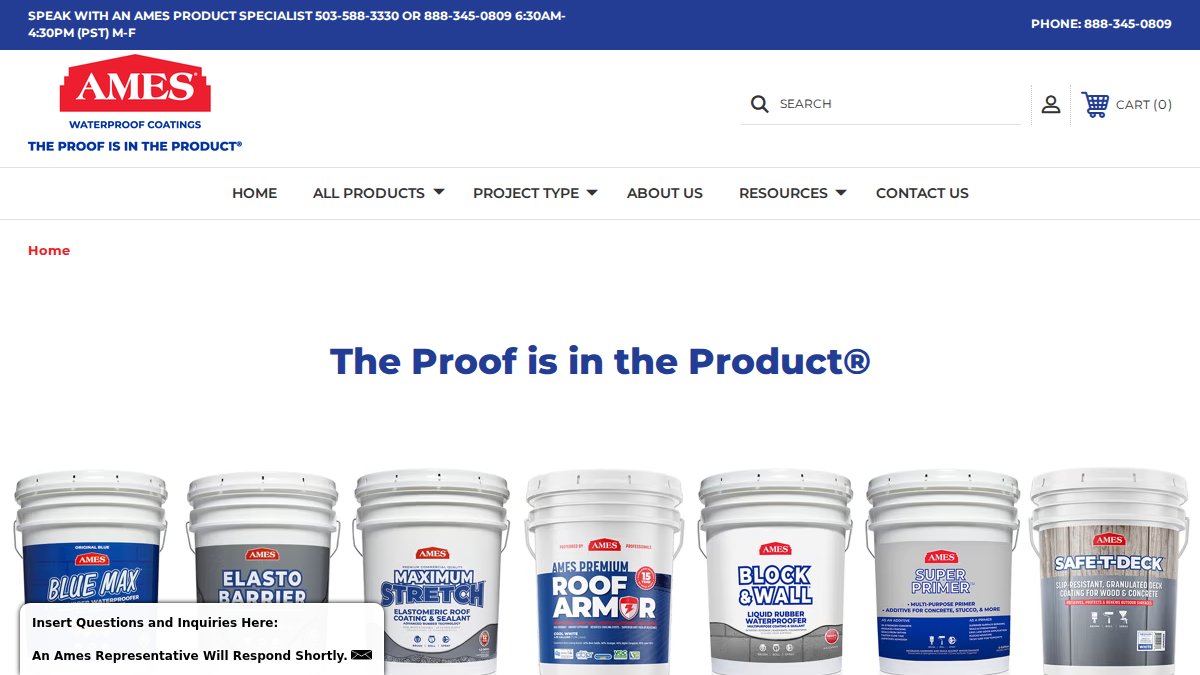
AMES Safe-T-Deck is a water-based acrylic coating applied with a roller or brush, accessible for DIYers and contractors doing maintenance work.

Screenshot of amesresearch.com interface
Roof Sealants, Waterproofing Coatings & Elastomeric Paint | AMES

Pros:

Book inspection →

  • User-friendly application via roller or brush
  • Water-based formula with low VOC emissions
  • Excellent slip resistance for safety
  • Suitable for DIY application on existing surfaces

Cons:

  • Shorter lifespan than membrane systems (5-7 years)
  • Requires proper surface preparation for adhesion
  • Recoating cycles are more frequent than PVC systems

Balcony Inspection Requirements and Waterproofing Compliance

California properties with elevated decks must comply with SB 326 and SB 721, which mandate structural inspections and documented waterproofing assessments for residential buildings with three or more units.

Signs of Balcony Structural Failure and When to Upgrade Your Waterproofing

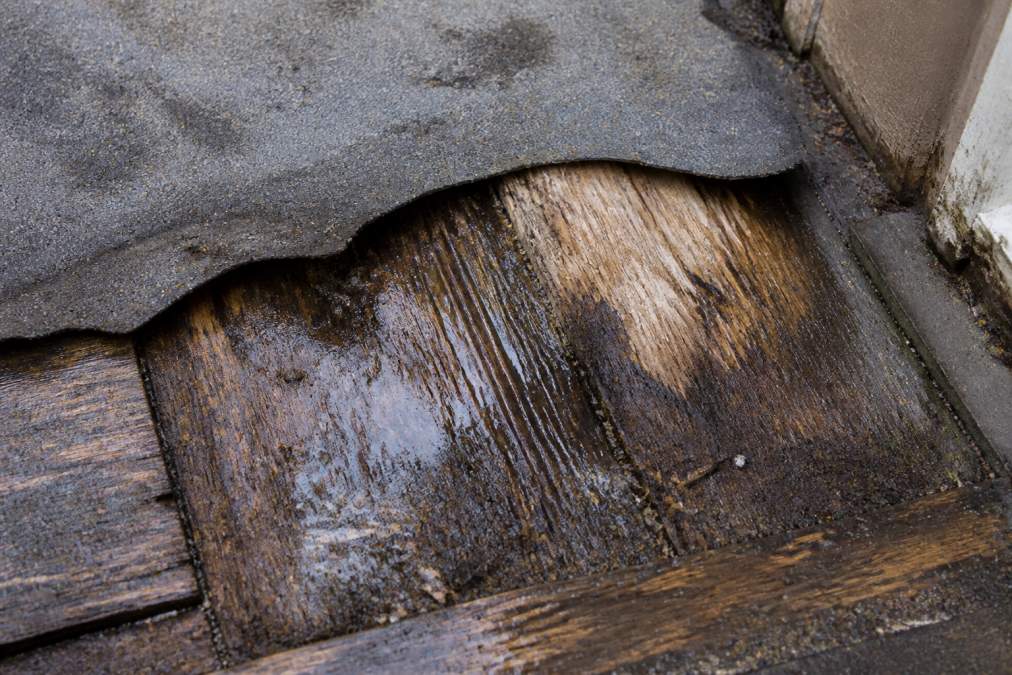
Water damage is the primary driver of balcony structural failure. Failed waterproofing allows water to reach substrates, causing soft spots, discoloration, and rot that compromises joist strength.

Infographic showing signs of structural failure to consider before installing the 5 best waterproofing systems for elevated

Common warning signs include:

  • Surface pooling or standing water indicates improper slope or low spots
  • Soft or spongy deck surface suggests water penetration and weakening structural support
  • Visible cracks in coating or membrane allow water infiltration
  • Discoloration or dark stains indicate moisture accumulation
  • Lifted or peeling membrane edges at seams or flashing, the most common water entry point
  • Rust stains or metal flashing deterioration indicate water reaching steel components
  • Musty odors or mold growth on the deck underside signal persistent moisture

10-Year Cost-of-Ownership Analysis: Repair, Recoat, or Replace

Upgrade decisions should be grounded in 10-year cost-of-ownership analysis, not just upfront material costs, as maintenance cycles and lifespans vary significantly.

Heat-Welded PVC Membrane Systems (Duradek, Tufdek):

  • Initial installation cost: $15-$25 per square foot
  • Maintenance cycle: Minimal; annual inspection
  • Expected lifespan: 15-20 years
  • 10-year total cost: For a 400-square-foot deck, approximately $8,000-$14,000 (initial plus annual inspection)
  • Cost-benefit: Highest upfront investment with lowest maintenance burden and longest lifespan.

Cementitious Coating Systems (Westcoat ALX):

  • Initial installation cost: $12-$18 per square foot (professional installation required)
  • Maintenance cycle: Recoating recommended every 7-10 years, depending on foot traffic and climate
  • Recoating cost: $8-$12 per square foot for full recoating
  • Expected lifespan: 10-15 years before first recoating; 15-20 years with proper maintenance
  • 10-year total cost: For a 400-square-foot deck, initial cost is $4,800-$7,200. If recoating is needed in year 8, add $3,200-$4,800. Total over 10 years: approximately $8,000-$12,000
  • Cost-benefit: Moderate upfront cost with predictable maintenance. Good for properties with plywood substrates that need seamless protection and high slip resistance.

Liquid Acrylic Coating Systems (AMES Safe-T-Deck):

  • Initial installation cost: $4-$8 per square foot (DIY or professional application)
  • Maintenance cycle: Recoating required every 5-7 years
  • Recoating cost: $4-$8 per square foot
  • Expected lifespan: 5-7 years per application
  • 10-year total cost: For a 400-square-foot deck, initial cost is $1,600-$3,200. Recoating in year 5-6 costs $1,600-$3,200. Total over 10 years: approximately $3,200-$6,400
  • Cost-benefit: Lowest upfront cost, but highest maintenance frequency. Best for budget-conscious property owners willing to recoat every 5-7 years, or for temporary solutions on decks scheduled for replacement.

When Repair Makes Sense vs. When Replacement Is Necessary

Repair is cost-effective when:

  • The waterproofing system is less than 10 years old and showing isolated failures (a few failed seams or small cracks)
  • The substrate beneath is structurally sound (no soft spots, rot, or spalling)
  • The failure is localized to less than 20% of the deck surface
  • The system type is still available and compatible with existing material
  • Estimated repair cost is less than 40% of the cost of full replacement

Replacement is necessary when:

  • The waterproofing system is at or beyond its expected lifespan (15+ years for membranes, 10+ years for coatings)
  • Water damage has compromised the substrate; soft joists, rot, or spalling concrete must be repaired before new waterproofing is installed
  • The failure is widespread (more than 30% of the deck surface showing signs of water infiltration)
  • The existing system is incompatible with modern code requirements or SB 326/SB 721 compliance standards
  • Estimated repair cost exceeds 50% of the cost of full replacement

Preventive Investment Protects Structural Assets

The cost-benefit analysis over 10 years typically favors upgrading sooner rather than later. A failed waterproofing system that damages joists or causes concrete spalling can cost 3-5 times more to repair than replacing the waterproofing system before substrate damage occurs. For example, replacing a failed membrane system on a 400-square-foot deck costs $6,000-$10,000. Repairing water-damaged joists and then installing new waterproofing can easily exceed $20,000-$30,000 because structural repairs are labor-intensive and may require temporary deck closure.

Frequently Asked Questions

How do I know which waterproofing system for elevated decks is right for my property?

Your choice depends on three factors: your deck substrate (plywood vs. concrete), expected foot traffic volume, and climate exposure. PVC membrane systems like Duradek excel in high-moisture climates and offer 20+ year lifespans. Liquid-applied coatings like AMES Safe-T-Deck work well for maintenance recoating. If your deck sits over living space, substrate protection is critical, consider professional installation to ensure proper application and warranty coverage.

What is the typical waterproof deck coating lifespan?

Lifespan varies significantly by system type. Heat-welded PVC membranes like Duradek and Tufdek typically last 20-30 years with minimal maintenance. Cementitious systems like Westcoat ALX last 10-15 years depending on foot traffic and UV exposure. Water-based acrylic coatings require reapplication every 3-5 years. Climate, substrate condition, and maintenance frequency all affect longevity. Professional installation ensures proper seam integrity and thermal expansion accommodation, extending service life.

What are the signs of balcony structural failure I should watch for?

Common warning signs include soft or spongy wood when you press on the deck surface, visible discoloration or dark staining indicating moisture penetration, cracking or separation along seams, water pooling on the surface, and deterioration around flashing and joist connections. If water reaches the substrate beneath your waterproofing system, structural failure accelerates rapidly. Inspect after heavy rain or in spring when freeze-thaw cycles have stressed the membrane. Early detection prevents costly joist replacement.

Do I need professional installation for all waterproofing systems?

Professional installation is strongly recommended for PVC membrane systems (Duradek, Tufdek) and cementitious coatings (Westcoat ALX) to maintain warranty coverage and ensure watertight seam integrity. Liquid acrylic coatings like AMES Safe-T-Deck can be applied by experienced DIYers if substrate preparation is meticulous. Improper seam welding or surface prep leads to early failure and moisture infiltration into the structural substrate. When protecting a building’s integrity, professional expertise typically prevents costly repairs.

How do balcony inspection requirements affect my waterproofing choice?

SB 326 and SB 721 mandate structural inspections every 6 years for buildings with 3+ units in California. Inspectors look for water damage, failed membranes, and substrate deterioration as evidence of deferred maintenance. Choosing a durable waterproofing system with proven longevity helps you pass inspection cycles without emergency repairs. Systems with excellent crack-bridging properties and UV stability demonstrate responsible stewardship. Proper waterproofing reduces the likelihood of inspector-flagged deficiencies and associated repair costs.

Book inspection

Posted in BlogTagged 5 best waterproofing systems for elevated decks, balcony inspection requirements, signs of balcony structural failure, waterproof deck coating lifespan

Balcony Structural Integrity vs Surface Wear: 2026 Guide

Posted on September 17, 2026 by Apex Balcony admin
Balcony Structural Integrity vs Surface Wear: 2026 Guide

Table of Contents

  • What Balcony Structural Integrity vs Surface Wear Actually Means
    • How Load Distribution and Load-Bearing Capacity Work on a Cantilevered Balcony
  • Signs of Balcony Structural Failure You Should Never Ignore
    • Cosmetic Issues: Hairline Cracks, Efflorescence, and Minor Surface Wear
    • Red Flags: Concrete Spalling, Rust Staining, Railing Instability, and Dry Rot
  • A Visual Identification Guide: DIY vs. Professional Assessment
    • The Four-Tier Severity Ladder
    • How to Measure a Crack Without Guessing
    • The DIY Visual Check (Do This Quarterly)
    • When to Stop and Call a Professional
    • What a Professional Assessment Actually Involves
  • SB 326 Balcony Inspection Requirements and When to Call a Structural Engineer
  • Waterproofing, Drainage, and Preventative Maintenance That Protect Structural Integrity
  • The Cost of Balcony Structural Engineering Services and Repair vs. Replacement
  • Insurance, Liability, and Property Valuation: What HOA Boards Need to Know
    • How Insurers Underwrite Balcony Risk
    • The Foreseeable-Hazard Problem
    • What Belongs in the Board’s Records
    • How Structural Condition Affects Valuation
    • HOA Responsibility and the Limits of DIY
  • Frequently Asked Questions

Last Updated: September 16, 2026

What Balcony Structural Integrity vs Surface Wear Actually Means

Balcony structural integrity is the ability of a balcony’s load-bearing components to safely carry their intended loads without failure, while surface wear is cosmetic deterioration that does not compromise that load path. At Apex Balcony, we’ve worked with hundreds of building owners, and confusing these two categories is the single most expensive mistake property owners make. One costs a few hundred dollars.

How Load Distribution and Load-Bearing Capacity Work on a Cantilevered Balcony

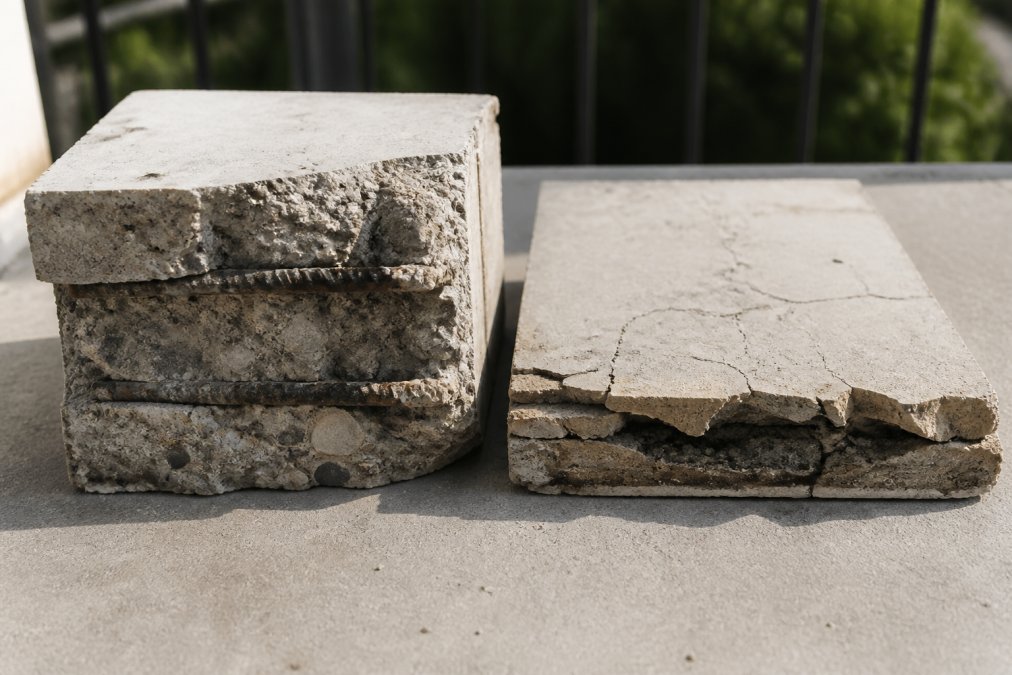
A cantilevered balcony carries its load through reinforcement steel embedded in the slab, transferring weight back into the building’s primary structure. When that steel corrodes, the balcony loses load-bearing capacity even if the surface looks fine.

Signs of Balcony Structural Failure You Should Never Ignore

The clearest signs of balcony structural failure are concrete spalling, rust staining, railing instability, and dry rot in wood framing. These indicate the load path is compromised, not just the finish.

Inspector examining a cracked concrete slab showing signs of poor balcony structural integrity and rust staining

Cosmetic Issues: Hairline Cracks, Efflorescence, and Minor Surface Wear

Hairline cracks under about the width of a credit card, white mineral deposits called efflorescence, and worn sealant are usually cosmetic maintenance items.

Red Flags: Concrete Spalling, Rust Staining, Railing Instability, and Dry Rot

Concrete spalling, rust staining, railing instability, and dry rot are red flags requiring immediate professional assessment. Spalling is when chunks of concrete break away, exposing corroded reinforcement steel beneath.

Watch Out
Ignoring railing instability is the most common fatal mistake. A railing that wobbles under hand pressure has already lost its anchor capacity. Do not host anyone on that balcony until a licensed inspector evaluates it.

A Visual Identification Guide: DIY vs. Professional Assessment

Most owners cannot tell a cosmetic crack from a structural one. This section gives you a usable decision framework: a visual guide, a severity ladder, and a clear line between “monitor it” and “call someone today.”

The Four-Tier Severity Ladder

Every defect you find falls into one of four tiers. The tier determines your next action, not the size of the defect.

TierWhat You SeeWhat It MeansYour Action
1, CosmeticHairline cracks narrower than a credit card, efflorescence, chalking paint, worn sealantFinish-layer deterioration; load path intactClean, seal, re-inspect in 6 months
2, WatchCracks wider than a credit card but under 1/8 inch, isolated rust staining, minor water poolingMoisture is reaching embedded steel or framingDocument with dated photos, schedule a licensed inspection within 30 days
3, ActSpalling concrete, exposed reinforcement steel, railing post movement, soft wood at anchor pointsLoad path is compromised or actively degradingRestrict access, call a licensed inspector within days
4, EmergencySagging or deflecting slab, diagonal cracks radiating from corners, water staining on the ceiling below, railing that moves under hand pressureFailure is possible under normal useClose the balcony, call a structural engineer immediately

How to Measure a Crack Without Guessing

Eyeballing a crack is unreliable. Use a credit card as your gauge: a standard card is about 1/32 inch thick. Narrower than the card is typically cosmetic; if the card slips in with room to spare, treat it as Tier 2 or higher.

The DIY Visual Check (Do This Quarterly)

  • Walk the full perimeter of every balcony; look up at the underside of the slab
  • Check for cracks wider than a credit card
  • Look for rust stains on concrete, stucco, or the ceiling below
  • Push each railing post firmly in two directions; note any movement
  • Look for water pooling or staining after rain
  • Check for soft, spongy, or crumbling wood at the base of railings and at ledger connections
  • Confirm drains and scuppers are clear of debris
  • Photograph anything new and date the file

When to Stop and Call a Professional

Stop your DIY assessment and call a licensed inspector or structural engineer the moment you see any of the following:

  • Spalling concrete with exposed reinforcement steel
  • Railing movement of any kind, in any direction
  • Sagging, deflection, or a visible slope in the slab
  • Diagonal cracks running from a corner or from a column
  • Water stains on the ceiling or wall below the balcony
  • A crack that has widened since your last check
  • Soft or crumbling wood at any structural connection
Watch Out
A wobbling railing is not a cosmetic issue and it is not a maintenance item. It means the anchor or the framing that holds the post has already lost capacity. Do not host anyone on that balcony until a licensed inspector evaluates it.

What a Professional Assessment Actually Involves

A licensed inspector documents conditions: crack widths and locations, spall dimensions, corrosion extent, railing anchor condition, waterproofing and drainage function. A structural engineer goes further, evaluating whether remaining load-bearing capacity is adequate using the original design’s load assumptions.

Pro Tip
Ask your inspector to photograph every defect with a scale reference in the frame. Boards that submit photo-documented reports to their insurers and legal counsel face far fewer disputes when a claim arises.

SB 326 Balcony Inspection Requirements and When to Call a Structural Engineer

SB 326 balcony inspection requirements apply to specified buildings with three or more dwelling units, mandating periodic structural inspections by licensed professionals. SB 721 covers similar requirements for certain other residential buildings.

Waterproofing, Drainage, and Preventative Maintenance That Protect Structural Integrity

Waterproofing membrane condition, drainage function, and sealing most directly protect structural integrity. Moisture intrusion is the leading cause of reinforcement steel corrosion.

The Cost of Balcony Structural Engineering Services and Repair vs. Replacement

The cost of balcony structural engineering services depends on the number of balconies, the extent of defects, and whether engineering calculations are required. Pricing depends on quantity, dates, and delivery. Contact Apex Balcony for current prices or a quote.

Insurance, Liability, and Property Valuation: What HOA Boards Need to Know

Most articles stop at “get an inspection” and skip what boards actually lose sleep over: what happens to insurance coverage, legal exposure, and property value when a balcony fails, or when records are missing. This section covers the mechanisms, not just the warnings.

How Insurers Underwrite Balcony Risk

Carriers writing policies on buildings with elevated exterior elements increasingly treat inspection records as an underwriting input, not a courtesy. At renewal, the carrier may ask for the most recent structural inspection report, the scope of completed repairs, and evidence recommended work was done.

Three outcomes are common:

  • Records present and current: the policy renews on standard terms.
  • Records missing or stale: the carrier may non-renew, exclude balcony-related losses, or apply a surcharge.
  • Known defect not addressed: the carrier may deny a claim tied to that defect on the grounds that the loss was foreseeable.

The Foreseeable-Hazard Problem

Liability exposure turns on one question: did the board know, or should it have known, about a hazard and fail to act? A documented inspection flagging a defect that the board ignores is the worst combination, it converts an unknown risk into a known one.

Key Takeaway
Inspection records are not just a compliance checkbox. They are the evidence that protects your board, your insurance coverage, and your property value in the event of an incident.

What Belongs in the Board’s Records

A defensible record set includes:

  • The most recent structural inspection report, signed and dated
  • Photographs of every defect noted, with scale references
  • Repair scopes, permits, and completion documentation
  • A log of when each recommendation was addressed
  • Meeting minutes showing the board reviewed the report and acted on it

If a recommendation was deferred, the minutes should say why and when it will be revisited. A deferral with a documented reason is defensible. A deferral with no record is not.

How Structural Condition Affects Valuation

Appraisers and lenders treat documented structural condition as a proxy for risk. A building with current inspections and completed repairs supports a higher valuation than an identical building with unknown condition, because the buyer isn’t pricing in an unknown repair liability.

HOA Responsibility and the Limits of DIY

Boards sometimes assume a handyman walkthrough or a member’s informal inspection satisfies their obligation. It does not: the inspection must be performed by a qualified, licensed professional, and findings must be documented and acted on.

Pro Tip
Before renewal season, pull the last three years of inspection reports and repair records into a single indexed file. When the carrier asks, you answer in an afternoon instead of a month.

Frequently Asked Questions

What is the difference between surface wear and structural damage on a balcony?

Surface wear affects only the outer layer of concrete or coating, showing up as hairline cracks, faded paint, or light efflorescence. Structural damage reaches the load-bearing capacity of the balcony, visible through concrete spalling, exposed reinforcement steel, rust staining, or railing instability. Surface issues are cosmetic and can usually be sealed or patched. Structural defects compromise safety and require a licensed structural engineer to assess repair or replacement before the balcony is used again.

Does SB 326 require inspections for surface-level balcony damage?

SB 326 requires inspections of elevated exterior elements regardless of visible damage. The law applies to buildings with three or more multifamily dwelling units, and inspectors must examine balconies, decks, stairways, and walkways for signs of structural distress. Surface wear alone may not trigger repairs, but the inspection itself is mandatory by January 1, 2025, and every nine years after. Skipping the inspection because damage looks cosmetic leaves the HOA exposed to fines and liability.

How can I tell if my balcony has structural integrity issues?

Start with the signs of balcony structural failure: concrete spalling, rust staining around reinforcement steel, water pooling that never drains, railing instability, or a spongy feel underfoot. Hairline cracks that stay narrow are usually surface wear. Cracks wider than a credit card, horizontal cracking along the slab edge, or any sagging in a cantilevered balcony point to structural problems. A licensed inspector can confirm what you are seeing and document it for compliance.

How much do balcony structural engineering services typically cost, and what affects the price?

The cost of balcony structural engineering services depends on the number of units, the extent of accessible damage, the type of report required for SB 326 or SB 721 compliance, and whether destructive testing is needed. Pricing depends on quantity, dates, and delivery. Contact Apex Balcony directly for a quote tailored to your building and inspection scope.


Balcony safety comes down to knowing the difference between cosmetic wear and structural failure, and acting on the right one. Apex Balcony provides licensed inspections for HOAs and multifamily owners, with specialized expertise in SB 326 and SB 721 compliance, comprehensive evaluation of balconies, decks, and stairways, and a clear path to necessary repairs. Get started with Apex Balcony and protect your residents, your board, and your building’s value.

Book inspection

Posted in BlogTagged balcony structural integrity, balcony structural integrity vs surface wear, sb 326 balcony inspection requirements, signs of balcony structural failure

Recent Posts

  • Cost of Balcony Structural Repairs in California
  • Hiring a Structural Engineer for Deck Safety: 2026 Guide
  • Balcony Maintenance Tips for California Homeowners
  • How to Choose a Structural Engineer for Home Renovation
  • Structural Engineering for Hillside Homes: A Complete Guide

Recent Comments

No comments to show.

Archives

  • October 2026
  • September 2026
  • August 2026
  • July 2026
  • June 2026

Categories

  • Blog
Logo
Created by Unilime.Group
  • Balcony Law
  • About us
  • Inspection services
  • FAQ
  • Blog

Call us ‪+1 818-806-7885‬
License: CSLB #1101305

Apex Balcony Inspection
‪+1 818-806-7885‬
[email protected]
4645 Van Nuys Blvd #201
Sherman Oaks CA 91403

Created by Unilime.Group