Logo
  • Balcony Law
  • About us
  • Inspection services
  • FAQ
  • Blog
  • Call us ‪+1 818-806-7885
  • Book now

Month: October 2026

Structural Inspection Requirements for Apartment Balconies

Posted on October 22, 2026 by Apex Balcony admin
Structural Inspection Requirements for Apartment Balconies

Table of Contents

  • Why Structural Inspections for Apartment Balconies Are Non-Negotiable
  • SB 721 Balcony Inspection Requirements: What Apartment Owners Must Know
  • SB 326 Balcony Inspection Requirements: HOA and Condo Compliance
  • Balcony Inspection Frequency and Deadlines: A State-by-State View
    • The four-layer test every owner should run
    • What the state-level rules actually look like
    • How to confirm your own deadline
  • Apartment Balcony Inspection Checklist: What a Qualified Inspector Examines
    • Step 1: Records review before anyone climbs a ladder
    • Step 2: Access and sampling plan
    • Step 3: Visual survey from below
    • Step 4: Walking surface and guardrails
    • Step 5: Moisture and material condition
    • Step 6: Structural integrity and load path
    • What a visual inspection cannot tell you
  • How to Read the Inspection Report and Prioritize Repairs
  • Frequently Asked Questions

Last Updated: October 21, 2026

Why Structural Inspections for Apartment Balconies Are Non-Negotiable

A balcony can look fine from the ground and still be months from failure.

Two events changed how owners think about this work.

The core problem: apartment balconies fail from the inside out. You cannot inspect them with a glance from the parking lot.

Below, we break down the rules that apply, what inspectors actually check, and how to read the report you get back.

Watch Out
The biggest mistake we see is treating a fresh coat of paint as evidence of sound structure. Paint hides corrosion and fills hairline cracks. It tells you nothing about the wood behind it.

SB 721 Balcony Inspection Requirements: What Apartment Owners Must Know

SB 721 is the California law requiring periodic inspection of exterior elevated elements on multifamily apartment buildings. It applies to buildings with three or more dwelling units and targets balconies, decks, stairs, walkways, and porches more than six feet above ground.

The law sets out a specific sequence:

  1. Identify every covered element. Not just balconies. Stairs, landings, and walkways count when they are elevated.
  2. Hire a qualified inspector. The law defines who qualifies, and a general contractor without the right credentials does not.
  3. Complete the inspection within the statutory window. Deadlines run from the certificate of occupancy date, not from when the owner learned about the law.
  4. File the report with the local enforcement agency. The report is a public record in most jurisdictions.
  5. Keep records. Owners must retain inspection reports and evidence of repairs.

A critical point most owners miss: SB 721 requires inspection of a sample of covered elements, not all of them. The inspector examines a statistically valid portion and extrapolates; if the sample shows problems, the scope expands.

Pro Tip
Pull your certificate of occupancy date before you call anyone. It sets your deadline, and it is the first thing a qualified inspector will ask for.

SB 326 Balcony Inspection Requirements: HOA and Condo Compliance

SB 326 covers the same category of elements but applies to homeowners associations rather than individual apartment owners. It requires HOAs to inspect exterior elevated elements, completing a visual survey plus a structural review of a sample of components.

The practical difference matters: under SB 326, the association carries the obligation, not the individual unit owner. The board budgets for it, schedules it, and answers to members when it is late.

A few things HOAs get wrong:

  • Assuming SB 721 covers them. It does not. Different law, different responsible party.
  • Treating the reserve study as an inspection. A reserve study estimates replacement costs. It does not evaluate structural condition.
  • Skipping the repair follow-through. The inspection is the start of a process, not the end of one.
Key Takeaway
The report is a legal document. If an association inspects and then ignores a flagged deficiency, that report becomes evidence of knowledge in any later claim.

Balcony Inspection Frequency and Deadlines: A State-by-State View

Most owners searching this topic are handed a California statute and left to guess whether it applies to them. Only a handful of states impose a balcony-specific inspection mandate, and those that do use very different triggers, building age, height, occupancy type, or a local ordinance layered on top of state law. The practical answer is a stack of four questions, and the statute is only the first.

The four-layer test every owner should run

  1. Is there a state statute? A statewide mandate sets the floor. California is a state with balcony inspection mandates, but each state defines the covered buildings differently.
  2. Is there a local ordinance? Many cities and counties add facade, balcony, or rental-housing inspection programs that are stricter than the state rule. A property can be exempt under state law and still be covered by a city program.
  3. Does the insurer require it? Carriers increasingly ask for documented inspection and repair records at renewal, regardless of statute. A policy condition is a requirement even when no law compels the work.
  4. Does the building’s own governing document require it? HOA CC&Rs, ground leases, and loan covenants sometimes impose inspection cycles that no regulator would.

Run those four layers before you budget anything. The strictest applicable layer controls the schedule.

What the state-level rules actually look like

StateInstrumentTriggerRecurring cycleResponsible party
CaliforniaSB 721 (apartments) and SB 326 (HOAs)Buildings with three or more dwelling units; exterior elevated elements more than six feet above groundStatutory cycle keyed to the certificate of occupancy date, then recurringOwner or HOA board
FloridaMilestone inspection and structural integrity reserve study provisionsBuildings at defined age thresholds, with a second phase at a later thresholdSet by statute at age milestonesBuilding owner or association
New JerseyStructural inspection requirements for certain multifamily buildingsDefined categories of multifamily buildingsPeriodic, set by regulationBuilding owner
New YorkFacade inspection programBuildings above a height thresholdPeriodic cycleBuilding owner
Most other statesNo statewide balcony-specific mandateLocal code and insurer requirements governSet locally or by policyOwner, association, or local authority

Two patterns stand out. First, triggers cluster around age and height: older and taller buildings get inspected more often, and scope widens as the building ages. Second, the responsible party is almost always whoever controls the common elements, which is why HOAs and apartment owners end up under different statutes for the same physical balcony.

How to confirm your own deadline

The certificate of occupancy date is the single most important document in this process. In California, SB 721 and SB 326 deadlines run from that date, not from when the owner learned about the law, and not from the last repair.

Outside a mandate state, the deadline is whatever the strictest of the four layers says it is. A city rental-housing program, an insurer’s renewal questionnaire, or a lender’s reserve requirement can each create a binding date no statute mentions.

Do not assume a neighboring state’s rules apply to you, and do not assume your state has no rules. Local ordinances and insurance requirements change faster than statutes, and a liability claim will not care whether an inspection was legally required.

When you request records from the building department, ask for the full permit history, not just the certificate of occupancy. Alterations, re-roofs, and prior balcony repairs often reset the clock or change which elements are covered.

Book inspection →

The statute is the floor, not the ceiling. The controlling deadline is the strictest of the state rule, the local ordinance, the insurance condition, and the governing document.

Apartment Balcony Inspection Checklist: What a Qualified Inspector Examines
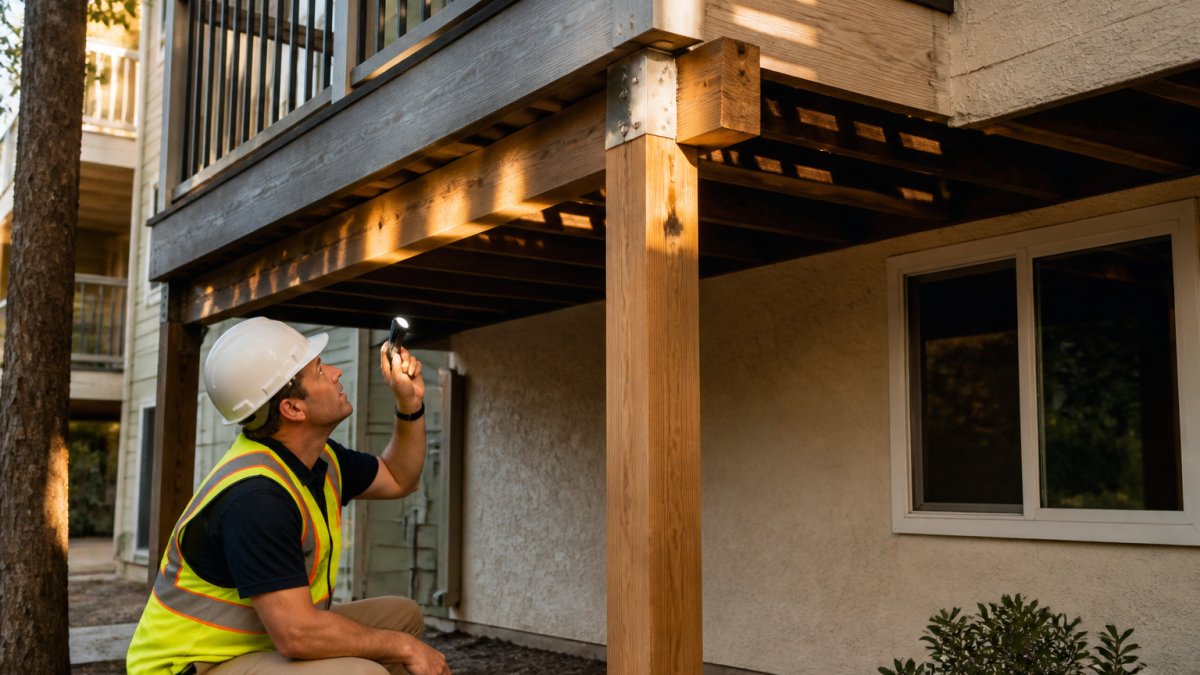
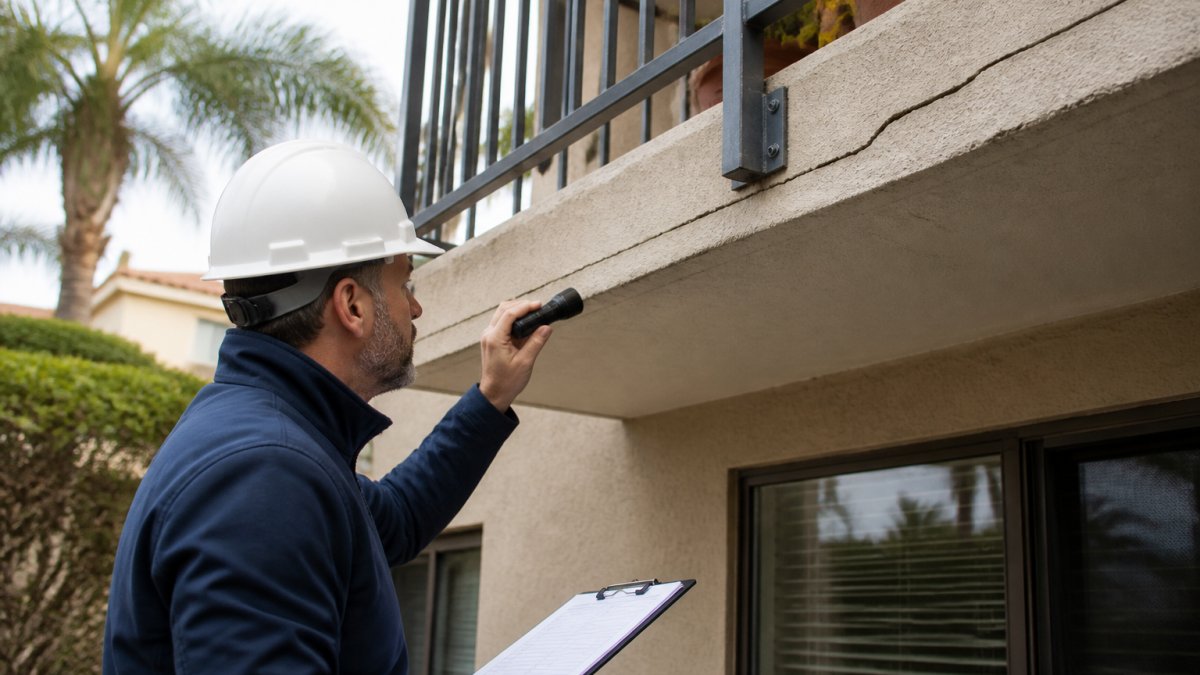
A licensed inspector in a hard hat and safety vest crouched beneath a multi-story apartment balcony, shining a flashlight up at the ledger connection and support posts, late afternoon light filtering through the deck boards

A checklist is only useful if it tells you what the inspector does, in what order, and what the finding means. The list below is organized as a workflow, not a component inventory, because that is how a qualified inspector moves through a property.

Step 1: Records review before anyone climbs a ladder

  • Structural drawings, original permit set, and the certificate of occupancy
  • Prior inspection reports, repair scopes, and close-out documentation
  • Water-intrusion complaints, work orders, and any history of leaks at the balcony line
  • Alteration permits that may have changed the structure or the waterproofing

The records review tells the inspector which elements are original, which have been repaired, and where to look hardest. Skipping it is the most common cause of a report that misses the actual problem.

Step 2: Access and sampling plan

Most statutes and standards require inspection of a sample of covered elements, not every balcony. The inspector selects a statistically valid portion, weighted toward the elements most likely to fail: the oldest, most exposed, previously repaired, and longest spans.

Access is the constraint that drives cost and schedule. Inspectors need to get below the deck, which may mean ladders, lifts, or entry through a lower unit.

Step 3: Visual survey from below

  • Ledger connection and fasteners. Look for corrosion, missing or backed-out fasteners, and separation between the ledger and the building face.
  • Support posts and footings. Check for rot at the base, footing movement, and post-to-beam connections.
  • Joist ends and rim board. These are the first members to stay wet and the first to decay.
  • Ground clearance. Insufficient clearance traps moisture and accelerates decay.

Step 4: Walking surface and guardrails

  • Deck board condition, spacing, and fastener condition
  • Guardrail height, attachment, and post anchorage
  • Handrail security on stairs and landings
  • Unevenness, trip hazards, and ponding on the walking surface

Step 5: Moisture and material condition

  • Waterproof membrane integrity at the deck-to-wall junction
  • Drainage paths, scuppers, and standing water
  • Wood decay and dry rot at connection points, probed rather than eyeballed
  • Corrosion on fasteners, hangers, and metal hardware
  • Cracks in concrete or stucco, and whether they are active

Step 6: Structural integrity and load path

  • Load-bearing components under actual load
  • Condition of previously repaired sections and whether the repair is holding
  • Signs of deflection, movement, or distress that suggest a load-path problem

What a visual inspection cannot tell you

A visual inspection is a condition assessment, not a laboratory test. It cannot confirm the remaining capacity of a corroded fastener, the depth of decay behind paint, or the condition of embedded steel without invasive testing. When the survey finds distress that could be structural, the next step is a specialist evaluation, invasive probing, moisture mapping, or a structural engineer’s analysis.

The biggest mistake we see is treating a fresh coat of paint as evidence of sound structure. Paint hides corrosion and fills hairline cracks. It tells you nothing about the wood behind it.

Photograph every finding with a reference point, unit number, elevation, and a tape measure in frame. A finding without a location is a finding the contractor cannot bid on.

How to Read the Inspection Report and Prioritize Repairs

The report should separate findings into three buckets: safety hazards requiring immediate action, deterioration needing repair within a defined window, and items to monitor at the next cycle.

Prioritize in this order:

  1. Anything flagged as an immediate safety hazard. Close or barricade the element until it is repaired.
  2. Structural items. Ledger connections, posts, and load-bearing members come before cosmetics.
  3. Waterproofing and drainage. These cause the structural damage, so fixing them stops the clock on everything else.
  4. Cosmetic and surface items. Deck boards and paint last.

Get a repair scope in writing before you solicit bids. Three contractors will give three different interpretations of a vague report; a clear scope fixes that.


Every inspection cycle ends the same way: with a list of things to fix and a board or owner deciding what to fund first.

Frequently Asked Questions

Are balconies considered structural?

Yes. Apartment balconies are structural elements because they carry people and must transfer loads safely to the building frame. Key load-bearing components include the ledger connection, support posts, joists, and the walking surface. When any of these deteriorate through wood decay or corrosion, the balcony can fail. That is why structural inspection requirements for apartment balconies focus on these components and why states like California mandate periodic inspections by qualified professionals.

How often do apartment balconies need to be inspected in California?

Under SB 721, apartment building owners must have exterior elevated elements inspected every six years by a licensed architect, civil or structural engineer, or certified building inspector. The first inspection was due by January 1, 2025, for buildings with three or more dwelling units. SB 326 applies to HOAs and condominiums, requiring inspections every nine years with the first completed by January 1, 2025. Your local jurisdiction may set stricter deadlines, so confirm with your city or county building department.

Who is qualified to inspect an apartment balcony?

A qualified inspector for apartment balconies must be a licensed architect, a licensed civil or structural engineer, or a certified building inspector with specific experience in exterior elevated elements. Some states require additional certification. The inspector must be able to evaluate structural integrity, load-bearing components, waterproofing, and drainage. Always ask for proof of licensure and insurance before booking an inspection, and confirm the inspector carries errors and omissions coverage.

What should property owners do after an inspection identifies a safety concern?

If an inspection flags a safety concern, act immediately. Restrict access to the affected balcony or stairway, then hire a licensed contractor to make repairs based on the inspector’s written recommendations. Keep detailed records of the inspection report, repair permits, and completion photos. For SB 721 and SB 326 compliance, you may need to file a report with your local building department and schedule a reinspection. Prioritize repairs that affect load-bearing components or waterproofing to prevent further deterioration.

Book inspection

Posted in BlogTagged apartment balconies, sb 326 balcony inspection requirements, sb 721 balcony inspection requirements, structural inspection requirements for apartment balconies

How to Document Balcony Repairs for Legal Compliance

Posted on October 21, 2026 by Apex Balcony admin
How to Document Balcony Repairs for Legal Compliance

Table of Contents

  • Why Documentation Matters for Balcony Repairs
  • Understanding SB 721 and SB 326 Documentation Requirements
  • Creating a Balcony Repair Documentation Checklist
    • Pre-Repair Documentation
    • During-Repair Documentation
  • Balcony Repair Photo Documentation Best Practices
  • Preparing Your Balcony Repair Closeout Report
  • Balcony Inspection and Repair Record Retention
    • Building a Retention Schedule That Survives an Audit
    • Digital Document Management for Long-Term Audit Readiness
    • What to Do When Records Are Missing
    • Physical vs. Digital: A Practical Split
  • Protecting Your Property from Liability
    • The Liability Mechanism: Why Records Win Cases
    • What Insurance Adjusters Actually Look For
    • Reducing Liability Before an Incident
  • Frequently Asked Questions

Last Updated: October 20, 2026

Why Documentation Matters for Balcony Repairs

To document balcony repairs properly is critical, balcony failures kill.

When you document balcony repairs properly, you create a legal shield showing inspectors, insurers, and courts that you identified problems and fixed them.

This guide from Apex Balcony covers how to build a documentation system that protects your property and residents. We’ve worked with hundreds of building owners facing SB 721 and SB 326 compliance.

Understanding SB 721 and SB 326 Documentation Requirements

California’s two major balcony laws demand different documentation approaches. SB 326 applies to residential buildings with three or more units built before January 1, 2019.

The law doesn’t just say “fix your balconies.” It says keep permanent records.

Here’s what regulators actually look for:

  • Inspection reports signed by a licensed engineer or architect
  • Photographic evidence showing the condition before and after repairs
  • Maintenance logs that track every inspection and repair over time

Missing even one category creates gaps an auditor or plaintiff’s attorney will exploit, arguing you didn’t really inspect, didn’t really fix the problem, or just covered it up.

Watch Out
A common mistake is treating the inspection report as the only documentation you need. The report is one piece. You also need photos, invoices, permits, and a maintenance log showing you stayed on top of things. Without all of them together, you look like you cut corners.

Creating a Balcony Repair Documentation Checklist

A balcony repair documentation checklist keeps you from missing critical steps. Before, during, and after the repair, each phase needs its own documentation.

Pre-Repair Documentation

Before any repair begins, document the baseline condition: take photos, get the inspection report in writing, and collect prior maintenance records.

What to document before repairs start:

  • Date and time of inspection
  • Inspector’s name, license number, and firm
  • Property address and specific balcony or deck location

This baseline proves the balcony’s condition before you touched it. If someone claims damage happened during the repair, your photos show it was already there.

During-Repair Documentation

While contractors work, keep a running record to protect you if disputes arise about what was actually done.

What to document during repairs:

  • Daily work logs showing who worked, what they did, and for how long
  • Photos of the work in progress, exposed framing, removed materials, new components being installed
  • Photos showing old materials being removed (proof of scope)

Many property owners skip this step, figuring the final invoice is enough. It’s not. If the repair fails later, photos of work in progress prove the contractor did the job correctly.

Pro Tip
Use your phone to take daily photos. Set a specific time each day, 10 a.m., for example, and photograph the same balcony from the same angles. This creates a visual timeline that’s hard to dispute.

Balcony Repair Photo Documentation Best Practices

Photos are your most powerful evidence. A good photo shows exactly what the problem was and what you did about it. A bad photo proves nothing.

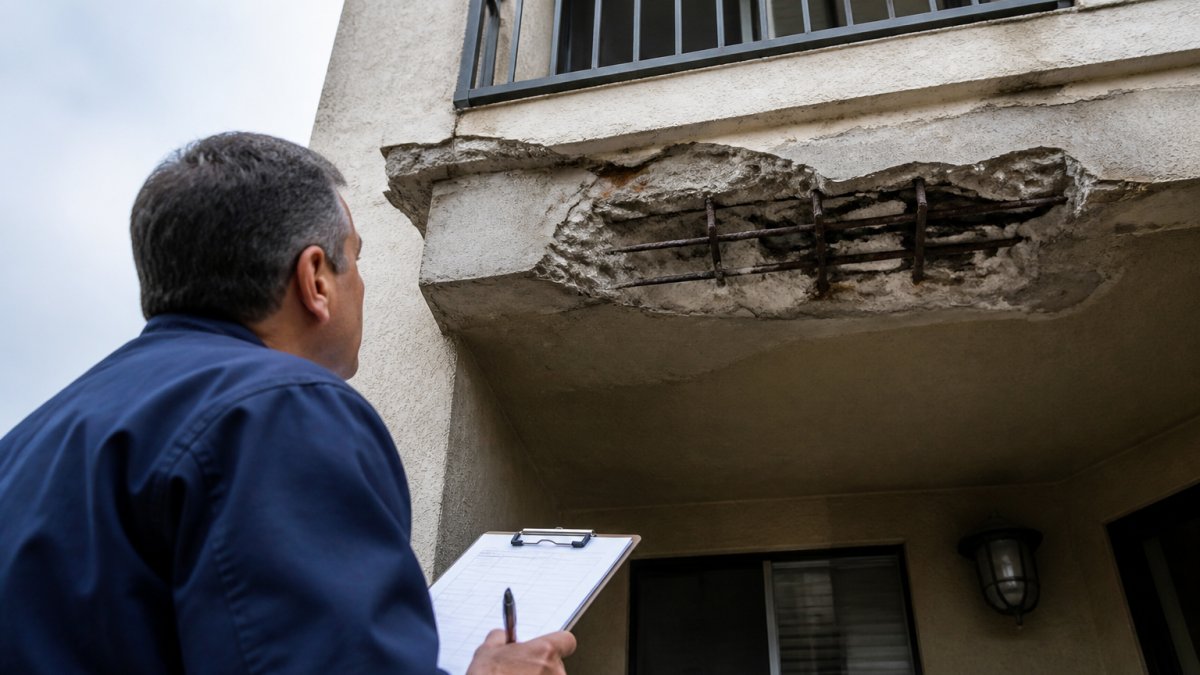
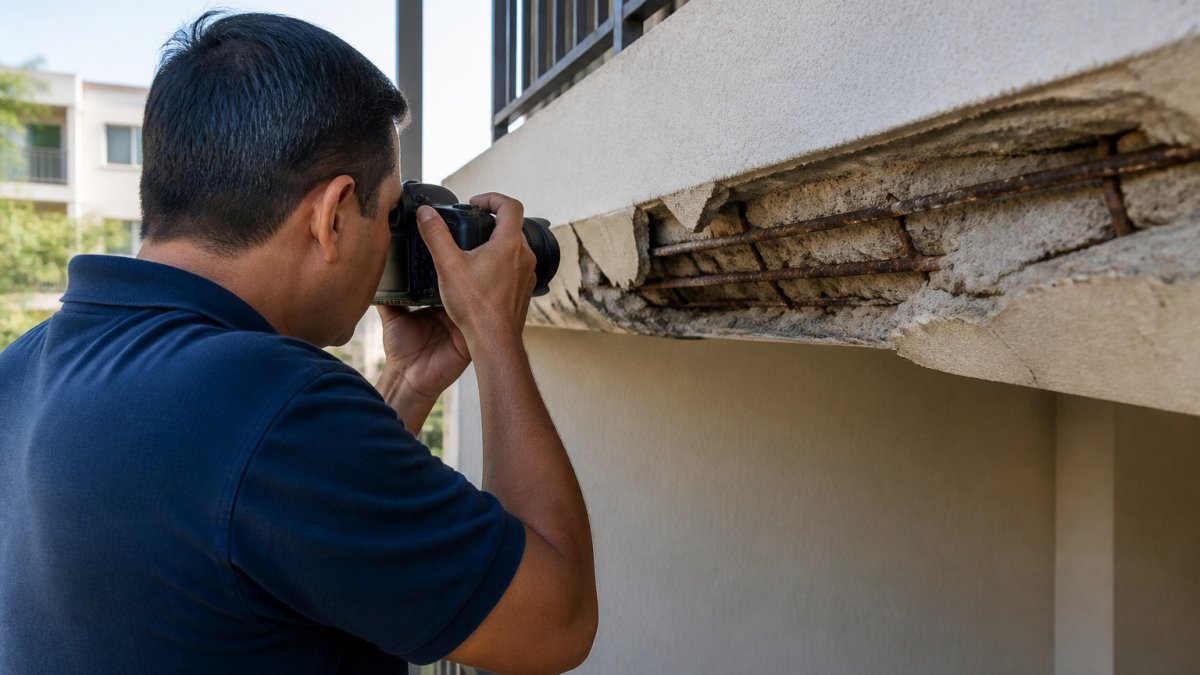
Professional inspector photographing balcony structural damage with digital camera, capturing close-up details of cracked concrete and exposed rebar, natural daylight illuminating the defects

How to take documentation photos that hold up:

  • Use natural daylight. Shadows hide problems. Morning or midday light is best.
  • Photograph the same balcony from the same position before and after. This shows the transformation clearly.
  • Include reference objects for scale. A ruler, a coin, or a hand in the photo shows how big the damage actually is.

Store photos in a folder labeled with the property address and repair date. Back them up to cloud storage. Don’t rely on your phone, phones get lost, data gets deleted.

Key Takeaway
Photos with date stamps and clear location markers are nearly impossible to dispute. They’re your best defense if someone later claims the repair was done wrong or not at all.

Preparing Your Balcony Repair Closeout Report

A closeout report is your final summary, tying together the inspection, the repairs, and proof everything was completed correctly. It becomes part of your permanent record.

The closeout report should include:

  • Project scope: What balconies were repaired and why
  • Inspection findings: Reference the original engineer’s report and list every deficiency that was addressed
  • Repair work completed: Describe what was done, not in vague terms but specifically

This document becomes your single reference point. An auditor can read it and see the full story. A lawyer can use it to show you took the problem seriously.

Balcony Inspection and Repair Record Retention

California law requires you to keep balcony inspection and repair records. The question is how long, in what format, and organized how.

SB 326 and SB 721 don’t specify an expiration date, so keep records indefinitely, a repair from 10 years ago might become relevant if someone gets hurt today. Most compliance practitioners keep every inspection report, repair record, permit, and sign-off for the life of the building, plus a minimum of seven years after the most recent repair or inspection.

Book inspection →

Building a Retention Schedule That Survives an Audit

A retention schedule is a written policy stating what you keep, where, and who is responsible. Without one, records scatter across email inboxes, contractor files, and desk drawers. Here’s a structure that holds up:

  • Tier 1, Permanent records (keep for the life of the building): Engineer inspection reports, structural certifications, permit approvals, closeout reports, and engineer sign-offs. These are the documents that prove the building was safe at a point in time.
  • Tier 2, Long-term records (keep 10 years minimum): Repair invoices, contractor bids, material specifications, waterproofing product data sheets, and warranty documents. These prove what was installed and who installed it.
  • Tier 3, Working records (keep 7 years): Daily work logs, progress photos, internal emails about scheduling, and routine maintenance notes. These support the Tier 1 and Tier 2 documents if a dispute arises.

Write the schedule down, name a responsible person (property manager, HOA secretary, or asset manager), and review it annually. An undocumented policy is almost as bad as none, it shows you thought about records but didn’t commit.

Digital Document Management for Long-Term Audit Readiness

Most guides tell you what to keep but not how to organize it so an auditor can find it in minutes instead of days. That gap matters in practice.

A workable digital system has four components:

  1. A cloud-based document management platform with version history. Generic file folders work, but a platform that tracks who uploaded what and when gives you an audit trail. Look for automatic backup, searchable text (OCR), and permission controls so contractors can upload without deleting.
  2. A consistent folder taxonomy. Use: Property Address → Building/Structure → Year → Record Type (Inspection, Permit, Repair, Closeout). Every file goes in the same place every time. When an inspector asks for the 2019 east balcony inspection, you open one path and hand it over.
  3. A master index or register. One spreadsheet or database listing every document: property, structure, date, record type, file location, and retention tier. The index is what you hand an auditor first. It shows you know what you have.
  4. A backup and access plan. Cloud storage with automatic backup, plus a local encrypted copy updated quarterly. Name two people who can access the system so records don’t disappear when one employee leaves.

NIST Cybersecurity Framework guidance on data backup and access control

Run a quarterly “audit drill.” Pick a random balcony and try to produce its complete file, inspection report, photos, permits, invoices, closeout, in under 15 minutes. If you can’t, your organization system needs work before a real auditor or attorney tests it.

What to Do When Records Are Missing

Gaps happen: contractors go out of business, files get lost in moves, and older repairs predate your system. If you find a gap, document it, write a memo noting what’s missing, why, and what you did to reconstruct the record (contractor affidavits, bank records showing payment, photos from other sources). A documented gap beats a silent one, and an auditor who sees you addressed it is more likely to trust the records you do have.

Physical vs. Digital: A Practical Split

Keep signed originals of engineer reports, permits, and certifications in a fireproof safe or off-site storage, and digital copies of everything in the cloud system. The originals are your legal backstop; the digital system is your working file.

The Apex Balcony team recommends digital management systems because they’re searchable, backed up automatically, and easy to share with inspectors or legal counsel.

Protecting Your Property from Liability

Complete documentation doesn’t just satisfy regulators. It reduces your legal liability if someone gets hurt and often determines whether an insurance claim is paid or denied, where property owners lose the most money. Establishing a rigorous system for property maintenance documentation ensures that every structural intervention remains transparent and defensible during future audits.

The Liability Mechanism: Why Records Win Cases

If a tenant is injured on a balcony, they’ll sue, and their attorney will demand all your records through discovery. A complete file showing you inspected on schedule, identified problems, and fixed them promptly proves due diligence. Incomplete or missing records let a court infer the worst, that you didn’t inspect, didn’t care, or covered up problems. That inference costs money.

Documentation creates four specific legal protections:

  • Proof of inspection: Shows you knew about hazards and monitored them.
  • Proof of action: Shows you didn’t ignore problems once identified.
  • Proof of compliance: Shows you followed SB 326 and SB 721 requirements.

What Insurance Adjusters Actually Look For

Most property owners learn this too late. When a balcony-related claim comes in, a collapse, water intrusion, or third-party injury, the adjuster checks not just whether you had a policy but whether you maintained the property in a way that keeps the claim covered.

Adjusters typically look for:

  • A dated inspection trail showing regular inspections by a licensed professional, consistent with the frequency your policy or state law requires.
  • Proof that identified defects were repaired, not just noted. An inspection report that flags a hazard with no follow-up repair record is a red flag.
  • Contractor credentials and permits showing the work was done by licensed professionals and passed inspection.

If your policy includes a maintenance or inspection condition (many commercial and HOA policies do), failing to document compliance can give the carrier grounds to deny coverage. The documentation you keep for regulators is the same documentation your insurer will request.

Don’t wait until a claim to assemble your file. Insurance adjusters work on deadlines, and a disorganized response can lead to a denial before you’ve had a chance to explain. Keep your documentation audit-ready at all times so a claim response takes hours, not weeks.

Reducing Liability Before an Incident

The strongest liability protection is documented prevention:

  • Inspect on the schedule the law and your insurer expect, and keep the reports.
  • Repair defects promptly and keep the invoices, permits, and photos.
  • Notify tenants in writing when repairs affect their use of a balcony, and keep copies of those notices. (See the tenant notification guidance elsewhere in this guide.)

A complete file doesn’t just help you win a lawsuit, it helps you avoid one, helps your insurer defend you, and helps your claim get paid when something goes wrong.

Frequently Asked Questions

What documents should you keep after balcony repairs?

Retain all inspection reports, engineer certifications, contractor invoices, permit approval notices, photographic evidence, maintenance logs, and the final closeout report. These documents prove compliance with SB 721 and SB 326 requirements and protect you from liability. Store originals in a secure location and maintain digital copies for at least seven years, as records may be audited by local authorities or reviewed in legal proceedings.

How long should balcony inspection and repair records be kept?

Keep all balcony inspection and repair records for a minimum of seven years. However, consider retaining records for the life of the building, as structural integrity issues may emerge years after repair. Digital document management systems make long-term storage efficient and ensure records remain accessible during HOA board transitions.

What should a balcony repair closeout report include?

A closeout report must document all work completed, contractor certification, engineer sign-off, before-and-after photographs, permit approval confirmation, and any deficiencies corrected. Include a summary of structural components repaired, materials used, and compliance statements referencing SB 721 or SB 326 standards. This report serves as your proof of completion and protects against future liability claims.

Do I need SB 721 or SB 326 documentation for my property?

SB 326 applies to residential buildings with three or more units built before January 1, 2019. SB 721 covers buildings with exterior elevated elements, balconies, decks, stairs, walkways, at least 6 feet above grade. If your property is a multifamily residential building or HOA-governed condo complex in California, you likely fall under one or both statutes. Licensed engineers can confirm which applies to your structure during an inspection, ensuring you meet the correct regulatory requirements.

Book inspection

Posted in BlogTagged balcony repair closeout report, balcony repair documentation checklist, balcony repair photo documentation, document balcony repairs, how to document balcony repairs for legal compliance

SB 326 Balcony Inspection Cost: What to Budget

Posted on October 20, 2026 by Apex Balcony admin
SB 326 Balcony Inspection Cost: What to Budget

Table of Contents

  • Understanding SB 326 Balcony Inspection Costs
  • SB 326 Inspection Requirements and Scope
  • What Factors Affect Your SB 326 Balcony Inspection Cost
    • Building Size and Number of Elements
    • Normalizing Quotes: Cost per Element and per Unit
    • What a Quote Should Itemize
    • Inspection Methods: Visual vs. Invasive Testing
    • Access Difficulty and Equipment Requirements
  • SB 326 Balcony Inspection Checklist: What Inspectors Evaluate
  • SB 326 Inspection Report Requirements and Documentation
  • SB 326 Balcony Repair Costs and Budget Planning
  • How to Compare Inspection Quotes and Minimize Costs
    • A Quote-Comparison Checklist for HOA Boards
    • Inspection-Only Pricing vs. Bundled Repair Proposals
    • How Findings Change the Total Budget
    • A Step-by-Step HOA Procurement and Budgeting Process
  • Inspection Deadlines and Recurring Inspection Cycles
  • Frequently Asked Questions

Last Updated: October 19, 2026

Understanding SB 326 Balcony Inspection Costs

The cost of SB 326 balcony inspection varies widely by building size, number of elevated elements, and inspection methods. The cost of a complete inspection varies.

SB 326 requires residential buildings with three or more dwelling units to regularly inspect exterior elevated elements, balconies, decks, stairways, and other raised structures.

Apex Balcony has guided hundreds of California property owners through this process.

SB 326 Inspection Requirements and Scope

SB 326 mandates that buildings with three or more units inspect all exterior elevated elements for safety and structural integrity, covering common interest developments, condominiums, and apartment complexes statewide.

The inspection must cover:

  • Balconies and decks
  • Exterior stairs and landings
  • Walkways and railings
  • Load-bearing connections and supports
  • Signs of moisture intrusion or water damage
  • Structural deterioration or wood rot

Licensed professionals must conduct these inspections and document findings in a written report. Scope directly influences the SB 326 balcony inspection cost: a 12-unit building with 24 small balconies costs less than a 50-unit complex with large decks and multiple stairways.

What Factors Affect Your SB 326 Balcony Inspection Cost

Several key variables determine your final bill. Understanding each, and how it appears on a line-item quote, helps you evaluate proposals on equal footing.

Building Size and Number of Elements

The number of dwelling units and elevated elements is the biggest cost driver. A 12-unit building might have 24 balconies; a 100-unit complex could have 150+ elevated structures.

Cost scales with volume, but not linearly. Inspectors typically price in one of three ways:

  • Flat project fee, one number for the whole building, common on smaller properties.
  • Per-element pricing, a rate applied to each balcony, deck, stair flight, or landing.
  • Per-unit pricing, a rate applied to each dwelling unit, with common-area elements folded in.

Ask which method the inspector used. A per-element quote on a 24-balcony building and a per-unit quote on the same building are not directly comparable until you convert them to the same basis.

Normalizing Quotes: Cost per Element and per Unit

Property-level estimates are hard to compare across bids.

Per-element pricing tends to fall as element count rises, because mobilization, report writing, and travel spread across more work.

Use these normalized figures only as a sanity check, not as a substitute for scope review. A low per-element rate on a quote that excludes invasive testing or photo documentation is not a bargain.

What a Quote Should Itemize

A transparent proposal separates work into components. Look for these line items:

  • Field inspection labor, inspector time on site, by element type.
  • Access equipment, lifts, scaffolding, rope access, or staging, often billed separately or as a pass-through.
  • Testing, moisture metering, thermal imaging, or probe testing, if included.
  • Report preparation, photo documentation, written findings, and repair recommendations.
  • Engineering review, sign-off by a licensed professional, if required by the scope.
  • Permits or notifications, where the jurisdiction requires them.
  • Exclusions, what the quote explicitly does not cover, such as destructive testing or repair design.

A lump-sum quote isn’t automatically worse, but it gives the board less to compare and less to document if scope is later disputed.

Inspection Methods: Visual vs. Invasive Testing

The inspection method affects both cost and findings.

Visual inspection examines balconies from outside without removing materials or cutting into structures, the least invasive and typically least expensive approach.

Non-destructive testing uses tools like moisture meters and thermal imaging to assess conditions without damage. Cost increases moderately.

Invasive or destructive testing removes siding, cuts into wood, or opens sealed areas to inspect hidden components.

Many inspectors start visually and recommend invasive testing if concerns arise.

Access Difficulty and Equipment Requirements

Difficult access raises inspection costs: a ground-level complex is cheaper to assess than a high-rise requiring scaffolding or lifts.

Access factors include:

  • Building height and number of stories
  • Availability of safe staging areas
  • Need for lifts, scaffolding, or rope access
  • Weather conditions affecting inspection scheduling

A small building on flat ground costs less than a hillside property requiring heavy equipment.

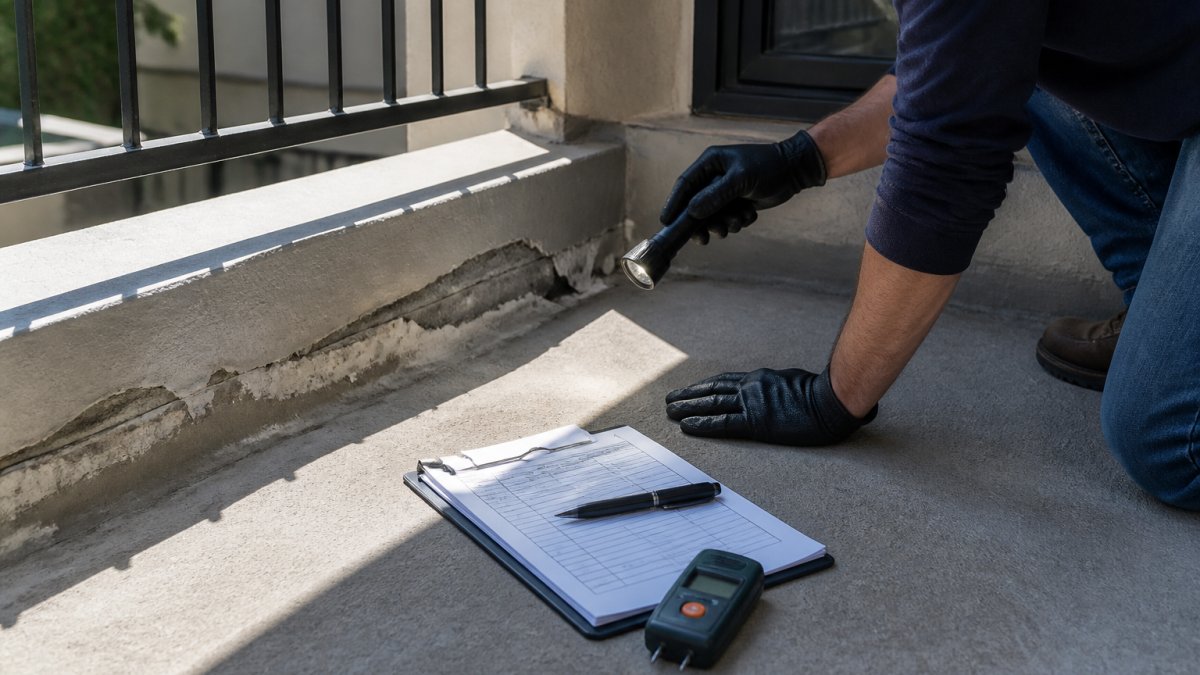
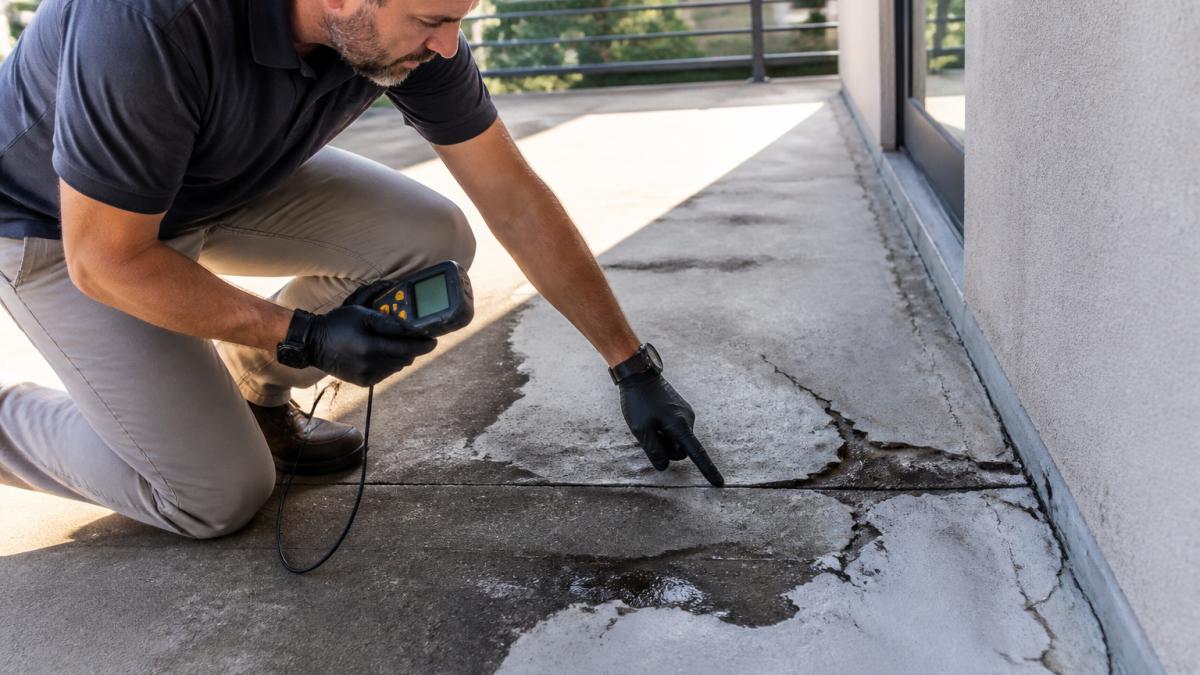
Professional structural inspector examining wooden balcony railing with moisture meter and inspection clipboard, close-up of hands using diagnostic tools, natural outdoor lighting
Key Takeaway
Before comparing totals, convert every quote to the same basis: cost per element, cost per unit, and a line-item scope. A quote that looks higher may simply include testing, access equipment, and a detailed report that a cheaper quote excludes.

SB 326 Balcony Inspection Checklist: What Inspectors Evaluate

A thorough SB 326 inspection examines specific conditions and components. Knowing what inspectors look for clarifies scope and what your report should contain.

Inspectors assess:

  • Wood rot, decay, or deterioration in framing and decking
  • Moisture damage, water intrusion, or failed waterproofing
  • Rust or corrosion on metal fasteners and connections
  • Structural cracks or settlement issues
  • Loose or failing railings and balusters
  • Separation between elements or connections
  • Proper drainage and slope to prevent water pooling

The checklist drives time and depth of analysis; complex buildings with mixed materials or visible damage take longer to assess.

Book inspection →

SB 326 Inspection Report Requirements and Documentation

Your inspector must provide a written report documenting all findings, critical for compliance and future planning.

The SB 326 inspection report requirements include:

  • Detailed description of each element inspected
  • Photographic documentation of conditions
  • Assessment of structural integrity and safety
  • Identification of deterioration or damage
  • Repair recommendations with priority levels
  • Timeline for necessary repairs or replacements
  • Inspector credentials and qualifications

A thorough report becomes your repair roadmap and budgeting tool. Poor reports lack detail and leave you guessing. Quality documentation protects you legally and guides maintenance planning.

SB 326 Balcony Repair Costs and Budget Planning

Inspections often uncover repairs. Understanding typical findings helps you prepare financially.

Common repair categories include:

  • Waterproofing and flashing repairs: typically moderate cost
  • Wood replacement due to rot: varies by extent
  • Railing or baluster repairs: usually lower cost
  • Structural reinforcement: can be expensive
  • Full deck or balcony replacement: highest cost option

Your report should categorize repairs by urgency: some issues need immediate attention for safety, others can wait.

Key Takeaway
Budget for both the inspection itself AND potential repairs. Many boards underestimate follow-up costs. A thorough inspection report helps you plan repairs systematically rather than facing surprise bills later.
::: Proactive maintenance extends beyond structural elements to include electrical safety inspection costs that ensure the long-term integrity of the entire building.

How to Compare Inspection Quotes and Minimize Costs

Getting multiple quotes is smart, but comparing them fairly requires structured review, proposals that look similar on the cover page often differ sharply in scope, exclusions, and deliverables.

A Quote-Comparison Checklist for HOA Boards

Before the board approves any proposal, verify each of the following and record the answer in the meeting minutes:

  • Scope of elements, Does the quote list the number and type of elements inspected (balconies, decks, stairs, landings, railings)? Are common-area elements included?
  • Inspection method, Visual only, non-destructive testing, or invasive testing? Is follow-up testing included or billed separately?
  • Access assumptions, Does the quote assume ground-level access, or does it include lifts, scaffolding, or rope access? Who arranges and pays for equipment?
  • Deliverables, Is a written report included? Does it include photographs, element-by-element findings, and prioritized repair recommendations?
  • Licensing and credentials, Is the inspector a licensed professional qualified to perform the work? Ask for the license type and number.
  • Exclusions, What is explicitly not covered? Destructive testing, repair design, permit filing, and engineering review are common exclusions.
  • Timeline, When will fieldwork be completed, and when will the report be delivered?
  • Insurance, Does the inspector carry liability coverage? Request a certificate.

A cheap quote may exclude important services; an expensive one may include documentation and analysis you need. The checklist turns a subjective comparison into a documented decision.

Inspection-Only Pricing vs. Bundled Repair Proposals

Some firms offer a free or discounted inspection when the same firm performs the resulting repairs. That arrangement can create a conflict of interest: the entity that identifies the work also profits from it.

This does not mean bundled proposals are always wrong, but boards should treat them carefully. Recommended practices:

  • Ask whether the inspection fee changes if repair work is awarded to the same firm.
  • Request the inspection report and the repair proposal as separate documents with separate pricing.
  • Consider an independent review of the findings before committing to a large repair contract.
  • Document the board’s reasoning in the minutes, especially if the inspection was discounted.

A transparent firm will separate inspection pricing from repair pricing and will not condition the inspection fee on winning the repair work.

How Findings Change the Total Budget

The inspection fee is only the first cost. Findings can trigger additional spending that boards should plan for:

  • Further testing, invasive probes or laboratory analysis when visual inspection is inconclusive.
  • Engineering review, structural analysis or repair design by a licensed engineer.
  • Permits, jurisdiction fees for repair work, where required.
  • Repairs, waterproofing, wood replacement, railing repair, structural reinforcement, or full replacement, priced by extent.
  • Temporary measures, shoring, barricades, or closing an element until repairs are complete.

A thorough report categorizes findings by urgency so the board can sequence spending rather than facing a single lump-sum surprise.

A Step-by-Step HOA Procurement and Budgeting Process

Turning cost information into a decision follows a repeatable sequence:

  1. Confirm the obligation. Verify the building’s unit count and element inventory so the scope is defined before quotes are requested.
  2. Request written proposals. Ask at least two or three firms for itemized quotes using the same scope description.
  3. Normalize the quotes. Convert each to cost per element and cost per unit, and compare line items side by side.
  4. Check credentials and insurance. Confirm licensing and request certificates of insurance.
  5. Review exclusions. Identify what each quote leaves out and estimate those costs separately.
  6. Document the decision. Record the comparison and the board’s rationale in the minutes.
  7. Budget for follow-up. Set aside a reserve for testing, engineering, permits, and repairs identified in the report.
  8. Calendar the next cycle. Note the recurring inspection interval specified in the report and build it into the reserve schedule.

Apex Balcony provides transparent, itemized quotes. This approach lets you compare fairly and understand exactly what you’re paying for.

Avoid selecting inspectors solely on price. A thorough, well-documented inspection protects your building and residents. Cutting corners on inspection quality can lead to missed safety issues and larger repair bills later. Also be cautious with free or discounted inspections tied to repair work, separate the inspection decision from the repair decision.

Inspection Deadlines and Recurring Inspection Cycles

SB 326 establishes specific timelines for inspections. Missing deadlines creates legal liability.

Initial inspections must be completed by a deadline set when the law took effect. Recurring inspections follow a cycle based on initial findings:

  • Buildings with no significant issues: six-year cycle
  • Buildings with minor issues: three-year cycle
  • Buildings with significant deterioration: one-year cycle

Your inspection report specifies your building’s cycle. Mark your calendar and plan budgets accordingly. Missing inspection deadlines can result in penalties and loss of liability protection.


Understanding the SB 326 balcony inspection cost is the first step toward compliance and resident safety. The investment in a thorough inspection protects your building, reduces liability, and helps you plan repairs systematically.

Frequently Asked Questions

What is included in an SB 326 balcony inspection?

An SB 326 inspection covers all exterior elevated elements including balconies, decks, stairways, and walkways. Inspectors assess structural deterioration, moisture intrusion, waterproofing conditions, and load-bearing component integrity. The inspection uses visual assessment and may include non-destructive or invasive testing depending on what the inspector observes. A written inspection report documents findings and repair recommendations.

How often are SB 326 balcony inspections required?

Initial SB 326 inspections must be completed by January 1, 2025, for buildings with three or more dwelling units. After the initial inspection, recurring inspection cycles depend on the condition of the elements and local enforcement requirements. Most properties require follow-up inspections every 3-6 years, though severely deteriorated elements may need more frequent assessment.

What factors affect SB 326 balcony inspection cost?

Cost depends on the number of elevated elements, building size, inspection method (visual vs. invasive testing), access difficulty, and whether destructive testing is needed. Wood-framed structures with moisture damage typically cost more to inspect than newer construction. Properties requiring specialized access equipment or extensive moisture intrusion assessment also incur higher fees.

Are repair costs included in an SB 326 inspection quote?

No. Inspection fees cover only the assessment and written report. Repair costs are separate and depend on what the inspector finds. Some inspectors bundle inspection and repair proposals, but you should separate inspection-only pricing from repair estimates so you can compare bids fairly and evaluate repair recommendations independently.

Book inspection

Posted in BlogTagged cost of sb 326 balcony inspection, sb 326 balcony inspection checklist, sb 326 balcony inspection cost, sb 326 inspection report requirements, sb 326 inspection requirements

Balcony Waterproofing Inspection Checklist: 7 Steps

Posted on October 19, 2026 by Apex Balcony admin
Balcony Waterproofing Inspection Checklist: 7 Steps

Table of Contents

  • Why a Balcony Waterproofing Inspection Checklist Matters
    • What the Checklist Protects Against
  • Step 1: Start With the Balcony Inspection Report and Property Details
  • Step 2: Check the Waterproofing Membrane and Walking Surface
    • Membrane Types, Service Life, and Failure Indicators
    • How Each System Fails Mechanically
    • Repair-Versus-Replacement Decision Criteria
    • What to Record for Each Membrane Finding
  • Step 3: Spot Common Balcony Waterproofing Problems
  • Step 4: Identify Balcony Leak Signs and Test for Moisture
    • Reading the Leak Signs in Order of Reliability
    • Moisture Detection Methods and How to Interpret Them
    • Controlled Water Testing: When and How
    • Photo Documentation and Severity-Based Prioritization
  • Step 5: Inspect Sealants, Flashing, and the Balcony-Frame Joint
  • Step 6: Perform a Balcony Drainage Inspection
  • Step 7: Check Structural Elements, Railings, and Stairs
  • Frequently Asked Questions

Last Updated: October 18, 2026

Why a Balcony Waterproofing Inspection Checklist Matters

A balcony waterproofing inspection checklist is a structured set of checks covering the waterproofing membrane, sealant joints, flashing, drainage, and structural elements of an elevated balcony in a fixed order. We have walked hundreds of building owners through this process, and the sequence matters as much as the checks themselves. A missed membrane breach does not stay a small leak for long.

What the Checklist Protects Against

Water intrusion is the quiet failure mode on any elevated balcony. Water finds a path through a failed sealant joint, sits under the deck surface, and reaches the framing before anyone sees a drip inside. By then, wood decay and corrosion are already underway. The checklist protects against three outcomes: structural damage that spreads, safety hazards for residents, and compliance problems for owners who need documented inspection records.

Watch Out
The most expensive mistake is treating a hairline crack at the balcony-frame joint as cosmetic. That joint is the most common entry point for water, and a failed seal there can rot framing long before a stain appears on the ceiling below.

Step 1: Start With the Balcony Inspection Report and Property Details

Begin every balcony waterproofing inspection by confirming the property address, the number of exterior elevated elements, and any prior inspection report on file. The report tells you what failed last time and what was repaired, saving you from re-diagnosing the same defect.

Gather these before you step outside:

  • Property address and building age
  • Count of balconies, decks, walkways, and stair landings
  • Previous inspection findings and repair records

A prior report is not a substitute for a fresh look. Materials age between cycles, and a joint that passed two years ago may be separating now.

Step 2: Check the Waterproofing Membrane and Walking Surface

The membrane keeps water out, so inspect the walking surface first for cracks, blisters, and separation at edges. Walk the full deck and check where it meets walls, railings, and drains, any gap between membrane and substrate is a water path.

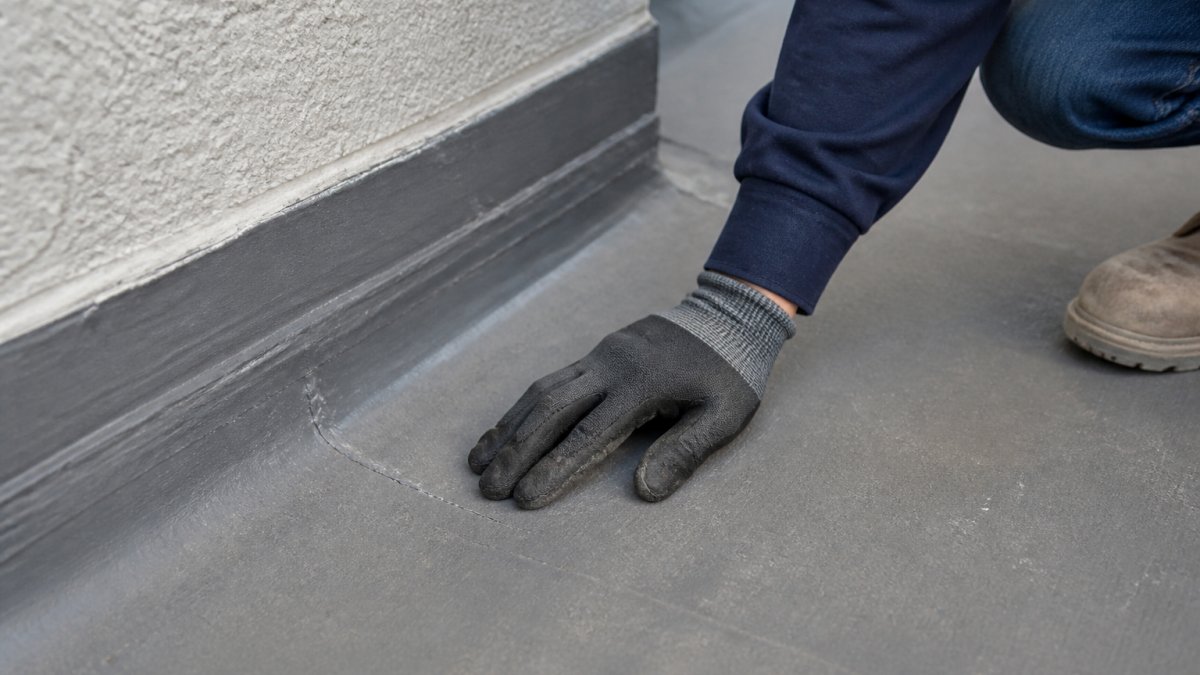
Close-up of an inspector in work gloves running a hand along a balcony deck surface near a wall joint, with visible sealant lines and a small crack in the membrane

Membrane Types, Service Life, and Failure Indicators

Most balconies use one of three systems, and each fails in a signature way. Knowing the system on your deck tells you where to look first.

Membrane TypeTypical Service LifeFailure SignatureWhat to Check
Fluid-applied coating (polyurethane or acrylic)5-10 years before recoating; longer with a wear surfaceBlistering, thin spots at high-traffic paths, hairline cracks, chalkingWet-film thickness at edges, coating termination at walls and drains, pinholes over fasteners
Sheet membrane (PVC, TPO, or modified bitumen)10-20 yearsLifted or curled seams, bubbling from trapped moisture, punctures at furniture and planter contact pointsSeam laps (minimum 2-inch overlap on most systems), perimeter terminations, terminations under thresholds
Cementitious coating5-10 yearsCrazing, chalking, surface erosion, cracks that widen with thermal cyclingCoating loss at drains and scuppers, crack width, adhesion at the deck-to-wall transition

Service life varies with sun exposure, foot traffic, and installation quality, so use the manufacturer’s stated life as a starting point and let visible condition drive the call. A 12-year-old sheet system may still have years left; a 6-year-old fluid-applied coating with widespread blistering may already be at end of life.

How Each System Fails Mechanically

Fluid-applied coatings fail from the top down: UV breaks down the polymer chains, foot traffic abrades high-traffic paths, and the coating thins until pinholes open.

Sheet membranes fail at seams and terminations first: adhesive-backed seams lift when the substrate moves or water gets behind the lap, and once a seam opens, water wicks under the sheet and the membrane bubbles.

Cementitious coatings fail from thermal movement and coating loss at drains.

Repair-Versus-Replacement Decision Criteria

Use these thresholds to decide what a finding requires:

  • Reseal only: isolated sealant failures at joints and penetrations, with the membrane itself intact and no moisture detected in the substrate. This is a maintenance item, not a membrane repair.
  • Localized repair: a single blister, puncture, or seam lift under roughly 1 square foot, with dry substrate confirmed by moisture meter. Patch with the same membrane system, a mismatched patch is a future failure point.
  • Full system replacement: widespread blistering, multiple seam failures across the deck, coating worn through to substrate in traffic paths, or any moisture reading that indicates saturated framing. Patching a membrane at end of life just moves the leak.
Watch Out
Do not apply a new coating over a failed membrane to “buy a year.” Trapped moisture under a new coating will blister it within one season, and you will have paid for the coating twice. Confirm the substrate is dry before any recoating.

What to Record for Each Membrane Finding

For every defect, note the location (measured from a fixed reference such as the door threshold), membrane type, defect type, approximate size, and whether moisture was detected. That record lets a contractor price the repair without a second site visit and protects you if a defect is later disputed.

Step 3: Spot Common Balcony Waterproofing Problems

Balcony waterproofing problems show up in predictable places. Look for cracks, gaps, and separation at the balcony-frame joint, then check the deck surface for ponding marks and staining.

The short list of repeat offenders:

  • Cracks and gaps in the deck coating
  • Separation where the deck meets the wall
  • Ponding water and dark staining near drains

Take a photo of every defect with a tape measure or coin in frame for scale. When you prioritize repairs later, a photo with scale settles arguments about whether a crack is cosmetic or structural far faster than memory does.

Step 4: Identify Balcony Leak Signs and Test for Moisture

Balcony leak signs include staining on the ceiling below, efflorescence on masonry, and musty odors in the units under the deck. Confirm suspected moisture with a meter rather than waiting for a visible drip, by the time a stain appears inside, the framing has usually been wet for months.

Reading the Leak Signs in Order of Reliability

Not all leak signs are equally trustworthy. Rank them before you act:

  1. Active drip or standing water below the deck, definitive. The path is open now.
  2. Moisture meter reading above the dry baseline, strong evidence of concealed moisture, even without a visible stain.
  3. Efflorescence on masonry or concrete below, mineral deposits left by water that has evaporated. Indicates a recurring path, not necessarily an active one.
  4. Staining or paint peeling on the ceiling below, indicates past or current moisture; timing is uncertain.
  5. Musty odor in the unit below, suggests long-term moisture but does not localize it.

Moisture Detection Methods and How to Interpret Them

A pin-type moisture meter reads electrical resistance between two probes; a pinless meter reads capacitance through the surface. Both are useful but answer different questions.

  • Pin-type: best for wood framing and drywall below the deck. Drive the pins into the suspect area and compare against a reading from a known-dry area of the same material. A reading that is more than a few percentage points above the dry baseline warrants investigation.
  • Pinless: best for scanning large areas of membrane and substrate without leaving holes. Use it to map the extent of a suspected wet zone, then confirm with a pin-type meter.

Take a dry baseline reading on the same material in a known-dry location before interpreting any suspect reading, without a baseline, a meter number means nothing. A suspect reading within a few points of baseline is noise; one well above baseline in the same material is a real signal.

Book inspection →

Controlled Water Testing: When and How

A controlled water test isolates the entry point when the leak path is unclear, appropriate when you suspect a leak but cannot see the breach and the area below can be observed during the test.

Procedure:

  1. Plug or cap the drain so water does not leave the deck.
  2. Apply a shallow film of water, no more than about 1 inch, to a small, bounded area, starting at the highest suspect point.
  3. Observe the area below for 30-60 minutes. If moisture appears, you have found an active path.
  4. If no moisture appears, expand the test area incrementally toward the next suspect zone.
  5. Drain and dry the test area completely when finished.

Safety and damage limits:

  • Never test more than a small, bounded area at a time. A full-deck flood test can drive water deep into framing and turn a small leak into a structural problem.
  • Do not test if the membrane is already known to be breached in the test area, you will only add water to the substrate.
  • Do not test during freezing conditions or when rain is forecast within 24 hours.
Watch Out
A water test is a diagnostic tool, not a repair. If the test confirms a leak, dry the area thoroughly and schedule the repair before the next rain event. Leaving a tested area wet defeats the purpose.

Photo Documentation and Severity-Based Prioritization

Record every finding, visual or meter-confirmed, in a consistent format so it can be prioritized and tracked. Capture:

  • Location: measured from a fixed reference (door threshold, drain center, railing post).
  • Symptom: what you saw or measured (stain, blister, meter reading, drip).
  • Severity: use a simple three-tier scale, monitor (cosmetic, no moisture), repair (localized defect, dry substrate), urgent (active leak, saturated substrate, or structural movement).

Pair each photo with the location note so a contractor can find the defect without a second site visit.

Keep a simple log, one row per finding, with the four fields above. When you hand it to a contractor, you get a priced scope of work instead of an hourly diagnostic visit. When you hand it to an insurer or a buyer, you have a documented inspection record.

Step 5: Inspect Sealants, Flashing, and the Balcony-Frame Joint

Sealant and flashing fail before the membrane does, so check every joint and penetration. Run a finger or tool along the sealant at the balcony-frame joint and look for cracking, pulling away, or loss of adhesion.

Flashing should sit tight against the wall and shed water outward. Lifted flashing, missing fasteners, or gaps at the top edge are all water entry points.

Step 6: Perform a Balcony Drainage Inspection

A balcony drainage inspection confirms water leaves the deck quickly and completely. Check that drains are clear, the deck slopes toward the drain, and no standing water remains after rain.

Look for:

  • Clogged or partially blocked drains
  • Flat or back-sloped areas where water pools
  • Debris trapped at scuppers and strainers

Standing water is a slow-motion failure. Even a shallow pool keeps the membrane saturated and accelerates sealant breakdown at the perimeter.

Step 7: Check Structural Elements, Railings, and Stairs

Finish with the structure and safety elements: framing, railings, and stairs. Check railings and connections for rust, movement, or looseness, and test guardrail height and stability by hand.

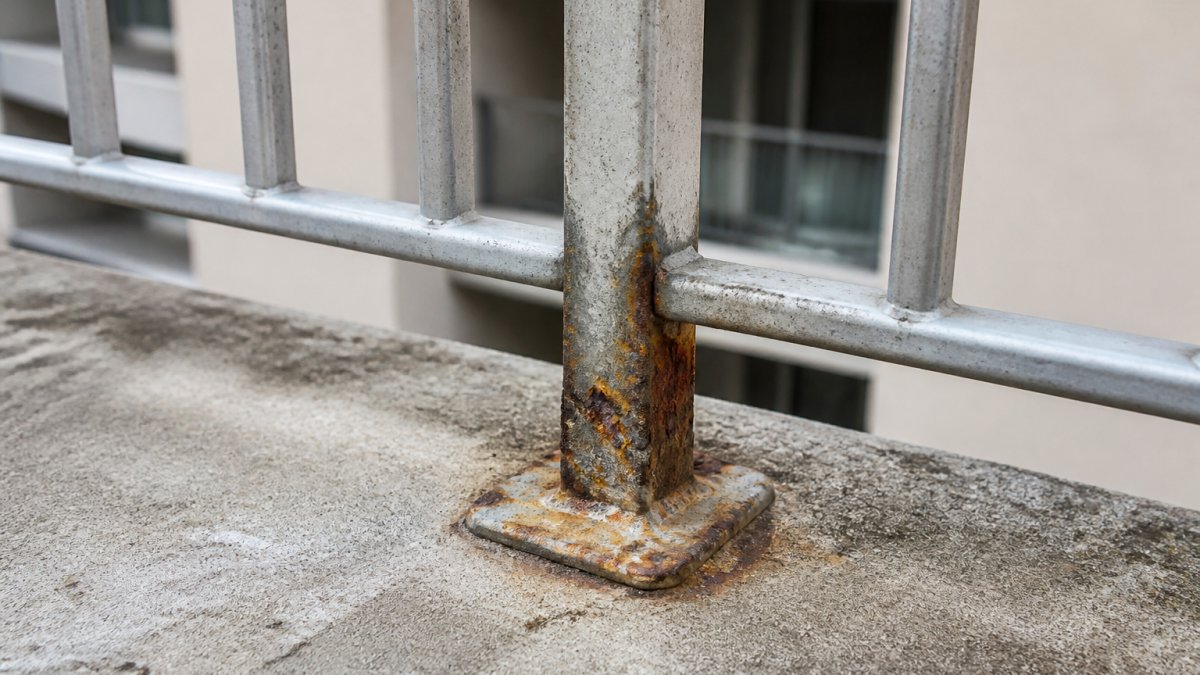
Inspect stairs for loose treads, worn nosings, and movement at stringers and landings. Corrosion on fasteners and metal connectors is a structural warning, not cosmetic. If you find movement, soft framing, or heavy corrosion, stop and bring in a licensed inspector, a documented professional assessment protects you if a defect is later challenged.

The checklist works best in order: report and property details first, then membrane, defects, moisture, sealant and flashing, drainage, and structure last. Document each finding with a photo and a severity rating so repairs can be prioritized and tracked.

Frequently Asked Questions

What does a balcony inspection consist of?

A balcony inspection covers the waterproofing membrane, walking surface, sealant joints, flashing, drainage and slope, structural framing, and railings. The inspector documents cracks, gaps, standing water, corrosion, and wood decay, then records findings with photos and severity ratings. For buildings covered by SB 326 or SB 721, the inspection must be performed by a qualified professional and the results compiled into a formal balcony inspection report that identifies whether repairs or further testing are needed.

What are the signs of a failed balcony waterproofing membrane?

Look for bubbling, blistering, or delamination of the deck surface, cracks that run through the coating, dark stains near the balcony-frame joint, and soft or spongy spots underfoot. Water that beads and pools instead of draining, or rust streaks on the framing below, also point to a failed membrane. Any of these balcony leak signs means the waterproofing system is no longer protecting the structure, and a closer moisture test or professional assessment is the next step.

How often should a balcony be inspected for water damage?

A visual walk-through once or twice a year, ideally before and after the rainy season, catches most early balcony waterproofing problems. Full professional inspections are typically done every few years, and SB 326 requires periodic inspections of exterior elevated elements on covered buildings. Any time you see standing water, cracked sealant, or stains after a storm, treat it as an inspection trigger rather than waiting for the next scheduled visit.

Can a balcony leak cause structural damage?

Yes. Water that gets past the membrane or sealant reaches the framing, fasteners, and sheathing, where it causes corrosion, dry rot, and wood decay. Because the damage happens out of sight, it often goes unnoticed until the balcony feels soft or a railing connection loosens. The 2015 Berkeley balcony collapse and the 2021 Malibu collapse both show how hidden water damage can turn into a safety hazard, which is why a regular balcony waterproofing inspection checklist matters.

What should be included in a balcony inspection report?

A complete balcony inspection report should list the property address, each exterior elevated element inspected, and the condition of the waterproofing membrane, sealants, flashing, drainage, railings, and structural framing. It should include dated photos of every defect, a severity rating so owners can prioritize repairs, and a clear recommendation for repair, further testing, or replacement. For SB 326 and SB 721 compliance, the report also needs the inspector’s qualifications and sign-off.


Waterproofing failures rarely announce themselves, and the cost of guessing wrong lands on owners and boards. Apex Balcony provides licensed inspectors with decades of combined construction and design experience, specialized expertise in SB 326 and SB 721 compliance, and comprehensive inspection of all elevated exterior elements including balconies, decks, and stairways. Book an inspection with Apex Balcony and get a clear, documented path from findings to repairs.

Book inspection

Posted in BlogTagged balcony drainage inspection, balcony inspection report, balcony leak signs, balcony waterproofing inspection, balcony waterproofing inspection checklist, balcony waterproofing problems

Legal Steps for Forcing HOA Balcony Repairs in 2026

Posted on October 18, 2026 by Apex Balcony admin
Legal Steps for Forcing HOA Balcony Repairs in 2026

Table of Contents

  • When an HOA Delays Balcony Repairs, the Clock Becomes a Safety Risk
  • HOA Responsibility for Balcony Repairs: Who Actually Owns the Duty
    • Common Areas vs. Exclusive-Use Common Areas
  • SB 326 Balcony Inspection Requirements and What They Trigger
    • Inspection and Repair Deadlines Under SB 326 and SB 721
  • Step 1: Build Your Evidence File Before You Send Anything
  • Step 2: Send a Formal HOA Repair Request Letter Template
  • Step 3: Use the HOA Dispute Resolution Process Before Escalating
    • What the Internal Process Actually Requires
    • Documents That Trigger the Process
    • When the Internal Process Is Not Required
  • Step 4: Escalate to Regulators, Mediation, and Legal Remedies
    • Mediation and Arbitration
    • Regulatory Complaints
    • Civil Claims
    • The Risks of Self-Help
    • Do Not Withhold Assessments
    • Deadlines and Practical Timing
  • Frequently Asked Questions

Last Updated: October 17, 2026

When an HOA Delays Balcony Repairs, the Clock Becomes a Safety Risk

A delayed balcony repair is not a paperwork problem. It is a structural safety problem with a legal deadline attached.

That gap has real consequences. The 2015 Berkeley and 2021 Malibu balcony collapses both turned deferred maintenance into fatalities and pushed lawmakers to tighten inspection rules.

Below, we break down who owns the repair duty, what SB 326 and SB 721 require, and how to build a record that holds up before a mediator, regulator, or judge.

HOA Responsibility for Balcony Repairs: Who Actually Owns the Duty

The HOA usually owns the repair duty for structural elements, but not always. Responsibility depends on what the governing documents say, not on who uses the balcony.

That is the part most owners get wrong. A balcony attached to your unit can still be a common area. Under California law, an exclusive-use common area is reserved for one owner’s use, but the association still owns and maintains it.

Common Areas vs. Exclusive-Use Common Areas

  • Common area: the association owns it, maintains it, and funds repairs through reserves or assessments.
  • Exclusive-use common area: one owner uses it, but the association typically keeps structural and waterproofing duties.
  • Owner-maintained element: some CC&Rs shift limited duties to the owner, usually cosmetic only, rarely structural.

Read three documents before you write a single letter: the declaration, the CC&Rs, and the maintenance responsibility matrix if one exists. If they conflict, the declaration usually controls.

Watch Out
Boards often misread “exclusive use” as “owner pays.” That misreading is the most common cause of a stalled balcony repair, and it can leave the association holding liability for a failure it thought was someone else’s problem.

SB 326 Balcony Inspection Requirements and What They Trigger

SB 326 requires condominium associations to have elevated exterior elements inspected by a licensed structural engineer or architect. It covers balconies, decks, stairways, and walkways, applies to associations rather than individual owners, and sets a compliance window rather than a single fixed date.

Legal Requirements for Balcony Inspections

HOA Legal Issues

SB 721 is the companion law for multifamily rental buildings with three or more units, requiring similar inspections of balconies, decks, and other elevated elements that rely on wood or wood-based materials for structural support.

Inspection and Repair Deadlines Under SB 326 and SB 721

  • Inspection: must be completed within the statutory compliance window for your building type.
  • Report: the inspector issues a written report flagging unsafe conditions.
  • Immediate threat: conditions posing an immediate risk must be addressed right away, not at the next board meeting.

Exact dates and dollar thresholds change, so confirm current requirements with the California Legislature’s SB 326 text and the SB 721 statute before you rely on a deadline. We tell every board the same thing: get the inspection report in writing, then calendar the repair deadline the day you receive it.

Step 1: Build Your Evidence File Before You Send Anything

An evidence file turns a complaint into a case. Build it before your first letter, because a board responds differently to a documented file than to an angry email.

Here is the checklist recommended to owners and boards:

  • Copy of the declaration, CC&Rs, and any maintenance responsibility matrix
  • The current SB 326 or SB 721 inspection report, if one exists
  • Dated photos of cracking, rust, soft wood, sagging, or water staining
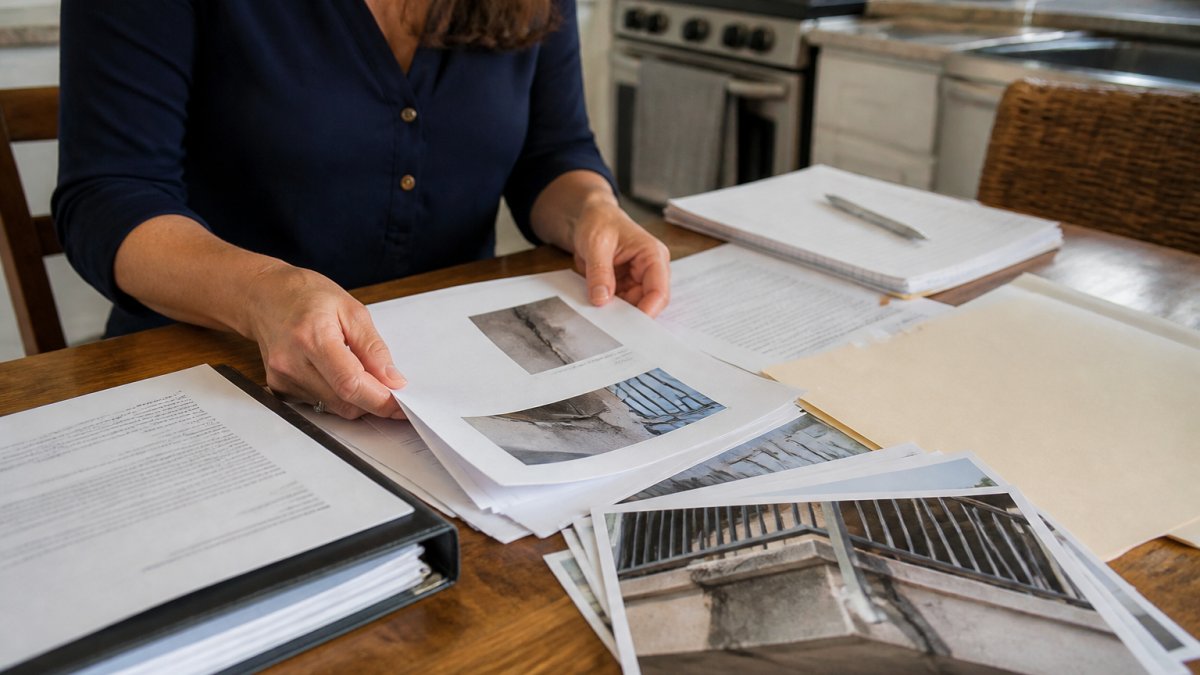
Close-up of a homeowner's hands organizing inspection reports, dated photos of a cracked balcony railing, and correspondence letters on a kitchen table
Close-up of a homeowner’s hands organizing inspection reports, dated photos of a cracked balcony railing, and correspondence letters on a kitchen table

Keep everything in one folder, digital and printed. If the dispute escalates, this file becomes your record of notice, and notice starts the legal clock.

Pro Tip
Send your first report by email and by certified mail. A board can claim it never received a verbal complaint. It cannot as easily claim it missed a certified letter with a return receipt.

Step 2: Send a Formal HOA Repair Request Letter Template

A formal request letter creates a paper trail and shifts the burden onto the board. Send it to the board of directors, not the property manager alone, and ask for a written response within a set window.

Use this template:

Subject: Formal Request for Balcony Repair and Inspection Follow-Up

Dear Board of Directors of [Association Name],

I am the owner of Unit [Number] at [Address]. I am writing to formally request that the association address [describe the condition: cracked railing, water intrusion, soft decking, etc.] on the [balcony/deck/stairway] serving my unit.

This condition was first reported on [date]. It appears to involve [structural element / waterproofing / common area component], which the governing documents assign to the association under [cite the relevant CC&R section].

Please confirm in writing within [10/15/30] days: (1) whether the association has inspected the condition, (2) what repairs are planned, and (3) the timeline for completion.

I am requesting this in writing to ensure the association has clear notice of a potential safety issue. Please respond to [email] and [mailing address].

Book inspection →

Sincerely,
[Name], Owner, Unit [Number]

Attach your evidence file. Keep a copy. Log the date you sent it.

Step 3: Use the HOA Dispute Resolution Process Before Escalating

Most associations must offer an internal dispute resolution process before an owner files a claim, and using it correctly is the difference between a paper trail that helps you and one that hurts you. A documented attempt at internal resolution strengthens your position and shows a court or regulator you tried to resolve the matter in good faith.

The usual sequence looks like this:

  1. Written request to the board, which you have already sent.
  2. Board response or meeting: ask in writing to be placed on the agenda and attend. Under most declarations, owners have a right to attend open board meetings and to speak on items affecting their unit.
  3. Internal ADR or mediation: many associations must offer this before litigation, and some states require a pre-litigation meet-and-confer or mediation step before an owner can file suit over a governing-document dispute.
  4. Written outcome: get the result in writing, even if the answer is “no action.”

What the Internal Process Actually Requires

The mechanics vary by state and declaration, but the common pattern is two-stage. First, the owner submits a written request identifying the defect, the governing-document provision at issue, and the remedy sought.

Do not skip the internal step because you think it is futile. Courts and regulators routinely ask whether the owner gave the association a genuine opportunity to cure.

Documents That Trigger the Process

  • Written request letter with a specific deadline and a request for a written response.
  • Request to be placed on the board agenda, sent to the board secretary, not just the property manager.
  • Request for the association’s dispute resolution policy, which many declarations require the board to provide on request.

If the board refuses to schedule the item, send a follow-up asking for a written denial. A written denial is more useful than silence, because it documents the association’s position and starts the clock on any statutory pre-litigation requirement.

Key Takeaway
Silence from a board is not a dead end. It is a record. Every unanswered letter and skipped meeting strengthens the case that the association had notice and failed to act.

When the Internal Process Is Not Required

Some disputes fall outside the internal process, and some associations are exempt. Emergency conditions posing an immediate safety threat usually do not require waiting for a meeting before demanding interim safety measures. Likewise, a claim that the association violated a statutory inspection or repair mandate may proceed on a different track than a pure governing-document dispute. Confirm your state’s framework with a local attorney before deciding the internal process does not apply.

Step 4: Escalate to Regulators, Mediation, and Legal Remedies

When internal steps fail, escalation options depend on your state and documents. The remedies below are the ones most commonly available to owners, but availability, deadlines, and procedural requirements vary widely, so treat this as a map rather than a menu.

Mediation and Arbitration

Mediation is usually the lowest-cost, fastest path, and many declarations and state statutes require it before litigation. Arbitration may be mandatory if the declaration contains a binding arbitration clause, and courts generally enforce those clauses for governing-document disputes. Before agreeing to either, ask for the association’s dispute resolution policy in writing and confirm who pays.

Regulatory Complaints

A regulatory complaint is appropriate where a statutory inspection or repair duty is being ignored. In states with balcony inspection mandates, the agency overseeing the statute may accept complaints about missed inspections or unrepaired hazards. A complaint creates a public record and can prompt an agency inquiry, but it does not usually order a repair on its own. Pair it with a written demand to the board so the association cannot claim it lacked notice.

Civil Claims

A civil claim for breach of the governing documents, breach of fiduciary duty, or failure to maintain can seek an order requiring the association to repair, plus damages in some cases. The remedy most owners want is an injunction compelling the association to act. Injunctions can be sought on an emergency basis where there is an immediate threat to safety, but courts expect documented notice and a clear record of the defect.

The Risks of Self-Help

Know the risks before you touch anything. Repairing a common area yourself can expose you to liability, violate the governing documents, and complicate cost recovery. Courts generally disfavor owners who act unilaterally on association property, and an owner who arranges unauthorized work may lose the ability to recover the cost. If there is an immediate threat, document it and demand interim safety steps such as blocking access, rather than commissioning the repair yourself.

Do Not Withhold Assessments

Withholding assessments is one of the most common owner responses to a stalled repair, and one of the most damaging. Most declarations and state statutes allow the association to impose late fees, interest, and collection costs, and to record a lien. In many states, an owner who withholds assessments loses the ability to argue the repair dispute in court until the assessments are paid.

Deadlines and Practical Timing

  • Emergency conditions: demand interim safety measures immediately and document the demand.
  • Statutory inspection or repair deadlines: calendar the date the report was issued and the deadline the statute or report specifies.
  • Pre-litigation mediation or meet-and-confer: complete it within the window your state or declaration requires.

State rules differ widely. Some states impose specific inspection mandates; others rely on general negligence and contract law. For a broader read on how associations handle structural duties, the Community Associations Institute’s governance resources are a useful starting point.

If your board needs a defensible inspection report to move a stalled repair forward, California’s Department of Real Estate publishes guidance on association obligations that pairs well with a licensed engineer’s findings.

Frequently Asked Questions

Is an HOA responsible for repairing a condo balcony?

It depends on how the governing documents classify the balcony. Most CC&Rs treat balconies as exclusive-use common areas, which means the association handles structural repairs while the owner handles routine cleaning and surface upkeep. Read your CC&Rs and the maintenance matrix before sending any demand. If the balcony is structural and serves more than one unit, the HOA almost always carries the repair duty, and delaying it exposes the board to liability for injuries or property damage.

What should I do if my HOA ignores a balcony safety concern?

Document the condition with dated photos and any inspection report, then send a written notice to the board by certified mail. If the board does not respond within the deadline stated in your governing documents, request a hearing and file a complaint with your state’s consumer protection or real estate regulator. Forcing HOA balcony repairs often requires a paper trail showing the board knew about the hazard and failed to act.

Can an owner request balcony inspection records under SB 326?

Yes. SB 326 requires associations to complete inspections of exterior elevated elements by January 1, 2025, and repeat them every nine years. Members can request copies of the inspection report and repair plans. If the board refuses, cite your state’s member inspection rights and put the request in writing. Missing records are themselves a compliance problem, so a written request often prompts action faster than a phone call.

How can a homeowner escalate a dispute over balcony repairs?

Follow a staged path: written notice, board hearing, alternative dispute resolution, then a regulatory complaint or civil suit. Most governing documents require mediation before litigation, and courts expect a good-faith attempt. Keep every letter, email, and meeting minute. If the balcony poses an immediate threat, document the hazard and notify the board in writing the same day, because urgency changes both the timeline and the legal exposure.


A stalled balcony repair is a liability that grows every month it sits. If your board is stuck, the fastest way to break the logjam is a clear inspection report and a documented repair plan. Apex Balcony provides licensed inspectors with decades of construction and design experience, specialized SB 326 and SB 721 compliance expertise, and comprehensive inspections of balconies, decks, and stairways. Book an inspection with Apex Balcony and give your board the evidence it needs to act.

Book inspection

Posted in BlogTagged forcing hoa balcony repairs, hoa dispute resolution process, hoa repair request letter template, hoa responsibility for balcony repairs, legal steps for forcing hoa balcony repairs

How to Repair Leaking Elevated Deck Membranes

Posted on October 17, 2026 by Apex Balcony admin
How to Repair Leaking Elevated Deck Membranes

Table of Contents

  • Why Elevated Deck Membrane Leaks Require Immediate Attention
  • How to Diagnose Deck Membrane Leak Detection
    • Identifying the leak source and location
    • Inspecting for cracks, punctures, and failed seams
    • Checking flashing and wall transitions
  • Preparing the Deck Surface for Repair
    • Clearing debris and restoring drainage
    • Drying and cleaning the damaged area
  • Applying a Vinyl Deck Membrane Patch
    • Selecting compatible patch materials and tape
    • Step-by-step patching technique
  • Sealing Joints, Penetrations, and Vulnerable Details
    • Sealing around deck drains and railing posts
    • Protecting edges and transitions
  • When to Pursue Deck Waterproofing Membrane Replacement
    • Assessing repair limits and replacement criteria
    • Identifying structural and concealed damage
  • Scheduling a Balcony Inspection for Water Damage
  • Frequently Asked Questions

Last Updated: October 16, 2026

Why Elevated Deck Membrane Leaks Require Immediate Attention

Water damage in elevated structures spreads fast. A small leak today becomes structural failure tomorrow.

Elevated deck membranes protect everything beneath them. When they fail, water intrusion doesn’t just stain ceilings. It rots support beams, triggers mold growth, and creates liability for property owners.

This guide walks you through diagnosing and repairing leaking elevated deck membranes before damage becomes catastrophic.

How to Diagnose Deck Membrane Leak Detection

Finding the leak source is the critical first step. Water travels. It enters at one point but pools somewhere else entirely. You must trace it back to its origin.

Professional inspector examining a cracked and deteriorating elevated deck membrane with visible water stains, pointing to failed seams and punctures using a moisture meter in bright natural light

Identifying the leak source and location

Start from the wet area and work backward. Mark where water drips or pools. This is rarely the leak source, it’s where water exits after traveling through the membrane system.

Check for these common entry points:

  • Cracks in the waterproof coating or membrane surface
  • Punctures from debris, foot traffic, or installation damage
  • Failed seams where membrane sheets overlap
  • Gaps around deck penetrations (posts, railings, mechanical vents)

Use a moisture meter to identify wet areas in the membrane and substrate. Soft spots indicate water saturation. Press firmly on suspect areas, compromised membrane feels spongy or yields under pressure.

Inspecting for cracks, punctures, and failed seams

Examine the entire membrane surface systematically. Don’t assume damage is limited to the wet zone.

Look for these failure patterns:

  • Cracks: Linear splits in liquid-applied membranes or vinyl decking, often radiating from stress points
  • Punctures: Holes or tears from sharp objects, typically surrounded by delamination
  • Delamination: Separation between membrane layers or between membrane and substrate
  • Failed seams: Lifted or separated edges where two membrane sheets meet
  • Blistering: Bubbles indicating moisture trapped beneath the membrane surface

Run your hand across suspect areas. Smooth membrane feels uniform. Failed areas feel rough, raised, or soft. Mark all damage with chalk or tape for reference during repair planning.

Checking flashing and wall transitions

Flashing failures cause most elevated deck leaks. Water runs down walls and penetrates gaps between the membrane and vertical surfaces.

Inspect these transition details:

  • Wall base flashing: Where the membrane meets building walls, check for gaps, separation, or deterioration
  • Door thresholds: Especially common failure points where foot traffic stresses the seal
  • Railing post bases: Posts penetrate the membrane; water pools at these connections
  • Mechanical penetrations: HVAC vents, electrical conduits, and plumbing stacks create weak points
  • Deck edges: Perimeter edges where membrane terminates often show lifting or separation

Water typically enters through flashing gaps rather than through the membrane itself. Failed flashing allows water to run beneath the membrane surface where it collects and causes hidden damage.

Watch Out
Do not assume a dry membrane means no leak. Water can travel 10+ feet horizontally beneath the surface before pooling. Inspect the full extent of the deck, not just the wet area.

Preparing the Deck Surface for Repair

Surface preparation determines repair success. A patch applied to dirty, wet, or contaminated membrane will fail within months.

Clearing debris and restoring drainage

Remove all debris from the deck surface and drainage paths. Leaves, dirt, and standing water prevent the membrane from drying.

Clear these areas:

  • The entire repair zone (extend 12 inches beyond visible damage in all directions)
  • All deck drains and drainage channels
  • Gaps between the membrane and flashing
  • Around posts and penetrations where water pools

Use a broom or soft brush, avoid pressure washers that can damage the membrane further. Pressure washing can delaminate weakened membrane and force water deeper into the substrate.

Restore proper drainage by ensuring water flows toward drains, not toward walls or low spots. Slope the deck slightly if standing water is present.

Pro Tip
After clearing debris, wait 24-48 hours before applying repairs. Trapped moisture beneath the membrane will cause patches to fail. Proper drying is non-negotiable.

Drying and cleaning the damaged area

Moisture is the enemy of membrane repairs. Patches won’t bond to wet surfaces. The repair area must be completely dry.

Use these drying methods:

  • Air circulation: Place fans to direct airflow across the repair zone for 24-48 hours
  • Dehumidifiers: In humid climates, run dehumidifiers to remove moisture from the air
  • Heat lamps: Low-wattage heat lamps accelerate drying without damaging the membrane (keep at least 3 feet away)
  • Calcium chloride: Place moisture-absorbing products around the repair area to pull humidity

Test for dryness by placing a plastic sheet over the area for 2 hours. If condensation forms underneath, the surface is still too wet.

Clean the repair area thoroughly. Use a soft brush or cloth with mild detergent to remove algae, mold, or dirt.

Applying a Vinyl Deck Membrane Patch

Patch repairs work for localized damage. Most elevated decks use vinyl or single-ply membranes that accept patches well when applied correctly.

Selecting compatible patch materials and tape

Material compatibility is critical. Vinyl patches bond to vinyl membranes. Liquid-applied patches bond to liquid-applied membranes. Mixing incompatible materials causes failure.

Identify your existing membrane type:

  • Vinyl decking: Smooth, flexible sheet material, typically gray or tan
  • Single-ply membrane: Rubber (EPDM) or modified bitumen sheets
  • Liquid-applied membrane: Coating that cured in place, typically gray or white
  • Flashing tape: Self-adhesive repair tape for seams and transitions

Select patch materials to match:

  • For vinyl: Use vinyl repair tape or vinyl membrane patches with compatible adhesive
  • For rubber/EPDM: Use rubber-compatible patches and sealant
  • For liquid-applied: Use compatible liquid sealant or membrane coating
  • For seams: Use flashing tape rated for the specific membrane type

Never mix materials. A vinyl patch on a rubber membrane will fail. Incompatible adhesives don’t bond properly.

Step-by-step patching technique

Proper technique ensures patches stay in place for years.

Step 1: Cut the patch [Time: 10 minutes]

Step 2: Prepare the patch surface [Time: 5 minutes]

Step 3: Apply adhesive [Time: 15 minutes]

Follow the patch manufacturer’s instructions for adhesive application.

Book inspection →

Step 4: Position and press the patch [Time: 10 minutes]

Carefully position the patch over the repair area.

Press for at least 5 minutes. Complete adhesion requires time.

Step 5: Seal patch edges [Time: 20 minutes]

Once the patch is set, seal all edges with compatible sealant.

Allow sealant to cure fully before exposing the repair to water.

Expected Result: A properly applied patch stops water intrusion at that location.

Key Takeaway
The most common patch failure occurs at edges. Sealing patch perimeters thoroughly is what separates a short-term fix from a durable repair.

Sealing Joints, Penetrations, and Vulnerable Details

Patches stop active leaks. Sealing vulnerable details prevents future leaks from starting.

Sealing around deck drains and railing posts

Drains and posts penetrate the membrane. Water pools around them. These areas fail first.

Seal deck drains:

  • Clean the drain opening and surrounding area thoroughly
  • Apply a flexible sealant around the drain perimeter, at least 4 inches wide
  • Use a sealant rated for wet conditions (polyurethane or silicone, not acrylic)
  • Ensure water still flows freely into the drain, don’t block it

Seal railing post bases:

  • Posts create stress points where the membrane flexes
  • Apply sealant in a wide band around each post base (minimum 6 inches)
  • Extend sealant up the post flashing at least 2 inches
  • Check annually for sealant cracking and reapply as needed

Protecting edges and transitions

Deck edges and wall transitions are constant failure points. Water runs down walls and infiltrates gaps in the membrane system.

Protect these areas:

  • Perimeter edges: Apply edge flashing and sealant to prevent water from running under the membrane
  • Wall transitions: Ensure membrane extends at least 6 inches up the wall or connects to wall flashing
  • Door thresholds: Install threshold flashing that directs water away from the membrane penetration
  • Mechanical vents: Seal around all penetrations with compatible flashing and sealant

Water always flows downward and sideways. Your sealing strategy must anticipate this flow and direct it safely away from the membrane system.

When to Pursue Deck Waterproofing Membrane Replacement

Patches and sealant work for limited damage. Some situations demand full membrane replacement instead of repair.

Assessing repair limits and replacement criteria

Repair is appropriate when:

  • Damage is localized to one or two areas
  • The membrane surface is generally intact elsewhere
  • Damage is less than 10% of the total membrane area
  • The existing membrane is less than 15 years old

Replace the membrane when:

  • Damage is widespread across multiple areas
  • The membrane shows extensive cracking, blistering, or delamination
  • Damage exceeds 10% of the total membrane area
  • The membrane is more than 15-20 years old
  • Repair costs approach 50% of replacement costs

A membrane reaching the end of its service life will fail again soon after repair. Patching an aging membrane is temporary. Plan for replacement if the membrane is showing its age across multiple areas.

Identifying structural and concealed damage

Before committing to patch repairs, assess whether hidden damage exists beneath the membrane.

Signs of concealed damage:

  • Soft or spongy areas in the deck substrate
  • Discoloration or staining on ceilings below the deck
  • Mold or mildew growth in the space below
  • Rust stains on metal framing visible from below
  • Visible rot or deterioration in wood framing

If concealed damage is suspected, remove a small section of membrane to inspect the substrate. A small investigative opening reveals the extent of moisture penetration. This determines whether patching is sufficient or replacement is necessary.

Watch Out
Extensive concealed damage may require structural repair in addition to membrane replacement. This is beyond DIY scope and requires professional assessment.

Scheduling a Balcony Inspection for Water Damage

Professional inspection identifies problems your visual assessment might miss.

Our inspection process covers:

  • Membrane condition and remaining service life
  • Flashing integrity and transition details
  • Drainage system function and blockages
  • Structural impact of water intrusion
  • Hidden damage beneath the membrane surface

For California properties, professional inspection ensures compliance with SB 326 and SB 721 balcony safety requirements.

Early detection of water damage prevents expensive replacement and protects residents from safety hazards.


Leaking elevated deck membranes demand prompt action. Water intrusion accelerates structural deterioration and creates serious liability for property owners. Small leaks become major problems when ignored.

Apex Balcony helps property managers and building owners protect their assets through professional inspection and guidance. Our licensed inspectors identify water damage early, assess repair versus replacement, and ensure your elevated decks meet current safety standards. California’s SB 326 and SB 721 balcony inspection requirements establish mandatory timelines for structural assessment.

Frequently Asked Questions

How do you find the source of a leak in an elevated deck membrane?

Start by looking for visible signs: cracks, punctures, soft areas, and standing water. Check the underside of the deck for water stains and drips. Inspect seams, flashing at walls and doors, and areas around penetrations like railing posts and drains. Use a hose to spray water systematically across the membrane while observing from below, or apply a dye to water to trace its path. Professional deck membrane leak detection involves moisture meters and thermal imaging to identify concealed damage.

Can you patch a leaking deck membrane, or does it need to be replaced?

Small, isolated leaks can be patched if the surrounding membrane is still sound. Use a vinyl deck membrane patch or self-adhesive flashing tape compatible with your membrane type. However, if the membrane shows widespread cracks, delamination, or multiple failed seams, full deck waterproofing membrane replacement is more cost-effective and reliable long-term. Patches are temporary solutions; replacement addresses the root cause and restores full protection.

What materials are used to repair a waterproof deck membrane?

Repair materials depend on your membrane type. For single-ply membranes, use compatible self-adhesive tape, liquid-applied sealant, or vinyl patches. For liquid rubber coatings, apply additional coats over cleaned and dried areas. Always verify material compatibility with your existing membrane, mixing incompatible products causes adhesion failure. Flashing tape works for seams and transitions. Primer may be required before applying sealants. Consult your membrane manufacturer’s specifications or hire a professional for guidance.

When should a leaking elevated deck membrane be inspected by a professional?

Schedule a professional balcony inspection for water damage immediately if you notice standing water, soft spots, water stains below the deck, or active dripping. Do not wait, water intrusion causes structural rot, mold, and liability risks. If repairs are uncertain or the leak persists after patching, professional assessment is essential. California property owners with three or more residential units should have annual inspections to meet SB 326 and SB 721 compliance requirements and catch damage early.

Book inspection

Posted in BlogTagged deck membrane leak detection, deck waterproofing membrane replacement, elevated deck membranes, how to repair leaking elevated deck membranes, vinyl deck membrane patch

How to Fix Galvanic Corrosion on Metal Railings

Posted on October 16, 2026 by Apex Balcony admin
How to Fix Galvanic Corrosion on Metal Railings

Table of Contents

  • How to Tell If Your Railing Has Galvanic Corrosion
    • Galvanic Corrosion Between Dissimilar Metals: The Core Problem
    • Identifying the Metals in Your Railing Assembly
    • Which Metal Pairings Are Most Prone to Attack
    • Rust vs. Galvanic Corrosion: Key Visual Differences
  • What You’ll Need Before You Start
  • Step 1: Assess Safety and Structural Damage
  • Step 2: How to Remove Rust from Metal Railings
  • Step 3: Stop the Corrosion Cell at Joints and Fasteners
    • Isolate the Dissimilar Metals
    • Replace Incompatible Fasteners
    • Prepare Galvanized and Aluminum Surfaces Correctly
    • Rebuild and Seal the Joint
    • When the Joint Is Beyond Repair
  • Step 4: How to Repaint an Iron Railing
  • Step 5: How to Prevent Railings from Rusting
  • When to Repair vs. Replace a Corroded Railing
  • Frequently Asked Questions

Last Updated: October 15, 2026

How to Tell If Your Railing Has Galvanic Corrosion

Galvanic corrosion on metal railings is the accelerated breakdown of one metal caused by electrical contact with a different, more noble metal in the presence of moisture. Left alone, it eats through joints and fasteners fast. At Apex Balcony, our licensed inspectors see it constantly on multi-unit properties.

The damage rarely starts on the open rail. It starts where two metals meet.

Galvanic Corrosion Between Dissimilar Metals: The Core Problem

Galvanic corrosion between dissimilar metals happens when two unlike metals touch in a wet environment. One acts as the anode and gives up metal.

That is why the worst damage sits at joints, base plates, and fasteners.

Three conditions have to line up at once for the cell to run:

  1. Two different metals in direct electrical contact.
  2. An electrolyte, water, condensation, or salt spray bridging the gap.
  3. A completed circuit, usually through the fasteners and the frame itself.

Break any one of the three and the corrosion stops. That is the entire logic behind the repair steps later in this guide.

Identifying the Metals in Your Railing Assembly

You cannot predict galvanic risk without knowing what you are looking at. Most railings are one of four metals.

  • Carbon steel, magnetic, dark gray, rusts orange-brown. Common in older welded guardrails and cheap fasteners.
  • Galvanized steel, carbon steel with a sacrificial zinc coating. Dull gray, sometimes spangled; a magnet sticks.
  • Aluminum, non-magnetic, light, silver-white. Forms a gray-white powder at contact points rather than orange rust.

A few field checks help sort them out:

  • Magnet test. A magnet sticks to carbon and galvanized steel, generally not to aluminum or 300-series stainless.
  • Color of the corrosion product. Orange-brown flaking points to steel; white or gray powder to aluminum or a consumed zinc coating; dark pitting to stainless.
  • Weight and feel. Aluminum feels light; steel feels dense.

Which Metal Pairings Are Most Prone to Attack

Once you know the metals, you can rank the risk: the wider the gap in the galvanic series, the faster the less noble one corrodes.

PairingRiskWhat Happens
Aluminum + stainless steelHighAluminum becomes the anode and pits or powders at the contact point
Aluminum + carbon steelHighSteel rusts and aluminum corrodes; both degrade
Galvanized steel + stainless steelModerate to highThe zinc coating is consumed faster than normal
Galvanized steel + bare carbon steelLowBoth are steel-family; the zinc still protects the joint
Stainless steel + stainless steelLowSame metal, no cell
Aluminum + aluminumLowSame metal, no cell

The pattern to remember: mixing across metal families, aluminum against steel or stainless, is where galvanic corrosion does its worst work. Keeping fasteners and connectors in the same family as the rail removes most of the risk.

Rust vs. Galvanic Corrosion: Key Visual Differences

Rust is the normal oxidation of iron or steel when it meets oxygen and water. It spreads evenly across the surface, showing orange-brown flaking on the whole rail.

Galvanic corrosion attacks one metal next to a different one, showing pitting, white or gray powder, and deep metal loss at the joint.

Here is how to tell them apart:

FeatureOrdinary RustGalvanic Corrosion
LocationEven, all overAt joints and fasteners
ColorOrange-brownWhite, gray, or dark pitting
PatternFlaking and scalingDeep localized pits
TriggerMoisture and oxygenTwo different metals plus moisture
Fastener conditionRusts with the railOne metal eaten, the other intact

A quick field test: if the rail is sound a few inches from a joint but the metal at the fastener is pitted, powdered, or eaten away, you are looking at galvanic corrosion, not ordinary rust.

What You’ll Need Before You Start

Gather your tools before you touch the railing, so bare metal is not left exposed.

Safety gear:

  • Safety glasses and work gloves
  • A respirator for paint and primer fumes

Cleaning and removal:

  • Stiff wire brush and sandpaper (medium and fine grit)
  • Scraper and a wire cup brush for a drill
  • Rags and a mild degreaser

Repair and finish:

  • Rust-inhibiting metal primer
  • Topcoat paint rated for outdoor metal
  • Stainless steel or nylon washers and fasteners
Watch Out
Never mix bare steel fasteners with aluminum or galvanized parts. That single shortcut is the most common cause of galvanic corrosion we find on railings. It restarts the corrosion cell the moment the job is done.

Step 1: Assess Safety and Structural Damage

Check safety first. Push and pull each post and rail section by hand. Look for wobble, cracks at welds, and rust eating into the base plate.

If a post moves, or a base plate is more than lightly pitted, stop. That is a structural problem, not a cosmetic one: a corroded base can fail under load, and a collapse on an elevated walkway is a life-safety event.

Step 2: How to Remove Rust from Metal Railings

Remove all loose rust before you prime, or the new coating will fail. Start with a wire brush on the corroded areas.

Gloved hands using a wire brush to remove rust and galvanic corrosion from a metal railing section.

Next, scrape away flaking coating, then sand the bare spots, medium grit first, then fine grit to smooth.

Wipe the surface clean with a rag and degreaser. The metal should be dry and dull, not shiny; oil left behind keeps the primer from sticking.

Book inspection →

  • Remove every trace of loose rust and old paint
  • Feather the edges where old coating meets bare metal
  • Clean and dry the surface fully before priming

Step 3: Stop the Corrosion Cell at Joints and Fasteners

Stopping the cell means breaking the metal-to-metal contact. This is the fix most guides leave out, and the one that actually solves the problem. Repainting over a live joint hides the damage for a season and lets it keep eating from the inside.

Isolate the Dissimilar Metals

The goal is a non-conductive barrier between the two metals so current cannot flow. Common isolating materials include:

  • Nylon or plastic washers between a fastener head and the metal it bears on.
  • Neoprene or EPDM gaskets between a base plate and the surface it sits on.
  • Plastic or nylon sleeves inside a bolt hole so the shank never touches the surrounding metal.

Any one of these breaks the circuit; using two together is cheap insurance at a joint that is hard to reach later.

Replace Incompatible Fasteners

Fasteners are the most common failure point because they are almost always a different metal than the rail. The rule:

  • Match the fastener family to the rail. Stainless rail, stainless fasteners. Aluminum rail, aluminum or stainless fasteners with isolation. Galvanized rail, galvanized fasteners.
  • Never put bare carbon steel fasteners into aluminum or galvanized rail. That single shortcut is the most common cause of galvanic corrosion we find on railings.
  • Use 300-series stainless for exposed outdoor fasteners where the budget allows; it resists uniform rust and holds up in coastal air.

Prepare Galvanized and Aluminum Surfaces Correctly

Galvanized and aluminum railings need different prep than bare steel; the wrong abrasive or primer is why coatings fail.

  • Galvanized steel. Do not grind the zinc off. Clean it, remove white rust with a stiff brush, and use a primer formulated for galvanized metal, standard alkyd primers often fail to adhere to zinc.
  • Aluminum. Scuff lightly, clean, and use a primer rated for aluminum. Bare aluminum forms an oxide layer within minutes, so prime soon after cleaning.
  • Damaged galvanized areas. Where the zinc is gone and bare steel shows, clean the area and apply a zinc-rich primer to bring back sacrificial protection, then topcoat.

Rebuild and Seal the Joint

Do this at every joint where two different metals meet:

  1. Take the joint apart and clean both surfaces down to sound metal.
  2. Remove all loose corrosion product, white powder, flaking rust, or spent zinc.
  3. Coat the mating faces with an isolating primer.
  4. Add a nylon or plastic washer (and a sleeve if the bolt passes through the rail).
  5. Rebuild with fasteners in the correct family.
  6. Seal the joint so water cannot sit inside it.

Galvanic corrosion needs a path for current and a place for water to pool. Cut off the contact and seal the gap, and the cell stops.

Pro Tip
Water hides in the gap between a base plate and the concrete. Seal that seam with a flexible outdoor sealant after the paint cures. Moisture trapped there is what keeps a “fixed” railing corroding from the bottom up.

When the Joint Is Beyond Repair

If the metal around a fastener hole is pitted through, or the hole has enlarged so the bolt no longer grips, isolation will not save it. That joint needs a new plate, a welded repair, or a replacement section; cosmetic repair on a joint that has lost section thickness just postpones failure.

Step 4: How to Repaint an Iron Railing

Repainting an iron railing correctly means primer first, then topcoat, with full cure time between each, the step that locks out moisture and restores the barrier. Apply a rust-inhibiting metal primer to all bare and repaired spots, let it cure per the label, then apply a topcoat made for outdoor metal in two thin coats rather than one thick one.

  • Prime within hours of cleaning bare metal
  • Use thin coats to avoid runs and trapped moisture
  • Let each coat cure fully before the next

A proper coating is a barrier. Skip the primer and the topcoat sits on rust, not clean metal, and peels within a season.

Step 5: How to Prevent Railings from Rusting

Preventing future rust comes down to three habits: keep water out, keep metals separated, and inspect on a schedule. Prevention is far cheaper than repair.

  • Rinse salt and dirt off coastal railings a few times a year
  • Touch up any scratch or chip before rust starts
  • Re-seal joints and base plates every couple of years

For property owners under state balcony rules, these checks also feed your compliance record. Annual inspection is the baseline most owners use.

Key Takeaway
The cheapest repair is the one you prevent. A ten-minute rinse and a touch-up coat twice a year will outlast any one-time fix.

When to Repair vs. Replace a Corroded Railing

Repair when corrosion is surface-level and the metal is still thick. Replace when a post, base plate, or weld has lost real material or the section moves under load.

Use this rule of thumb:

ConditionAction
Surface rust onlyClean, prime, and repaint
Pitting at jointsRepair joints and isolate metals
Thin or cracked metalReplace the section
Wobbly post or baseReplace and get a structural check

Also weigh the railing’s age and design.

If you are unsure whether the damage is cosmetic or structural, bring in a licensed inspector.

The same corrosion that ruins a railing can hide inside a balcony structure where you cannot see it.

Frequently Asked Questions

How can you tell if rust on a railing is galvanic corrosion?

Galvanic corrosion between dissimilar metals typically appears at contact points where two different metals meet, such as aluminum posts bolted to steel bases or galvanized brackets touching bare iron. Look for white or gray powdery deposits on aluminum, bubbling paint around fasteners, and concentrated corrosion in a ring pattern at joints. Ordinary rust from weather exposure tends to spread more evenly across the surface. If corrosion clusters tightly around fasteners or where two metals touch, galvanic activity is the likely cause.

Can you paint over corrosion on a metal railing?

Painting directly over active corrosion will fail within months. You need to remove loose rust with a wire brush or sandpaper, treat the bare metal with a rust-inhibiting primer, and then apply a topcoat. If galvanic corrosion is the root cause, painting alone will not stop it. You also need to break the metal-to-metal contact at joints using nylon washers or isolation tape. Surface preparation determines how long the paint lasts, so do not skip the cleaning and sanding steps.

How do you stop galvanic corrosion between two metals?

The most effective approach is to separate the dissimilar metals with a non-conductive barrier. Nylon washers, plastic shims, or rubber gaskets placed between contact surfaces block the electrical current that drives galvanic corrosion. You can also apply a corrosion-inhibiting compound at the joint. If the joint is already damaged, clean it thoroughly, remove loose rust, and apply a zinc-rich primer before reassembling with isolation washers. For railings in coastal or high-moisture areas, inspect these joints annually.

When should a corroded railing be replaced instead of repaired?

Replacement becomes necessary when corrosion has reduced the structural thickness of the metal by more than 25 percent, when fasteners can no longer hold torque, or when the railing base shows cracking or separation from the concrete. Surface rust on a solid railing is repairable. But if a railing feels loose when pushed, or if you can see deep pitting and flaking at load-bearing connections, a licensed inspector should assess whether repair is safe. Railings on elevated balconies carry life-safety risk, so err on the side of professional evaluation.


Corroded railings are a warning sign, and hidden structural damage is the bigger risk. Apex Balcony helps building owners and HOAs stay ahead of it with licensed inspectors, deep experience in balcony safety rules, and a full review of every elevated exterior element. Book an inspection with Apex Balcony and get a clear, documented path to safe, compliant railings.

Book inspection

Posted in BlogTagged galvanic corrosion, galvanic corrosion between dissimilar metals, how to fix galvanic corrosion on metal railings, how to remove rust from metal railings, how to repaint an iron railing

Common Structural Defects in Multi-Family Buildings

Posted on October 15, 2026 by Apex Balcony admin
Common Structural Defects in Multi-Family Buildings

Table of Contents

  • Water Intrusion and Moisture Damage: The Most Common Structural Defect
  • Signs of Structural Failure in Buildings Every Owner Should Recognize
  • Balcony Structural Defects: Why Elevated Elements Fail First
  • Foundation Problems in Apartment Buildings and Differential Settlement
    • How to read the pattern
    • Why foundation movement is often slow and cumulative
    • Short-term mitigation vs. permanent repair
    • Lifecycle implications for multifamily owners
  • Roofing Defects, Framing Deficiencies, and Building Envelope Failures
  • Structural Inspection Checklist for Apartment Buildings
    • Severity levels: what to watch, what to schedule, what to escalate
    • Multifamily-specific inspection priorities
    • What a qualified inspection actually examines
    • When to bring in an engineer or specialist
  • Conclusion
  • Frequently Asked Questions

Last Updated: October 14, 2026

Water Intrusion and Moisture Damage: The Most Common Structural Defect

Water intrusion is the leading cause of structural deterioration in multi-family buildings. This guide breaks down the most common structural defects and what to do next.

Moisture damage rarely announces itself. It works behind stucco, under decks, and inside wall cavities for months before a stain appears.

The most frequent entry points are:

  • Failed flashing at roof-to-wall junctions
  • Cracks in exterior cladding and stucco
  • Clogged or improperly pitched gutters and downpipes

According to FEMA guidance on moisture and building damage, prolonged moisture exposure weakens structural connections long before visible sagging appears.

Watch Out
Ignoring a small ceiling stain for one rainy season can turn a minor flashing repair into full framing replacement. Water travels along the path of least resistance, so the leak source is often far from the stain.

Signs of Structural Failure in Buildings Every Owner Should Recognize

The clearest signs of structural failure in buildings are cracks that widen over time, uneven floors, warped ceilings, and doors or windows that suddenly stick.

Walk your property quarterly and look for:

  1. Diagonal cracks at corners of door and window openings
  2. Stair-step cracking in masonry walls, a classic settlement pattern
  3. Uneven or sloping floors in upper units
  4. Warped ceilings or sagging rooflines
  5. Separation between balconies and the main structure
  6. Rust stains on concrete, a sign of rebar corrosion

A common mistake is treating cosmetic and structural cracks the same. Hairline shrinkage cracks in stucco are usually harmless; cracks wider than a quarter inch, or any that grow month to month, need a licensed inspector.

Balcony Structural Defects: Why Elevated Elements Fail First

Balcony structural defects appear earlier than defects elsewhere because elevated elements face weather from every direction. Cantilevered and projecting balconies carry loads with fewer support points, so weaknesses compound fast.

Inspector checking balcony railing and connections for structural defects on a multi-family building

The failure modes documented most often:

  • Rotted wood joists where they meet the building wall
  • Corroded steel brackets and straps
  • Water trapped between the walking surface and the framing below

These defects are not theoretical. The 2015 Berkeley balcony collapse killed six people, and a 2021 Malibu collapse injured several more, both involved deteriorated structural elements that failed under normal use.

Key Takeaway
Balconies, decks, and stairways fail before the rest of the building because they are exposed on all sides and often under-maintained. Prioritize them in every inspection cycle.

Foundation Problems in Apartment Buildings and Differential Settlement

Foundation problems in apartment buildings usually show up as differential settlement, where one part of the structure sinks faster than another, producing cracked walls, uneven floors, and doors that no longer close. What separates a manageable issue from a costly one is how long movement has been active and whether water is still reaching the soil beneath the footings. Persistent moisture often exacerbates these foundation shifts by destabilizing the surrounding grade, a process that frequently mirrors the structural distress seen in failing retaining walls that compromise the integrity of the entire site.

How to read the pattern

Settlement cracks follow predictable patterns that tell you what is happening:

  • Stair-step cracking in brick or block walls points to differential settlement, where one portion of the foundation is dropping relative to another.
  • Diagonal cracks radiating from corners of door and window openings often indicate movement at the foundation or a failing header.
  • Separations where additions meet the original structure are classic evidence of two foundation systems moving at different rates.

Expansive clay soils, poor drainage, and tree roots pulling moisture from under footings accelerate the process. In multifamily buildings the risk compounds: one foundation issue can affect stacked units, shared stairwells, and common-area corridors at once.

Why foundation movement is often slow and cumulative

Foundation movement is rarely a single event. A foundation settling a fraction of an inch per year looks fine for a decade, then produces a wave of cracking when a wet winter follows a dry summer.

This is why inspection timing matters: checking after the first heavy rain reveals new cracks and damp patches that point directly to drainage and grading problems, far cheaper to correct than structural repairs.

Pro Tip
Check your property after the first heavy rain of the season. New cracks and damp patches that appear within days of a storm point directly to drainage and grading problems, which are cheaper to fix than structural repairs.

Short-term mitigation vs. permanent repair

Owners face a trade-off between stabilizing the symptom and correcting the cause:

  • Short-term mitigation, patching cracks, regrading soil, extending downspouts, and adding drainage, buys time and reduces further movement. It is appropriate when the cause is clearly water-related and the structure is stable.
  • Permanent repair, underpinning, helical piers, or foundation replacement, addresses the cause but is disruptive, expensive, and requires engineering design. It is appropriate when movement is ongoing, when the structure has lost capacity, or when safety is at risk.
  • Deferred maintenance is the third path, and it is the most expensive. Water that is not redirected continues to soften soil, corrode reinforcement, and widen cracks. What starts as a $2,000 drainage correction can become a six-figure foundation project if ignored for several seasons.

Lifecycle implications for multifamily owners

Foundation repairs affect more than the foundation: they disrupt residents, can require temporary relocation, and may trigger disclosure obligations during a sale. Planning foundation maintenance in a multi-year capital reserve, rather than reacting to failures, is the difference between a controlled repair and an emergency.

A practical approach:

Book inspection →

  1. Document the foundation condition at purchase and after every significant weather event.
  2. Correct drainage and grading before assuming the structure needs repair.
  3. Re-inspect after corrections to confirm movement has stopped.
  4. If movement continues, bring in a licensed engineer to evaluate cause and capacity.
  5. Budget for both short-term mitigation and long-term repair in your reserve study.
Key Takeaway
Foundation movement is slow until it is not. The cheapest repair is the one you make before the water reaches the soil.

Roofing Defects, Framing Deficiencies, and Building Envelope Failures

Roof-covering failure, improper framing, and a compromised building envelope are the three defects that most often trigger large repair bills.

Roofing defects include failed flashing at penetrations, deteriorated underlayment, and ponding water from inadequate slope.

Framing deficiencies include missing or undersized shear walls, improperly nailed connections, missing straps and connectors, and cut or notched structural members.

Building envelope failures include defective windows, cracked exterior cladding, and failed sealants.

Defect CategoryTypical Warning SignPrimary Risk
Water intrusionCeiling stains, damp wallsRotted framing, mold
Foundation settlementStair-step cracks, uneven floorsStructural instability
Balcony defectsRotted joists, loose railingsCollapse, injury
Roofing failurePonding water, interior leaksEnvelope breach
Framing deficienciesSagging floors, wall movementSeismic weakness
Envelope failureCracked cladding, window leaksMoisture damage
Concrete deteriorationCrumbling, rust stainingRebar corrosion

Structural Inspection Checklist for Apartment Buildings

A structural inspection checklist for apartment buildings should tell you what to look for, how to judge what you find, and when to call a licensed inspector. The checklist below is organized by building system and paired with a severity framework so owners and managers can triage findings instead of treating every crack as an emergency.

Severity levels: what to watch, what to schedule, what to escalate

  • Monitor (cosmetic or early-stage): Hairline shrinkage cracks in stucco, minor sealant gaps, small paint blisters. Document with dated photos and re-check at the next quarterly walk. These rarely indicate structural movement on their own.
  • Schedule a professional assessment (prompt): Cracks wider than a quarter inch, stair-step cracking in masonry, recurring ceiling stains after rain, rust staining on concrete, or any crack that has visibly grown since the last inspection. These point to active water intrusion or movement and should be evaluated by a licensed inspector within weeks, not months.
  • Escalate immediately (potential safety risk): Separation between a balcony and the main structure, loose or leaning guardrails, spalling concrete with exposed reinforcing steel overhead, sagging rooflines, or doors and windows that suddenly bind. Restrict access to the affected area and bring in a qualified engineer before residents use it again.

Multifamily-specific inspection priorities

Shared structures and stacked units change the risk profile: one defect can affect multiple residents at once, and common areas often fall between the cracks of unit-by-unit maintenance.

  • Elevated elements first: Balconies, decks, exterior stairways, and walkways are exposed on all sides and carry the highest consequence of failure. Inspect connections at the building wall, guardrail posts, and walking-surface waterproofing every cycle.
  • Parking structures: Look for ponding water, efflorescence, spalling under slabs, and rust staining at beam-to-column connections. Post-tensioned garages deserve extra attention because cable corrosion is invisible until failure.
  • Shared plumbing and roof drainage: A single failed riser or clogged roof drain can damage multiple stacked units. Trace the full path from roof to grade.

What a qualified inspection actually examines

A licensed inspector or engineer should document, at minimum:

  • All balconies, decks, and stairways for rot, corrosion, and loose connections
  • Flashing at every roof penetration, wall junction, and parapet
  • Gutters and downpipes for blockage, pitch, and overflow evidence

When to bring in an engineer or specialist

A general inspection identifies symptoms; an engineer determines cause and capacity. Escalate when you see:

  • Movement that continues after drainage or moisture issues are corrected
  • Cracks that cross structural members rather than following mortar joints
  • Any elevated element with corroded or deteriorated connections

For properties with elevated elements, California’s SB 326 and SB 721 requirements set specific inspection timelines that owners must meet. Even where those statutes do not apply, the underlying logic, inspect elevated elements on a defined cycle, document findings, and repair what is unsafe, is sound practice for any multifamily portfolio.

Pro Tip
Build a simple inspection log that records date, location, finding, severity level, and action taken. A documented history is the single most useful tool when you need to show that you identified and addressed a defect in good faith.

This is where Apex Balcony fits in. Our licensed inspectors have decades of combined construction and design experience and specialize in identifying early signs of structural failure before they become emergencies. We inspect every balcony, deck, and stairway and give you a clear report you can act on.

Best For
HOA boards and property owners who need a documented, defensible inspection that stands up to audit or litigation.

Conclusion

The most dangerous structural defects are invisible until they are expensive. Water intrusion, differential settlement, and balcony deterioration progress quietly, and by the time a resident reports a problem, the damage is often severe.

Apex Balcony helps property owners and HOAs stay ahead of that curve. Our licensed inspectors identify early signs of structural failure, keep you compliant with SB 326 and SB 721, and give you a clear path to the repairs you need.

Book an inspection with Apex Balcony and protect your residents, your asset, and your liability exposure before the next rainy season.

Frequently Asked Questions

What are the four main types of structural failure?

The four main types are water intrusion and moisture damage, foundation problems including differential settlement, framing deficiencies, and roof-covering or building envelope failures. In multi-family buildings, these often overlap. Water intrusion weakens wood framing, which then causes balcony structural defects and wall cracks. Foundation problems in apartment buildings show up as settlement cracks and uneven floors. Recognizing which category a defect falls into helps owners prioritize repairs and understand whether they face a safety hazard or a cosmetic issue.

How can property owners distinguish cosmetic cracks from structural cracks?

Cosmetic cracks are typically hairline, appear in drywall or paint, and stay stable over time. Structural cracks are wider than a quarter inch, run diagonally across walls, appear near door or window corners, or grow noticeably within months. They often accompany uneven floors, warped ceilings, or sticking doors. Any crack that lets light through, displaces brick or concrete, or pairs with water staining signals a structural defect that warrants a professional inspection before it worsens.

Which structural defects require immediate professional attention?

Call a licensed inspector immediately for sagging or bouncing balconies, visible rebar corrosion or crumbling concrete, diagonal cracks wider than a quarter inch, floors that slope noticeably, or any railing that moves when pushed. These signs of structural failure in buildings point to compromised load-bearing elements. In multi-family properties, delaying inspection risks safety hazards and costly repairs. State balcony laws in some regions also mandate periodic inspections, so urgent defects may carry compliance deadlines as well.

How often should a multi-family building receive a structural inspection?

Most multi-family properties benefit from a professional structural inspection every three to five years, with annual visual checks by maintenance staff in between. Buildings near the coast, older wood-frame construction, and properties with known water intrusion should be inspected more often. Some states require periodic inspections of elevated elements like balconies and stairways. A structural inspection checklist for apartment buildings helps owners track foundation problems, framing deficiencies, and roofing defects between full inspections so small issues do not become expensive failures.

Book inspection

Posted in BlogTagged common structural defects in multi-family buildings, signs of structural failure in buildings, structural defects, structural inspection checklist for apartment buildings

California Building Codes for Balcony Deck Replacement

Posted on October 14, 2026 by Apex Balcony admin
California Building Codes for Balcony Deck Replacement

Table of Contents

  • Understanding SB 721 and SB 326: Which Law Applies to Your Property
    • SB 721: Apartment Buildings and Multifamily Properties
    • SB 326: Condominiums and HOA-Managed Properties
  • SB 721 Deck Inspection Requirements and Timelines
  • SB 326 Balcony Inspection Requirements for Your Building
  • What Exterior Elevated Elements Are Covered
  • California Balcony Replacement Permit Requirements and Code Compliance
    • When a Permit Is Required
    • Permit and Plan-Check Requirements by Project Scope
    • Structural Safety and Load Requirements
    • Component-Level Code Details for Replacements
    • Verifying Local Requirements
  • Balcony Inspection Report Repair Recommendations and Next Steps
    • Distinguishing Repair, Partial Replacement, and Full Replacement
    • Step-by-Step Replacement Process
    • Timeline and Cost Factors for Replacement Projects
    • Material and Assembly Choices
  • Inspector Qualifications and Choosing a Qualified Professional
  • Frequently Asked Questions

Last Updated: October 13, 2026

Understanding SB 721 and SB 326: Which Law Applies to Your Property

SB 721 and SB 326 both govern balcony and deck inspections in California but apply to different property types, with implications for when balcony deck replacement may be required.

Apex Balcony helps hundreds of owners and HOAs navigate these rules. SB 721 targets apartment buildings and multifamily properties; SB 326 focuses on condominiums and HOA-managed communities. Both require regular inspections of exterior elevated elements, but timelines and reporting differ.

SB 721: Apartment Buildings and Multifamily Properties

SB 721 applies to apartment buildings and multifamily properties with three or more units where the owner is not a resident, requiring inspection of all exterior elevated elements, including balconies, decks, and exterior stairs.

The law mandates an initial inspection by January 1, 2025, then every six years. If unsafe conditions are found, the owner must act immediately, posting warnings, restricting access, or scheduling repairs.

SB 326: Condominiums and HOA-Managed Properties

SB 326 applies to condominiums and common interest developments managed by HOAs, requiring inspections of all exterior elevated elements that are common property or shared responsibility.

The initial inspection deadline was January 1, 2019, with inspections every six years after. If repairs are needed, the HOA must complete them within a timeline based on safety severity.

Professional inspector examining residential balcony with guardrails, decking, and structural framing showing visible wear and moisture damage in natural daylight

SB 721 Deck Inspection Requirements and Timelines

SB 721 inspection requirements are non-negotiable. Owners must hire a qualified inspector to evaluate all exterior elevated elements, examining structural integrity, load-bearing capacity, waterproofing, and safety features like guardrails and handrails.

The initial inspection deadline was January 1, 2025; properties that missed it face potential liability and code violations.

Documentation is critical: owners must maintain inspection reports and provide copies to the local building department on request. These reports protect the owner legally.

Watch Out
Delaying an SB 721 inspection exposes your building to liability. If an accident occurs on an uninspected balcony or deck, your building owner insurance may deny claims, and residents could pursue legal action.

SB 326 Balcony Inspection Requirements for Your Building

SB 326 balcony inspection requirements apply to condominium common areas and shared exterior elevated elements. The HOA schedules inspections and funds repairs through reserves or special assessments.

Learn New California Building Codes: SB721 and SB326 | Live Balcony Inspection

Fire Escape Engineers

Initial inspections were due by January 1, 2019. Properties are now in the six-year cycle, so many buildings are due for re-inspection in 2025 or 2026. Inspections must be documented in writing.

If defects are found, the HOA must prepare a written report for all unit owners with a repair timeline based on safety severity: critical defects require immediate attention, while moderate defects may have a longer window.

Pro Tip
Many HOAs overlook the requirement to share inspection reports with unit owners. California law requires transparency. Sharing reports builds trust and helps residents understand why special assessments may be necessary.

What Exterior Elevated Elements Are Covered

Both laws define “exterior elevated elements” broadly: balconies, decks, patios, walkways, stairs, and landings elevated above ground level. The inspection must evaluate the entire assembly, not just the visible surface.

Covered components include:

  • Guardrails and handrails
  • Ledger connections where decks attach to the building
  • Waterproofing membranes and flashing

Load requirements vary by element type: residential balconies and decks must support a minimum live load of 40 pounds per square foot, and guardrails must resist horizontal and vertical forces without failing.

California Balcony Replacement Permit Requirements and Code Compliance

A balcony deck replacement requires attention to permit requirements and code compliance; the scope of work determines what the building department will ask for.

When a Permit Is Required

A building permit is required for any balcony or deck replacement and for most repairs that alter structure, connections, or guards. If you’re cutting, splicing, or replacing framing members, ledger connections, guard posts, or the waterproofing assembly, expect a permit. Cosmetic work, resealing a joint, replacing a board on a surface deck, repainting a rail, typically doesn’t require one, but confirm with the local building department first.

A common pattern is a tiered review process:

  • Like-for-like replacement of a single balcony or deck, same size and configuration, often moves through a streamlined permit with standard details and minimal structural calculations.
  • Replacement with any change in size, height, guard configuration, or occupancy loading triggers a full plan review with stamped structural calculations.
  • Repairs that restore existing structure without changing the footprint may qualify for a repair permit, but the inspector still verifies connections and waterproofing.

Permit and Plan-Check Requirements by Project Scope

What the building department asks for scales with the project:

Scope of WorkTypical SubmittalTypical Inspections
Guardrail replacement onlyStandard guard details, attachment specsFraming/attachment, final
Waterproofing/deck surface onlyMembrane and flashing detailsWaterproofing, final
Partial structural replacementStructural calculations for affected membersFoundation/ledger, framing, waterproofing, final
Full balcony or deck replacementStamped structural calculations, architectural drawings, material specsFoundation/ledger, framing, waterproofing, guard, final

Plan-check timelines vary widely: some departments return comments within two weeks, others take four to six weeks, and resubmittals add more time. Build that uncertainty into your schedule.

Structural Safety and Load Requirements

The California Building Code sets minimum design loads a replacement must meet or exceed.

Book inspection →

Concentrated loads matter too: a 300-pound concentrated load over a small area is a standard check for deck surfaces, guardrails must resist 200 pounds applied horizontally at any point along the top rail in either direction, and handrails must resist 200 pounds in any direction.

Structural calculations prepared by a licensed architect or engineer accompany the permit application, evaluating member sizing, connection details, load paths, and the existing building’s capacity to receive new loads.

Component-Level Code Details for Replacements

A replacement has to satisfy code at the component level, not just in aggregate. The items below are the ones most often flagged during inspection:

  • Guards and guard height. Guards on balconies and decks more than 30 inches above the surface below must be at least 36 inches high, with baluster spacing that prevents passage of a 4-inch sphere. Openings must also be configured so they do not form a ladder effect.
  • Stairs and handrails. Exterior stairs must meet riser and tread dimensional limits, and handrails must be graspable, continuous, and mounted at a consistent height. Stair guards follow the same 36-inch minimum and 4-inch sphere rule.
  • Ledger connections. Where a deck attaches to the building, the ledger must be positively attached with approved fasteners and hardware, with flashing that directs water away from the wall. Bolted or lagged connections are common; the engineer specifies spacing and edge distances.
Key Takeaway
On a replacement, the two items most often flagged at inspection are the ledger connection and the waterproofing assembly. Both are hidden once the deck surface goes down, so they must be inspected and documented before closure.

Verifying Local Requirements

The California Building Code is the statewide baseline, but cities and counties adopt amendments, and some have local ordinances that add requirements for exterior elevated elements. Before submitting a permit application, confirm with the local building department whether the jurisdiction has adopted amendments, whether it requires a pre-construction inspection, and what documentation it expects for the final inspection. California Building Code standards for residential structures is the starting point; the local building department is the authority for your project.

Balcony Inspection Report Repair Recommendations and Next Steps

After an inspection, the qualified inspector provides a written report documenting findings by severity and recommending corrective action. That report is the starting point for the replacement decision.

Distinguishing Repair, Partial Replacement, and Full Replacement

The inspection report may recommend repair, partial replacement, or full replacement. The decision turns on three questions: how much of the structure is affected, whether the load path is compromised, and whether the waterproofing assembly can be restored without removing the framing.

  • Repair is appropriate when damage is localized and non-structural, loose fasteners, minor surface cracks, a single rotted board on a surface deck, or a failed sealant joint. The load path and waterproofing assembly remain intact.
  • Partial replacement applies when specific components have failed but the primary structure is sound. Examples: a damaged guardrail section on an otherwise sound deck, a failed waterproofing membrane over a limited area, or a rotted stair tread and stringer section. The scope is defined by the failed component and its immediate connections.
  • Full replacement is the right call when structural damage is extensive or when multiple systems have failed together. If the ledger connection is compromised, the framing shows rot across multiple members, and the waterproofing has failed, replacing the entire assembly is usually safer and more cost-effective than chasing repairs. A common pattern is that once more than roughly half the framing is affected, full replacement wins on both cost and service life.

The report should state which option is recommended and why. If it’s ambiguous, ask the inspector to clarify load-path implications before committing to a scope.

Step-by-Step Replacement Process

A balcony or deck replacement follows a predictable sequence from assessment through final inspection.

  1. Assessment and documentation. The inspector or engineer evaluates the existing structure, documents conditions, and determines whether the existing building can receive a replacement. Photographs and measurements feed the design.
  2. Design and engineering. A licensed architect or engineer prepares drawings and structural calculations for the replacement, including connection details, guard configuration, and waterproofing assembly.
  3. Permit application and plan review. The drawings and calculations are submitted to the local building department. Plan-check comments are addressed and the permit is issued.
  4. Temporary protection and demolition. The work area is protected, the existing balcony or deck is removed, and the building’s ledger and rim joist are exposed and evaluated. If the existing ledger is compromised, it is replaced as part of the scope.
  5. Structural framing and connections. New framing is installed, the ledger is attached with approved hardware, and the load path is completed. This is a common inspection hold point.
  6. Waterproofing and flashing. The membrane, flashing, and drainage details are installed and inspected before the walking surface goes down. This is the other common hold point.
  7. Walking surface, guards, and stairs. Decking, guardrails, handrails, and stairs are installed to the approved details.
  8. Final inspection and closeout. The building department performs the final inspection, and the permit is closed. Documentation is retained for the property’s compliance record.

Timeline and Cost Factors for Replacement Projects

Timelines depend on scope, weather, and local permitting. A guardrail-only replacement might take two to four weeks from permit approval; a full balcony or deck replacement typically requires eight to twelve weeks, with structural and waterproofing phases taking longest.

Cost factors include:

  • Material selection. Wood, composite, and concrete systems differ in material cost, installation labor, and service life.
  • Structural complexity. Cantilevered, multi-level, or irregular configurations require more engineering and labor than a simple rectangular deck.
  • Site access. Limited access for equipment and materials raises labor cost and can extend the schedule.

Weather affects scheduling. Rain delays waterproofing and concrete work; extreme heat affects material installation. Planning during favorable weather windows reduces delays.

Material and Assembly Choices

The replacement is also a chance to choose a system that fits the building’s exposure and maintenance capacity. Main options:

  • Wood framing with wood or composite decking. Familiar, widely permitted, and repairable. Requires periodic maintenance and is vulnerable to moisture if the waterproofing assembly fails.
  • Wood framing with a waterproofed walking surface. Common on balconies over occupied space, where a membrane is required beneath the surface. The membrane is the critical detail.
  • Concrete or steel systems. Higher upfront cost and more engineering, but longer service life and lower maintenance. Common on larger multifamily and commercial buildings.

Whichever system is chosen, waterproofing and drainage details drive long-term performance more than the surface material: a well-detailed membrane over wood framing outlasts a poorly detailed assembly over a premium surface.

Key Takeaway
The most common cause of failed balcony replacement projects is inadequate waterproofing during construction. Cutting corners here saves money upfront but leads to expensive repairs within five years.

Inspector Qualifications and Choosing a Qualified Professional

California law specifies who can perform SB 721 and SB 326 inspections: a licensed architect, structural engineer, or other professional with specific building inspection expertise.

When selecting an inspector, verify their license status and experience with balcony and deck inspection. Ask about their process for evaluating structural components and waterproofing.

Apex Balcony’s licensed inspectors bring decades of combined construction and design experience, specializing in early signs of structural failure in elevated exterior elements.

Best For
Property managers and HOA boards seeking professional inspection services from inspectors with deep expertise in California balcony and deck safety standards.

Balcony and deck safety protects your residents and your building’s long-term value. Our team provides comprehensive inspection services and clear recommendations for keeping your balconies, decks, and exterior stairs in safe, code-compliant condition. California Building Code standards for residential structures and local building department guidelines govern these requirements.

Inspection ElementSB 721 (Apartments)SB 326 (Condos/HOAs)
Initial DeadlineJanuary 1, 2025January 1, 2019
Periodic InspectionEvery 6 yearsEvery 6 years
Property TypeMultifamily rental buildingsCondominiums and HOAs
Qualified InspectorLicensed architect or engineerLicensed architect or engineer
Report DistributionBuilding owner maintains recordMust share with unit owners

Frequently Asked Questions

What is the difference between SB 721 and SB 326?

SB 721 applies to apartment buildings and multifamily residential properties with three or more units where the owner does not occupy a unit. It requires inspection of exterior elevated elements including balconies and decks. SB 326 applies to condominium buildings and properties managed by homeowners associations. While both mandate periodic inspections and structural safety compliance, SB 721 focuses on owner-occupied multifamily buildings, while SB 326 targets condominiums and HOA-governed communities. Your property type determines which law governs your balcony deck replacement and inspection obligations.

Do you need a permit to replace a deck in California?

Yes, most deck replacements in California require a building permit, especially if the work involves structural framing, guardrails, or connections to the main building. The California Building Code and local building departments require permits for any work that affects structural safety, waterproofing, or load-bearing capacity. Minor surface-level repairs may not require permits, but full or partial replacement of decking, ledger connections, or support posts almost always does. Contact your local building department before starting work to confirm permit requirements for your specific project scope.

What inspections are required when replacing a balcony or deck?

Before replacement, a qualified inspector must conduct a comprehensive inspection to assess structural damage, moisture intrusion, and code compliance. After replacement, a final inspection by the local building department verifies that all work meets current California Building Code standards for guardrails, handrails, load requirements, waterproofing, and structural connections. For SB 721 and SB 326 properties, periodic inspections are also required before replacement to document existing conditions and establish a repair or replacement timeline. These inspections protect residents and ensure your property remains compliant with state and local safety regulations.

What are the building code requirements for replacing a balcony in California?

Balcony replacement must comply with current California Building Code standards for guardrail height and strength, handrail design, walking surface slope and material, ledger connections to the main structure, and waterproofing assemblies that prevent moisture intrusion and dry rot. Load requirements typically specify that guardrails withstand 200 pounds per linear foot of force. All structural components, including deck framing and support posts, must be properly sized and connected. Waterproofing membranes must be installed to prevent water from penetrating to structural members. Your contractor and local building department will verify compliance through plan review and final inspection.

Book inspection

Posted in BlogTagged balcony deck replacement, california balcony replacement permit requirements, california building codes for balcony deck replacement, sb 326 balcony inspection requirements

Signs Your Apartment Deck Needs Professional Waterproofing

Posted on October 13, 2026 by Apex Balcony admin
Signs Your Apartment Deck Needs Professional Waterproofing

Table of Contents

  • Why Apartment Deck Waterproofing Matters
  • 1. Visible Cracks in the Surface or Coating
  • 2. Peeling, Bubbling, or Blistering Coatings
  • 3. Worn or Chalking Topcoat and Surface Deterioration
  • 4. Standing or Ponding Water and Poor Drainage
  • 5. Soft Spots and Deteriorating Deck Materials
  • Signs of Balcony Waterproofing Failure You Cannot Ignore
    • Water Stains and Discoloration Below the Deck
    • Rust on Metal Railings and Flashing
    • Cracked or Deteriorated Sealant Around Joints and Penetrations
  • How to Identify an Apartment Deck Leak Before Major Damage Occurs
  • Frequently Asked Questions

Last Updated: October 12, 2026

Why Apartment Deck Waterproofing Matters

Water damage to apartment decks and balconies isn’t just cosmetic. It’s a structural threat that spreads silently, affecting units below, compromising building integrity, and creating serious liability for property owners. At Apex Balcony, we’ve inspected hundreds of residential buildings across California, and we’ve seen the same pattern repeatedly: small warning signs go ignored, water infiltration accelerates, and a manageable repair becomes a catastrophic structural failure.

The stakes are particularly high in multifamily properties. A single failing balcony waterproofing system damages the units below it: water intrusion compromises reinforcement, rots wood framing, and creates mold growth that affects residents’ health.

Below are the specific signs your apartment deck needs professional waterproofing, the visual indicators that separate minor maintenance from urgent structural concerns. Spotting them early can save tens of thousands in repair costs and protect your residents.

1. Visible Cracks in the Surface or Coating

Cracks in a deck’s surface or protective coating are among the earliest warning signs of waterproofing failure. These aren’t just aesthetic issues, they’re entry points for water infiltration.

Hairline cracks, especially those that form in patterns or expand over time, indicate the underlying waterproofing membrane is breaking down. Water seeps in, travels beneath the surface, and begins deteriorating the structure long before you see damage below. Freeze-thaw cycles accelerate this, widening cracks further.

Look for cracks that:

  • Run horizontally or diagonally across the deck surface
  • Appear near joints, seams, or where the deck meets railings
  • Expand visibly from season to season
  • Are accompanied by surface discoloration or efflorescence (white, chalky deposits)

If cracks are widening or new ones appear after weather events, water intrusion is likely underway. Call for a professional assessment before water reaches the structural elements beneath the surface.

Watch Out
Hairline cracks can widen by 50% or more during a single winter season in climates with freeze-thaw cycles. Delaying inspection means exponentially higher repair costs within 12-24 months.

2. Peeling, Bubbling, or Blistering Coatings

When the protective topcoat fails, you’ll see peeling, bubbling, or blistering across the deck surface, direct signs that water has penetrated beneath the coating and is trapped between layers.

Five Signs your #balcony or #deck needs maintenance #waterproofing tips by #baycitiesconstruction

Bay Cities Construction

Bubbles form when water vapor trapped under the topcoat pushes the coating away from the substrate. Peeling means the coating has lost adhesion, either from water saturating the base layer or improper application. Blistering is especially concerning because it signals active water movement and ongoing damage beneath the surface.

Common patterns include:

  • Small blisters that cluster in low-lying areas or near drainage points
  • Peeling that starts at edges, joints, or corners where water naturally collects
  • Bubbling that appears after heavy rain or during humid seasons
  • Coatings that peel in large sheets rather than small flakes

When you see these symptoms, water intrusion has already begun: the failed coating exposes the waterproofing membrane beneath to direct water contact. Professional intervention is urgent, since damage spreads quickly once the protective layer is compromised.

Pro Tip
Press gently on a blister with your finger. If it’s soft or releases liquid, water saturation is active. This requires professional assessment within 2-4 weeks, not months.

3. Worn or Chalking Topcoat and Surface Deterioration

A worn or chalking topcoat means your protective barrier is nearing the end of its useful life. Chalking occurs when UV exposure and weathering break down the topcoat’s binders, leaving a powdery residue.

Chalking means the coating no longer provides effective water protection: its ability to shed water is compromised and moisture penetrates more easily. Combined with surface deterioration, thin, discolored, or degraded areas, chalking signals that waterproofing failure is imminent.

Watch for:

  • A white or gray powdery residue that rubs off on your hand
  • Dull, faded appearance across large portions of the deck
  • Thin or worn spots where the substrate shows through
  • Uneven wear patterns that suggest water pooling or poor drainage

This stage is critical because topcoat failure is predictable and preventable with maintenance. If chalking is severe and widespread, however, the coating has lost most of its protective function, and professional recoating is necessary to prevent accelerating water intrusion and surface deterioration.

4. Standing or Ponding Water and Poor Drainage

Standing water is perhaps the most obvious and dangerous sign of waterproofing failure. Water that pools instead of draining is actively working against your waterproofing system, and winning.

Ponding water means the deck’s slope is inadequate, the drainage system is blocked, or the waterproofing membrane has failed. Whatever the cause, standing water accelerates every form of deterioration: it softens wood, promotes mold, corrodes metal, and deepens cracks.

Poor drainage problems include:

  • Water collecting in corners, low spots, or around railings
  • Debris clogging drains or scuppers (drainage openings)
  • Water remaining on the deck surface for hours after rain
  • Visible algae or mold growth in areas where water sits

If you notice standing water after rain, check the drainage system first: clear debris from scuppers, downspouts, or drain lines. If water still pools, the deck’s slope or the waterproofing membrane itself is compromised, requiring professional intervention to redirect water flow or replace the failing membrane.

Key Takeaway
Standing water on a deck surface can cause structural damage in as little as 6-12 months. If ponding persists after drainage is cleared, schedule a professional inspection immediately.

5. Soft Spots and Deteriorating Deck Materials

Soft spots on a deck surface, areas that feel spongy or compress under foot, indicate that water has penetrated deep enough to saturate and begin rotting the underlying wood framing or composite materials.

This is critical: soft spots mean structural deterioration is already advanced. Water has bypassed the coating and waterproofing membrane and reached the structural substrate, so the damage beneath the surface is likely far more extensive than what you can see.

Soft spots often appear:

  • Near joints, seams, or where the deck meets railings
  • In low-lying areas where water collects
  • Around penetrations like HVAC vents or plumbing
  • Along the edges of the deck where water naturally runs off

Press firmly on different areas with your heel. If the surface gives or feels soft, water damage is present. Splintering, discoloration, or crumbling surface material confirms structural failure is underway.

Book inspection →

This is not a maintenance issue. Soft spots and deteriorating materials require immediate professional assessment; depending on the damage, structural repairs or full deck replacement may be needed to restore safety and prevent collapse.

Signs of Balcony Waterproofing Failure You Cannot Ignore

Water Stains and Discoloration Below the Deck

Close-up of water stains and discoloration on ceiling below a balcony, showing brown rings and moisture marks on white drywall with soft lighting

Water stains come in several forms:

  • Brown or yellow rings that expand over time
  • Wet spots that appear after rain or in humid weather
  • Discoloration that follows a line or pattern, indicating water flow direction
  • Mold or mildew growth accompanying the stains

The critical point: if you see water stains below a deck, the waterproofing system above has already failed and water is actively traveling through the structure, affecting the unit below as well as the one with the deck.

Document stains with photos, note their location and size, and report them to the property manager or building owner. This is evidence of active water intrusion and grounds for urgent professional assessment.

Rust on Metal Railings and Flashing

Rust on metal railings, flashing, or fasteners means water intrusion has reached your deck system’s metal components, indicating prolonged water exposure and corrosion of the protective finish.

Flashing, the metal trim where the deck meets the building wall or around penetrations, is particularly vulnerable. When it rusts or corrodes, it can no longer shed water away from vulnerable areas, so water penetrates behind it and into the building structure.

Watch for:

  • Orange or reddish discoloration on metal railings, posts, or fasteners
  • Pitting or surface deterioration on flashing
  • Rust stains running down from railings or flashing onto the deck surface
  • Loose or corroded bolts and fasteners

Rust on flashing is especially serious because flashing failures are a common source of hidden water intrusion: water can travel behind corroded flashing into walls, framing, and units below without visible evidence until significant damage occurs. Professional inspection is essential, since failed flashing often requires replacement as part of a comprehensive waterproofing repair.

Cracked or Deteriorated Sealant Around Joints and Penetrations

Sealant around deck joints, where the deck meets railings, and around penetrations like HVAC vents or plumbing is your deck’s second line of defense against water intrusion. When it cracks, shrinks, or deteriorates, water finds a direct path inside.

Deteriorated sealant often shows:

  • Visible cracks or gaps where sealant has pulled away from the surface
  • Sealant that has shrunk or is no longer flush with the surface
  • Discoloration or mold growth along sealant lines
  • Areas where sealant is missing entirely

Joints are natural stress points where water collects and sits. If sealant fails, water penetrates the joint, travels along it, and eventually reaches structural elements or the units below.

Regular sealant inspection is preventive maintenance. Sealant typically lasts 5-10 years depending on climate and UV exposure; if it’s cracked or deteriorated, professional resealing is a relatively inexpensive repair that prevents far costlier water intrusion damage.

How to Identify an Apartment Deck Leak Before Major Damage Occurs

Early detection of apartment deck leaks can prevent catastrophic structural failure and save tens of thousands in repair costs. Here’s how to identify leaks before they become emergencies.

Start with visual inspection. Walk the deck after rain or in humid conditions.

Inspect the unit below. Water stains on ceilings or walls are often the first visible evidence of a deck leak.

Document changes over time. Photograph cracks, coating condition, and drainage areas, then compare month-to-month or season-to-season. Expanding cracks or new stains indicate accelerating water intrusion.

Check drainage and slope. Keep deck drains clear of debris and confirm water flows toward drainage points rather than pooling.

Listen for water movement. During or right after rain, walk the deck and listen for dripping or flowing beneath the surface.

Hire a professional assessment. If you notice any warning signs above, contact a licensed balcony inspector.

Warning SignUrgency LevelTypical Next Step
Hairline cracks in coatingMediumProfessional inspection within 2-4 weeks
Peeling or bubbling coatingHighProfessional inspection within 1-2 weeks
Soft spots in deck materialCriticalProfessional inspection within days
Water stains below deckCriticalImmediate inspection and documentation
Standing water after rainMedium-HighClear drainage; inspect if persists
Rust on flashingHighProfessional inspection within 1-2 weeks

Protecting your apartment building’s structural integrity starts with recognizing the warning signs before they become emergencies. Apex Balcony provides comprehensive deck and balcony inspections for California property owners and HOAs, with specialized expertise in identifying early waterproofing failures and ensuring compliance with SB 326 and SB 721 structural safety requirements. Book an inspection and get a clear path to necessary repairs, protecting your residents and your assets.

Frequently Asked Questions

How can you tell if an apartment deck needs waterproofing?

Look for visible cracks, peeling or bubbling coatings, standing water, soft spots in the deck material, water stains below the balcony, and rust on railings or flashing. These are the most common warning signs that your apartment deck waterproofing is failing and water is infiltrating the structure. If you notice any of these, a professional assessment is essential to prevent hidden damage to the framing and units below.

What does a professional waterproofing testing procedure involve?

A professional waterproofing testing procedure includes visual inspection of the deck surface, coating, and sealant; checking for water pooling and drainage issues; examining flashing and joints; and testing the membrane condition. Licensed inspectors also assess the underlying structure for soft spots, wood rot, and reinforcement corrosion. The inspection may include moisture testing and documentation of findings to guide repair decisions and ensure compliance with local safety codes.

What is the typical deck waterproofing cost for apartment buildings?

Waterproofing costs vary based on deck size, damage severity, and the scope of repairs needed. Costs increase if structural damage, rot, or reinforcement corrosion requires repair. Contact a licensed inspector for a detailed quote tailored to your property.

Can water damage beneath a deck be hidden from view?

Yes. Water intrusion often causes hidden damage to the framing, structural components, and units below before visible signs appear on the deck surface. Soft spots, wood rot, and reinforcement corrosion can develop inside the structure while the topcoat still looks intact. This is why professional inspections are critical, they identify early signs of deterioration that are not visible during a casual walkthrough and help prevent costly structural failure or safety hazards.

Book inspection

Posted in BlogTagged apartment deck leak, balcony waterproofing signs, deck waterproofing cost, signs your apartment deck needs professional waterproofing, waterproofing testing procedure

Posts navigation

Older posts
Newer posts

Recent Posts

  • 7 Ways to Prevent Balcony Wood Rot Under SB 721
  • What Does an SB 721 Inspection Actually Cost Versus Repairs?
  • 7 Balcony Collapse Causes and How to Prevent Them
  • What Does Preventative Maintenance for EEE Compliance Require?
  • 7 Steps to Document Balcony Inspections for SB 326 Compliance

Recent Comments

No comments to show.

Archives

  • October 2026
  • September 2026
  • August 2026
  • July 2026
  • June 2026

Categories

  • Blog
Logo
Created by Unilime.Group
  • Balcony Law
  • About us
  • Inspection services
  • FAQ
  • Blog

Call us ‪+1 818-806-7885‬
License: CSLB #1101305

Apex Balcony Inspection
‪+1 818-806-7885‬
[email protected]
4645 Van Nuys Blvd #201
Sherman Oaks CA 91403

Created by Unilime.Group