Logo
  • Balcony Law
  • About us
  • Inspection services
  • FAQ
  • Blog
  • Call us ‪+1 818-806-7885
  • Book now

Tag: balcony inspection report

How Do You Hire a Structural Engineer for a Balcony Assessment?

Posted on October 26, 2026 by Apex Balcony admin
How Do You Hire a Structural Engineer for a Balcony Assessment?

Last Updated: October 25, 2026

Quick Summary

To hire a structural engineer for a balcony assessment, first verify their active license through your state licensing board, then confirm professional liability insurance and balcony-specific experience. Ask how many balcony assessments they completed in the past 24 months and get the scope, report format, and fee in writing before signing.

  • SB 326 requires associations to have exterior elevated elements inspected by a licensed structural engineer or architect on a recurring cycle.
  • Confirm the engineer holds an active license in the right category and write the license number into the proposal.
  • Ask for a certificate of insurance and call the insurer to confirm the policy covers inspection services.
  • Access is frequently the largest single driver of the inspection fee.
  • A usable report includes the license number, methods used, photos keyed to locations, and prioritized deficiencies.

Table of Contents

  • Why a Balcony Assessment Needs a Licensed Structural Engineer
    • What California Balcony Laws Require of Owners
  • How to Find and Vet a Structural Engineer in Your Area
    • Verifying License and Insurance Before You Sign
    • Screening for Balcony-Specific Experience
  • Questions to Ask a Structural Engineer Before Hiring
  • What a Balcony Inspection Checklist Should Cover
  • What Drives Balcony Structural Inspection Cost
    • Flat Fee Versus Per-Element Pricing
  • What a Balcony Inspection Report Should Contain
  • Comparing Proposals and Booking Your Assessment
  • Frequently Asked Questions

Why a Balcony Assessment Needs a Licensed Structural Engineer

Hiring a structural engineer for balcony assessment is the step that decides whether your building passes inspection or becomes a liability case. A balcony assessment is a documented evaluation of an elevated exterior structure’s load capacity, connections, waterproofing, and material condition, performed by a licensed professional.

The stakes are not theoretical. The 2015 Berkeley balcony collapse killed six people and the 2021 Malibu collapse injured several more, and both incidents reshaped how California treats exterior elevated elements. A visual walk-by is not an assessment. An assessment requires an engineer who can read load paths, identify hidden deterioration, and put findings in writing.

What California Balcony Laws Require of Owners

Two state laws drive most balcony work in California. SB 326 requires associations to have balconies, decks, stairways, and other exterior elevated elements inspected by a licensed structural engineer or architect on a recurring cycle. SB 721 applies similar inspection duties to apartment buildings with three or more units. Both laws focus on elements supported wholly or substantially by wood, and both require the inspector to identify whether the element is in need of repair.

The details matter, and they vary by jurisdiction. Read the full California balcony laws compliance guide before you assume your building is exempt.

How to Find and Vet a Structural Engineer in Your Area

Start with the state licensing board, not a search engine. Every licensed engineer holds a verifiable license number, and most state boards publish a free public lookup that shows license status, discipline history, and expiration date. That single check eliminates most of the risk in this process, and it takes about five minutes.

Then narrow by relevant experience. An engineer who has spent a decade on commercial high-rises may be excellent and still be the wrong fit for a 12-unit apartment building with wood-framed balconies. Ask directly how many balcony and deck assessments they have completed in the last two years, and ask for two client references from buildings similar to yours. For a deeper walkthrough of the vetting process, see our guide to hiring structural engineers for inspections.

Verifying License and Insurance Before You Sign

Confirm four things in writing before any contract:

  • Active license in the right category. Structural engineering is typically a separate license or designation from civil engineering. Confirm the engineer, not just the firm, holds the credential your project requires, and write the license number into the proposal.
  • Professional liability (errors and omissions) coverage. Ask for a certificate of insurance naming the coverage limit and expiration date. A general liability policy does not cover design or inspection errors; you want E&O.
  • Scope of work defined in the proposal. The proposal should list the specific elements to be inspected, the methods, the report format, and the delivery date. Vague scopes produce vague reports.
  • Independence from repair contractors. Ask whether the firm or any principal has a financial interest in a repair company. An engineer who recommends repairs and then bids the work has a conflict; independent assessment protects you.
Watch Out
A certificate of insurance is not proof of coverage for your project. Call the insurer’s verification line listed on the certificate and confirm the policy is current and covers inspection services. A common mistake is accepting a certificate without checking that it covers the specific type of work being performed.

Screening for Balcony-Specific Experience

Balcony and exterior elevated element work is a specialty. Ask these screening questions on the first call:

  • How many balcony, deck, or stairway assessments has your firm completed in the past 24 months?
  • Have you worked with the inspection statutes that apply to my building type, for example, association inspections versus apartment inspections?
  • Do you access the underside of each element, or is your review visual-only from above?
  • Who signs the report, and what is that person’s license number?

A firm that specializes in this work will answer in specifics. A generalist will answer in generalities. The difference shows up in the report you receive.

Questions to Ask a Structural Engineer Before Hiring

The right questions separate a serious engineer from a signature on a form. Ask these before you sign anything:

  • Which specific code sections and statutes will your inspection address?
  • Will you physically access the underside of each balcony, or is this a visual-only review?
  • What destructive testing do you perform, and how do you limit water intrusion afterward?
  • Who signs the report, and what is their license number?
  • What happens if a condition is found that requires immediate action?
  • Are repair recommendations included, or is that a separate engagement?
  • What is your turnaround time from site visit to signed report?

The last two questions surface the real cost difference between proposals. A cheap inspection that produces a one-page letter with no repair scope often costs more in the end, because you pay twice.

What a Balcony Inspection Checklist Should Cover

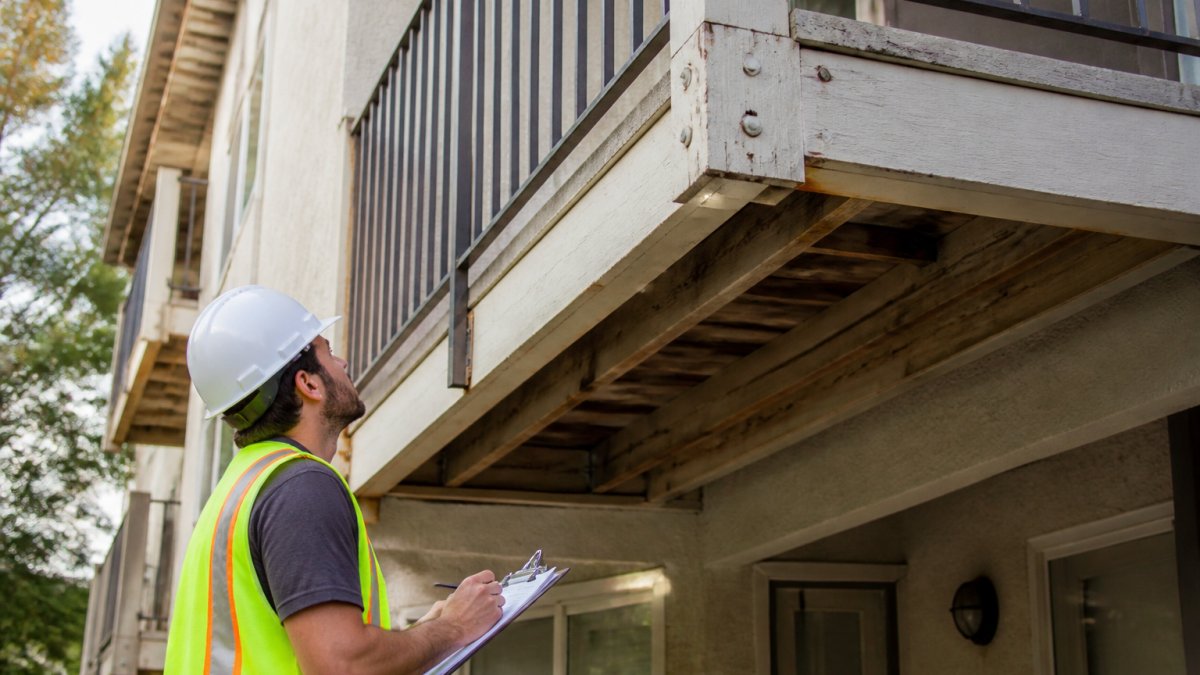
A proper checklist covers more than the walking surface. It should address the structural framing and connections, the waterproofing membrane and flashing, the guardrails and their attachment points, stair stringers and landings, drainage, and signs of dry rot or corrosion. The inspector should document existing conditions with photographs and note the location of every defect.
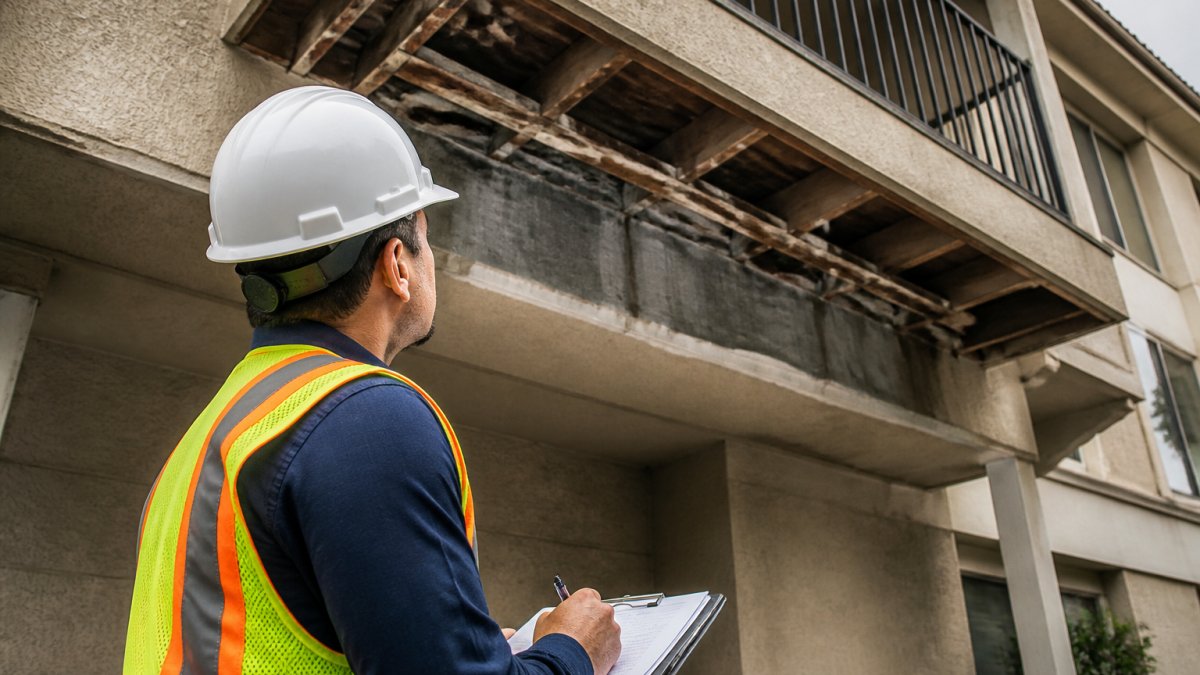
A structural engineer inspecting the exposed framing and waterproofing of a multifamily building balcony.

Compare whatever checklist an engineer proposes against a comprehensive balcony safety inspection checklist, so you can spot gaps before the site visit rather than after.

Book inspection →

What Drives Balcony Structural Inspection Cost

Balcony structural inspection cost depends on four variables: the number of elevated elements, the level of access required, the depth of testing, and the reporting requirements. Most firms price a single-family balcony assessment in the low hundreds to low thousands of dollars, while a multifamily building with dozens of elements and limited access can run into the tens of thousands. The range is wide because the scope is wide, a four-balcony walk-by and a twenty-element assessment with lift access are different projects.

Here is how each variable moves the number:

  • Number of elements. A building with twenty balconies costs more to assess than one with four. Most firms price per element or per building, and the per-element rate often drops as volume rises.
  • Access. A structure that requires lifts, scaffolding, or partial demolition to reach the underside costs more than one with open access from a parking deck or grade. Access is frequently the largest single driver of the fee.
  • Testing depth. Visual review, moisture metering, and destructive probing are three different levels of effort. Destructive testing, opening a small section of framing or membrane, adds cost but can reveal hidden deterioration a visual review misses.
  • Reporting. A one-page letter and a photo-documented report with prioritized deficiencies and repair scopes are not the same deliverable. Ask what the fee includes before you compare proposals.

Flat Fee Versus Per-Element Pricing

Fee structures vary. Some firms charge a flat fee per building; others charge per element. A flat fee is easier to budget; a per-element fee can be cheaper on small buildings and more expensive on large ones. Ask for the fee structure in writing and compare the total deliverable, not just the headline number. A low per-element rate with a thin report often costs more in the end, because you pay twice, once for the inspection and again for a report a contractor cannot bid from.

Pro Tip
Ask every firm to quote the same scope in writing: the exact elements, the access method, the testing level, and the report format. Apples-to-apples proposals are the only way to compare cost fairly.

We quote each project individually because pricing depends on the number of elements, access conditions, and reporting requirements. Request a written scope and fee before you sign anything.

Four variables move the price of a balcony structural inspection, and each one changes the scope of the project.

Cost driverWhat it coversHow it affects the fee
Number of elementsBalconies, decks, stairways to be assessedPer-element rate often drops as volume rises
AccessLifts, scaffolding, or partial demolition to reach undersideFrequently the largest single driver of the fee
Testing depthVisual review, moisture metering, destructive probingDestructive testing adds cost but reveals hidden deterioration
ReportingOne-page letter versus photo-documented report with repair scopesAsk what the fee includes before comparing proposals

What a Balcony Inspection Report Should Contain

A usable report states the inspector’s license number, the date and scope of the inspection, the methods used, the condition of each element, and a clear conclusion about whether each element needs repair. It should include photographs keyed to locations, a prioritized list of deficiencies, and repair recommendations with enough specificity that a contractor can bid from it.

If the report you receive is thin, ask for the missing pieces before you accept it. Our guide on how to interpret balcony inspection reports explains what each section should say and what a vague finding actually means. Our guide on how to interpret balcony inspection reports explains what each section should say and what a vague finding actually means.

Comparing Proposals and Booking Your Assessment

Compare proposals on four lines: scope, deliverable, timeline, and follow-up. A proposal that lists the exact elements to be inspected, names the report format, commits to a delivery date, and offers to answer questions after delivery is worth more than one that offers a lower fee and no detail.

When you’re ready to move, review our structural engineering services to request an assessment. For a deeper walkthrough of the vetting process, the guide to hiring structural engineers for inspections covers contract terms and red flags in more detail.


The hardest part of this process is not finding an engineer. It is finding one whose report will hold up when a board, an auditor, or a court asks hard questions. Apex Balcony exists for that exact problem.

Frequently Asked Questions

How do I find a structural engineer for a balcony assessment?

Start with your state licensing board to confirm an active professional engineer (PE) license, then look for engineers with documented experience on exterior elevated structures and multifamily buildings. Ask for recent balcony and deck projects, confirm liability insurance, and request a sample inspection report. Local engineering firms and referrals from property managers who have completed SB 326 or SB 721 work are reliable sources. Verify the license number yourself rather than relying on a website badge, and confirm the engineer carries errors and omissions coverage.

What qualifications should a structural engineer have to inspect a balcony?

The engineer should hold an active PE license in the state where the building sits, ideally with a structural emphasis. Beyond the license, look for direct project experience with balconies, decks, stairways, and other exterior elevated structures on residential or multifamily buildings. Ask whether they have worked on buildings subject to California balcony inspection laws and whether they can produce permit-ready plans and repair recommendations. Insurance matters too: professional liability coverage protects you if the assessment misses a defect.

How much does a structural engineer charge for a balcony inspection?

Pricing depends on the number of balconies, building height, access difficulty, and how detailed the report needs to be. A single-unit residential inspection and a full multifamily assessment under SB 326 or SB 721 are very different scopes, so quotes vary widely. Ask each firm to itemize what the fee includes: site visit, photo documentation, written report, and follow-up consultation. Request a written proposal and confirm whether repair recommendations are included or billed separately.

What should a balcony inspection report include?

A usable report identifies each inspected element, documents existing conditions with dated photos, and states whether each balcony is safe for continued use. It should flag structural integrity concerns, water intrusion, corrosion, and connection failures, then give repair recommendations ranked by urgency. Look for a clear statement of the engineer’s professional opinion, the scope and limitations of the inspection, and whether any areas were inaccessible.

Book inspection

GoogleAdd apexbalcony.com as a preferred source on Google →
Posted in BlogTagged balcony inspection report, balcony structural inspection cost, hiring a structural engineer for balcony assessment, questions to ask a structural engineer, structural engineer

How to Choose a Balcony Inspection Company

Posted on October 24, 2026 by Apex Balcony admin
How to Choose a Balcony Inspection Company

Last Updated: October 23, 2026

Quick Summary

To choose a balcony inspection company, first confirm which statute governs your building (SB 326 for condo associations, SB 721 for multifamily rentals), then verify the inspector holds a license as an architect, civil engineer, structural engineer, or credentialed building contractor. Ask for a sample report, proof of insurance, and written confirmation of the statute before you sign.

  • SB 326 covers condo associations; SB 721 covers multifamily rentals with three or more dwelling units.
  • Verify each inspector’s license number through the state licensing board before shortlisting anyone.
  • Require general and professional liability insurance naming your association as an additional insured.
  • Ask how the inspector examines the underside of cantilevered balconies and documents hidden connections.
  • A compliant report carries the inspector’s stamp, license number, dates, and photographs of every defect.

Table of Contents

  • Start With the Legal Requirements for Balcony Inspections
    • Which Law Applies to Your Building: SB 326 vs. SB 721
  • Who Is Qualified to Perform a Balcony Inspection
  • Balcony Inspector Questions to Ask Before You Sign
    • A Vetting Checklist for Inspectors
    • How to Interview Each Candidate
    • Red Flags in a Proposal
  • What a Balcony Inspection Checklist Should Cover
  • Balcony Inspection Cost: What Drives the Quote
  • What a Balcony Inspection Report Must Contain
  • After the Inspection: Remediation, Permits, and Insurance
    • From Report to Remediation Plan
    • Permits and Building Department Review
    • Insurance Implications of the Report
  • Conclusion
  • Frequently Asked Questions

Start With the Legal Requirements for Balcony Inspections

Choosing a balcony inspection company starts with knowing which law governs your building.

Balcony inspection is the process of examining elevated exterior elements, including balconies, decks, stairways, and walkways, for structural defects that could lead to collapse.

The stakes are not theoretical. The 2015 Berkeley balcony collapse that killed six people and the 2021 Malibu collapse both reshaped how regulators treat elevated exterior elements.

Which Law Applies to Your Building: SB 326 vs. SB 721

The dividing line is building type, not size alone. SB 326 applies to condominium associations and other multi-unit residential associations. SB 721 applies to multifamily rental buildings with three or more dwelling units.

For a direct, side-by-side breakdown of obligations under each statute, read our comparison of SB 326 vs. SB 721 requirements. Confirm the classification with your legal counsel before you solicit bids.

Who Is Qualified to Perform a Balcony Inspection

Only a licensed architect, civil engineer, structural engineer, or building contractor with the right credentials can perform a statutory balcony inspection in California.

Ask for the license number and verify it through the state licensing board before you shortlist anyone. That document protects no one.

What most guides miss is the difference between a visual inspection and invasive testing.

The statute names the professions that can perform a statutory balcony inspection, and the inspection type determines how far the examination goes.

ItemValueNote
Licensed architectQualifies to inspectNamed specifically in the statute
Civil engineerQualifies to inspectNamed specifically in the statute
Structural engineerQualifies to inspectNamed specifically in the statute
Building contractor with right credentialsQualifies to inspectCredentials must be verified
General handyman with a ladderDoes not qualifyNo matter how many balconies walked
Visual inspectionCovers what is visible and reachableNo opening of the building envelope
Invasive testingMay open stucco or flashingChecks water intrusion, dry rot, corrosion

Balcony Inspector Questions to Ask Before You Sign

The right questions separate a qualified inspector from a fast quote. Ask them in the same order every time, and treat vague answers as a disqualifier. A firm that cannot tell you which statute applies to your building before you hire it is guessing.

A Vetting Checklist for Inspectors

Use this as a scoring sheet, not a wish list. A candidate that fails any starred item should be removed from the shortlist regardless of price.

  • * License number provided and verified through the state licensing board’s public lookup
  • * Written confirmation of which statute applies to your building (SB 326 vs. SB 721) and why
  • * Certificate of insurance showing both general liability and professional liability (errors and omissions), with your association named as an additional insured

How to Interview Each Candidate

Do not email the checklist and accept written answers alone. A 20-minute call reveals more than a proposal packet. Work through these questions in order and note whether the answers are specific or rehearsed.

  1. “Which statute governs my building, and what is the filing deadline?” A qualified inspector answers within a minute and explains the building-type distinction. Hesitation here is the single strongest warning sign.
  2. “Walk me through how you inspect the underside of a cantilevered balcony.” Listen for access method, probe locations, and how the inspector documents connections that are hidden behind finishes. An answer that stays at the railing level is a template answer.
  3. “When would you recommend invasive testing, and who pays for it?” The inspector should describe the trigger conditions (water staining, soft wood at probe points, corrosion at hangers) and whether testing is inside or outside the base fee.
  4. “Who signs and stamps the report?” The name on the proposal should match the name on the stamp. Subcontracted engineering is common, but you should know about it before you sign.
  5. “What does your report look like when a defect is ambiguous?” Ask for the exact language. “Monitor” without a timeline or trigger is not a finding.
  6. “What happens if the building department rejects the report?” A firm that stands behind its deliverable will describe a correction process at no additional fee.

Red Flags in a Proposal

  • A quote issued without a site visit or a building-plans review
  • A per-unit price that is identical across radically different building types
  • No named inspector, or a sales contact who cannot answer technical questions

For a fuller walkthrough of verifying credentials and insurance, use our guide on how to choose a qualified balcony inspector. The checklist above is the short version; that page covers what each credential actually proves.

Watch Out
Skipping the insurance question is the most common and most expensive mistake. If an inspector misses a defect and someone is later injured, an uninsured firm may leave your association holding the liability. Ask for the certificate before the contract, not after.

What a Balcony Inspection Checklist Should Cover

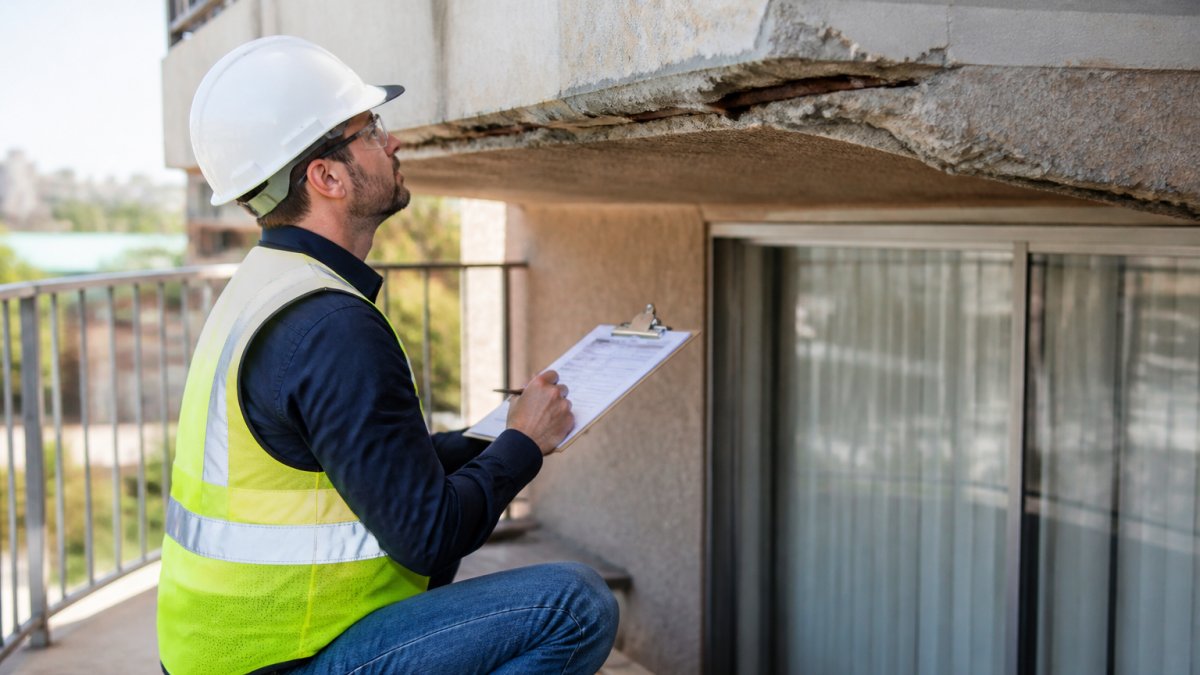
A proper inspection covers every elevated exterior element, not just the visible deck surface.

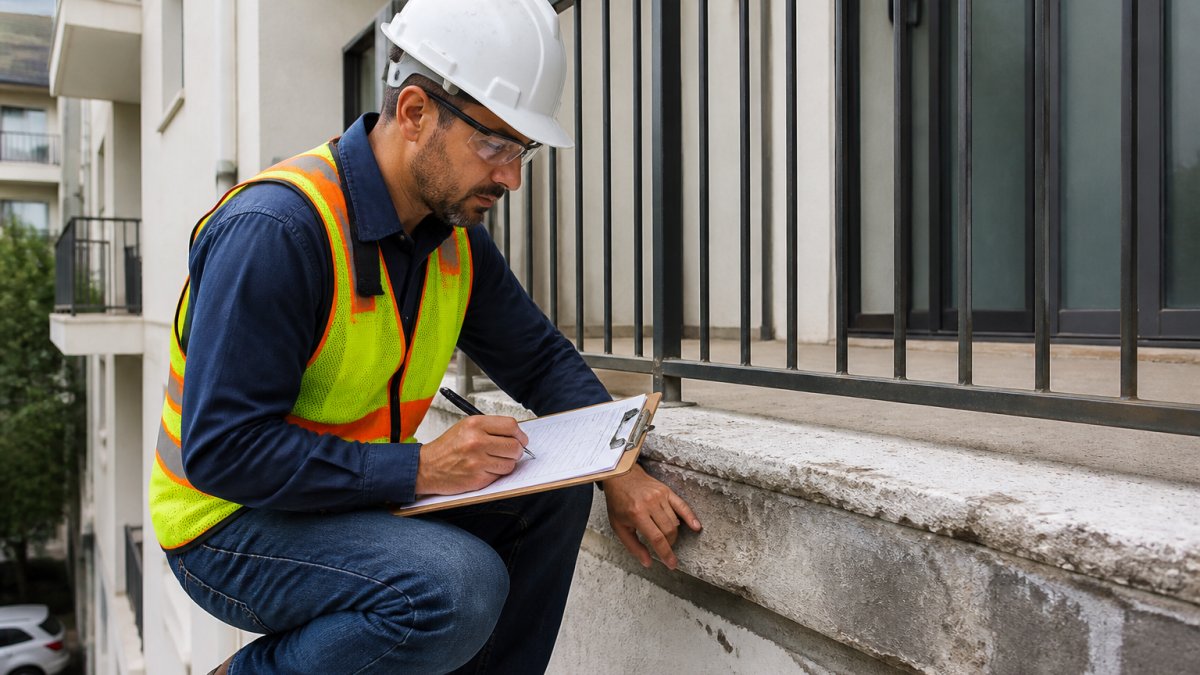
A licensed inspector in a hard hat and safety vest examining the underside of an elevated exterior balcony on a multi-story residential building, clipboard in hand, daylight, close view of railing and deck connections

A common mistake is hiring a firm that photographs the railing and stops there. The failure points are usually underneath: corroded joist hangers, rotted ledger boards, and failed flashing that lets water sit against framing for years.

Balcony Inspection Cost: What Drives the Quote

Balcony inspection pricing depends on building size, the number of elevated elements, access difficulty, and whether invasive testing is required. A single-story walkway building with six units is a different job from a four-story complex with forty balconies and limited ladder access.

We do not publish flat fees, and we would be wary of any firm that does. For a fuller cost breakdown, see our guide to SB 326 inspection cost.

Book inspection →

Pro Tip
Ask whether the fee includes a follow-up site visit after repairs. Some firms charge a second full inspection to confirm remediation was done correctly. Knowing that before you sign prevents a surprise line item mid-project.

What a Balcony Inspection Report Must Contain

A compliant report identifies each inspected element, describes its condition, flags any safety hazard, and states whether repair or further testing is needed.

The report is the document your building department, insurer, and attorney will read. Vague language like “monitor condition” without specifics will not survive scrutiny.

Detailed requirements for the deliverable, including deadlines and inspector qualifications, are covered in our guide to balcony inspection report requirements.

After the Inspection: Remediation, Permits, and Insurance

Findings are the beginning of the work, not the end. The gap between a report and a completed repair is where most boards lose time and money, and most guides stop at the inspection. This section covers the three things that happen next: sequencing the repairs, confirming permits, and protecting insurance coverage.

From Report to Remediation Plan

A report lists findings; a remediation plan sequences them. The board’s job is to convert one into the other before soliciting repair bids. A workable plan does four things:

  1. Sorts findings by safety priority. Immediate hazards (loose guardrails, corroded connections at load-bearing points) get temporary measures first, even before permanent repairs are designed.
  2. Groups repairs by trade and access. Scaffolding, stucco removal, and waterproofing are separate scopes; bundling them into one bid usually lowers the total cost and the number of site mobilizations.
  3. Sets a design threshold. Findings that involve structural connections typically need an engineer’s repair detail before a contractor can bid. Findings limited to surface wear may not.
  4. Maps to the reserve fund and assessment calendar. A repair that exceeds the reserve balance forces an assessment or a loan, and that decision has a lead time the board must build into the compliance schedule.

A common pattern is for the inspection firm to offer repair design or construction as a separate engagement. That can be efficient, but confirm the scope is separately priced and that the board retains the right to bid the work to other contractors. Ask each inspection candidate up front whether they perform repairs and how they handle that conflict.

Permits and Building Department Review

Structural repairs to balconies, stairways, and their connections usually require a building permit and inspection by the local building department. The permit process runs on its own timeline, separate from the statutory inspection deadline, and the two are easy to conflate.

Ask the repair contractor, not the inspector, which permits apply and who pulls them. A contractor who proposes to start structural work without a permit is a liability, not a bargain.

Insurance Implications of the Report

Carriers increasingly ask for proof of inspection compliance at renewal and at claim time. A missed statutory deadline can affect coverage or premiums when a loss occurs, and the effect can follow a property for years.

Before the board files the report, confirm with the association’s insurance broker how the carrier wants to receive it and whether any findings trigger a disclosure obligation. Our overview of the insurance implications of SB 326 non-compliance explains how a missed deadline can follow a property for years.

Pro Tip
Ask the inspection firm whether they will provide a short cover letter summarizing compliance status for the carrier. Some will; some charge for it. Knowing before you sign prevents a scramble at renewal.
Key Takeaway
The cheapest inspection is the one that produces a report your insurer and building department accept without a second opinion. Price the deliverable, not the site visit.

Conclusion

The hardest part of this process is not finding an inspector. It is finding one whose report holds up when a building department, an insurer, or a plaintiff’s attorney reads it closely.

Our licensed inspectors bring decades of combined construction and design experience to every site, we specialize in SB 326 and SB 721 compliance, and we inspect all elevated exterior elements, including balconies, decks, and stairways.

Book an inspection with Apex Balcony and get a report your board can act on with confidence.

Frequently Asked Questions

What qualifications should a balcony inspection company have?

Under SB 326 and SB 721, inspections must be performed by a licensed architect, civil or structural engineer, or a building contractor holding the appropriate license. Ask for the individual inspector’s license number, not just the firm’s, and confirm it is active with the state licensing board. Also ask whether the company carries errors and omissions coverage and general liability insurance, and request a sample report so you can see the depth of documentation before you commit.

How much does a balcony inspection cost, and what changes the price?

Balcony inspection cost depends on the number of elevated exterior elements, building height and access difficulty, the percentage of units sampled, and whether invasive testing is required. A 12-unit building with simple access sits at the low end; a large condominium association with many decks and stairways sits higher. Ask each firm to itemize what the quote includes, especially report delivery, photo documentation, and any follow-up visit, so you are comparing the same scope rather than the same headline number.

How do I compare balcony inspection quotes from different companies?

Line up the quotes against the same scope: number of balconies, decks, and stairways inspected, sample size, invasive versus non-invasive methods, photo documentation, report format, and turnaround time. A quote that is thousands lower often inspects fewer units or skips destructive testing. Ask each firm what they would do if they found dry rot, corrosion, or water intrusion at a load-bearing connection, and confirm the report will be signed and sealed by a licensed professional who can stand behind it in a building department review.

What happens if the inspection misses something and a problem is found later?

Ask about professional liability coverage before you hire anyone. A signed report from a licensed architect, civil engineer, or structural engineer carries professional accountability, and errors and omissions insurance is what responds if a defect is missed. Request a certificate of insurance naming your association or ownership entity, and confirm the inspector who signs the report is the one who actually performed the visual inspection. Keep the report on file: it is your record of compliance and your defense in a liability dispute.


Sources and further reading: California Legislature SB 326 and SB 721 statutory text, California Department of Consumer Affairs license verification, U.S. Consumer Product Safety Commission outdoor structural safety guidance

Book inspection

GoogleAdd apexbalcony.com as a preferred source on Google →
Posted in BlogTagged balcony inspection, balcony inspection checklist, balcony inspection cost, balcony inspection report, balcony inspector questions to ask, how to choose a balcony inspection company

Balcony Waterproofing Inspection Checklist: 7 Steps

Posted on October 19, 2026 by Apex Balcony admin
Balcony Waterproofing Inspection Checklist: 7 Steps

Table of Contents

  • Why a Balcony Waterproofing Inspection Checklist Matters
    • What the Checklist Protects Against
  • Step 1: Start With the Balcony Inspection Report and Property Details
  • Step 2: Check the Waterproofing Membrane and Walking Surface
    • Membrane Types, Service Life, and Failure Indicators
    • How Each System Fails Mechanically
    • Repair-Versus-Replacement Decision Criteria
    • What to Record for Each Membrane Finding
  • Step 3: Spot Common Balcony Waterproofing Problems
  • Step 4: Identify Balcony Leak Signs and Test for Moisture
    • Reading the Leak Signs in Order of Reliability
    • Moisture Detection Methods and How to Interpret Them
    • Controlled Water Testing: When and How
    • Photo Documentation and Severity-Based Prioritization
  • Step 5: Inspect Sealants, Flashing, and the Balcony-Frame Joint
  • Step 6: Perform a Balcony Drainage Inspection
  • Step 7: Check Structural Elements, Railings, and Stairs
  • Frequently Asked Questions

Last Updated: October 18, 2026

Why a Balcony Waterproofing Inspection Checklist Matters

A balcony waterproofing inspection checklist is a structured set of checks covering the waterproofing membrane, sealant joints, flashing, drainage, and structural elements of an elevated balcony in a fixed order. We have walked hundreds of building owners through this process, and the sequence matters as much as the checks themselves. A missed membrane breach does not stay a small leak for long.

What the Checklist Protects Against

Water intrusion is the quiet failure mode on any elevated balcony. Water finds a path through a failed sealant joint, sits under the deck surface, and reaches the framing before anyone sees a drip inside. By then, wood decay and corrosion are already underway. The checklist protects against three outcomes: structural damage that spreads, safety hazards for residents, and compliance problems for owners who need documented inspection records.

Watch Out
The most expensive mistake is treating a hairline crack at the balcony-frame joint as cosmetic. That joint is the most common entry point for water, and a failed seal there can rot framing long before a stain appears on the ceiling below.

Step 1: Start With the Balcony Inspection Report and Property Details

Begin every balcony waterproofing inspection by confirming the property address, the number of exterior elevated elements, and any prior inspection report on file. The report tells you what failed last time and what was repaired, saving you from re-diagnosing the same defect.

Gather these before you step outside:

  • Property address and building age
  • Count of balconies, decks, walkways, and stair landings
  • Previous inspection findings and repair records

A prior report is not a substitute for a fresh look. Materials age between cycles, and a joint that passed two years ago may be separating now.

Step 2: Check the Waterproofing Membrane and Walking Surface

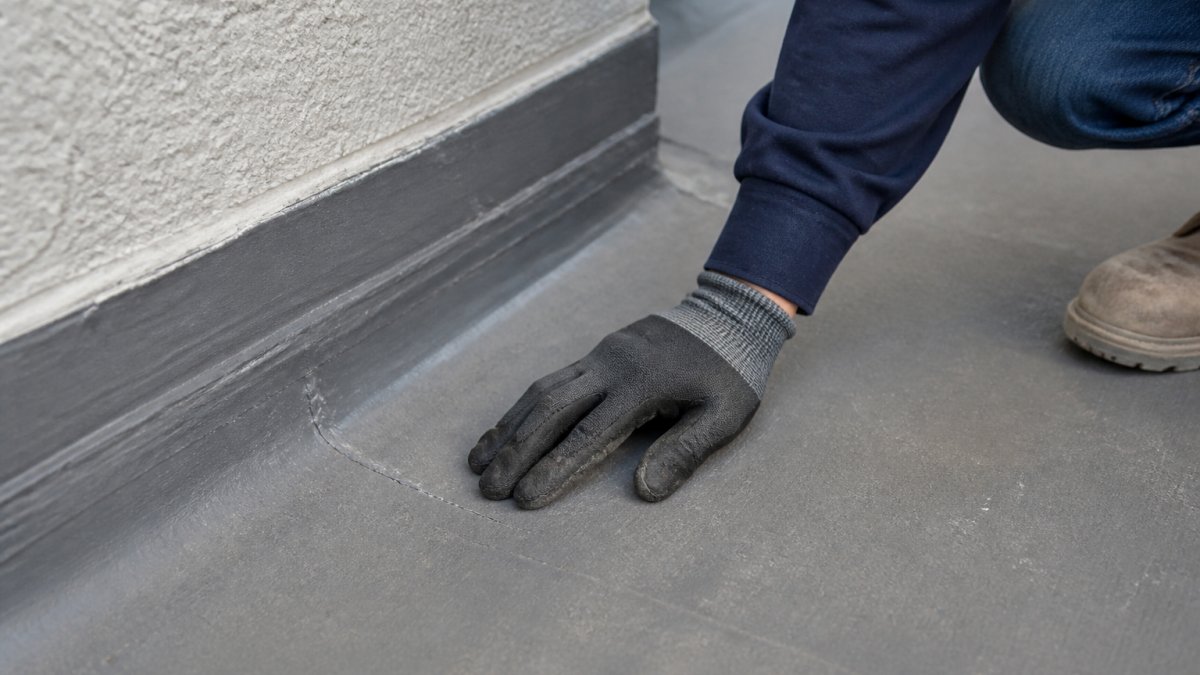
The membrane keeps water out, so inspect the walking surface first for cracks, blisters, and separation at edges. Walk the full deck and check where it meets walls, railings, and drains, any gap between membrane and substrate is a water path.

Close-up of an inspector in work gloves running a hand along a balcony deck surface near a wall joint, with visible sealant lines and a small crack in the membrane

Membrane Types, Service Life, and Failure Indicators

Most balconies use one of three systems, and each fails in a signature way. Knowing the system on your deck tells you where to look first.

Membrane TypeTypical Service LifeFailure SignatureWhat to Check
Fluid-applied coating (polyurethane or acrylic)5-10 years before recoating; longer with a wear surfaceBlistering, thin spots at high-traffic paths, hairline cracks, chalkingWet-film thickness at edges, coating termination at walls and drains, pinholes over fasteners
Sheet membrane (PVC, TPO, or modified bitumen)10-20 yearsLifted or curled seams, bubbling from trapped moisture, punctures at furniture and planter contact pointsSeam laps (minimum 2-inch overlap on most systems), perimeter terminations, terminations under thresholds
Cementitious coating5-10 yearsCrazing, chalking, surface erosion, cracks that widen with thermal cyclingCoating loss at drains and scuppers, crack width, adhesion at the deck-to-wall transition

Service life varies with sun exposure, foot traffic, and installation quality, so use the manufacturer’s stated life as a starting point and let visible condition drive the call. A 12-year-old sheet system may still have years left; a 6-year-old fluid-applied coating with widespread blistering may already be at end of life.

How Each System Fails Mechanically

Fluid-applied coatings fail from the top down: UV breaks down the polymer chains, foot traffic abrades high-traffic paths, and the coating thins until pinholes open.

Sheet membranes fail at seams and terminations first: adhesive-backed seams lift when the substrate moves or water gets behind the lap, and once a seam opens, water wicks under the sheet and the membrane bubbles.

Cementitious coatings fail from thermal movement and coating loss at drains.

Repair-Versus-Replacement Decision Criteria

Use these thresholds to decide what a finding requires:

  • Reseal only: isolated sealant failures at joints and penetrations, with the membrane itself intact and no moisture detected in the substrate. This is a maintenance item, not a membrane repair.
  • Localized repair: a single blister, puncture, or seam lift under roughly 1 square foot, with dry substrate confirmed by moisture meter. Patch with the same membrane system, a mismatched patch is a future failure point.
  • Full system replacement: widespread blistering, multiple seam failures across the deck, coating worn through to substrate in traffic paths, or any moisture reading that indicates saturated framing. Patching a membrane at end of life just moves the leak.
Watch Out
Do not apply a new coating over a failed membrane to “buy a year.” Trapped moisture under a new coating will blister it within one season, and you will have paid for the coating twice. Confirm the substrate is dry before any recoating.

What to Record for Each Membrane Finding

For every defect, note the location (measured from a fixed reference such as the door threshold), membrane type, defect type, approximate size, and whether moisture was detected. That record lets a contractor price the repair without a second site visit and protects you if a defect is later disputed.

Step 3: Spot Common Balcony Waterproofing Problems

Balcony waterproofing problems show up in predictable places. Look for cracks, gaps, and separation at the balcony-frame joint, then check the deck surface for ponding marks and staining.

The short list of repeat offenders:

  • Cracks and gaps in the deck coating
  • Separation where the deck meets the wall
  • Ponding water and dark staining near drains

Take a photo of every defect with a tape measure or coin in frame for scale. When you prioritize repairs later, a photo with scale settles arguments about whether a crack is cosmetic or structural far faster than memory does.

Step 4: Identify Balcony Leak Signs and Test for Moisture

Balcony leak signs include staining on the ceiling below, efflorescence on masonry, and musty odors in the units under the deck. Confirm suspected moisture with a meter rather than waiting for a visible drip, by the time a stain appears inside, the framing has usually been wet for months.

Reading the Leak Signs in Order of Reliability

Not all leak signs are equally trustworthy. Rank them before you act:

  1. Active drip or standing water below the deck, definitive. The path is open now.
  2. Moisture meter reading above the dry baseline, strong evidence of concealed moisture, even without a visible stain.
  3. Efflorescence on masonry or concrete below, mineral deposits left by water that has evaporated. Indicates a recurring path, not necessarily an active one.
  4. Staining or paint peeling on the ceiling below, indicates past or current moisture; timing is uncertain.
  5. Musty odor in the unit below, suggests long-term moisture but does not localize it.

Moisture Detection Methods and How to Interpret Them

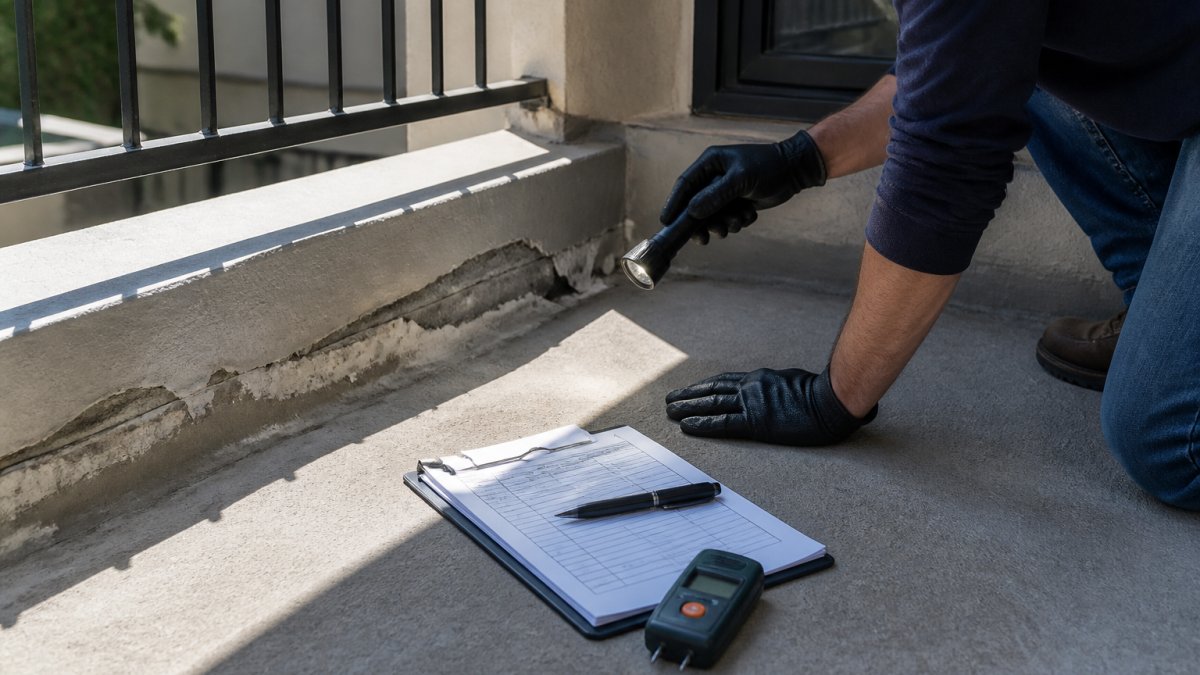
A pin-type moisture meter reads electrical resistance between two probes; a pinless meter reads capacitance through the surface. Both are useful but answer different questions.

  • Pin-type: best for wood framing and drywall below the deck. Drive the pins into the suspect area and compare against a reading from a known-dry area of the same material. A reading that is more than a few percentage points above the dry baseline warrants investigation.
  • Pinless: best for scanning large areas of membrane and substrate without leaving holes. Use it to map the extent of a suspected wet zone, then confirm with a pin-type meter.

Take a dry baseline reading on the same material in a known-dry location before interpreting any suspect reading, without a baseline, a meter number means nothing. A suspect reading within a few points of baseline is noise; one well above baseline in the same material is a real signal.

Book inspection →

Controlled Water Testing: When and How

A controlled water test isolates the entry point when the leak path is unclear, appropriate when you suspect a leak but cannot see the breach and the area below can be observed during the test.

Procedure:

  1. Plug or cap the drain so water does not leave the deck.
  2. Apply a shallow film of water, no more than about 1 inch, to a small, bounded area, starting at the highest suspect point.
  3. Observe the area below for 30-60 minutes. If moisture appears, you have found an active path.
  4. If no moisture appears, expand the test area incrementally toward the next suspect zone.
  5. Drain and dry the test area completely when finished.

Safety and damage limits:

  • Never test more than a small, bounded area at a time. A full-deck flood test can drive water deep into framing and turn a small leak into a structural problem.
  • Do not test if the membrane is already known to be breached in the test area, you will only add water to the substrate.
  • Do not test during freezing conditions or when rain is forecast within 24 hours.
Watch Out
A water test is a diagnostic tool, not a repair. If the test confirms a leak, dry the area thoroughly and schedule the repair before the next rain event. Leaving a tested area wet defeats the purpose.

Photo Documentation and Severity-Based Prioritization

Record every finding, visual or meter-confirmed, in a consistent format so it can be prioritized and tracked. Capture:

  • Location: measured from a fixed reference (door threshold, drain center, railing post).
  • Symptom: what you saw or measured (stain, blister, meter reading, drip).
  • Severity: use a simple three-tier scale, monitor (cosmetic, no moisture), repair (localized defect, dry substrate), urgent (active leak, saturated substrate, or structural movement).

Pair each photo with the location note so a contractor can find the defect without a second site visit.

Keep a simple log, one row per finding, with the four fields above. When you hand it to a contractor, you get a priced scope of work instead of an hourly diagnostic visit. When you hand it to an insurer or a buyer, you have a documented inspection record.

Step 5: Inspect Sealants, Flashing, and the Balcony-Frame Joint

Sealant and flashing fail before the membrane does, so check every joint and penetration. Run a finger or tool along the sealant at the balcony-frame joint and look for cracking, pulling away, or loss of adhesion.

Flashing should sit tight against the wall and shed water outward. Lifted flashing, missing fasteners, or gaps at the top edge are all water entry points.

Step 6: Perform a Balcony Drainage Inspection

A balcony drainage inspection confirms water leaves the deck quickly and completely. Check that drains are clear, the deck slopes toward the drain, and no standing water remains after rain.

Look for:

  • Clogged or partially blocked drains
  • Flat or back-sloped areas where water pools
  • Debris trapped at scuppers and strainers

Standing water is a slow-motion failure. Even a shallow pool keeps the membrane saturated and accelerates sealant breakdown at the perimeter.

Step 7: Check Structural Elements, Railings, and Stairs

Finish with the structure and safety elements: framing, railings, and stairs. Check railings and connections for rust, movement, or looseness, and test guardrail height and stability by hand.

Inspect stairs for loose treads, worn nosings, and movement at stringers and landings. Corrosion on fasteners and metal connectors is a structural warning, not cosmetic. If you find movement, soft framing, or heavy corrosion, stop and bring in a licensed inspector, a documented professional assessment protects you if a defect is later challenged.

The checklist works best in order: report and property details first, then membrane, defects, moisture, sealant and flashing, drainage, and structure last. Document each finding with a photo and a severity rating so repairs can be prioritized and tracked.

Frequently Asked Questions

What does a balcony inspection consist of?

A balcony inspection covers the waterproofing membrane, walking surface, sealant joints, flashing, drainage and slope, structural framing, and railings. The inspector documents cracks, gaps, standing water, corrosion, and wood decay, then records findings with photos and severity ratings. For buildings covered by SB 326 or SB 721, the inspection must be performed by a qualified professional and the results compiled into a formal balcony inspection report that identifies whether repairs or further testing are needed.

What are the signs of a failed balcony waterproofing membrane?

Look for bubbling, blistering, or delamination of the deck surface, cracks that run through the coating, dark stains near the balcony-frame joint, and soft or spongy spots underfoot. Water that beads and pools instead of draining, or rust streaks on the framing below, also point to a failed membrane. Any of these balcony leak signs means the waterproofing system is no longer protecting the structure, and a closer moisture test or professional assessment is the next step.

How often should a balcony be inspected for water damage?

A visual walk-through once or twice a year, ideally before and after the rainy season, catches most early balcony waterproofing problems. Full professional inspections are typically done every few years, and SB 326 requires periodic inspections of exterior elevated elements on covered buildings. Any time you see standing water, cracked sealant, or stains after a storm, treat it as an inspection trigger rather than waiting for the next scheduled visit.

Can a balcony leak cause structural damage?

Yes. Water that gets past the membrane or sealant reaches the framing, fasteners, and sheathing, where it causes corrosion, dry rot, and wood decay. Because the damage happens out of sight, it often goes unnoticed until the balcony feels soft or a railing connection loosens. The 2015 Berkeley balcony collapse and the 2021 Malibu collapse both show how hidden water damage can turn into a safety hazard, which is why a regular balcony waterproofing inspection checklist matters.

What should be included in a balcony inspection report?

A complete balcony inspection report should list the property address, each exterior elevated element inspected, and the condition of the waterproofing membrane, sealants, flashing, drainage, railings, and structural framing. It should include dated photos of every defect, a severity rating so owners can prioritize repairs, and a clear recommendation for repair, further testing, or replacement. For SB 326 and SB 721 compliance, the report also needs the inspector’s qualifications and sign-off.


Waterproofing failures rarely announce themselves, and the cost of guessing wrong lands on owners and boards. Apex Balcony provides licensed inspectors with decades of combined construction and design experience, specialized expertise in SB 326 and SB 721 compliance, and comprehensive inspection of all elevated exterior elements including balconies, decks, and stairways. Book an inspection with Apex Balcony and get a clear, documented path from findings to repairs.

Book inspection

Posted in BlogTagged balcony drainage inspection, balcony inspection report, balcony leak signs, balcony waterproofing inspection, balcony waterproofing inspection checklist, balcony waterproofing problems

Recent Posts

  • Are Hidden Balcony Framing Problems Showing Up in Your Building?
  • Apartment Building Maintenance Budget: A Step-by-Step Guide
  • Is Your Older Balcony Safe? A Structural Assessment Guide
  • 5 SB 326 Inspection Penalty Risks California HOAs Miss
  • What Are the Structural Retrofit Options for Apartment Buildings?

Recent Comments

No comments to show.

Archives

  • November 2026
  • October 2026
  • September 2026
  • August 2026
  • July 2026
  • June 2026

Categories

  • Blog
Logo
Created by Unilime.Group
  • Balcony Law
  • About us
  • Inspection services
  • FAQ
  • Blog

Call us ‪+1 818-806-7885‬
License: CSLB #1101305

Apex Balcony Inspection
‪+1 818-806-7885‬
[email protected]
4645 Van Nuys Blvd #201
Sherman Oaks CA 91403

Created by Unilime.Group