
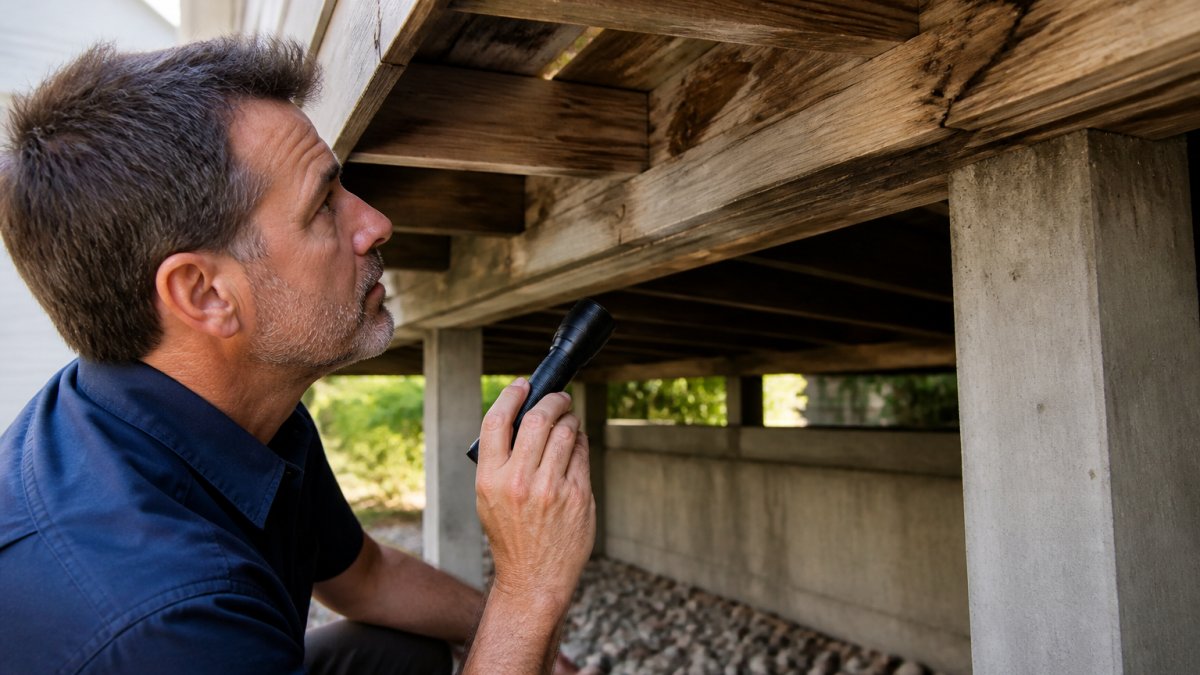
Table of Contents
- Structural Inspection vs. General Home Inspection
- How Long Does a Structural Inspection Take
- What Structural Inspectors Look For
- Signs of Structural Damage in a House
- SB 326 and SB 721 Balcony Inspection Requirements
- Visual vs. Invasive Testing During Inspection
- What to Do After Your Structural Inspection Report
- Step 1: Understand the Report’s Severity Classification
- Step 2: Obtain Repair Estimates and Create a Prioritized Repair Plan
- Step 3: Leverage Findings in Purchase Negotiations (For Buyers)
- Step 4: Protect Your Insurance and Mortgage
- Step 5: Document Everything for Future Liability Protection
- Step 6: Schedule Follow-Up Inspections for Active Issues
- Step 7: For SB 326 and SB 721 Compliance (Property Owners and HOAs)
- Frequently Asked Questions
Last Updated: October 3, 2026
Structural Inspection vs. General Home Inspection
A structural home inspection focuses on the foundation, load-bearing walls, roof framing, and other critical structural elements. General inspectors aren’t trained to catch early signs of structural failure; structural engineers use specialized tools and deep construction knowledge to identify settling, deflection, cracking patterns, and load-bearing issues.
For multi-unit residential buildings in California, structural inspections aren’t optional. Buildings with three or more units must comply with SB 326 and SB 721, which mandate regular inspections of balconies, decks, and elevated exterior elements.
How Long Does a Structural Inspection Take
A typical structural home inspection takes two to four hours for smaller residential properties, or four to six hours for larger multi-unit buildings, depending on size, age, and complexity.
Timing depends on building size, age, accessibility of crawl spaces and attics, visible damage, and whether invasive testing is needed (which can add 30 minutes to two hours). A thorough structural home inspection requires careful attention to detail.
What Structural Inspectors Look For
Structural inspectors examine specific elements that determine whether your building is safe and structurally sound. Here’s what they’re analyzing:
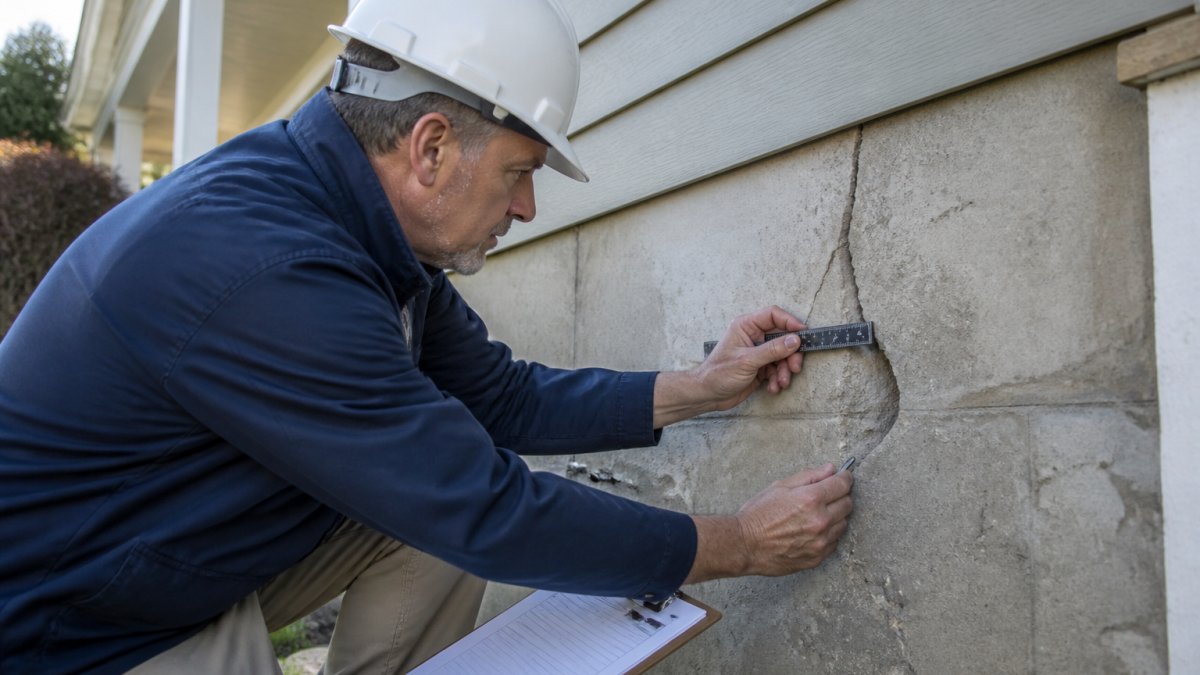
Foundation Assessment and Settling
Inspectors look for signs of foundation settlement, which occurs when soil beneath the foundation compacts or shifts. Early warning signs include:
- Horizontal or diagonal cracks in foundation walls
- Uneven floor levels or sloping floors
- Doors and windows that stick or won’t close properly
- Gaps between walls and the foundation
Inspectors measure floor slope using specialized equipment to detect deflection; even a quarter inch over ten feet can signal serious settling. They assess drainage around the foundation for standing water, poor grading, or hydrostatic pressure issues. For slab-on-grade foundations, they check cracking patterns and movement; for pier and beam foundations, they examine support posts and beams.
Wall Cracking Patterns and Analysis
Structural inspectors distinguish between cosmetic cracks and those signaling structural stress by analyzing stair-step cracking (diagonal cracks following mortar joints), horizontal cracks (hydrostatic pressure or wall failure), vertical cracks (cosmetic or structural depending on width and activity), and crack width (cracks wider than one-eighth inch warrant inspection). They document whether cracks are active and growing. Load-bearing walls receive extra attention because failure compromises the entire building’s structural integrity.
Floor Slope and Deflection Measurements
Sagging or sloping floors indicate structural problems. Inspectors use laser levels to detect deflection in floor joists and beams. A floor slope greater than one-eighth inch per ten feet suggests undersized or damaged joists, inadequate support, water damage, or structural stress. Even minor deflection can signal bigger problems developing.
Roof and Attic Structural Integrity
Inspectors examine roof framing for water damage, rot, or insect damage; structural connections and bracing; sagging or deflection in roof lines; evidence of past leaks or ongoing moisture; and attic ventilation. Water damage and wood deterioration are common in older roofs and spread quickly if not caught early.
Signs of Structural Damage in a House
Before hiring a structural engineer, perform a preliminary walkthrough to identify whether your property warrants professional inspection. Learning to distinguish between cosmetic concerns and genuine red flags saves money.
Critical Red Flags That Require Professional Inspection
Critical red flags requiring immediate professional inspection include: stair-step cracking in masonry (foundation movement), horizontal foundation cracks (hydrostatic pressure or structural failure), doors and windows sticking across multiple rooms (foundation settlement or wall movement), visible gaps between walls and foundation exceeding one-quarter inch (active movement), sagging or uneven floors (test with a marble), bowing or leaning exterior walls (structural emergency), water stains or moisture combined with cracks (hydrostatic pressure or drainage failure), and visible rot or insect damage in structural framing.
Minor Issues You Can Monitor Without a Professional Visit
Minor issues common in older homes that often don’t require immediate intervention include small vertical drywall cracks near windows (cosmetic, from seasonal wood movement), hairline concrete cracks narrower than one-sixteenth inch (natural curing), minor floor sloping less than one-eighth inch per ten feet with no worsening (historical settling), and small gaps between trim and walls (wood shrinkage or seasonal movement).
DIY Pre-Inspection Checklist
Use this checklist to assess your property before calling a professional:
Foundation & Basement: Check for visible cracks wider than one-eighth inch, standing water or dampness, gaps between foundation and sill plate, and grading that allows water pooling. Floors & Interior: Test floor slope with a marble or ball, check for sticking doors and windows, and look for diagonal drywall cracks. Exterior & Roof: Sight along wall lines for bowing, check roofline for sagging, inspect for missing shingles, and look for stair-step cracking in brick or siding. Attic & Crawl Space: Look for water stains, rot, sagging roof framing, insect damage, and proper ventilation.
When to Skip the Professional Inspection
If your checklist reveals only minor cosmetic issues and the home was built within the last 50 years with no foundation history, a structural inspection may not be necessary. Monitor these areas annually and photograph them for your records. Keeping a consistent log of these conditions helps you distinguish between normal settling and the more significant structural concerns that a professional home inspector check would typically evaluate.
When to Hire a Structural Engineer
If your checklist identifies critical red flags or you’re uncertain, hire a licensed structural engineer. The inspection cost is far less than ignoring a real structural problem. Engineers distinguish between active movement and historical settling and provide documentation protecting you during a sale or insurance claim.
SB 326 and SB 721 Balcony Inspection Requirements
California’s SB 326 and SB 721 laws require regular structural inspections of balconies, decks, and elevated exterior elements on residential buildings with three or more units. SB 326 (buildings built before January 1, 2008) requires inspections every six years, with initial inspections due by January 1, 2025. SB 721 (buildings built on or after January 1, 2008) requires inspections every nine years.
Visual vs. Invasive Testing During Inspection
Inspectors use two approaches: visual analysis (non-destructive examination of surfaces, measurements, and photographs) and invasive testing (removing materials, drilling, or cutting to assess hidden conditions). Visual analysis is fast but can’t reveal hidden damage. Invasive testing reveals problems visual inspection might miss but is more time-consuming and expensive. Most inspectors start with visual analysis and recommend invasive testing if they find concerning signs. Experienced inspectors minimize damage by extracting samples strategically and properly sealing openings afterward.
What to Do After Your Structural Inspection Report
Your structural inspection report is the beginning of action. How you interpret, document, and communicate findings directly impacts your negotiating power, insurance coverage, and liability protection.
Step 1: Understand the Report’s Severity Classification
Engineers typically categorize findings into three tiers: Immediate/Critical (imminent risk of injury or collapse, requiring emergency repair before occupancy), Significant/Urgent (problems worsening rapidly or compromising safety within months to years, requiring repair within 30-90 days), and Minor/Deferred (stable or slowly developing issues, scheduled into a maintenance plan over 1-2 years).
Your engineer’s report should explicitly state which category each finding falls into; if not, request clarification before proceeding.
Step 2: Obtain Repair Estimates and Create a Prioritized Repair Plan
Get written estimates from at least two licensed contractors for each major repair to verify costs and protect against outdated estimates. Create a spreadsheet listing finding description, severity tier, estimated repair cost (average of bids), timeline, and contractor contact information. Total costs by severity tier to prioritize repairs.
Step 3: Leverage Findings in Purchase Negotiations (For Buyers)
If structural inspection reveals significant issues, you have negotiating leverage. Request a Price Reduction: Calculate total repair costs for “Immediate” and “Significant” categories and request a price reduction to account for repairs and contractor oversight. Attach the engineer’s report and contractor estimates. Request Seller-Funded Repairs: Ask the seller to hire a contractor and complete repairs before closing, specifying which repairs, that licensed contractors must perform the work, and that you’ll conduct a final walk-through. Request an Escrow Hold: Ask your lender to hold a portion of the purchase price in escrow until repairs are completed.
Step 4: Protect Your Insurance and Mortgage
Structural inspection findings can affect your homeowners insurance and mortgage approval. Take these steps:
Notify Your Lender Immediately
If the inspection reveals significant structural issues, inform your lender before closing. Most lenders require that critical repairs be completed or escrowed before they’ll fund the loan. Failing to disclose findings can void your mortgage or insurance.
Review Your Homeowners Insurance Policy
Contact your insurance agent with a copy of the inspection report. Ask:
- Will the insurer cover damage related to these findings?
- Are there exclusions for pre-existing conditions?
- Will the policy remain in force if repairs aren’t completed immediately?
Some insurers will not cover damage from structural issues the homeowner knew about but didn’t repair. Document your communication with the insurer in writing.
Obtain a Written Repair Plan
If you’re deferring repairs, create a written plan with timelines and contractor information. This documentation proves you’re addressing issues responsibly, which protects you if a problem worsens or causes damage later.
Step 5: Document Everything for Future Liability Protection
Keep a permanent file containing:
- The original structural engineer’s report
- All contractor estimates and bids
- Photographs of findings (the engineer should have provided these)
- Receipts and invoices for all repairs completed
- Permits and final inspection certificates from the local building department
- Correspondence with the seller, lender, and insurance company
- Your written repair plan for deferred items
If you ever face a liability claim (someone is injured due to a structural defect) or sell the property later, this documentation proves you acted responsibly to identify and address structural issues. It’s your legal protection.
Step 6: Schedule Follow-Up Inspections for Active Issues
If the engineer identified “active” movement, cracks that are still growing, ongoing settling, or water intrusion, schedule a follow-up inspection in 6-12 months. This accomplishes two things:
- It confirms whether the problem is stabilizing or worsening, which informs repair urgency.
- It creates a documented record of the issue’s progression, which is valuable for insurance and liability purposes.
Some engineers offer monitoring services where they install crack monitors or laser targets to track movement over time. This is worth the cost if the initial report shows active structural stress.
Step 7: For SB 326 and SB 721 Compliance (Property Owners and HOAs)
If your building is subject to these California requirements, the inspection report becomes a compliance document. You must:
- File the report with your local jurisdiction within the required timeframe (typically 30 days of completion).
- Create a written repair plan for any findings that don’t meet code.
- Document all repairs with permits, contractor invoices, and final inspection certificates.
- Maintain records for at least 10 years in case of audit or liability claim.
Failure to comply can result in fines up to $1,000 per day per violation, plus liability if someone is injured due to a structural defect you knew about but didn’t repair.
Frequently Asked Questions
What is the biggest red flag in a structural home inspection?
Horizontal cracks in foundation walls, stair-step cracking in brick or block, or evidence of wood deterioration in load-bearing beams signal serious structural stress. These indicate potential settlement, hydrostatic pressure, or compromised structural integrity. Bowing walls, sagging floors, or misaligned door frames also warrant immediate attention from a structural engineer. Any of these findings typically requires remediation before the property can be safely occupied.
How long does a structural inspection take?
Most structural inspections take 2-4 hours depending on property size, age, and accessibility. Larger multi-unit buildings or properties with visible damage may require 4-6 hours. The inspector examines foundations, crawl spaces, attics, load-bearing walls, and roof structure. Additional time is needed if invasive testing, such as moisture meter readings or wood sampling, is required to assess deterioration or hidden damage beneath surfaces.
When should you hire a structural engineer versus a general home inspector?
Hire a structural engineer if a general inspection reveals potential structural issues, if you own a building subject to SB 326 or SB 721 compliance, or if you’re purchasing a property with visible cracking, settling, or water damage. Structural engineers provide detailed remediation plans and code compliance verification. General home inspectors identify problems; structural engineers diagnose causes and design solutions. For multi-unit residential buildings in California, specialized balcony and elevated element inspections are often required by law.
Does a structural inspection include the foundation and roof?
Yes. Structural inspections examine foundation settlement patterns, sub-floor systems, load-bearing walls, joists, beams, rafters, and roof trusses. Inspectors assess grading and drainage around the foundation, look for wood deterioration in attic framing, and evaluate structural stress indicators. For properties with decks or balconies, the inspection includes cantilever support systems and connection integrity. The scope depends on the building type and any specific compliance mandates like SB 721.